
Owner's Manual

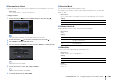

Table Of Contents
- Easy Setup Guide
- Owners Manual
- Table of Contents
- Features
- Video Signal Flow
- Supplied Accessories
- Parts & Controls
- Preparations
- Playback
- Basic playback procedure
- Selecting the input source and favorite settings with one touch (SCENE)
- Selecting the sound mode
- Listening to FM/AM radio
- Playing back iPod music
- Playing back music stored on a USB storage device
- Playing back music stored on media servers (PCs/NAS)
- Listening to Internet radio
- Playing back iTunes/iPod music via a network (AirPlay)
- Playing back videos/audio in multiple rooms (multi-zone)
- Viewing the current status
- Configuring playback settings for different playback sources (Option menu)
- Configurations
- Configuring input sources (Input menu)
- Configuring the SCENE function (Scene menu)
- Configuring sound programs/surround decoders (Sound Program menu)
- Configuring various functions (Setup menu)
- Viewing information about the unit (Information menu)
- Configuring the system settings (ADVANCED SETUP menu)
- ADVANCED SETUP menu items
- Changing the speaker impedance setting (SPEAKER IMP.)
- Turning on/off the remote control sensor (REMOTE SENSOR)
- Selecting the remote control ID (REMOTE CON AMP)
- Changing the FM/AM tuning frequency setting (TUNER FRQ STEP)
- Switching the video signal type (TV FORMAT)
- Removing the limitation on HDMI video output (MONITOR CHECK)
- Backing up/recovering the settings (RECOV./BACKUP)
- Restoring the default settings (INITIALIZE)
- Updating the firmware (FIRM UPDATE)
- Checking the firmware version (VERSION)
- Controlling external devices with the remote control
- Updating the unit’s firmware via the network
- Frequently asked questions
- Troubleshooting
- Error indications on the front display
- Information on HDMI
- Glossary
- Specifications
- Index
- Supplement for Web Control
- Supplement for SiriusXM Internet Radio
- Quick Guide for Multi-zone and Remote Control Functions
- List of Remote Control Codes
- Warranty

CONFIGURATIONS ➤ Configuring input sources (Input menu) En 105
■ Rename/Icon Select
Changes the input source name and icon displayed on the front display or TV screen.
Input sources
AV 1–7, V-AUX, AUDIO 1–4, PHONO, USB, MULTI CH
■ Setup procedure
1
Use the cursor keys (e/r) to select a template and press the cursor key (w).
• You cannot change the template or icon for “USB” when an iPod is connected.
2
Use the cursor keys (e/r) to select an icon and press the cursor key (w).
3
Press ENTER to enter the name edit screen.
4
Use the cursor keys and ENTER to rename and select “ENTER” to confirm the entry.
• To clear the entry, select “CLEAR”.
5
Use the cursor keys to select “OK” and press ENTER.
• To restore the default setting, select “RESET”.
6
To exit from the menu, press ON SCREEN.
■ Decoder Mode
Sets the format of digital audio playback to “DTS”.
For example, if the unit does not detect DTS audio and outputs noise, set “Decoder
Mode” to “DTS”.
Input sources
AV 1–7, V-AUX, AUDIO 1–4 (available only when any audio digital input jack is assigned)
Settings
■ Volume Interlock
Enables/disables volume controls from iTunes/iPod via AirPlay.
Input sources
AirPlay
Settings
■ Video Out
Selects a video to be output with the audio input source.
Input sources
TUNER, (network sources), USB, MULTI CH
Settings
Default
USB: V-AUX
Others: Off
Auto (default) Automatically selects an audio format to match the input audio signal.
DTS Selects DTS only. (Other audio signals are not reproduced.)
Off Disables volume controls from iTunes/iPod.
Limited (default)
Enables volume controls from iTunes/iPod within the limited range
(-80 dB to 0 dB and mute).
Full
Enables volume controls from iTunes/iPod in the full range (-80 dB to
+16.5 dB and mute).
Off Does not output video.
AV 1–7, V-AUX Outputs video input through the corresponding video input jacks.