
User Manual


only, and may not match actual appearances during operation.
Some fittings may deteriorate due to wear and/or corrosion. Rigging systems and rigging
accessories, including all eyebolts and speaker brackets provided by Yamaha, need to be
checked thoroughly for fatigue at regular intervals to ensure maximum safety. (Intervals
may vary, please contact your rigging expert for more information.) All other third-party
accessories also need inspection, please refer to the hardware manufacturer’s safety and
inspection guidelines. All components must be inspected following exposure to impact,
shock, fire, water or other hazard to detect cracks, corrosion, damages or any other signs of
decrease in strength of all components.
3. Ascertaining the data
In order to plan loudspeaker rigging effectively, one needs to be in possession of all the facts.
Typical data required includes:
• Floor plan
• Cross-section
• Roof / wall construction detail
• Weight loadings of structural members to mount or fly from
A site survey is a good idea even for simple jobs. Bring a digital camera if possible so that
intended mounting positions can be shared with others not in attendance at the site survey.
4. Designing the system
Once the loudspeaker system has been designed (see other information such as the
Installation Series application guide), the desired loudspeaker positions will be determined.
The types of system, from a rigging point of view can be broadly categorized as:
• single loudspeaker mounting
• single loudspeaker suspension
• array suspension
• ground stacked systems
5. Single loudspeaker mounting
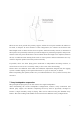
Single loudspeakers can be mounted in many ways. The most common methods include:
• Wall or ceiling mounting using Yamaha U-brackets
These allows convenient ‘portrait’ or ‘landscape’ mounting, but note that the cabinet
can be rotated in one direction only
• Wall or ceiling mounting using third-party supplied tilt and swivel brackets
5