
User Manual
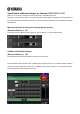


Table Of Contents
- Specification additions/changes for Yamaha CL5/CL3/CL1 V1.02
- Mounting limitation for two-space Premium Rack processor(Reference Manual, p. 127)
- Addition of PATCHING indicator(Reference Manual, p. 136)
- Using a Premium Rack with the MIDI PROGRAM CHANGE popup window(Reference Manual, p. 148)
- Addition of options when loading a settings file(Reference Manual, p. 170)
- Display of version information(Reference Manual, p. 184)
- Operation when changing NETWORK settings(Reference Manual, p. 191)
- Operation when changing settings in the DANTE SETUP popup window(Reference Manual, p. 198)
- I/O rack settings for scene recall(Reference Manual, p. 198)
4. After waiting about 1 minute, plug the Ethernet cable into the Dante connector on the I/O rack,
and then wait about 20 seconds before plugging the Ethernet cable into the Dante connector on the
CL series.
Changing the ID
1. T
urn off the CL series.
2. Turn the I/O rack off, then on again.
3. Wait about 1 minute, and then turn on the CL series.
NOTE
If the CL series cannot be turned off, unplug the Ethernet cable from the Dante connector on the I/O rack,
turn off the I/O rack while it is disconnected from the network, then turn it on again, and then wait about 1
minute before connecting the Ethernet cable.