SR230 Owner's / Operator's Manual 2004
TO THE OWNER Thank you for choosing a Yamaha Sport Boat. This Owner’s Manual contains information you will need for proper operation, maintenance, and care. A thorough understanding of these simple instructions will help you to obtain maximum enjoyment from your new Yamaha. If you have any questions about the operation or maintenance of your Sport Boat, please consult a Yamaha dealer.
SPORT BOAT SAFETY INFORMATION 1 FEATURES & FUNCTIONS 2 OPERATION 3 MAINTENANCE & CARE 4 TROUBLESHOOTING & SPECIAL PROCEDURES 5 CONSUMER INFORMATION 6
Chapter 1 SAFETY INFORMATION IDENTIFICATION NUMBER RECORDS . . . . . . . . . . . . . . . . . . . . . . . . . . . .1-1 Primary I.D. Number . . . . . . . . . . . . . . . . . . . . . . . . . . . . . . . . . . . . . . .1-1 Hull Identification Number (H.I.N.) . . . . . . . . . . . . . . . . . . . . . . . . . . . . .1-1 Engine Serial Number . . . . . . . . . . . . . . . . . . . . . . . . . . . . . . . . . . . . . .1-1 Star Labels . . . . . . . . . . . . . . . . . . . . . . . . . . . . . . . . . . . . . . . . . .
1 SAFETY INFORMATION IDENTIFICATION NUMBER RECORDS Record your Primary I.D., H.I.N., and engine numbers in the spaces provided to assist you in ordering spare parts from your Yamaha Sport Boat dealer. Also record and keep these I.D. numbers in a separate place in case your Sport Boat is stolen. 1 PRIMARY I.D. NUMBER F1C \ \ \ \ \ \ \ \ \ \ \ The Primary I.D. number is stamped on a label 1 attached to the inside of the engine compartment. 2 HULL IDENTIFICATION NUMBER (H.I.N.
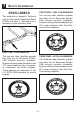
1 SAFETY INFORMATION STAR LABELS TWO STARS - VERY LOW EMISSION This watercraft is labeled in California with a California Air Resources Board (CARB) star label 1. See below for a desciption of your particular label. The two-star label identifies engines that meet the Air Resources Board’s 2004 exhaust emission standards. Engines meeting these standards have 20% lower emissions that One StarLow-Emission engines.
SAFETY INFORMATION 1 EMISSION CONTROL INFORMATION This engine family conforms to U.S. EPA regulations for marine SI engines. APPROVAL LABEL OF EMISSION CONTROL CERTIFICATE This label is attached to the electrical box. 1 Emission control information label EMISSION CONTROL INFORMATION ENGINE FAMILY : THIS ENGINE CONFORMS TO FELs U.S. EPA REGULATIONS FOR MARINE S1 ENGINES g/low - hr SPARK PLUG GAP (mm) : TROLLING SPEED : rpm YAMAHA MOTOR CO., CO, LTD.
1 SAFETY INFORMATION IMPORTANT LABELS 4 3 6 6 1 5 14 4 6 1 2 3 15 8 11 6 6 13 13 16 12 7 7 10 9 1-4 2 15
SAFETY INFORMATION 1 3 4 5 2 6 7 1-5 1
1 SAFETY INFORMATION 8 9 10 11 12 1-6
SAFETY INFORMATION 13 Do not touch or remove electrical parts when starting or running engine.
1 SAFETY INFORMATION Know the operator age and training requirements for your state. A boating safety course is recommended and may be required in your state. You can find local rules by contacting the United States Coast Guard (USCG), the National Association of State Boating Law Administrators, or your local Power Squadron.
SAFETY INFORMATION REQUIRED EQUIPMENT 1 ADDITIONAL EQUIPMENT RECOMMENDATIONS The U.S. Coast Guard (USCG) has regulations which describe minimum standards of safety. You must comply with these regulations, which apply to boats like your Sport Boat which are less than 26 feet long.
1 SAFETY INFORMATION CRUISING LIMITATIONS Scan constantly for people, objects, and other watercraft. Be alert for conditions that limit your visibility or block your vision of others. Operate defensively at safe speeds and keep a safe distance from people, objects, and other watercraft. risk of back/spinal injury (paralysis), facial injuries, and broken legs, ankles, and other bones. Do not jump waves or wakes.
SAFETY INFORMATION OPERATIONAL REQUIREMENTS All riders must wear a Coast Guard approved personal flotation device (PFD). 1 For reasons of safety and proper care of the Sport Boat, always perform the pre-operation checks listed on page 3-4 before operating. Passengers must always sit in a designated seating area, place feet on the deck, and hold on to the hand grips when the boat is in motion.
1 SAFETY INFORMATION Attach the engine shut-off cord (lanyard) to PFD and keep it free from steering wheel or other controls so that the engine stops if the operator accidentally leaves the helm. Failure to attach the engine shut-off cord could result in a runaway boat if the operator is ejected. Maintain a safe distance from other boats or watercraft, and also watch for boats’ ski ropes or fishing lines.
SAFETY INFORMATION an open area without obstructions until you have a good feel for the maneuver. Yamaha Sport Boats are water-jet propelled. The pumps are directly connected to the engines. This means that the jet thrust will produce some movement whenever the engines are running. The Sport Boat has a “neutral” position, but since the Sport Boat is always producing thrust while the engines are running, some forward or reverse movement may occur.
1 SAFETY INFORMATION WATER-SKIING You can use the Sport Boat to tow a water skier, using the tow cleat provided. It is the boat operator’s responsibility to be alert to the safety of the water-skier and others. Know and follow all state and local water-skiing regulations in effect for the waters in which you will be operating. The following are some important considerations for minimizing risks while water-skiing.
SAFETY INFORMATION RULES OF THE ROAD Your Yamaha Sport Boat is legally considered a powerboat. Operation of the Sport Boat must be in accordance with the rules and regulations governing the waterway on which it is used. Just as there are rules that apply when you are driving on streets and highways, there are waterway rules that apply when you are operating your boat. These rules are used internationally, and are also enforced by the United States Coast Guard and local agencies.
1 SAFETY INFORMATION RULES WHEN ENCOUNTERING VESSELS There are three main situations that you may encounter with other vessels which could lead to a collision unless the Steering Rules are followed: Meeting: you are approaching another vessel head-on Crossing: you are traveling across another vessel's path Meeting If you are meeting another power vessel head on, and are close enough to run the risk of collision, neither of you has the right-of-way! Both of you should alter course to avoid an accident.
SAFETY INFORMATION Overtaking If you are passing another vessel, you are the give-way vessel. This means that the other vessel is expected to maintain its course and speed. You must stay out of its way until you are clear of it. Likewise, if another vessel is passing you, you should maintain your speed and direction so that the other vessel can steer itself around you.
M AI N “7” CH AN NE L SAFETY INFORMATION C “1” “6” CH AN NE L RB “L” or RG “L” N “2” SE CO ND AR Y 1 “1” “3” “5” “7” LIGHTED BUOY (Port Hand) Odd number, increasing toward head of navigation. Leave to port (left) proceeding White Light Green Light OR “5” “4” Old New “2” “4” “6” LIGHTED BUOY (Starboard Hand) Even number, increasing toward head of navigation.
SAFETY INFORMATION Reading Buoys and Other Markers The waters of the United States are marked for safe navigation by the lateral system of buoyage. Simply put, buoys and markers have an arrangement of shapes, colors, numbers and lights to show which side of the buoy a boater should pass on when navigating in a particular direction. The markings on these buoys are oriented from the perspective of being entered from seaward (the boater is going towards the harbor).
1 SAFETY INFORMATION ACCIDENT REPORTING ENJOY YOUR SPORT BOAT RESPONSIBLY Boat operators are required by law to file a Boating Accident Report with their state boating law enforcement agency if their boat is involved in any of the following accidents: 1. There is loss of life or probable loss of life. 2. There is personal injury which requires medical attention beyond first aid. 3. There is damage to boats or other property which exceeds $500.00.
Chapter 2 FEATURES & FUNCTIONS LOCATION OF MAIN COMPONENTS . . . . . . . . . . . . . . . . . . . . . . . . . . . . . 2-1 OPERATION OF CONTROLS AND OTHER FUNCTIONS . . . . . . . . . . . . . 2-5 Steering . . . . . . . . . . . . . . . . . . . . . . . . . . . . . . . . . . . . . . . . . . . . . . . . 2-5 Tilt Lever . . . . . . . . . . . . . . . . . . . . . . . . . . . . . . . . . . . . . . . . . . . . . . . . 2-5 Engine Shut-Off Switch . . . . . . . . . . . . . . . . . . . . . . . . . . . . . . . . . . . .
FEATURES & FUNCTIONS 2 LOCATION OF MAIN COMPONENTS 1 8 8 16 11 11 10 10 15 13 14 4 2 3 6 12 7 9 6 5 7 5 12 9 17 17 18 18 19 19 11 Air Filter Cases Main Features: 12 Hood Supports 1 Fuel Tank 2 Battery 13 Engine Compartment Vent Outlets 3 Blower Motor 14 Engine Compartment Vent Inlets 15 Fuel Tank Compartment Air Ventilation Port/Starboard Features: 16 Fuel Tank Compartment Drain Plug 4 Flush Attachments 5 Electrical Boxes 6 Oil Tanks 7 Oil Tank Cap/ Dipstick 8 Muffler
2 FEATURES & FUNCTIONS 1 2 6 6 4 3 5 5 3 3 23 20 D 3 3 A 19 7 7 6 B 6 B 18 9 5 10 22 C 3 17 8 C 12 8 3 3 21 3 11 14 6 6 13 17 16 2-2 15
FEATURES & FUNCTIONS LOCATION OF MAIN COMPONENTS: 1 Bow Light 2 Bow Eye 3 Storage Compartments 4 Bow Anchor Locker 5 Grab Handles 6 Cleats 7 Courtesy Lights 8 Fuel Pump Access Hatch 9 Throttles 10 Shifter 11 Stern Light Storage 12 Stern Light Socket 13 Ski Tow Hook 14 Jet Pump Clean-out Access Panel 15 Pump Clean-out Interlock Switches 16 Rear Boarding Step 17 Accessory Pedestal Table Mounts 18 Tilt Adjustable Steering Wheel 19 Glove Box 20 Center Walk-Through Folding
2 FEATURES & FUNCTIONS LOCATION OF MAIN COMPONENTS 1 3 2 4 3 2 1 5 6 RPM x 1000 4 40 45 35 MPH 50 30 55 20 10 60 7 8 9 10 11 S 4 3 2 SE III IIIIIIII 1/2 E E 1 F 5 6 RPM x 1000 2 7 8 9 10 11 FUEL 8 PORT 5 STARBOARD 6 5 7 Control Features: 1 Speedometer 5 Ignition Switch Keys Tachometer 6 Steering Wheel 3 Compass 7 Tilt Adjustment Lever 4 Fuel Gauge 8 Switches and Breakers 2 7 7 5 6 4 2 1 3 4 5 7 Control Features: 1 Deck Drain 5 Pump Gates 2 Clean-out
FEATURES & FUNCTIONS 2 TILT LEVER OPERATION OF CONTROLS AND OTHER FUNCTIONS STEERING 4 3 2 1 5 6 RPM x 1000 40 45 35 MPH 50 30 55 20 10 60 7 8 9 10 11 S SE II IIIIIIIII E 4 3 2 1/2 E 1 F 5 6 RPM x 1000 7 8 9 10 11 FUEL 1 The tilt lever 1 is located under the steering wheel and is used to adjust the tilt of the steering wheel. There are three positions. 1 ➀ Steering wheel To adjust the tilt, pull the lever up, and then move the steering wheel up or down to the desired position.
2 FEATURES & FUNCTIONS WARNING ENGINE SHUT-OFF SWITCH Always attach the engine shut-off cord to your personal flotation device (PFD) BEFORE starting the engines. Failure to attach the cord could result in a runaway boat if the operator is ejected. Do not attach the cord to clothing that could tear loose. Do not route the cord in such a way that it could become entangled, preventing it from functioning. Avoid accidentally pulling the cord during normal operation.
FEATURES & FUNCTIONS OFF: Ignition circuits are switched off. The engine cannot be started but other switches will operate. (The key can be removed.) ON: Ignition circuits are switched on. (The key cannot be removed). START: The starter motor will turn to start the engine. (When the key is released, it returns automatically to “ON.”) WARNING Before starting the engine, always check the operation of each throttle lever. It should move smoothly through its full range of operation.
2 FEATURES & FUNCTIONS NOTE: This Sport Boat is equipped with a mechanical interlock that prevents shift lever movement unless both throttle levers are put in the idle position first. It also has a start-in-gear protection neutral switch that prevents the engines from cranking if the shift lever is not in Neutral. 1 2 3 Neutral The jet pump gates are dropped down part way over the jet nozzles. Some jet thrust is to the rear and some jet thrust is redirected forward.
FEATURES & FUNCTIONS Reverse The jet pump gates are dropped all the way down over the jet nozzles. Jet thrust is redirected toward the bow of the boat, which moves the boat backward. 2 GAUGES 1. Speedometer The speedometer 1 shows the boat speed in miles per hour (mph). 1 4 3 5 6 RPM x 1000 2 1 40 45 35 MPH 50 30 55 20 10 60 7 8 9 10 11 S SE II IIIIIIIII 4 3 E RPM x 1000 1 F 7 8 9 10 11 FUEL 2. Tachometers The Sport Boat has two tachometers 2 which display engine rpm.
2 FEATURES & FUNCTIONS 3. Fuel Level Gauge The fuel level gauge 1 shows the amount of fuel in the fuel tank. The ignition switch must be in the “ON” position to activate the gauge. 1 4 3 2 1 5 6 RPM x 1000 40 45 35 MPH 50 30 55 20 10 60 7 8 9 10 11 S SE II IIIIIIIII 4 3 5 6 RPM x 1000 2 1/2 E E 1 F 7 8 9 10 11 FUEL 4. Compass The compass shows your direction of travel. 5.
FEATURES & FUNCTIONS OVERHEAT WARNING SYSTEM The engine has an overheat warning device. If either engine starts to overheat, the engine speed of the affected engine will be limited to 3000 rpm. Each engine is equipped with coolingwater pilot outlets 1 on the starboard side of the hull. Check that water comes out of the outlet while the engine is running, particularly while applying throttle. If you do not see any water at the outlet, cooling water may not be circulating in the engine.
2 FEATURES & FUNCTIONS Lights This toggle switch controls the required on-board lighting. Press the top of the switch to turn on both the bow light and stern light for night running. Press the bottom of the switch to operate the stern light alone when anchored at night. Put the switch in the middle position to turn off all lights (see page 3-9). SWITCHES 1 1 2 3 4 5 6 2 3 4 5 6 Horn Pressing this switch activates the horn.
FEATURES & FUNCTIONS 2 2 3 1 NOTE: There is also an accessory fuse at the battery (see page 4-15). SWIVEL SEAT OPERATION The driver’s and mid-ship passenger’s seats are two-way adjustable. To move the seat forward or back, pull up on the lever 1 located under the front of the seat. Move the seat to the desired position, then release the lever. STEREO SYSTEM A stereo CD player/receiver is standard. The system consists of the CD player/receiver, four speakers, and a remote control keypad at the helm.
2 FEATURES & FUNCTIONS ENGINE HOOD STORAGE COMPARTMENTS There are two hood latches located under the front of the rear seat. To open the engine hood, lift both latch hooks upward and lift the hood. The hood is supported by gas-filled struts. Your boat has 12 convenient on-board storage compartments. Bow Anchor Storage Hood Latches and Struts Under Front Seats Pull up the seat cushions to access the storage compartments.
FEATURES & FUNCTIONS Glove Box 2 Under Rear Side Seats Pull up the seat cushions to access the storage compartments. Port-Side Console Starboard Side Rear Compartment Port Gunwale Battery Compartment Driver’s Side Console WARNING Do not carry any flammable substances in the battery compartment or any heavy or metal items that can damage the battery or cause a short circuit. Sparks or fire could result.
2 FEATURES & FUNCTIONS FRONT WALK-THROUGH Windshield If desired, the Walk-Through to the bow of the boat can be closed. Doorway 1 2 Unlatch the folding door from the port side console by pulling the rubber latch. Unfold the door and guide the edge of it into the channel on the driver’s side helm console. To hold the door in place, hook the rubber latch to the metal tab on the front side of the door. 2 Unsnap the retaining strap 1 from the windshield and pivot it into place.
FEATURES & FUNCTIONS SWIM PLATFORM The swim platform area provides a place to stand or sit while putting on skis or a wakeboard, and includes a ladder to make boarding from the water easier. To use the ladder, pull it out from underneath the swim platform until it can drop down. Before operating the boat, return the ladder to its storage position. WARNING Stay away from the swim platform area while the engines are running.
OPERATION 3 Chapter 3 OPERATION FUEL AND OIL . . . . . . . . . . . . . . . . . . . . . . . . . . . . . . . . . . . . . . . . . . . . . . . 3-1 Gasoline . . . . . . . . . . . . . . . . . . . . . . . . . . . . . . . . . . . . . . . . . . . . . . . . 3-1 Engine Oil . . . . . . . . . . . . . . . . . . . . . . . . . . . . . . . . . . . . . . . . . . . . . . . 3-2 GASOLINE AND ENGINE OIL FILLING . . . . . . . . . . . . . . . . . . . . . . . . . . . . 3-2 Filling the Gasoline Tank . . . . . . . . . . . . . . . .
OPERATION 3 vapor, or get gasoline in your eyes, get immediate medical attention. If any gasoline spills onto your skin, immediately wash with soap and water. Change clothing if gasoline spills on it. FUEL AND OIL GASOLINE Use regular unleaded 87 octane (R+M ÷ 2) gasoline. WARNING GASOLINE AND ITS VAPORS ARE HIGHLY FLAMMABLE AND EXPLOSIVE! CAUTION: Use only fresh gasoline that has been stored in clean containers.
3 OPERATION Stop filling when the fuel just becomes visible in the bottom of the filler tube. Do not “top off” the tank, because gasoline could spill out. Be sure to tighten the cap securely. While many additives available may reduce deposits, Yamaha recommends the use of Ring Free Fuel Additive, available from your Yamaha dealer. Ring Free has repeatedly proven its ability to clean combustion deposits from inside the engine, notably in the critical piston-ring-land area, and fuel system components.
OPERATION To check oil, be sure the boat is level, either in the water or on the trailer. Open the engine compartment by pulling up on the two latches located under the front of the rear seat. 1 3 result in an overfilled engine once it warms up. 4) Repeat for the other engine. Warm Engine Check 1) Be sure the engine is warmed to operating temperature.
3 OPERATION PRE-OPERATION CHECKS WARNING If any item in the Pre-Operation check is not working properly, have it inspected and repaired before operating the Sport Boat. Otherwise an accident could occur. CHECK LIST Before Operating this Sport Boat, perform the following checks: ITEM PAGE REF. CHECK BEFORE LAUNCH OR OPERATION: STEERING Check for proper steering operation. 3-5 THROTTLE Check for proper throttle operation. 3-5 SHIFTING Check for proper shift operation.
OPERATION NOTE: Pre-operation checks should be made each time the boat is used. This procedure can be accomplished thoroughly in a short time. The added safety and reliability the checks assure is worth the time involved. 3 Throttle CHECK POINTS Steering 4 3 2 1 5 6 RPM x 1000 40 45 35 MPH 50 30 55 20 10 60 7 8 9 10 11 S SE III IIIIIIII E 4 3 2 1/2 E 1 F 5 6 RPM x 1000 Operate the throttle levers several times to make sure there is no hesitation in their travel.
3 OPERATION WARNING Always carry a fire extinguisher on board. This Sport Boat is an inboard boat less than 26’ long. A boat of this type MUST carry a fire extinguisher of a B-1 classification, with a capacity of two pounds or more, when navigating in waters controlled by the U.S. Coast Guard. In addition, most state and local boating laws also require that the craft carry a USCG-approved fire extinguisher whenever the boat is operated. WARNING Shift only with the engine idling.
OPERATION Jet Intakes 3 Fuel System Refer to page 4-11, “FUEL SYSTEM INSPECTION,” for correct procedure. 1 Fuel and Engine Oil Levels 1) Turn the main switch key to ON. Wait for the fuel gauge needle to stop moving, then note the fuel level. Add fuel if necessary. 2 1 2 NOTE: The fuel level is most accurate when the boat is sitting level on the trailer or in the water.
3 OPERATION through the large drain hole in the deck. A one-way check valve in the drain prevents water from traveling back to the deck during mooring or while moving in reverse. A drain plug is located at the center of the stern to allow more complete draining when the boat is removed from the water.
OPERATION Engine Compartment 3 Lights 1 3 Check for proper operation of the bow, stern, and instrument lights by pressing the switch 3 on the control panel. Operate the bilge blower switch 1 for at least 4 minutes before starting the engines. Open engine hood and check to be sure no gasoline vapors are present. Check for fuel leaks or loose electrical connections. 2 2 Blower motor WARNING Gasoline vapors can explode.
3 OPERATION Horn Press the horn switch 1 to be sure the horn operates. Cooling-Water Pilot Outlets Check that water comes out from the pilot outlets while engine is running in the water. Refer to page 2-10 for correct operation of the device. 1 Engine Shut-Off Switch NOTE: It may take up to 20 seconds for water to reach the pilot outlets when first launching the boat. The amount and force of the exiting water will vary with engine rpm.
OPERATION BIMINI TOP ((Optional) Raising from the fully collapsed storage position. 3 4) Attach the snap hooks to the strap eyes. 1) With an assistant, raise the top and secure the rear support poles to the rear support pole mounts with the lock pins. 5) The top should be snug and wrinkle free. If the top is too loose or too tight, adjust the front straps by sliding the buckle up or down the strap as needed. 2) Unzip and remove the storage cover.
3 OPERATION Storing In The Upright Position 1) Raise the rear support poles. 2) Unhook the front straps and pull the top to the back. 3) Roll the fabric around the frames and zip the storage cover in place. CAUTION: Do not trailer the boat with the Bimini top in the fully extended or upright storage positions. Put the cover in the fully collapsed position to avoid damage. Storing In the Fully Collapsed Position 1) Follow the steps for storing in the upright position.
OPERATION 3 OPERATION STARTING THE ENGINES WARNING 3 FT (90 CM) SEVERE INJURY OR DEATH MAY RESULT IF YOU IGNORE ANY OF THE FOLLOWING: Before operating your Sport Boat, become familiar with all controls. Consult your Yamaha dealer about any control or function you do not fully understand. Attach the engine shut-off switch cord to your personal flotation device before operating. Failure to attach cord could result in a runaway boat if operator is ejected.
3 OPERATION 1 2 NOTE: Before the first start-up, remove the fuel tank filler cap to release any built-up pressure in the tank because of fuel expansion. 1 2 Engine shut-off switch Clip with cord NOTE: It is not possible to start the engine with the clip removed from the engine shut-off switch. However, the starter motor will turn the engine over. PW CD V T V ON F JVC T By Pros AM 3 5 tronics pec Elec 4 6 ON OFF STA START OFF 2) Attach the engine shut-off cord to your PFD.
OPERATION CAUTION: Never turn the ignition key to “Start” while the engine is running. Do not keep the starter motor running for more than 5 seconds. If the engine does not start after 5 seconds of cranking, release the starter button. Wait at least 15 seconds before trying to start the engine again. If the starter motor is engaged continuously for more than 5 seconds, the battery will be quickly discharged, and it will be impossible to start the engine.
3 OPERATION BREAK-IN PROCEDURE The engine break-in period is essential to allow the various components of the engine to wear and polish themselves to the correct operating clearances. This ensures proper performance and promotes longer component life. 1) Launch the boat and start the engine. (See page 3-13). 2) For the first 5 minutes, run the engine at trolling speed. For the 30 minutes of operation after that, keep the engine speed below 5,000 rpm.
OPERATION 3 DRIVING YOUR SPORT BOAT Know and follow U.S. Coast Guard, state, and local laws when operating your Sport Boat. GETTING TO KNOW YOUR SPORT BOAT Select a wide area to learn in, where visibility is good and other boat traffic is light. Keep the proper distance from other boats and vehicles. Do not operate where people are swimming. Operating your Sport Boat requires skills acquired through practice over a period of time.
3 OPERATION TURNING THE SPORT BOAT Steering control depends on the combination of steering wheel position and the amount of throttle. Water sucked in through the intake grate is pressurized by the impeller in the jet pump. As the pressurized water is expelled from the pump through the jet thrust nozzle, it creates thrust to move and steer the Sport Boat. The higher the engine speed, the more thrust is produced.
OPERATION TURNING LEFT 4 3 5 6 RPM x 1000 2 1 BOATING WITH PASSENGERS 40 45 35 MPH 50 30 55 20 10 60 7 8 9 10 11 S SE II IIIIIIIII 4 3 5 6 RPM x 1000 2 1 1/2 E F E 7 8 9 10 11 FUEL TURNING RIGHT 4 3 2 1 5 6 RPM x 1000 40 45 35 MPH 50 30 55 20 10 60 7 8 9 10 11 S 3 SE II IIIIIIIII E 4 3 2 1/2 E 1 F 5 6 RPM x 1000 7 8 9 10 11 FUEL When one or more passengers are on board, the boat may handle differently, so operating it requires a higher degree of skill.
3 OPERATION WARNING Stay away from the swim step while the engines are running. Exhaust gases coming from underneath it contain carbon monoxide, a colorless, odorless gas which may cause brain damage or death when inhaled. Symptoms include nausea, dizziness, and drowsiness. 2) Climb up onto the swim platform, then sit in one of the seats provided. BOARDING FROM A DOCK OR LANDING JETTY 1) Be sure engines are off, then move to the stern of the boat. Pull out the ladder and climb up onto the step.
OPERATION STOPPING 345 ft (105 m) 3 2) Notice how wind and water currents are affecting boat movement as you attach your mooring lines and fenders. 3) Approach the dock at idle speed. Use reverse as necessary during slow speed maneuvering to help control speed and direction. Position the boat according to wind and water conditions. WARNING The Sport Boat is not equipped with a separate braking system. It is stopped by water resistance after the throttle levers are moved back to idle.
3 OPERATION Wind or current pushing boat toward dock: WIND OR CURRENT 2) When the stern is out a few feet, release the bow mooring then steer in the direction you want the bow to move. Open the throttle slightly and begin to move away from the dock. BEACHING 1) Make sure no obstructions, boats or swimmers are near the beach. Slowly maneuver to a shallow angle and allow the boat to move toward the dock. No wind or current: Approach the dock at a shallow angle.
OPERATION ANCHORING WARNING Always anchor from the bow. Anchoring from the stern will make the boat unsteady. A strong current can pull a stern-anchored boat underwater. Select an anchor appropriate for your boat and water conditions. A “danforth” (or fluke) type anchor is suitable for most applications; your dealer can help you choose an anchor. 1) Make sure the anchor line is securely tied to the anchor and to the bow eye.
3 OPERATION CROSSING WAKES AND SWELLS You will not always have flat, smooth water. There will be swells, wakes from other boats, etc. SHARP WAKES The best way to cross wakes and swells is with the least jolt to you and the boat. Small swells are not as difficult to cross as larger swells or wakes. Crossing a sharp wake gives more of a jolt than a broad swell. To cross a wake or swell, change your speed and choose the angle at which you cross the wake or swell.
OPERATION POST-OPERATION CHECKS POST-OPERATION CHECKS These post-operation procedures are developed to help preserve the longterm appearance and reliability of your Sport Boat. Perform these procedures as soon as possible after the boat is loaded back on the trailer after the day’s use. Some owners plan to moor their boat seasonally, rather than keeping it on the trailer between uses. The procedures described in this section may not be possible if your Sport Boat is moored in the water.
3 OPERATION 5) Remove hull drain plug 1 and the engine compartment drain plugs 2. Rinse the engine compartment with a small amount of fresh water. Be careful not to get water on the carburetor or electrical components. Allow any water in the bilge to drain out. After the water has drained, wipe the engine compartment and bilge with dry rags. Reinstall all drain plugs. NOTE: This boat is equipped with an electric bilge pump that automatically removes excess water from the bilge while you are underway.
OPERATION TRAILERING WARNING Avoid accident and injury from improper trailering: The trailer must be matched for the Sport Boat’s weight and hull. The towing vehicle must have the capacity of pulling the load. Pulling a load that exceeds the towing capacity may cause loss of control. Be sure the boat is secured to the trailer and the trailer is properly hitched to the towing vehicle before towing. A trailer is provided as standard equipment with your Sport Boat.
3 OPERATION Check wheel bearings and wheel lug nuts before each trip. Check tail, brake, and turn signal lights for proper operation. Secure the bow of the boat to the trailer with the winch line and also with the chain. Secure the stern cleats to the trailer with tie-downs. it is a good idea to carry a set of spare wheel bearings, seals, and races. When making a turn, do not cut corners. The trailer has a smaller turning circle so it turns more sharply around the corner than the towing vehicle.
OPERATION LAUNCHING 3 5) Remove the bow line from the bow eye. 6) Back the trailer farther into the water until just the tops of the fenders show, then reset the parking brake. Board the boat and start it. If possible, remain on the trailer until the engines are warm and are responding to throttle. As a courtesy to other boaters, prepare your Sport Boat for launching before using the ramp. Each launch may have particular differences, such as ramp angle, prevailing wind, waves, and water currents.
4) Make sure the boat is centered on the support rails and is headed straight for the bow stop (bumper board). Ease the boat forward until the bow rests against the bow stop. 5) Attach and tighten the winch line. CAUTION: The winch line is not designed to pull the boat onto the trailer. The winch line should not be the only line securing the bow during trailering. Use the chain along with the winch to secure the boat to the trailer. 6) Pull the trailer up the ramp out of the way of other boaters.
Chapter 4 MAINTENANCE AND CARE STORAGE . . . . . . . . . . . . . . . . . . . . . . . . . . . . . . . . . . . . . . . . . . . . . . . . . . . Fuel System . . . . . . . . . . . . . . . . . . . . . . . . . . . . . . . . . . . . . . . . . . . . . Cooling System Flushing . . . . . . . . . . . . . . . . . . . . . . . . . . . . . . . . . . . Lubrication . . . . . . . . . . . . . . . . . . . . . . . . . . . . . . . . . . . . . . . . . . . . . . Battery . . . . . . . . . . . . . . . . . . . . . . . . . . . . . . . .
MAINTENANCE & CARE 4 COOLING SYSTEM FLUSHING STORAGE 3 Storing your Sport Boat for prolonged periods of time, such as winter storage, requires preventative maintenance to ensure against deterioration. It is advisable to have the Sport Boat serviced by an authorized Yamaha Sport Boat dealer before storage. However, the following procedures can be performed by the owner with a minimum of tools.
4 MAINTENANCE & CARE 4) Turn off the water supply, then drain residual water from the exhaust system by alternately pushing the throttle lever up to half throttle and back for 10 to 15 seconds. Shut off engine. CAUTION: Never have the water on when the engine is not running. The water could flow back through the muffler into the crankcase causing severe engine damage. Do not run the engine for more than 15 seconds after the water supply has been turned off to avoid engine overheating.
MAINTENANCE & CARE 7) Grease the areas of the Sport Boat specified in “Grease Points” in the Adjustment and Maintenance section. 4 3) If the battery will be stored for a longer period, check the specific gravity of the fluid at least once a month and recharge the battery if it gets too low. BATTERY Specific gravity: 1.28 at 20°C (68°F) 1) If the boat will be out of use, the battery switch 1 in the battery compartment can be switched to the Off position to prevent accidental draining of the battery.
4 MAINTENANCE & CARE 3) Rinse the engine and bilge areas with fresh water. Drain off all water and wipe up remaining moisture with clean, dry rags. Reinstall the drain plugs. 4) Spray the exterior of the engines with Yamaha Silicone Protectant and Lubricant or an equivalent. 5) Wax the hull with a non-abrasive wax such as Yamaha Ultra Gloss Cleaner Wax or other wax designed for marine gelcoat. CLEANING 1 3 WARNING Slippery surfaces can cause falls and injury.
MAINTENANCE & CARE 4 TOOL KIT ADJUSTMENT AND MAINTENANCE It is advisable always to carry the Owner's Manual and tool kit with you whenever you use the boat. Periodic inspection, adjustment, and lubrication will keep your Sport Boat in the safest and most efficient condition possible. Safety is an obligation of the Sport Boat owner. The most important points of boat inspection, adjustment and lubrication are explained on the following pages.
4 MAINTENANCE & CARE PERIODIC INSPECTION CHART Frequency of maintenance operations may be adjusted according to the operating conditions, but the following table gives general guidelines. ● Indicates the checkups which you may do yourself. ■ Indicates work to be done by your Yamaha dealer.
MAINTENANCE & CARE 4 When fitting the plug, always clean the gasket surface and use a new gasket. Wipe off any dirt from the threads and screw in the spark plug to the correct torque. SPARK PLUG CLEANING AND ADJUSTMENT The spark plug is an important engine component and is easy to inspect. The condition of the spark plug can indicate something about the condition of the engine.
4 MAINTENANCE & CARE GREASE POINTS To keep moving parts sliding or rotating smoothly, coat them with water resistant grease such as Yamaha Marine Grease, Yamaha Grease A, or an equivalent. Throttle Cable Grease the throttle-cable inner wires at the carburetors. Steering Cable Ball Joints and Inner Wire Grease the steering cable and shift cables ball joints at the steering nozzles. Extend the steering cable and shift cable inner wires and apply a thin coat of grease to them.
MAINTENANCE & CARE 4 Bearing Housing ➀ Bearing housing grease nipple Grease the bearing housing through the grease nipple. Recommended water-resistant grease: Yamaha Marine Grease, or Yamaha Grease A The first service should be done after 10 hours or 1 month by your Yamaha dealer. Fill the bearing housing with water resistant grease through the grease nipple. 1 Grease capacity: 33.0~35.0 cc (1.11~1.18 oz) After first service: Every 100 hours or 6 months (you may do this yourself) Grease capacity: 6.
4 MAINTENANCE & CARE FUEL SYSTEM INSPECTION WARNING Gasoline is highly flammable and explosive. Failure to check for and repair any fuel leakage could result in fire or explosion. A fire or explosion can cause severe injury or death. The United States Coast Guard requires that all inboard boats like your Sport Boat have visual access to fuel filler clamps and hoses. The Sport Boat has two access points for this purpose.
MAINTENANCE & CARE FUEL TANK If the fuel tank needs to be cleaned or when any water is found in the fuel system, take the Sport Boat to your Yamaha dealer for service. ENGINE OIL It is recommended to have a Yamaha dealer change the engine oil. However, if you choose to change the oil on your own and you have the special equipment necessary to do so, refer to the service manual for this Sport Boat. NOTE: Dispose of used oil according to local regulations.
4 MAINTENANCE & CARE AIR FILTER The air filter element should be checked every 12 months or every 100 hours of operation. To check the air filter: 1) Open the hood (see page 2-14). 2) Remove the air filter case cover screws 1, slide the locks 2 to open, and then remove the case cover. 3) Remove the air filter element. Check it for dirt and oil. Replace the air filter every 2 years or every 200 hours of operation, or if it becomes contaminated with dirt or oil.
MAINTENANCE & CARE STEERING CABLE INSPECTION Be sure to check: 1) Check for smooth operation of the wheel and steering nozzles. 2) Check for proper steering adjustment. The nozzles should both point straight back when the steering wheel is centered. If steering is stiff or misadjusted, ask your Yamaha dealer to service it.
4 MAINTENANCE & CARE THROTTLE CABLE INSPECTION Push and pull the throttle levers through their full range with the shift lever in Neutral. Repeat with the shift lever in Forward, and again in Reverse. Both throttle levers should move smoothly from idle to full throttle and back. If not, ask your Yamaha Sport Boat dealer for service. REVERSE GATE MECHANISM INSPECTION 1) Remove the engine stop switch lanyard and ignition keys.
MAINTENANCE & CARE FUSE REPLACEMENT 3 4 4 WARNING Do not use fuses of higher amperage that those recommended. Substitution of a fuse of improper rating can cause extensive electrical system damage and possible fire. BATTERY The fuse is in the ignition coil holder. To replace the fuse, unscrew the cap and pull the two red leads out with the fuse holder. Open the fuse holder and replace the fuse.
4 MAINTENANCE & CARE Recharging WARNING Battery electrolyte is poisonous and dangerous, causing severe burns, etc. It contains sulfuric acid. Avoid contact with skin, eyes or clothing. Antidote: EXTERNAL – Flush with water. INTERNAL – Drink large quantities of water or milk. Follow with milk of magnesia, beaten egg or vegetable oil. Call physician immediately. EYES – Flush with water for 15 minutes and get prompt medical attention. A battery produces explosive gases. Keep sparks, flame, cigarettes, etc.
MAINTENANCE & CARE 5 3 4 PERKO 1 2 4 Battery Switch This model includes a battery disconnect switch. Turn this switch to the Off position when you want to be sure no battery power is available, such as during storage to prevent accidental discharge of the battery or during service work.
4 MAINTENANCE & CARE SPECIFICATIONS MODEL ITEM VEHICLE CAPACITY Maximum people on board Maximum load capacity DIMENSIONS Length Beam Draft Dry weight Height on trailer PERFORMANCE Maximum output Maximum fuel consumption Cruising range (full throttle) ENGINE Number of engines Engine type Number of cylinder Displacement Bore & stroke Compression ratio Lubrication system Cooling system Starting system Ignition system Spark plug Spark plug gap Recommended battery Battery capacity Charging system DRIVE UNIT Pr
Chapter 5 TROUBLESHOOTING & SPECIAL PROCEDURES TROUBLESHOOTING . . . . . . . . . . . . . . . . . . . . . . . . . . . . . . . . . . . . . . . 5-1 Troubleshooting Chart . . . . . . . . . . . . . . . . . . . . . . . . . . . . . . . . . . 5-1 SPECIAL PROCEDURES . . . . . . . . . . . . . . . . . . . . . . . . . . . . . . . . . . . . Towing the Sport Boat . . . . . . . . . . . . . . . . . . . . . . . . . . . . . . . . . . Running on One Engine . . . . . . . . . . . . . . . . . . . . . . . . . . . . . . . . .
TROUBLESHOOTING & SPECIAL PROCEDURES 5 TROUBLESHOOTING If any trouble happens on your Sport Boat, use this section to check for possible cause. If you cannot find the cause or if the procedure for replacement or repair is not described in this owner's manual, ask your Yamaha Sport Boat dealer or qualified mechanic for the proper service. The Troubleshooting Chart contains “TROUBLE,” “POSSIBLE CAUSE,” “REMEDY,” “REFER PAGE.
5 TROUBLESHOOTING & SPECIAL PROCEDURES TROUBLE Engine runs irregularly or stalls POSSIBLE CAUSE • Fuel • Fuel filter • Spark plug • Spark plug cap Engine won't run • Engine over 3,000 rpm overheat** Sport Boat speed • Cavitation too slow or loses power • Engine overheat** • Fuel Filter • Spark plug REMEDY Page Empty • Refill as soon as possible 3-2 Stale or contaminated • Have serviced at Yamaha dealer Water or dust collected • Have serviced at Yamaha dealer Fouled or defective • Replace
TROUBLESHOOTING & SPECIAL PROCEDURES EMERGENCY PROCEDURES 5 WARNING The operator of the towing boat must keep speed to a minimum and avoid traffic or obstacles which could be a hazard to the driver on the Sport Boat. TOWING THE SPORT BOAT RUNNING ON ONE ENGINE If one engine becomes inoperative, the properly running engine can be used to return to shore. Operate at a “no wake” speed to prevent water from flooding the non-operating engine through the cooling water intake.
5 TROUBLESHOOTING & SPECIAL PROCEDURES 2) Connect one end of the negative (–) jumper cable to the negative (–) terminal of the booster battery. JUMP STARTING 3) Connect the other end of the negative (–) cable to an engine hanger on either side of the engine oil tank. ENGINE HANGER 2 ➀ ➁ 1 Negative (–) jumper cable Positive (+) jumper cable If the boat battery runs down, the engines can be started in an emergency using a 12-volt battery and jumper cables.
TROUBLESHOOTING & SPECIAL PROCEDURES 5 JET PUMP CLEAN-OUT PROCEDURE WARNING SEVERE INJURY OR DEATH MAY RESULT IF YOU IGNORE ANY OF THE FOLLOWING: ● Turn off and remove both ignition keys, remove lanyard, and wait for all movement to stop before removing access port caps. 3) Check that the retaining cord is securely attached to the cap and retaining strap. Press the release button and lift the cap up out of the port. Set the cap where it cannot be accidentally knocked overboard.
5 TROUBLESHOOTING & SPECIAL PROCEDURES 6) Press the T-handle down firmly to lock the cap in place. Pull up forcefully on the handle to be sure it is locked. If a strong pull will move the handle, it is not locked securely – the cap could be forced out by water pressure during operation. PUSH LOCK CAUTION: ● Be sure the caps are locked securely in place. Otherwise the cap could be forced out of the access ports by water pressure, causing loss of performance and possible damage.
Chapter 6 CONSUMER INFORMATION & INDEX LIMITED WARRANTY . . . . . . . . . . . . . . . . . . . . . . . . . . . . . . . . . . . . . . . . . . 6-1 YAMAHA EXTENDED SERVICE (Y.E.S) . . . . . . . . . . . . . . . . . . . . . . . . . . . . 6-4 BOATING TERMS . . . . . . . . . . . . . . . . . . . . . . . . . . . . . . . . . . . . . . . . . . . . . 6-5 SAMPLE FLOAT PLAN . . . . . . . . . . . . . . . . . . . . . . . . . . . . . . . . . . . . . . . . . 6-6 INDEX . . . . . . . . . . . . . . . . . . . . . . . . . . . . .
CONSUMER INFORMATION & INDEX 6 YAMAHA MOTOR CORPORATION, U.S.A. SPORT BOAT LIMITED WARRANTY Yamaha Motor Corporation, U.S.A. hereby warrants that new Yamaha Sport Boats will be free from defects in materials or workmanship for the period of time stated herein, subject to certain stated limitations.
6 CONSUMER INFORMATION & INDEX SPECIFIC PARTS EXCLUDED FROM WARRANTY; Parts replaced due to normal wear or routine maintenance such as oil, spark plugs, fuel filters, impeller and liner, and anodes are not covered by warranty. Charges for transporting the Sport Boat to and from an authorized Yamaha Sport Boat dealer are excluded from warranty coverage.
CONSUMER INFORMATION & INDEX 6 Q. Will the warranty be void or cancelled if I do not operate or maintain my new Sport Boat exactly as specified in the Owner’s Manual? A. No. The warranty on a new Sport Boat cannot be “voided” or “cancelled.” However, if a particular failure is caused by operation or maintenance other than as shown in the Owner’s Manual, that failure may not be covered under warranty. Q. What responsibility does my dealer have under this warranty? A.
6 CONSUMER INFORMATION & INDEX because your Yamaha needs covered service: replacement vehicle rental, emergency towing, phone calls, even food and lodging when you are away from home. This superb coverage goes into effect when you purchase Y.E.S., so it applies to any warranty repairs as well as covered repairs during your entire Y.E.S. plan period. Keep your Yamaha Sport Boat protected even after the 1-year warranty coverage provisions expire with genuine Yamaha Extended Service (Y.E.S.). Y.E.S.
CONSUMER INFORMATION & INDEX 6 BOATING TERMS TERM DEFINITION Bow The front part of the boat. Deck The “floor” or upper structure which covers the hull. Give-Way The vessel which must yield the right-of-way when two boats meet. Gunwale The meeting junction of the deck and hull; the upper edge around the boat. Pronounced “gun’l” Hatch An opening in the deck which provides access below. Helm The steering console. Hull The basic part of the boat; the under side.
6 CONSUMER INFORMATION & INDEX SAMPLE FLOAT PLAN Leave a float plan with a responsible person on shore before boating. The example below can be copied and used. FLOAT PLAN VESSEL INFORMATION BOAT MAKE: Yamaha MOTOR TYPE: Jet MODEL: LENGTH.
CONSUMER INFORMATION & INDEX 6 Checks: A Accident Reporting . . . . . . . . . . . . . . 1-20 Access port caps . . . . . . . . . . . 3-6, 5-5 Access Port Caps . . . . . . . . . . . . 3-6, 5-5 Battery condition . . . . . . 3-7, 4-3, 4-15 Adjustment and Maintenance . . . . . . . 4-5 Bilge . . . . . . . . . . . . . . . . . . . . . . . . 3-8 Age Limit . . . . . . . . . . . . . . . . . . . . . . . 1-8 Cooling water pilot outlets . . . . . . 3-10 Air Filter . . . . . . . . . . . . . . . . . . . . . .
6 CONSUMER INFORMATION & INDEX E Gauges . . . . . . . . . . . . . . . . . . . . . . . . 2-9 Electrical box . . . . . . . . . . . . . . . . . . . 2-1 Getting to know your Sport Boat . . . 3-17 “Emergency” procedures . . . . . . . . . . 5-3 Grease . . . . . . . . . . . . . . . . . . . . . . . . 4-8 Engine compartment . . . . . . . . . . 2-1, 3-9 Grease nipples . . . . . . . . . . . . . . . . . . 4-9 Engine hood . . . . . . . . . . . . . . . . . . . 2-14 Grease points . . . . . . . . . . . . . . . .
CONSUMER INFORMATION & INDEX 6 Location of main components . . . . . . 2-1 R Lubrication . . . . . . . . . . 3-2, 3-3, 4-2, 4-1 Reading owner’s manual . . . . . . . . . . 1-8 Recharging battery . . . . . . . . . . . . . . 4-16 M, N Replenishing the battery fluid . . . . . . 4-16 Main switches . . . . . . . . . . . . . . . . . . . 2-6 Reverse gate . . . . . . . . . . . 2-9, 3-5, 4-14 Meeting other vessels (Rules of the Road) . . . . . . . . . . . 1-15 Reverse operation . . . . . . . . . . .
6 CONSUMER INFORMATION & INDEX Stopping the engines . . . . . . . . . . . . 3-15 W, X Storage . . . . . . . . . . . . . . . . . . . . . . . . 4-1 Wakeboarding . . . . . . . . . . . . . 1-14, 3-17 Storage compartments . . . . . . . . . . . 2-14 Warning labels . . . . . . . 1-4, 1-5, 1-6, 1-7 Swimmers and traffic . . . 1-10, 1-12, 3-17 Warning light, low fuel . . . . . . . . . . . 2-10 Switches . . . . . . . . . . . . . . . 2-4, 2-6, 2-12 Warranty . . . . . . . . . . . . . . . . . . . . . . .
2004 SR230 Owner's / Operator's Manual LIT-18626-05-66 ©2003 YAMAHA MOTOR CORPORATION, U.S.A. Printed in U.S.A.