STAGEPAS Editor ユーザーガイド
目次 1. はじめに . . . . . . . . . . . . . . . . . . . . . . . . . . . . . . . . . . . . . . . . . . . . . . . . . . . . . . . . . . . . . . . . . . . . . . . . . . . . 1 1.1. 本ユーザーガイドについて . . . . . . . . . . . . . . . . . . . . . . . . . . . . . . . . . . . . . . . . . . . . . . . . . . . . . . . . . . 1 1.2. ご注意 . . . . . . . . . . . . . . . . . . . . . . . . . . . . . . . . . . . . . . . . . . . . . . . . . . . . . . . . . . . . . . . . . . . . . . . . . . 1 2. STAGEPAS Editorからリモートコントロールする . . . . . . . . . .
1. はじめに 1. はじめに STAGEPAS Editor は、STAGEPAS 1Kをスマートフォンやタブレットなどのモバイル端末からBluetooth®を 通じてリモートコントロールするためのアプリケーションソフトウェアです。STAGEPAS 1Kのパラメーターを コントロールしたり、メーターやインジケーターをモニターしたりできます。また、音楽プレーヤーの機能も 搭載しており、弾き語りに便利な“Cued Mode”機能(曲の頭でスタンバイする)も利用できます。 1.1. 本ユーザーガイドについて • 本ユーザーガイドは、接続方法や操作方法など、本製品を活用するための情報を記載しています。 • 本ユーザーガイドに記載されている記号とその内容は以下のとおりです。 記号 内容 NOTE 操作や運用に関連した情報です。参考にお読みください。 1.2.
2. STAGEPAS Editorからリモートコントロールする 2. STAGEPAS Editorからリモートコントロールする 2.1. STAGEPAS Editor を接続する 1. STAGEPAS 1Kの電源をオンにします。 2. モバイル端末のBluetooth®機能をオンにします。 3. STAGEPAS 1Kの[BLUETOOTH/CONTROL MODE]スイッチを1秒程度押します。 [BLUETOOTH/CONTROL MODE] LED が点滅し、接続の待機状態になります。 4. モバイル端末のSTAGEPAS Editorのアイコンをタップし、起動します。 NOTE • 初回起動時に、メディアライブラリーへのアクセス許可を求められます。あとからモバイル端末の 設定でアクセス許可/不許可を変更できます。 • 初回起動時に「位置情報へのアクセスを許可」をONにしなかった場合、STAGEPAS 1Kと接続でき ないことがあります。その場合は使用されているAndroid端末の位置情報と合わせてもう一度設定 をしてください。 5.
2. STAGEPAS Editorからリモートコントロールする 6. “Connect”ボタンをタップします。 初回接続時は、パスコードを設定する画面が表示されます。 7. パスコードを入力する画面が表示されたら、任意の4桁の数字を入力し、Doneボタンをタップして確定 します。 接続が完了すると、STAGEPAS 1Kの[BLUETOOTH/CONTROL MODE] LED が点灯し、EFFECT/EQ/PAN画面 を表示します。 NOTE • 一度接続した機器を次回接続するときは、手順5~手順7は不要です。 • Device List画面では、他のモバイル端末とすでに接続しているSTAGEPAS 1Kは表示されません。 2.2. STAGEPAS Editor を切断する 2.2.1. 本体側から切断する 1.
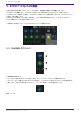
3. ツールバー 3.
4. プリセット 4. プリセット 音に関わる設定をプリセットとしてリコール(呼び出し)したり、ストア(保存)したりできます。プリセット は8つまでストアできます。 4.1. プリセットをストアする 1. ツールバーのSTOREをタップします。 2. STORE画面が表示されたら、ストア先のプリセットをタップします。 3.
4. プリセット 4.2. プリセットをリコールする 1. ツールバーのプリセットをタップします。 2. リコールしたいプリセットをプリセットリストからタップします。 NOTE • SETTINGS画面の”Recall Confirmation”で、リコールする前に表示される確認ダイアログを表示し ないように設定することもできます。 • プリセットはSTAGEPAS 1K本体に保存されます。 • No.
4. プリセット 4.3. プリセット名を編集する 1. プリセット欄をダブルタップします。 2. EDIT画面が表示されたら、プリセット名(最大16文字)を入力し、Doneボタンをタップします。 4.4. プリセットを削除する 1. ツールバーのプリセットをタップし、削除したいプリセットを左側にスライドします。 Deleteボタンが表示されます。 2.
5. EFFECT/EQ/PAN画面 5. EFFECT/EQ/PAN画面 全体の信号の流れを操作します。入力ソースの音作り、各種設定の確認または編集を行ないます。 STAGEPAS 1Kに接続すると、STAGEPAS 1K本体パネルの設定値がSTAGEPAS Editorに反映されます。 STAGEPAS Editorを操作した場合は、STAGEPAS 1K本体のツマミ位置は変わりませんが、STAGEPAS Editor で設定した値で動作します。 STAGEPAS 1K本体のツマミを操作した場合は、ツマミの設定値が反映されます。このとき、STAGEPAS Editorの操作子はツマミの動きに同期します。 この画面はCHANNELセクションとMASTERセクションから構成されます。 5.1.
5. EFFECT/EQ/PAN画面 ② EQノブ EQの値を設定します。 中心(FLAT)から左に回すと、低域を減衰(カット)します。右に回すと、低域と高域を増幅(ブースト)し ます。 このパラメータは、白線がSTAGEPAS Editorの値を示し、STAGEPAS 1K本体パネルのツマミの位置は薄い色 で表示します。 初期値:FLAT ③ PANバー PANの値を表示、設定します。このパラメーターはSTAGEPAS Editorでのみ設定できます。 左右にドラッグしてPANを設定できます。ダブルタップすると、C(センター)に戻ります。 ノブの下にはPANの値を数値で表示します。 範囲:L32~C~R32 初期値:C 5.2.
5.
6. FADER画面 6. FADER画面 レベルを調整する画面です。 メイン画面同様にCHANNELセクションとMASTERセクションから構成されます。 NOTE STAGEPAS EditorのCHANNELセクションのフェーダーは、STAGEPAS 1K本体のチャンネルレベルの直 後のデジタルレベルを操作します。どちらかのレベルが下がっている場合は、片方のレベルを上げても音 が出ません。 6.1.
6. FADER画面 6.2.
7. MUSIC PLAYER/FADER画面 7. MUSIC PLAYER/FADER画面 MUSIC PLAYER/FADER画面は、FADERセクションとMASTERセクションとMUSIC PLAYERセクションから構 成されます。 MUSIC PLAYERは、モバイル端末内の曲をBluetooth®オーディオを使ってSTAGEPAS 1Kで再生します。ただ し、Bluetooth®コントロールとは別に Bluetooth®オーディオのペアリングが必要です。ペアリングしていな い場合や、ペアリングしているSTAGEPAS 1Kと接続していない場合はモバイル端末で再生します。 NOTE • 初回起動時に、メディアライブラリーへのアクセス許可を求められます。あとからモバイル端末の 設定でアクセス許可/不許可を変更できます。 • 初回起動時に「位置情報へのアクセスを許可」をONにしなかった場合、STAGEPAS 1Kと接続でき ないことがあります。その場合は使用されているAndroid端末の位置情報と合わせてもう一度設定 をしてください。 7.1.
7.
7. MUSIC PLAYER/FADER画面 7.2. MASTERセクション ① REVERBボタン タップしてリバーブのON/OFFを切り替えます。ONのときは点灯します。 ② LIMITインジケーター リミッターがかかったときに、赤で点灯します。 ③ MASTERレベルインジケーター レベルに応じて点灯色が変化します。 -60dBから-18dBまでは緑 ( )、0dBまで黄色( 入力がない場合は消灯しています。 )で点灯します。 ④ MASTERレベル位置 現在のマスターフェーダーのレベルを表示します。 ⑤ MASTERレベルINC/DECボタン INC(+)/DEC(-)ボタンをタップしてマスターレベルを設定します。 INC(+)/DEC(-)ボタンの間にはマスターレベルを数値で表示します。 7.3.
7.
8. MUSIC PLAYER画面 8. MUSIC PLAYER画面 MUSIC PLAYER画面の機能の説明は7.
9. SONG画面 9. SONG画面 この画面では、再生する曲の選択やプレイリストの作成をします。 左側のメニューのタブをタップして画面を切り替えます。 9.1. Search Search Boxに入力すると、該当するプレイリスト、曲、アーティスト、アルバムをSearch Boxの下にリスト表 示します。 9.2.
9. SONG画面 9.2.1. 新規プレイリストを作成する 1. New playlistをタップします。 新規プレイリスト名を入力する画面が表示されます。 2. プレイリスト名を入力し、Doneボタンをタップして確定します。 NOTE • 最大64文字まで入力できます。日本語も入力できます。 9.3.
9. SONG画面 9.4. Albums モバイル端末に保存されているアルバムをリスト表示します。アルバムをタップすると、そのアルバムに含ま れる曲をリスト表示します。 ① Addボタン タップすると、プレイリスト選択画面が表示され、選択したプレイリストにアルバムの曲を追加できます。 9.5.
9. SONG画面 9.6.
10. SETTINGS画面 10.
10. SETTINGS画面 ⑤ Recall Confirmation リコール時に確認メッセージを表示するかどうかを設定します。 初期値:ON ⑥ Device Settingボタン タップすると、Device setting画面を表示します。 ⑦ User Guideボタン STAGEPAS Editorユーザーガイド(本書)を表示します。 ⑧ About About画面を表示します。 10.1. Device Setting画面 ➀ Device Name STAGEPAS 1KのDevice Nameを設定します。 ➁ Passcode セキュリティのためのパスコードを設定します。 10.2. Device Nameを設定する Device Nameは、Device List画面での表示のほか、モバイル端末のBluetoothのペアリング画面でも表示され ます。 1.
10. SETTINGS画面 2. Device Settingボタンをタップして、Device Setting画面を表示します。 3. Device Name入力欄をタップして、Device Nameを入力します。 4. Doneボタンを押して確定します。 NOTE • 空白のままに設定できますが、空白にした場合は「STAGEPAS 1K」と表示されます。 10.3. パスコードを設定する NOTE • パスコードを設定しないとオンライン接続できません。 • 設定したパスコードを忘れてしまった場合は、STAGEPAS 1Kを初期化してください。パスコード は忘れないよう、ご注意ください。 1.
10. SETTINGS画面 2. Device Settingボタンをタップして、Device Setting画面を表示します。 3.
11. Device List画面 11.
12. 警告表示について 12.
13. エラー表示について 13.
Manual Development Group © 2019 Yamaha Corporation 2020年12月 発行 YJMA-B0