2006 SuperJet 700 OWNER’S/OPERATOR’S MANUAL U.S.A.
E_F1N-10.book Page 1 Thursday, June 2, 2005 9:56 AM E EJU00989 To the owner/operator Thank you for choosing a Yamaha watercraft. This Owner’s/Operator’s Manual contains information you will need for proper operation, maintenance, and care. A thorough understanding of these simple instructions will help you to obtain maximum enjoyment from your new Yamaha. If you have any questions about the operation or maintenance of your watercraft, please consult a Yamaha dealer.
E_F1N-10.book Page 3 Thursday, June 2, 2005 9:56 AM EJU00992 CONTENTS E GENERAL AND SAFETY INFORMATION 1 FEATURES AND FUNCTIONS 2 OPERATION 3 MAINTENANCE AND CARE 4 TROUBLESHOOTING AND EMERGENCY PROCEDURES 5 APPENDIX 6 READ THIS OWNER’S/OPERATOR’S MANUAL CAREFULLY BEFORE OPERATING YOUR WATERCRAFT.
E_F1N-10.book Page 1 Thursday, June 2, 2005 9:56 AM E EJU00993 GENERAL AND SAFETY INFORMATION Identification numbers ............................1-1 Primary Identification (PRI-ID) number ...................................................1-1 Hull Identification Number (HIN) ............1-1 Engine serial number .............................1-1 Emission control information ................1-2 Approval label of Emission control certificate ................................................
E_F1N-10.book Page 1 Thursday, June 2, 2005 9:56 AM E EJU01830 Identification numbers Record the Primary Identification (PRI-ID) number, Hull Identification Number (HIN) and engine serial number in the spaces provided for assistance when ordering spare parts from a Yamaha dealer. Also record and keep these ID numbers in a separate place in case your watercraft is stolen. EJU01831 Primary Identification (PRI-ID) number The PRI-ID number is stamped on a label 1 attached inside the engine compartment.
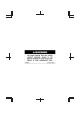
E_F1N-10.book Page 2 Thursday, June 2, 2005 9:56 AM E EJU01846 Emission control information This engine conforms to 2006 U.S. Environmental Protection Agency (EPA) regulations for marine SI engines. EJU01126 Approval label of Emission control certificate This label is attached to the electrical box and muffler. 1 Emission control information label EJU01127 Manufactured date label This label is attached to the electrical box and muffler.
E_F1N-10.
E_F1N-10.
E_F1N-10.
E_F1N-10.
E_F1N-10.book Page 7 Thursday, June 2, 2005 9:56 AM E EJU01177 EJU01143 Safety information The safe use and operation of this watercraft is dependent upon the use of proper riding techniques, as well as upon the common sense, good judgment, and expertise of the operator. Every operator should know the following requirements before riding the watercraft.
E_F1N-10.book Page 8 Thursday, June 2, 2005 9:56 AM E ● EJU12691 Cruising limitations ● ● ● ● ● ● ● ● ● ● Scan constantly for people, objects, and other watercraft. Be alert for conditions that limit your visibility or block your vision of others. Operate defensively at safe speeds and keep a safe distance away from people, objects, and other watercraft. Do not follow directly behind watercraft or other boats. Do not go near others to spray or splash them with water.
E_F1N-10.book Page 9 Thursday, June 2, 2005 9:56 AM E EJU11441 Operation requirements ● ● ● ● This watercraft is not equipped with lighting required for night operation. Do not operate the watercraft after sunset or before dawn, otherwise you increase the risk of colliding with another boat, which could result in severe injury or death. Follow navigation rules, and state/provincial and local laws that apply to watercraft. All riders must wear a U.S.
E_F1N-10.book Page 10 Thursday, June 2, 2005 9:56 AM E ● Helmets meeting Snell or DOT standards are required for IJSBA-sanctioned races. You must decide whether to wear a helmet while you ride for recreation. You should know that a helmet could help protect you in certain kinds of accidents and that it could injure you in others. A helmet is designed to provide some head protection.
E_F1N-10.book Page 11 Thursday, June 2, 2005 9:56 AM E ● ● ● ● ● Attach the engine shut-off cord (lanyard) to your wrist and keep it free from the handlebars so that the engine stops if the operator falls off. After riding, remove the engine shut-off cord from the watercraft to avoid accidental starting or unauthorized use by children or others. Scan carefully for swimmers, and stay away from swimming areas. Swimmers are hard to see and you could accidentally hit someone in the water.
E_F1N-10.book Page 12 Thursday, June 2, 2005 9:56 AM E EJU01003 EJU01271 Hazard information Watercraft characteristics ● ● ● When transporting or storing your watercraft, always place the fuel cock knob in the “OFF” position, otherwise gasoline may overflow from the carburetor. Never start the engine or let it run for any length of time in an enclosed area. Exhaust fumes contain carbon monoxide, a colorless, odorless gas that may cause loss of consciousness and death within a short time.
E_F1N-10.book Page 13 Thursday, June 2, 2005 9:56 AM E ● ● Keep away from intake grate 1 while the engine is on. Items such as long hair, loose clothing, or PFD straps can become entangled in moving parts resulting in severe injury or drowning. Never insert any object in the jet thrust nozzle 2. Severe injury or death could result from coming in contact with the rotating parts of the jet pump.
E_F1N-10.book Page 14 Thursday, June 2, 2005 9:56 AM E Steering and sailing rules EJU01180 Rules of the Road Yamaha watercraft is legally considered a powerboat. Operation of the watercraft must be in accordance with the rules and regulations governing the waterway on which it is used. Just as there are rules that apply when you are driving on streets and highways, there are waterway rules that apply when you are operating your watercraft.
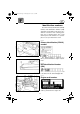
E_F1N-10.book Page 15 Thursday, June 2, 2005 9:56 AM E Rules when encountering vessels Meeting There are three main situations that you may encounter with other vessels which could lead to a collision unless the Steering Rules are followed: Meeting: you are approaching another vessel head-on Crossing: you are traveling across another vessel’s path Overtaking: you are passing or being passed by another vessel In the following illustration, your watercraft is in the center.
E_F1N-10.book Page 16 Thursday, June 2, 2005 9:56 AM E Overtaking Sailing vessel right-of-way If you are passing another vessel, you are the give-way vessel. This means that the other vessel is expected to maintain its course and speed. You must stay out of its way until you are clear of it. Likewise, if another vessel is passing you, you should maintain your speed and direction so that the other vessel can steer itself around you. Sailing vessels should normally be given the right-of-way.
E_F1N-10.book Page 17 Thursday, June 2, 2005 9:56 AM E This system uses buoys and signs with distinctive shapes and colors to show regulatory or advisory information. These markers are white with black letters and orange borders. They signify speed zones, restricted areas, danger areas, and general information. Remember, markings may vary by geographic location. Always consult local boating authorities before riding your watercraft in unfamiliar waters.
E_F1N-10.book Page 18 Thursday, June 2, 2005 9:56 AM E EJU01181 To get more boating safety information Be informed about boating safety. Additional publications and information can be obtained from many organizations, including the following. Yamaha is the watercraft industry’s leading manufacturer to build awareness and support for boating education. In 1997, Yamaha launched its GET W.E.T.
E_F1N-10.book Page 19 Thursday, June 2, 2005 9:56 AM E EJU01006 Enjoy your watercraft responsibly You share the areas you enjoy when riding your watercraft with others and with nature. So your enjoyment includes a responsibility to treat these other people, and the lands, waters, and wildlife with respect and courtesy. Whenever and wherever you ride, think of yourself as the guest of those around you.
E_F1N-10.book Page 1 Thursday, June 2, 2005 9:56 AM E EJU01007 FEATURES AND FUNCTIONS Location of main components ..............2-1 Operation of controls and other functions ...................................................2-3 Hood .......................................................2-3 Fuel tank filler cap ..................................2-4 Fuel cock knob .......................................2-4 Engine stop switch .................................2-5 Engine shut-off switch .....................
E_F1N-10.book Page 1 Thursday, June 2, 2005 9:56 AM E EJU01008 Location of main components 1 Rope hole Use to attach rope for transporting, mooring or towing the watercraft in an emergency. 2 Storage pouch 3 Steering pole Adjusts to suit operator’s riding posture. 4 Handlebars Use to control direction. 5 Riding tray Stand or kneel here for balance. 6 Fuel tank filler cap 7 Hood 8 Steering cover 9 Hood latch Locks the hood.
E_F1N-10.book Page 2 Thursday, June 2, 2005 9:56 AM E 1 Fire extinguisher container Use to store the fire extinguisher. 2 Fuel cock knob Use to select either normal or reserve fuel flow from the fuel tank to the carburetors, or to shut off fuel flow. 3 Choke knob Use to start a cold engine. 4 Clip Insert into the engine shut-off switch to enable starting of the engine. Remove to stop the engine or prevent accidental starting of the engine or unauthorized use of the watercraft.
E_F1N-10.book Page 3 Thursday, June 2, 2005 9:56 AM E EJU01009 Operation of controls and other functions EJU01272 Hood The hood is secured at the rear by a latch. Lift the steering pole and support it with the lock pin before removing the hood. To remove the hood: 1. Turn the latch knob 1 to the open position, and then pull up on the hood latch 2 to unlatch the hood. 2. Grasp the hood using the handgrips 3 provided at the front and rear side of the hood. Lift the hood up and to the rear to remove it.
E_F1N-10.book Page 4 Thursday, June 2, 2005 9:56 AM E 2. Push down on the hood latch, and then turn the knob to the lock position. NOTE: Make sure that the hood is properly secured before operating the watercraft. @ @ EJU01012 Fuel tank filler cap To remove the fuel tank filler cap 1, turn it counterclockwise. NOTE: Make sure that the fuel tank filler cap is properly secured before operating the watercraft. @ @ EJU01014 Fuel cock knob The fuel cock supplies fuel from the fuel tank to the carburetors.
E_F1N-10.book Page 5 Thursday, June 2, 2005 9:56 AM E EJU01015 Engine stop switch Push this switch 1 (red button) to stop the engine normally. EJU01016 Engine shut-off switch Insert the clip 1, on the end of the engine shut-off cord 2, under the engine shut-off switch 3 (black button). The engine will stop automatically when the clip is removed from the switch, such as if the operator falls off the watercraft.
E_F1N-10.book Page 6 Thursday, June 2, 2005 9:56 AM E EJU01215 Choke knob Starting a cold engine requires a richer air-fuel mixture, which is supplied by the choke. Pull the knob 1 out to turn the choke on. Push the knob in to turn the choke off. EJU01018 Throttle lever Squeeze the throttle lever 1 to increase engine speed. Release the throttle lever to decrease engine speed or to return it to the idle position. EJU01019 Start switch Push the start switch 1 (green button) to start the engine.
E_F1N-10.book Page 7 Thursday, June 2, 2005 9:56 AM E EJU11301 Cooling water pilot outlet This watercraft is equipped with a cooling water pilot outlet. When the engine is running, cooling water is circulated in the engine, and then it is discharged from the pilot outlet. To check for proper operation of the cooling system, check that water is being discharged from the pilot outlet. If water is not being discharged from the outlet, cooling water may not be circulating in the engine.
E_F1N-10.book Page 8 Thursday, June 2, 2005 9:56 AM E EJU01273 Steering pole The steering pole varies in height with the operator’s posture, enabling the operator to assume various riding positions. When removing the hood for pre-operation checks, maintenance, etc., lift the steering pole 1 and use the lock pin 2 to support it. Move the lock pin into the detent. Make sure the lock pin is returned to the stowed position after installing the hood.
E_F1N-10.book Page 9 Thursday, June 2, 2005 9:56 AM E EJU11311 Engine overheat warning system This model is equipped with an engine overheat warning system. If the engine starts to overheat, the engine speed will be limited to about 3,400 r/min. When this occurs, check for water discharge at the cooling water pilot outlet. If there is no discharge of water, reduce the engine speed and return to shore, and then check the intake grate and impeller for clogging.
E_F1N-10.book Page 10 Thursday, June 2, 2005 9:56 AM E EJU01274 Storage pouch A storage pouch is provided on the underside of the hood for the Owner’s/Operator’s Manual, tool kit and other small items. Bend the Owner’s/Operator’s Manual slightly to insert it into the storage pouch 1, then add the tool kit and any other small items. Fold the pouch and tie it with the belt. Install the storage pouch on the hood and secure it with the bands 2. NOTE: The storage pouch is not waterproof.
E_F1N-10.
E_F1N-10.book Page 1 Thursday, June 2, 2005 9:56 AM E EJU01040 OPERATION Fuel and oil ...............................................3-1 Gasoline .................................................3-1 2-stroke engine oil ..................................3-2 Mixing fuel and oil ..................................3-3 Filling the fuel tank .................................3-4 Pre-operation checks ..............................3-5 Pre-operation check list .........................
E_F1N-10.book Page 1 Thursday, June 2, 2005 9:56 AM E EJU01275 Fuel and oil EJU20550 Gasoline WARNING @ GASOLINE AND ITS VAPORS ARE HIGHLY FLAMMABLE AND EXPLOSIVE! ● Do not smoke when refueling, and keep away from sparks, flames, or other sources of ignition. ● Stop engine before refueling. ● Refuel in a well-ventilated area with the watercraft in a horizontal position. ● Do not stand or sit on the watercraft while refueling in case of fire. ● Take care not to spill gasoline.
E_F1N-10.book Page 2 Thursday, June 2, 2005 9:56 AM E Recommended gasoline: Regular unleaded gasoline with a minimum octane rating of 86 (Pump octane number) = (R+M)/2 90 (Research octane number) EJU01832 Gasohol There are two types of gasohol: gasohol containing ethanol and that containing methanol. Gasohol containing ethanol can be used if ethanol content does not exceed 10% and the fuel meets minimum octane ratings.
E_F1N-10.book Page 3 Thursday, June 2, 2005 9:56 AM E EJU01276 Mixing fuel and oil CAUTION: @ ● ● Avoid using any mixture of gasoline and oil other than those designated. Make sure gasoline and oil are thoroughly mixed in the correct ratio, otherwise the following problems may occur. Too little oil in the fuel mixing ratio could result in major engine trouble, such as seizure. Too much oil in the fuel mixing ratio could result in fouled spark plugs, smoky exhaust, or heavy carbon deposits.
E_F1N-10.book Page 4 Thursday, June 2, 2005 9:56 AM E EJU01277 Filling the fuel tank CAUTION: @ Be careful when refueling. Avoid getting water or other contaminants in the fuel tank. Contaminated fuel can cause poor running or engine damage. @ 1. Lift the steering pole and support it with the lock pin. 2. Remove the hood. 3. Open the fuel tank filler cap, and slowly add the premixed fuel to the fuel tank. 4. Stop filling when the fuel level just reaches the bottom of the filler tube.
E_F1N-10.book Page 5 Thursday, June 2, 2005 9:56 AM E EJU01346 Pre-operation checks EJU01347 Pre-operation check list Before operating this watercraft, perform the checks in the following check list. See the accompanying text in this chapter for details on how to perform the checks. WARNING @ If any item in the pre-operation check list is not working properly, have it inspected and repaired before operating the watercraft, otherwise an accident could occur.
E_F1N-10.book Page 6 Thursday, June 2, 2005 9:56 AM E EJU01048 Pre-operation check points EJU01278 Engine compartment Ventilate the engine compartment, before each use. To ventilate the engine compartment, lift the steering pole and support it with the stopper pin, then remove the hood. Put the hood aside for a few minutes to allow any fuel vapors to escape. Also, check for loose electrical connections. WARNING @ Failure to ventilate the engine compartment could result in fire or explosion.
E_F1N-10.book Page 7 Thursday, June 2, 2005 9:56 AM E EJU01279 Fuel system Check the fuel system for leakage, cracks or malfunctions before each use. (See page 4-10 for check points and correct procedures.) 1. Remove the fuel tank filler cap to release any pressure that might have built up in the fuel tank. 2. Remove the hood, and then check the fuel level in the tank. Replenish if necessary. (See page 3-4 for filling instructions.) 3. Close the fuel tank filler cap securely.
E_F1N-10.book Page 8 Thursday, June 2, 2005 9:56 AM E EJU01280 Bilge Check for moisture and fuel residue in the bilge. Excessive water in the bilge can splash into the carburetor and engine which could cause engine damage. EJU01969 Battery Check the battery condition and the electrolyte level. Check that the battery leads are tightened securely and there is no corrosion on the battery terminals. WARNING @ ● ● The battery must always be fully charged and in good condition.
E_F1N-10.book Page 9 Thursday, June 2, 2005 9:56 AM E EJU01145 Fire extinguisher Check that there is a full fire extinguisher on board. The fire extinguisher container 1 is on the hood under the steering pole. To open the fire extinguisher container: 1. Grasp the tab 2, pull the band to the rear, and then pull up. 2. Lift the container about 30 degrees from the stored position. 3. Remove the cap to reach the fire extinguisher.
E_F1N-10.book Page 10 Thursday, June 2, 2005 9:56 AM E EJU01834 Throttle Squeeze and release the throttle lever several times to make sure that there is no hesitation in its travel. It should be smooth over the complete range, and spring back to the idle position when released. WARNING @ Before starting the engine, always check the operation of the throttle lever. @ EJU01057 Steering system Check for looseness in the handlebars.
E_F1N-10.book Page 11 Thursday, June 2, 2005 9:56 AM E EJU01058 Jet unit Carefully check the jet intake for weeds, debris, or anything else that might restrict the intake of water. If the intake is clogged, cavitation could occur, reducing jet thrust, and possibly damaging the jet pump. In some cases, the engine may overheat because of lack of cooling water, and damage to the engine could result. Engine cooling water is fed to the engine by the jet pump. (See page 5-3 for jet intake cleaning procedures.
E_F1N-10.book Page 12 Thursday, June 2, 2005 9:56 AM E EJU18352 Switches CAUTION: @ Do not run the engine of the watercraft for more than 15 seconds on land without supplying water, otherwise the engine may overheat. @ Check the start switch, the engine stop switch, and the engine shut-off switch for proper operation. Push the start switch 1 to start the engine. As soon as the engine starts running, push the engine stop switch 2 to verify that the engine stops immediately.
E_F1N-10.book Page 13 Thursday, June 2, 2005 9:56 AM E EJU01283 Operation WARNING @ Before operating your watercraft, become familiar with all controls. Consult your Yamaha dealer about any controls or functions you do not fully understand. Failure to understand how controls work could cause an accident or prevent you from avoiding an accident.
E_F1N-10.book Page 14 Thursday, June 2, 2005 9:56 AM E 3. Gradually open the throttle lever to 3/4 or less. 4. Continue operation at 3/4 throttle or less until the first tankful of fuel has been used. 5. Fill the tank once more with a fuel-to-oil ratio of 25:1, and proceed with normal operation. CAUTION: @ Failure to follow the engine break-in procedure properly can result in severe damage to the engine.
E_F1N-10.book Page 15 Thursday, June 2, 2005 9:56 AM E EJU01137 Starting the engine WARNING @ Never start the engine or let it run for any length of time in an enclosed area. Exhaust fumes contain carbon monoxide, a colorless, odorless gas that may cause loss of consciousness and death within a short time. Always operate the watercraft in an open area. @ 1. Launch the watercraft in water free from weeds and debris and at least 60 cm (2 ft) deep.
E_F1N-10.book Page 16 Thursday, June 2, 2005 9:56 AM E 3. Attach the clip 1 to the engine shut-off switch 2. Also, attach the engine shut-off cord 3 to your left wrist. WARNING @ Check that the engine shut-off cord is not frayed or broken, and keep it free from the handlebars so the engine stops if the operator falls off. The engine shut-off cord may not pull free if wrapped around the handlebars when the operator falls off, allowing the watercraft to continue to run and cause an accident.
E_F1N-10.book Page 17 Thursday, June 2, 2005 9:56 AM E 6. Release the start switch as soon as the engine starts to run. CAUTION: @ ● ● Never push the start switch while the engine is running. Do not operate the start switch for more than 5 seconds, otherwise the battery will be discharged and the engine will not start. Also, the starter motor may be damaged. If the engine does not start in 5 seconds, release the start switch, wait 15 seconds, and try again. @ 7.
E_F1N-10.book Page 18 Thursday, June 2, 2005 9:56 AM E EJU01066 Stopping the engine To stop the engine, release the throttle lever, and then push the engine stop switch (red button). WARNING @ You need throttle to steer. Shutting off the engine can cause you to hit an obstacle you are attempting to avoid. A collision could result in severe injury or death.
E_F1N-10.book Page 19 Thursday, June 2, 2005 9:56 AM E EJU01068 EJU01147 Operating your watercraft Learning to operate your watercraft EJU01146 Getting to know your watercraft Operating your watercraft requires skills acquired through practice over a period of time. Take the time to learn the basic techniques well before attempting more difficult maneuvers. Operating your new watercraft can be a very enjoyable activity, providing you with hours of pleasure.
E_F1N-10.book Page 20 Thursday, June 2, 2005 9:56 AM E Wear protective clothing. Severe internal injuries can occur if water is forced into body cavities as a result of falling into water or being near the jet thrust nozzle. Normal swimwear does not adequately protect against forceful water entry into rectum or vagina. Operator must wear a wetsuit bottom or clothing that provides equivalent protection.
E_F1N-10.book Page 21 Thursday, June 2, 2005 9:56 AM E EJU01287 Starting the watercraft WARNING @ ● ● ● ● ● Scan constantly for people, objects and other watercraft. Be alert for conditions that limit your visibility or block your vision of others. Operate defensively at safe speeds and keep a safe distance away from people, objects and other watercraft. Do not follow directly behind watercraft or other boats. Do not go near others to spray or splash them with water.
E_F1N-10.book Page 22 Thursday, June 2, 2005 9:56 AM E EJU01378 Boarding and starting in deep water 1. Swim to the rear of the watercraft. Attach the engine shut-off cord to your wrist. Attach the clip to the engine shut-off switch. 2. Grasp the handlebars with both hands. Pull your body up onto the riding tray and balance there, using your elbows on the gunwales for leverage. 3. Start the engine and begin to accelerate. 4.
E_F1N-10.book Page 23 Thursday, June 2, 2005 9:56 AM E 6. Move as far forward as possible without interfering with the movement of the handlebars. Keep your body perpendicular to the water, with your weight forward and low. 7. Once the bow drops, and the watercraft has leveled out in the water and reached planing speed, back off the throttle lever and select your desired speed.
E_F1N-10.book Page 24 Thursday, June 2, 2005 9:56 AM E EJU01289 Boarding and starting in shallow water Be sure to learn the deep-water starting method before operating the watercraft in water where it is too deep for you to stand. Do not try to start the watercraft in water less than 60 cm (2 ft) deep. 1. Launch the watercraft into water. 2. Attach the engine shut-off cord to your wrist. Attach the clip to the engine shut-off switch. 3. Grip the handlebars with both hands.
E_F1N-10.book Page 25 Thursday, June 2, 2005 9:56 AM E EJU01290 Operating positions After you are underway, you may choose to kneel or stand, depending upon watercraft speed, your skill level, and your preference. Here are some guidelines. EJU01291 Kneeling It is easier to maintain your balance when kneeling than when standing. This position is suggested when traveling at sub-planing speeds.
E_F1N-10.book Page 26 Thursday, June 2, 2005 9:56 AM E EJU12931 Capsized watercraft If the watercraft capsizes, turn it over immediately. Be sure to carefully follow the procedures below to prevent injury or damage to the watercraft. WARNING @ IMPROPER UPRIGHTING CAN CAUSE INJURY: ● Shut the engine off by pulling on the engine shut-off cord to remove the clip from the engine shut-off switch. ● Do not put your hands in the intake grate.
E_F1N-10.book Page 27 Thursday, June 2, 2005 9:56 AM E 3. Start the engine and operate the watercraft to discharge any water remaining in the engine compartment. (If the engine does not start, see page 5-6, “Towing the watercraft” or page 5-7, “Submerged watercraft.”) NOTE: ● To efficiently discharge water from the engine compartment, operate the watercraft as straight as possible and above planing speed for at least 2 minutes.
E_F1N-10.book Page 28 Thursday, June 2, 2005 9:56 AM E EJU01294 Turning the watercraft Steering control depends on the combination of handlebar position and the amount of throttle. Water sucked in through the intake grate is pressurized by the impeller in the jet pump. As the pressurized water is expelled from the pump through the jet thrust nozzle, it creates thrust to move and steer the watercraft. The higher the engine speed, the more thrust is produced.
E_F1N-10.book Page 29 Thursday, June 2, 2005 9:56 AM E To maintain your balance, lean into a turn. How much you lean depends on the tightness of the turn and your traveling speed. In general, the higher the speed or the sharper the turn, the more you lean. WARNING @ Do not release the throttle when trying to steer away from objects—you need throttle to steer. A collision could result in severe injury or death.
E_F1N-10.book Page 30 Thursday, June 2, 2005 9:56 AM E EJU01080 Stopping the watercraft The watercraft is not equipped with a separate braking system. It is stopped by water resistance when the throttle lever is released. From full speed, the watercraft comes to a complete stop in approximately 90 m (300 ft) after the throttle is released and the engine is stopped, although this distance will vary depending on many factors, including gross weight, water surface conditions, and wind direction.
E_F1N-10.book Page 31 Thursday, June 2, 2005 9:56 AM E EJU01081 Beaching the watercraft 1. Make sure no obstructions, boats or swimmers are near the beach. Release the throttle lever about 90 m (300 ft) before you reach the intended beaching area. 2. Approach the beach slowly and stop the engine before reaching land. Remember: you need throttle to steer. 3. Get off the watercraft and pull it up on the beach.
E_F1N-10.book Page 32 Thursday, June 2, 2005 9:56 AM E EJU01894 Post-operation checks Always perform the following post-operation checks after operating the watercraft. 1. Remove the watercraft from the water. 2. Wash down the hull, steering pole, handlebars, and jet unit with fresh water. 3. Remove the hood and check the engine compartment for water. To drain excess water, turn the watercraft on its port (left) side. If necessary, turn the watercraft upside down to drain water completely.
E_F1N-10.book Page 33 Thursday, June 2, 2005 9:56 AM E CAUTION: @ Do not run the engine at full throttle or for more than 15 seconds on land, otherwise the engine may overheat and seize. @ 7. If the watercraft will be stored for a week or more, lubricate internal engine components to help prevent corrosion. (See page 4-3 for lubrication procedures.) 8. Rinse the engine and engine compartment with a small amount of water.
E_F1N-10.book Page 34 Thursday, June 2, 2005 9:56 AM E EJU01956 Transporting WARNING @ Always place the fuel cock knob in the “OFF” position when transporting the watercraft, otherwise fuel could leak out into the engine or engine compartment, which would create a fire hazard. @ Transport this watercraft using the special trailer that incorporates a hole into which the pin 1 can be inserted and locked after passing it through the rope hole 2.
E_F1N-10.
E_F1N-10.book Page 1 Thursday, June 2, 2005 9:56 AM E EJU01086 MAINTENANCE AND CARE Storage ......................................................4-1 Flushing the cooling system ..................4-1 Lubrication ..............................................4-3 Fuel system ............................................4-4 Battery ....................................................4-5 Cleaning the watercraft ..........................4-6 Maintenance and adjustments ..............
E_F1N-10.book Page 1 Thursday, June 2, 2005 9:56 AM E EJU01087 Storage WARNING @ Always place the fuel cock knob in the “OFF” position when storing the watercraft, otherwise fuel could leak out into the engine or engine compartment, which would create a fire hazard. @ Storage for prolonged periods of time, such as winter storage, requires preventative maintenance to ensure against deterioration. It is advisable to have the watercraft serviced by a Yamaha dealer prior to storage.
E_F1N-10.book Page 2 Thursday, June 2, 2005 9:56 AM E 1. Put the watercraft on land in a horizontal position. 2. Insert the garden hose adapter 2 into the flushing hose connector 1. 3. Connect the garden hose adapter to a water tap using a hose. NOTE: The garden hose is not included and must be purchased separately. @ @ 4. Start the engine, and then immediately turn the water supply on until water flows out continually from the cooling water pilot outlet. 5.
E_F1N-10.book Page 3 Thursday, June 2, 2005 9:56 AM E EJU01152 Lubrication WARNING @ To reduce the risk of fire or explosion: Never pour or spray gasoline, or any substance other than a rust inhibitor through the hole in the carburetor silencer cover. @ CAUTION: @ ● ● Make sure to replace the cap securely after fogging the engine, otherwise water could enter the engine and cause damage.
E_F1N-10.book Page 4 Thursday, June 2, 2005 9:56 AM E EJU20600 Fuel system WARNING @ GASOLINE AND ITS VAPORS ARE HIGHLY FLAMMABLE AND EXPLOSIVE! ● Do not smoke when refueling, and keep away from sparks, flames, or other sources of ignition. ● Stop engine before refueling. ● Refuel in a well-ventilated area with the watercraft in a horizontal position. ● Do not stand or sit on the watercraft while refueling in case of fire. ● Take care not to spill gasoline.
E_F1N-10.book Page 5 Thursday, June 2, 2005 9:56 AM E Top off the fuel tank with fresh gasoline and add one ounce of Yamaha Fuel Stabilizer and Conditioner to each gallon of fuel. NOTE: Use of Yamaha Fuel Stabilizer and Conditioner eliminates the need to drain the fuel system. If the fuel system is to be drained instead, consult a Yamaha dealer.
E_F1N-10.book Page 6 Thursday, June 2, 2005 9:56 AM E NOTE: The condition of the battery can be known by checking the specific gravity of the electrolyte. However, you can also know the condition of the battery by measuring the voltage at both battery terminals. Charge the battery if the voltage is less than 12 volts. @ Specific gravity (for reference): 1.28 at 20 °C (68 °F) It is recommended to have a Yamaha dealer check the specific gravity and to charge the battery.
E_F1N-10.book Page 7 Thursday, June 2, 2005 9:56 AM E EJU01170 Maintenance and adjustments Periodic inspection, adjustment and lubrication will keep your watercraft in the safest and most efficient condition possible. Safety is an obligation of the watercraft owner. The most important points of watercraft inspection, adjustment and lubrication are explained on the following pages. See your Yamaha dealer for genuine Yamaha replacement parts and optional accessories designed for your watercraft.
E_F1N-10.book Page 8 Thursday, June 2, 2005 9:56 AM E NOTE: A service manual is available for purchase through a Yamaha dealer for owners who have the mechanical skills, tools, and other equipment necessary to perform maintenance not covered by this Owner’s/Operator’s Manual. @ @ EJU11501 Owner’s/Operator’s Manual and tool kit It is advisable always to carry the Owner’s/Operator’s Manual and tool kit with you whenever you use the watercraft.
E_F1N-10.book Page 9 Thursday, June 2, 2005 9:56 AM E EJU01355 Periodic maintenance chart The following chart gives general guidelines for periodic maintenance. However, depending on your operating conditions maintenance may need to be performed more frequently. (●) This mark indicates maintenance that you may do yourself. (❍) This mark indicates work to be done by a Yamaha dealer.
E_F1N-10.book Page 10 Thursday, June 2, 2005 9:56 AM E EJU01383 Inspecting the fuel system WARNING @ Gasoline is highly flammable and explosive. A fire or explosion can cause severe injury or death. Shut off the engine. Do not smoke. Avoid spilling gasoline. @ Check the fuel system for leaks, cracks, or malfunctions. If any problem is found, do the necessary repair or replacement as required. If repair is necessary, consult a Yamaha dealer. Check: ● Carburetor for leakage.
E_F1N-10.book Page 11 Thursday, June 2, 2005 9:56 AM E EJU01953 Fuel filter This watercraft is equipped with a onepiece, disposable fuel filter 1. The fuel filter should be replaced after the initial 10 hours or first month of operation and every 200 hours or 24 months thereafter, or if water is found in the filter. Have a Yamaha dealer replace the fuel filter if necessary. WARNING @ Do not try to replace the fuel filter yourself.
E_F1N-10.book Page 12 Thursday, June 2, 2005 9:56 AM E EJU01891 Inspecting the jet thrust nozzle angle Check for smooth operation of the handlebars and jet thrust nozzle. Turn the handlebars as far as possible to the right and left and check that the distance between the jet thrust nozzle and the hull are equal on right and left sides. Distance A and B: A=B If steering is stiff or misadjusted, have a Yamaha dealer service it.
E_F1N-10.book Page 13 Thursday, June 2, 2005 9:56 AM E EJU20611 Cleaning and adjusting the spark plugs The spark plug is an important engine component and is easy to inspect. The condition of the spark plug can indicate something about the condition of the engine. For example, if the center electrode porcelain is very white, this could indicate an intake air leak or carburetion problem in that cylinder. Do not attempt to diagnose any problems yourself. Have a Yamaha dealer service the watercraft.
E_F1N-10.book Page 14 Thursday, June 2, 2005 9:56 AM E NOTE: ● Wipe off any water on the spark plug or inside the cap before installing the spark plug cap. Push the spark plug cap down until it is securely installed. ● If a torque wrench is not available when you are installing a new spark plug, a good estimate of the correct torque is 1/4 turn to 1/2 turn past finger tight with the spark plug wrench included in the tool kit.
E_F1N-10.book Page 15 Thursday, June 2, 2005 9:56 AM E ● Steering cable ball joint (handlebar end) Steering cable inner wire (handlebar end) 1. To access the steering cable and joint, remove the handle cover by removing the two bolts. 2. Grease the steering cable ball joints both on the handlebar end of the cable and on the jet thrust nozzle end. 3. Extend the steering cable inner wire, and then apply a thin coat of grease to both the handlebar end and the jet thrust nozzle end.
E_F1N-10.book Page 16 Thursday, June 2, 2005 9:56 AM E ● Intermediate housing Using a grease gun, fill the intermediate housing with water-resistant grease through the grease nipple. Grease quantity: Initial 10 hours or 1 month: 20.0–22.0 cm3 (0.67–0.74 oz) Every 100 hours or 12 months: 3.0–5.0 cm3 (0.10–0.33 oz) EJU01261 Adjusting the choke cable Check that the choke cable is properly adjusted. 1. Pull the choke knob out until it stops, and then release the knob. The knob should not move. 2.
E_F1N-10.book Page 17 Thursday, June 2, 2005 9:56 AM E EJU01971 Inspecting the battery Check the level of the battery electrolyte and make sure that the negative and positive leads are securely tightened. WARNING @ ● ● Battery electrolyte is poisonous and dangerous, causing severe burns, etc. Electrolyte contains sulfuric acid. Avoid contact with skin, eyes, or clothing. Antidotes External: Flush with water. Internal: Drink large quantities of water or milk.
E_F1N-10.book Page 18 Thursday, June 2, 2005 9:56 AM E To replenish the battery: 1. Make sure that the electrolyte level is between the upper 1 and lower 2 level marks. 2. Refill the battery with distilled water if necessary. CAUTION: @ Normal tap water contains minerals that are harmful to a battery. Use only distilled water for replenishing the battery. @ To recharge the battery: CAUTION: @ Do not attempt to charge a battery hastily. Battery life could be shortened.
E_F1N-10.book Page 19 Thursday, June 2, 2005 9:56 AM E EJU01109 Adjusting the carburetor The carburetor is a vital part of the engine and requires very sophisticated adjustment. Most adjusting should be left to a Yamaha dealer who has the professional knowledge and experience to perform it. However, the operator may adjust the trolling speed as part of the usual maintenance routine. CAUTION: @ The carburetor was set at the Yamaha factory after many tests.
E_F1N-10.book Page 20 Thursday, June 2, 2005 9:56 AM E EJU01263 Replacing the fuse The fuse is in the electrical box 1. To replace the fuse: 1. Remove the cap 2, pull out the red lead, and bring the fuse holder 3 out of the electrical box. 2. Open the fuse holder and replace the fuse 4 with one of the correct amperage. Fuse amperage: 10 A WARNING @ Do not use fuses of higher amperage that those recommended.
E_F1N-10.book Page 21 Thursday, June 2, 2005 9:56 AM E EJU01305 Adjusting the jet thrust nozzle angle The angle of the jet thrust nozzle can be adjusted to suit operator preference. 1. Loosen the two screws, and then remove the steering pole cover 1. 2. Select the desired nozzle angle a. Changing the position of the handlebar stopper and/or steering cable pivot bolt changes the nozzle angle as shown in the following chart.
E_F1N-10.book Page 22 Thursday, June 2, 2005 9:56 AM E To change the position for the steering cable pivot bolt: 1. Pull back the outer sleeve, and then disconnect the steering cable. 2. Remove the steering cable joint from the steering cable pivot bolt. 3. Loosen the pivot bolt and install it with the lock washer in the desired position (P1 or P2). Make sure to tighten it to the specified torque. Tightening torque: 5.4 N·m (0.5 kgf·m, 3.9 ft·lb) 4.
E_F1N-10.
E_F1N-10.book Page 1 Thursday, June 2, 2005 9:56 AM E EJU01115 TROUBLESHOOTING AND EMERGENCY PROCEDURES Troubleshooting ......................................5-1 Troubleshooting chart ............................5-1 Emergency procedures ..........................5-3 Cleaning the jet intake and impeller ......5-3 Jumping the battery ...............................5-4 Towing the watercraft ............................5-6 Submerged watercraft ...........................
E_F1N-10.book Page 1 Thursday, June 2, 2005 9:56 AM E EJU01116 Troubleshooting If you have any trouble with your watercraft, use this section to check for the possible cause. If you cannot find the cause, or if the procedure for replacement or repair is not described in this Owner’s/Operator’s Manual, have a Yamaha dealer perform the necessary service.
E_F1N-10.
E_F1N-10.book Page 3 Thursday, June 2, 2005 9:56 AM E EJU01118 Emergency procedures EJU11191 Cleaning the jet intake and impeller If weeds or debris get caught in the intake or impeller, cavitation can occur, causing jet thrust to decrease even though engine speed rises. If this condition is allowed to continue, the engine will overheat and may seize. If there is any sign that the jet intake or impeller is clogged with weeds or debris, return to shore and check the intake and impeller.
E_F1N-10.book Page 4 Thursday, June 2, 2005 9:56 AM E CAUTION: @ Always avoid operating your watercraft in areas where weed growth is thick. If traveling in weeded areas is unavoidable, operate the engine alternately at partial throttle and full throttle. Weeds tend to accumulate more at a steady speed and at trolling speed. If weeds clog the intake or impeller area and cause cavitation, follow the cleaning procedure above.
E_F1N-10.book Page 5 Thursday, June 2, 2005 9:56 AM E EJU01882 Connecting the jumper cables 1. Connect the positive (+) jumper cable 1 to the positive (+) terminals of both batteries. 2. Connect one end of the negative (–) jumper cable 2 to the negative (–) terminal of the booster battery 3. 3. Connect the other end of the negative (–) cable to an unpainted bolt on the cylinder head.
E_F1N-10.book Page 6 Thursday, June 2, 2005 9:56 AM E EJU01895 Towing the watercraft If the watercraft becomes inoperative in the water, it can be towed to shore. If the watercraft must be towed in an emergency using a tow line, the operator should ride the watercraft, holding onto the handlebars and supporting his body weight on the riding tray. This will help keep the bow of the watercraft out of the water.
E_F1N-10.book Page 7 Thursday, June 2, 2005 9:56 AM E EJU01907 Submerged watercraft If the watercraft is submerged or flooded with water, follow the procedure below and consult a Yamaha dealer as soon as possible. Failure to do so may result in serious engine damage! In an emergency: 1. Beach the watercraft and remove the hood. Turn the watercraft over far enough to drain the water from the engine compartment.
E_F1N-10.book Page 1 Thursday, June 2, 2005 9:56 AM E EJU01124 APPENDIX Limited warranty ......................................6-1 YAMAHA EXTENDED SERVICE (Y.E.S.) ......................................................6-3 Index...........................................................
E_F1N-10.book Page 1 Thursday, June 2, 2005 9:56 AM E EJU01172 Limited warranty YAMAHA MOTOR CORPORATION, U.S.A. WATERCRAFT LIMITED WARRANTY Yamaha Motor Corporation is proud of its heritage and reputation for producing products with high standards of quality and workmanship. Product excellence provides the cornerstone for our commitment to customer satisfaction. The Yamaha Watercraft Limited Warranty is your assurance of this commitment.
E_F1N-10.book Page 2 Thursday, June 2, 2005 9:56 AM E THIS WARRANTY GIVES YOU SPECIFIC LEGAL RIGHTS, AND YOU MAY ALSO HAVE OTHER RIGHTS WHICH VARY FROM STATE TO STATE. YAMAHA MOTOR CORPORATION, U.S.A. Post Office Box 6555 Cypress, California 90630 WARRANTY QUESTIONS AND ANSWERS Q. What costs are my responsibility during the warranty period? A. The customer’s responsibility includes all costs of normal maintenance services, non-warranty repairs, accident and collision damages. Q.
E_F1N-10.book Page 3 Thursday, June 2, 2005 9:56 AM E EJU19862 YAMAHA EXTENDED SERVICE (Y.E.S.) Keep your Yamaha protected even after your warranty expires with genuine Yamaha Extended Service (Y.E.S.). ● Y.E.S. is designed and administered by Yamaha Motor Corporation to provide maximum owner satisfaction. You get uninterrupted factory-backed coverage for extra peace of mind. ● Y.E.S. is flexible.
E_F1N-10.book Page 4 Thursday, June 2, 2005 9:56 AM E EJU01125 Index 2-stroke engine oil................................... 3-2 A Adjusting the carburetor ........................ 4-19 Adjusting the choke cable ..................... 4-16 Adjusting the jet thrust nozzle angle ..... 4-21 Adjusting the steering friction ................ 4-20 Adjusting the trolling speed ................... 4-19 Approval label of Emission control certificate................................................. 1-2 B Battery......
E_F1N-10.book Page 5 Thursday, June 2, 2005 9:56 AM E Location of main components ................. 2-1 Lubrication............................................... 4-3 Lubrication points .................................. 4-14 M Maintenance and adjustments ................ 4-7 Manufactured date label.......................... 1-2 Meeting ................................................. 1-15 Mixing fuel and oil ................................... 3-3 N Narrow channels and bends .................
YAMAHA MOTOR CORPORATION, USA Printed in Japan Jun. 2005—0.