
User Manual
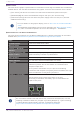
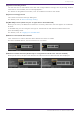
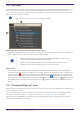

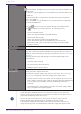
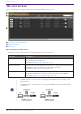
Table Of Contents
- Yamaha LAN Monitor for Win
- Table of contents
- 1. Introduction
- 2. Installing and uninstalling Yamaha LAN Monitor
- 3. Starting and exiting Yamaha LAN Monitor
- 4. Yamaha LAN Monitor screen structure
- 5. Network settings on the computer
- 6. Basic operation
- 7. Menu bar
- 8. Toolbar and display area
- 9. Map screen
- 10. List screen
- 11. Configuring the device
- 12. Update the firmware
- 13. Import/Export the CONFIG
- 14. Resources
- 15. Troubleshooting
-

Settings].
Note that the “Label Settings file” generated by this software version cannot
be imported to the software version 1.3.6 or earlier.
• Note that a snapshot notification will not be provided even if the keepalive
status changes from “UP” to “DOWN.”
List entry
To enter information in a list, or edit entered information, double click a cell.
Entries up to the following character counts and within the following ranges are permitted.
• [Device Label], [Model name], [Comment], [Manufacturer]: Up to 128 characters
• [Power consumption (W)]: Up to the first decimal place within a range of 0.0 – 90.0
Content entered into the [Device Label] and [Comment] fields are shared with
“Device Settings” dialog box. Changing entries in one will change the
corresponding entry for the other.
Show connection status
A snapshot saves the connected state of the devices at the time that you started monitoring.
Subsequently, if a device saved in the snapshot is no longer found, the corresponding device is
shown in red. If a device that had not been saved previously is newly found, the corresponding
device is shown in blue.
❸ [Refresh] button
Refreshes the information for the other agents or devices that are connected to the agent selected
in the tree view.
9. Map screen
Yamaha LAN Monitor for Win User Guide | 39