
User Manual


Toolbar and display area
Yamaha LAN Monitor User Guide
16
Toolbar and display area
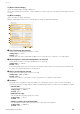
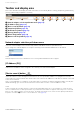
This section describes the display area and each button on the toolbar: [Device search], [Snapshots], [Notifications],
[History], [Whole map] and [Dante Controller].
1 Network adapter selection pull-down menu (page 16)
2 [IP Address (PC)] (page 16)
3 [Device search] button (page 16)
4 [Snapshots] button (page 18)
5 [Notifications] button (page 18)
6 [History] button (page 19)
7 [Whole map] button (page 19)
8 [Dante Controller] button (page 21)
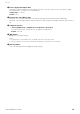
Network adapter selection pull-down menu
Select the network adapter to be monitored by Yamaha LAN Monitor from the pull-down menu.
If you change the network adapter, the snapshot internally held in Yamaha LAN Monitor is discarded.
NOTE
Network adapters that have been disabled on the PC running Yamaha LAN Monitor will not appear.
[IP Address (PC)]
Indicates the IP address that is assigned to the currently selected network adapter.
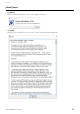
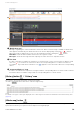
[Device search] button
Opens the “Device search” dialog box. This function can use specified IP addresses to ping devices that are
connected to the current network. This function also can search the IP addresses of all devices that are connected
to the current network.
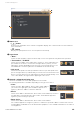
If the “Connected Devices” view does not list some devices on which you want to perform keepalive checks (life/
death monitoring), you can execute this function to list the devices in the “Connected Devices” view.
NOTE
A device that was discovered by the Device search function will disappear from the “Connected Devices” view if the device
does not communicate for a certain period of time. If you want a discovered device to appear continuously in the “Connected
Devices” view, enable keepalive check on the device. For details on keepalive check, refer to the description provided for the
Keepalive check box in 2 List for the “Connected Devices” view (page 28).
1
2
4 73 5 86