Virtual Acoustic Tone Generator Getting Started Owner’s Manual 1
Getting Started Contents Precautions ........................................... 4 About the Manuals . . . . . . . . . . . . . . . . . . . . . . . 6 ■ ■ ■ The Getting Started Manual (this manual) . . . . . . . . . . . . . . . . . . . . . . . . 6 The Feature Reference Manual . . . . . . . . . . . . . . . . . . . . . . . . . . . . . . . . . 7 Conventions . . . . . . . . . . . . . . . . . . . . . . . . . . . . . . . . . . . . . . . . . . . . . . . . . 7 VL1-m Basics . . . . . . . . . . . . . . . . . . .
Getting Started Voice Selection . . . . . . . . . . . . . . . . . . . . . . . . . 34 Selecting & Playing the VL1-m’s 128 Voices ■ ■ ■ Using the Voice Directory . . . . . . . . . . . . . . . . . . . . . . . . . . . . . . . . . . . . 36 The Sound Function . . . . . . . . . . . . . . . . . . . . . . . . . . . . . . . . . . . . . . . . . 36 The Pre-programmed VL1-m Voices . . . . . . . . . . . . . . . . . . . . . . . . . . . . 37 The Controllers . . . . . . . . . . . . . . . . . . . . . . . . .
Getting Started Precautions !! PLEASE READ THIS BEFORE PROCEEDING !! ■ Location ■ MIDI Connections Do not expose the instrument to the following conditions to avoid deformation, discoloration, or more serious damage. • Direct sunlight (e.g. near a window). • High temperatures (e.g. near a heat source, outside, or in a car during the daytime). • Excessive humidity. • Excessive dust. • Strong vibration.
Getting Started ■ Data Backup • To eject a floppy disk, press the eject button slowly as far as it will go then, when the disk is fully ejected, remove it by hand. The disk may not be ejected properly if the eject button is pressed too quickly, or it is not pressed in as far as it will go (the eject button may become stuck in a half-pressed position and the disk extends from the drive slot by only a few millimeters). If this happens, do not attempt to pull out the partially ejected disk.
Getting Started About the Manuals The VL1-m comes with two manuals — Getting Started and Feature Reference. The Getting Started Manual (this manual) The Getting Started manual contains seven chapters that take you through essential information and procedures you will need to know to become familiar with your VL1-m: 1. VL1-m Basics [≥ Page 8] Basic concepts you’ll need to understand in order to get the most out of the VL1-m. 2.
Getting Started The Feature Reference Manual The Feature Reference manual is the “nuts and bolts” reference for the VL1-m, individually describing its many functions in detail. The Feature Reference manual is divided into 5 main sections, each describing the various functions within a particular VL1-m edit or utility mode. 1. 2. 3. 4. 5.
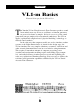
Getting Started VL1-m Basics Essential Concepts for the VL1-m User T he Yamaha VL1-m Virtual Acoustic Tone Generator produces sound in an entirely new way. It has no oscillators or function generators, no preset waveforms or samples. In fact, it uses none of the sound generation concepts employed in conventional synthesizers. The VL1-m applies sophisticated computer-based “physical modeling” technology to musical sound synthesis.
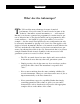
Getting Started What Are the Advantages? T he VL1-m offers many advantages in terms of musical performance. Not just in terms of sound, but also in terms of the “behavior” that makes acoustic instruments so … well, musical! But this is not because someone has programmed a certain sound or pattern of behavior into it.
Getting Started The VL1-m Model T he overall VL1-m model or “algorithm” consists of three main blocks: the instrument, controllers, and modifiers. In schematic form these blocks are arranged as follows: One VL "Element" (the VL has 2 of these) Controllers (also envelopes) Instrument Modifiers Sound out. ● The Instrument The key block in this algorithm is the instrument, since it is here that the fundamental tone or “timbre” of the sound is defined.
Getting Started In all these instruments pressure applied here (the driving point) causes vibration which results in sound. Reed vibration. Lip vibration. Air vibration. String vibration. The sound thus produced is amplified and sustained by the body of the instrument.
Getting Started ● The Controllers The input to an acoustic wind instrument comes from the player’s lungs, trachea, oral cavity, and lips. In a string instrument it comes from the player’s arm movement, transmitted to the string via a bow. These elements actually form an important part of the sound generating system and, in the VL1-m model, are included in the controllers block.
Getting Started ● The Modifiers Although you don’t have direct programming access to the VL1-m instrument block, the modifiers allow a significant degree of control over the final timbre of the voice. The modifiers block consists of 5 sections as shown in the diagram.
Getting Started Impulse Expander The Impulse Expander works in conjunction with the Resonator, described below, to simulate the effect of an instrument’s resonant cavity or sound box. It can also be used to simulate the acoustic environment in which the instrument is played. In contrast to the Resonator, the Impulse Expander is more suited to the simulation of metallic resonances and is thus invaluable for refining the sound of brass and metal-bodied woodwinds.
Getting Started There’s More … I n this brief introduction to VL1-m basics we’ve only looked at the central physical model which is the key the VL1-m’s unprecedented sound and musical performance. There’s actually much more to it. To begin with the VL1-m actually has two elements which function as independent physical models. Although it is basically a monophonic solo instrument, this means that the VL1-m can produce two notes at once. More commonly the two elements are used as layers of a single voice.
Getting Started ● The Controls & Connectors The Controls & Connectors A Brief Introduction To the VL1-m Interface The following brief descriptions of the VL1-m controls and connectors should help you to understand the overall logic of the interface.
Getting Started ● The Controls & Connectors q p Switch Press to turn power ON or OFF. w MODE Buttons The P, E, and U keys select the corresponding VL1-m modes. The PLAY mode lets you select and play voices, the EDIT mode gives you programming access to the VL1-m’s voice and controller parameters, and the UTILITY mode includes MIDI, disk, system and other functions that are essential for general operation.
Getting Started ● The Controls & Connectors t S Button Used to store edited data to an internal memory location. ☛ Feature Reference page 27. y VOLUME Control Adjusts the volume of the sound delivered via the rear-panel OUTPUT L and R jacks as well as the PHONES jack. ☛ Getting Started page 25. u LCD Display & ÷ Control This large multi-function liquid crystal display panel shows all parameters and prompts you need to operate the VL1-m with optimum ease and efficiency.
Getting Started ● The Controls & Connectors ☛ Getting Started page 23. !4 Breath Controller Jack An optional Yamaha BC2 or BC1 Breath Controller can be plugged in here. ☛ Getting Started page 23. !5 Floppy Disk Drive The VL1-m’s built-in floppy disk drive allows easy, economical, high-volume storage of voice data. The disk-in-use indicator below the drive slot lights while any disk operation is in progress (NEVER attempt to remove a disk or turn the power off while a disk operation is in progress).
Getting Started OUT The Controls & Connectors OUTPUT MIDI THRU ● IN R L AC INLET !8 MIDI IN, OUT and !7 OUTPUT L and R Jacks THRU Connectors !6 AC Power Cord Socket Rear Panel !6 AC Power Cord Socket Be sure the plug the VL1-m’s AC power cord into this socket before plugging the power cord into an AC outlet. ☛ Getting Started page 22. !7 OUTPUT L and R Jacks These are the main stereo outputs from the VL1-m.
Getting Started ● The Controls & Connectors The Controls & Connectors 21
Getting Started Setting Up ● Setting Up System Connections & Preparation MIDI Audio POWER VIRTUAL ACOUSTIC TONE GENERATOR ON / OFF VOLUME MIN PLAY EDIT UTILITY MIDI COPY STORE COMPARE MAX DEC INC EXIT ENTER/SOUND PHONES F1 F2 F3 F4 F5 F6 F7 F8 CONT BREATH Power Supply Headphones Breath Controller Power Supply Before making any other connections the “female” end of the AC power cord supplied with the VL1-m should be firmly plugged into the rear-panel AC cord socket.
Getting Started ● Setting Up Breath Controller NOTES ■ If you will be using a MIDI Wind Controller such as the Yamaha WX11 with the VL1-m, the appropriate breath-control data will be transmitted from the wind controller to the VL1-m via the MIDI interface, and no other breath controller will be necessary. ■ For more information on Breath Controller setup and operation, see the instructions packed with the supplied BC2 Breath Controller.
Getting Started ● Setting Up NOTES ■ For detailed MIDI specifications refer to the “MIDI Data Format” of the Voice List & MIDI Data Format. ■ When using the VL1-m with other MIDI equipment, it is a good idea to refer to the MIDI specifications (implementation chart, MIDI data format) of the equipment used to ensure compatibility. Audio Connections ● Headphones For private listening and practice headphones are ideal.
Getting Started ● Setting Up Power-on Procedure 1. Make sure your sound system’s main level/volume control(s) and the VL1-m volume control are turned all the way down prior to turning power on. 2. Turn on the VL1-m. 3. Turn on your MIDI controller. 4. Turn on the sound system. 5. Raise the sound system volume to a reasonable level. 6. Gradually raise the VL1-m VOLUME control while playing the MIDI controller to set the desired listening level.
Getting Started ● Setting Up Play the Demo Once you’ve set up your VL1-m system, you might like to play the pre-programmed demo sequence to hear how some of the voices sound. This process will also help to familiarize you with some of the VL1-m’s selection and editing procedures. 1. Select the Utility Mode System Page Press the U button to select the utility mode. 2. 3. Select the Demo Page Press the ∞ button to select the “Demo” page.
Getting Started 4. ● Setting Up Select a Song 5. Run the Demo Press the • button to run the demo. Playback will start with the selected song, then all other songs will be played in sequence. The cycle will repeat until stopped. 6. Stop the Demo Press the ¶ button to stop demo playback. 7. Return To the Play Mode When Done Press the MODE P button to return the PLAY mode. 27 Setting Up Use the data dial or = and - buttons to select the song number you want to start with.
Getting Started ● Setting Up Breath Controller Calibration If you will be using an optional Yamaha BC2 Breath Controller connected to the VL1-m Breath Controller jack, it must be properly calibrated to achieve the best possible sound from the VL1-m. Although the BC2 Breath Controller is factory-calibrated to match most requirements, we recommend that you carefully calibrate it for optimum performance with your own playing style. 1.
Getting Started 5. ● Setting Up Adjust the Breath Controller Gain 6. Return to the Play Mode Press the P button to return to the PLAY mode. 29 Setting Up Place the breath controller mouthpiece in your mouth and blow — notice that the cursors move to right and the number below the graph increases according to how hard you blow.
Getting Started ● Setting Up Load the Pre-programmed Voice Data Although the factory pre-programmed voices are stored in the VL1-m internal memory when the instrument is initially shipped, there is always a possibility that all or part of the memory has been erased or modified by the time the instrument gets to you. Here’s how you can re-load all the pre-programmed data from the supplied voice disk.
Getting Started 4. ● Setting Up Select “Load From Disk” 5. Select “All” and Select the “001:NOBREATH:ALL” File Make sure the cursor is positioned at “1:All” and press [. When the list of files appears select the “001:NOBREATH:ALL” file, then press [ again. NOTES ■ The “001:NOBREATH:ALL” file contains voices that are programmed to be played without a breath controller.
Getting Started 7. ● Setting Up Return to the Play Mode, Eject the Disk, & Select a Voice When the “Completed!” display appears, press the P button to return to the play mode, then press the eject button below the disk drive slot to eject the disk. Store the disk in a safe place. You must now select a voice in order for the loaded data to be properly activated — see the following section.
Getting Started ● Setting Up Setting Up 33
Getting Started ● Voice Selection Voice Selection Selecting & Playing the VL1-m’s 128 Voices One of the first things you’ll want to do with your VL1-m is select and play some of its voices … this section will show you how to do just that. 1. Select the Play Mode Press the P button so that its indicator lights and the word “PLAY” appears in the upper left corner of the LCD panel.
Getting Started 2. ● Voice Selection Select a Voice ● = and Buttons DEC ● Data Dial 3. INC These are best for small, step-wise changes — e.g. selecting adjacent voice numbers, or numbers that are only a few steps away. Press the = or button briefly to decrement or increment the voice number by one, or hold either button for continuous decrementing or incrementing in the corresponding direction.
Getting Started ● Voice Selection Using the Voice Directory The VL1-m also features a voice directory display that can be more convenient than the normal voice display in some situations. To switch to the voice directory display, press the • button — located directly below “Dir” on the display. The directory display shows all 16 voices in the current bank. Voices can be selected using either the data dial or = and - buttons as described above — the cursor will move to the selected voice.
Getting Started ● Voice Selection The Pre-programmed VL1-m Voices Here’s an abbreviated voice list for easy reference. Voice Name Voice No. Voice Name Voice No. Voice Name Voice No.
Getting Started ● The Controllers The Controllers Natural Musical Nuance and Expressive Control If you’ve read the “VL1-m Basics” section (if you haven’t, please do so — page 8) you should understand the concept of “controllers” as applied to the VL1-m. The “controller parameters” correspond to simulated characteristics of the instrument model — e.g. breath pressure, embouchure or tonguing. Any of these can be controlled by you via “physical controllers” — e.g.
Getting Started ● The Controllers Physical Controllers First, here’s a list of some of the physical controllers you might want to use with the VL1-m: Breath Controller A natural candidate for controlling pressure, tonguing, throat, growl, (MIDI control change no. 002) and other parameters. Pitch Wheel The pitch wheel on your MIDI keyboard can be assigned to a range of parameters, but it's “standard” function is pitch control.
Getting Started ● The Controllers VL1-m Controller Parameters Any of the physical controllers listed above can be assigned to control any of the VL1-m’s controller parameters: Pressure The amount of breath pressure applied to a reed or mouthpiece, or the speed of the bow applied to a string. Pressure variations affect both volume and timbre. Embouchure The tightness of the lips against the reed or against each other.
Getting Started ● The Controllers Controller Views In the PLAY mode, function buttons ¡ through § are used to select “controller view” displays that list all controller assignments for the currently selected voice. In particular, ¡ through ¢ display the assignments for the controller parameters listed in the preceding chart (you can press the ] button at any time to return to the normal play-mode display).
Getting Started ● The Controllers Some Exercises With the AltoSax Controllers Now that you know which physical controllers are assigned to which controller parameters in the Alto Sax voice, play the voice using the assigned controllers to get a feel for their effect before changing the assignments. 1. Engage the EDIT Mode The controller assignments are accessed via the EDIT mode Controller page. To get to this page first press the E button to engage the edit mode.
Getting Started The Controllers Edit the Scream Controller Parameter The cursor should be located at the “Controller” parameter, as shown in the example display. In the AltoSax voice the scream control parameter is not used so it is currently turned “off”. Press the - button or rotate the data entry dial to the right slightly to select “Modulation Wheel”, the first controller on the list.
Getting Started 6. ● The Controllers Go to the Pressure Controller Page From the Vibrato page use the § button to step back to the Pressure controller page. The touch envelope generator is assigned to control the “Pressure” parameter, and we will leave it set that way while we experiment with the “Depth” and “Curve” parameters. 7.
Getting Started ● The Controllers NOTES ■ Many parameters with any relationship to MIDI control have a range of values from -127 through 0 to 127 (255 steps). This corresponds to the range of values that can be represented in binary form by one “byte” (8 bits) of data — the number MIDI uses to convey control values. 8. Vary the Curve Parameter You may have noticed in the previous step that the relationship between touch pressure and output is not linear (the line in the graph is slightly curved).
Getting Started 9. ● The Controllers Experiment! Now that you’ve got the idea, flip through the all the available controller pages and experiment with alternative assignments and settings until you feel comfortable with the system. You should also try this with different voices later, since the controllers can have different effects with different voices. NOTES ■ There are several variations on the basic controller display and parameters.
Getting Started ● The Controllers Other Controller Views If you press the ∞ controller view: function button from the play mode you’ll see the following Polyphony This line shows which controller is currently assigned to polyphony mono/poly control. (≥ Feature Reference manual, page 36) Sustain Indicates whether sustain control is on or off. (≥ Feature Reference manual, page 35) Pitch Bend The VL1-m has three different pitch bend modes — Normal, Bottom, and Top.
Getting Started ● Mixing & The Modifiers Mixing & The Modifiers Creating New Timbres and Original Voices The VL1-m provides two ways to change the timbre of a voice to create original variations: 1) by mixing the output signals from various parts of the physical model, and 2) by using the VL1-m’s “Modifiers” to shape the overall harmonic structure. You should always start with the mixing parameters when attempting to create a new voice, so we’ll describe mixing first.
Getting Started ● Mixing & The Modifiers An Exercise: Remix the Pan Pipes Voice Before going to the EDIT mode, select and play the Pan Pipes voice for a few minutes to get a feel for how it sounds. 1. Engage the EDIT Mode The mixing parameters are accessed via the EDIT mode “Mixing” page. To get to this page first press the E button to engage the edit mode. You may have to press the ] button one or more times to get the initial edit display.
Getting Started ● Mixing & The Modifiers Tap Location 0% 50% 99% The remaining tap parameter — “Tap Sign” — inverts the phase of the tap signal. It has two settings: “+” and “-”. Try it. 4. Return To the PLAY Mode When Done Press the P button to return to the PLAY mode when you’ve finished experimenting with the mixing parameters. After experimenting with the Mixing parameters for a while you’ll discover that they define the basic sound of the instrument.
Getting Started ● Mixing & The Modifiers The Modifiers In (from physical model) Harmonic Enhancer Dynamic Filter Frequency Equalizer Impulse Expander Resonator Out (to effects stage) Harmonic Enhancer Of the five modifier stages, the Harmonic Enhancer has the most pronounced effect on the actual harmonic structure of the sound. It allows you to create radical timbral variations within the current instrument “family”. Modulator Source. Modulator Carrier Source.
Getting Started ● Mixing & The Modifiers Referring to the block diagram of the harmonic enhancer, above, we can see that it employs a modulation approach to building new harmonic structures. The carrier and modulator blocks have independent display pages and some independent parameters.
Getting Started ● Mixing & The Modifiers While the “Balance” and “Index” parameters apply to the overall harmonic enhancer sound, the following independent parameters are provided for the modulator and carrier blocks. HPF Cutoff Both the modulator and carrier blocks have high-pass filters that can be used to roll off the low frequencies of the corresponding signal. The cutoff frequency can be varied from 17.0 Hz to 11.2 kHz.
Getting Started ● Mixing & The Modifiers Dynamic Filter The Dynamic Filter stage is similar to the dynamic filters found in many conventional synthesizers. It allows both fixed and dynamic filtering in high-pass, low-pass, bandpass, and band elimination modes, and is effective for broad tonal control.
Getting Started ● Mixing & The Modifiers Frequency Equalizer The Frequency Equalizer stage consists of two blocks — Auxiliary and Band — each with its own display page. Equalizer (Auxiliary) Equalizer (Bands) Out (to Impulse Expander) ■ The Equalizer Auxiliary Parameter Page ■ The Equalizer Band Parameter Page The Auxiliary block includes programmable low-pass and high-pass filters that can be used independently or together to create a bandpass response.
Getting Started ● Mixing & The Modifiers Impulse Expander The Impulse Expander works in conjunction with the Resonator, described below, to simulate the effect of an instrument’s resonant cavity or sound box. It can also be used to simulate the acoustic environment in which the instrument is played.
Getting Started ● Mixing & The Modifiers Resonator While the Impulse Expander tends to give the sound a metallic quality, the Resonator produces a more woody resonance effect. Careful adjustment of the resonator’s parameters can often bring a not-quite-right voice to life.
Getting Started ● Effects Effects Creating the Right Ambience Effects are the essential finishing touches for any voice. Once you’ve created a sound you like, use one or more of the VL1-m’s three highperformance digital effect stages to polish and refine it as required. Each stage includes a number of effects. The Modulation, Feedback Delay, and Reverb stages can be used simultaneously, but only one of the effects available in each stage can be used at a time.
Getting Started ● Effects Modulation Effects Although “modulation” usually implies some sort of cyclical variation, the VL1-m Modulation stage allows selection of Flanger, Pitch Change, and Distortion effects (only Flanger fits the traditional definition of a modulation effect). Since most of these effects produce a marked change in the sound, you’ll probably only want to use them on certain voices, and maybe not all the time.
Getting Started ● Effects ■ The Time Calculation Pop-up Page NOTES ■ Refer to page 53 of the Feature Reference manual for full details on the Feedback Delay effects and parameters. Reverb Effects You’ll probably want to apply the effects in this stage to some degree to all your voices. These are the effects that will give your sound ambience and a sense of dimension, adding warmth and depth to an otherwise dry sound.
Getting Started ● Effects Effects 61
Getting Started ● Index Index This index covers both the VL1-m Getting Started and Feature Reference manuals for easy cross-referencing. Page numbers in the Getting Started manual are preceded by “©”, and page numbers in the Feature Reference manual are preceded by “ƒ”. A D Absorption . . . . . . . . . . . . . . . . . . . . . . . . . . . . . . . ƒ81 Amplitude & filter envelope . . . . . . . . . . . . . . . ƒ143 Amplitude & filter key scaling . . . . . . . . . ƒ146-150 Amplitude . . . . . . . . . . . .
Getting Started Index M Manuals, about the . . . . . . . . . . . . . . . . . . . ©6. ƒ4 Master tuning . . . . . . . . . . . . . . . . . . . . . . . . . . . ƒ153 Memory protect . . . . . . . . . . . . . . . . . . . . . . . . . . ƒ157 Micro tuning . . . . . . . . . . . . . . . . . . . . . . . . . . . . . ƒ42 MIDI connections . . . . . . . . . . . . . . . . . . . . . . . . . ©23 MIDI connectors . . . . . . . . . . . . . . . . . . . . . . . . . . ©20 MIDI Indicator . . . . . . . . . . . . . . . . . . . . . .
Getting Getting Started Started ●● Effects Index R Receive channel . . . . . . . . . . . . . . . . . . . . . . . . . ƒ154 Resonator . . . . . . . . . . . . . . . . . . . . . . . . ©57. ƒ126 Reverb effects . . . . . . . . . . . . . . . . . . . . . . . . . . . . ©60 Reverberation . . . . . . . . . . . . . . . . . . . . . . . . . . . . ƒ60 S Scream . . . . . . . . . . . . . . . . . . . . . . . . . . . . . . . . . . ƒ72 Selecting & editing parameters . . . . . . . . . . . . . . ƒ12 Sound Function . . . . . .