TLV Front Surround System (CENTER SYSTEM + SUBWOOFER/SYSTEM CONTROL) YAS-71 (YAS-71CU + YAS-71SPX) OWNER’S MANUAL MANUAL DE INSTRUCCIONES 使用说明书
Caution: Read this before operating your unit. 1 To assure the finest performance, please read this manual carefully. Keep it in a safe place for future reference. 2 Install this sound system in a well ventilated, cool, dry, clean place – away from direct sunlight, heat sources, vibration, dust, moisture, and/or cold. Allow ventilation space of at least 5 cm (2”) on the top, left, right, and the back of this unit.
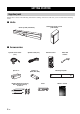
INTRODUCTION OTHER FUNCTIONS GETTING STARTED................................................ 2 LISTENING TO FM BROADCASTS ....................22 Supplied parts ................................................................ 2 Controls and functions................................................... 3 Overview ..................................................................... 22 Controls and functions for the FM tuning ................... 22 Basic tuning operation ...................................
INTRODUCTION GETTING STARTED Supplied parts This product consists of the following items. Before making connections, make sure you received all of the following items.
GETTING STARTED INTRODUCTION Controls and functions ■ Front panel of the center system 1 Front panel display Shows information about the operational status of the system. (☞ P. 4) 2 Remote control sensor Receives infrared signals from the remote control. (☞ P. 5, 7) 3 Power indicator Lights up when the system is turned on. (☞ P. 16) 4 STANDBY/ON Turns on the system, or sets it to standby mode. (☞ P.
GETTING STARTED ■ Front panel display of the center system 1 Decoder indicators The respective indicator lights up when any of the decoders of the system is functioning. 2 DOCK indicator • Lights up when the system is receiving a signal from an iPod stationed in the Yamaha iPod universal dock (such as YDS-10 or YDS-11, sold separately) connected to the DOCK terminal of the subwoofer/system control. (☞ P.
GETTING STARTED Infrared signal transmitter 1 Input buttons Select an input source you want to listen to. (☞ P. 16) 2 STEREO • Turns extended stereo mode on and off alternately. (☞ P. 21) • Turns off surround mode. (☞ P. 18) INTRODUCTION ■ Remote control 3 Cursors (W / X / S / T)/ENTER Position: Change the setting. (☞ P. 19) Audio delay: Change the setting. (☞ P. 31) iPod: Move the cursor. (☞ P. 27) FM: Move a preset group and number forward or backward. (☞ P.
GETTING STARTED B POSITION Shifts the optimum listening area according to your listening position. (☞ P. 19) C TEST Outputs the test tone. (☞ P. 20) D ENHANCER Turns on and off compressed music enhancer mode alternately. (☞ P. 21) E NIGHT Turns night listening mode on or off. (☞ P. 32) F AREA Selects the optimum listening area. (☞ P. 20) G AUDIO DELAY Delays the output sound to synchronize it with the video image. (☞ P. 31) H DISP. MODE Changes the brightness of the front panel display. (☞ P.
GETTING STARTED INTRODUCTION ■ Using the remote control Within 6 m (20’) Use the remote control within 6 m (20’) of the center system and point it toward the remote control sensor. Notes • Be careful not to spill liquid on the remote control. • Be careful not to drop the remote control. • Do not leave the remote control in a place that is: – hot or humid, such as near a heater or in a bathroom – extremely cold – dusty ■ Installing the batteries 1 Take off the battery compartment cover.
PREPARATION PLACING THIS SYSTEM To enjoy quality sound thoroughly, you need to place this system in the appropriate positions, and install the components correctly. After deciding the layout, follow the procedure below to install this system. Center system (YAS-71CU) Subwoofer/system control (YAS-71SPX) Center system (YAS-71CU) Place the center system beneath a TV or under the TV so that the center system and your TV align vertically. Make sure that the center system is placed in parallel with the wall.
PLACING THIS SYSTEM ■ Attaching the center system to a wall Installing the center system using the keyholes You can attach the center system to a wall using commercially available screws (#8, Diameter: 7.5 mm or more (5/16” or more)). When installing the center system on a wall, all installation work must be performed by a qualified contractor or dealer. The customer must never attempt to perform this installation work.
PLACING THIS SYSTEM Installing the center system using the screw holes You can also use the inner or outer screw holes on the rear of the center system for installing the center system using a commercially available bracket or rack. Bracket or rack, etc., 77 mm (3”) 15 mm (9/16”) 550 mm (21-5/8”) 290 mm (11-7/16”) Screw (M6) Screw hole 52.
CONNECTION • Do not connect the power cable until all connections are completed. • Do not use excessive force when inserting the cable plug. Doing so may damage the cable plug and/or terminal. Connecting the center system and the subwoofer/system control PREPARATION Follow the procedure below to connect the center system and the subwoofer/system control. Connecting speaker cables Connect the cable plug to the speaker jack of the same color. Connect the cable plug to the speaker jack of the same color.
CONNECTION Connecting external components The subwoofer/system control has 3 digital input jacks (optical digital × 2, coaxial digital × 1) and 1 analog input jack. Before connecting your external components, check the output jacks of the components and be sure to use correct connection cables. ■ Digital connection Notes • The digital jacks of this system support PCM, Dolby Digital, and DTS bitstream. • The digital jacks support digital signals of 96 kHz sampling frequency or less.
CONNECTION [INPUT 3] COAXIAL jack CD player PREPARATION Coaxial digital cable ■ Analog connection [INPUT 4] ANALOG jacks Example1: TV TV Example 2: VCR or video camera VCR or video camera, etc., with no digital output. VCR, etc.
CONNECTION Connecting the Yamaha iPod universal dock The system is equipped with the DOCK terminal, which allows you to connect the Yamaha iPod universal dock (such as YDS-10 or YDS-11, sold separately) where you can dock your iPod. Connect the Yamaha iPod universal dock to the DOCK terminal of the subwoofer/system control using its dedicated cable. Refer to “Using iPod™” on page 27 for details.
CONNECTION Connecting the power cable After you have made all connections, connect the power cable of the subwoofer/system control. PREPARATION To AC wall outlet y You can attach the cover after you have made all connections or detach according to your preference. Attach the cover to the rear panel of the subwoofer/system control using the 6 supplied screws as shown.
BASIC OPERATION BASIC PLAYBACK OPERATION Once you have finished all cable connections (☞ P. 11 to 15) and remote control preparation (☞ P. 7), follow the procedure below to start basic playback operation. y To turn off the volume temporarily, press MUTE. While the mute function is activated, the MUTE indicator flashes. To resume the volume, press MUTE again. Now, try various features of this system! Using various sound features • To enjoy highly realistic sounds with surround mode ☞ P.
AIR SURROUND XTREME What is AIR SURROUND XTREME ? Ordinarily, two front speakers, a center speaker, two surround speakers, and a subwoofer are necessary for enjoying 5.1 channel surround sound. Typical 5.1 channel speaker system Front speakers ■ Virtual 7.1 channel Subwoofer The AIR SURROUND XTREME technology, using only the front left and right speakers of the center system and subwoofer, enables you to enjoy a realistic 7.
AIR SURROUND XTREME Listening to surround mode of AIR SURROUND XTREME Press one of the surround mode buttons. Surround mode buttons The names of the selected input source and the selected surround mode appear in the front panel display. Surround mode descriptions Movie This mode is useful when you enjoy movie contents on media such as DVD, etc. Music This mode is useful when you listen to music contents on media such as DVD, etc. Sports This mode is useful when you enjoy sports programs or TV news.
AIR SURROUND XTREME Shifting the optimum listening area from side to side This function shifts the optimum listening area from side to side according to your listening position for the best Virtual Surround effect. 1 Press POSITION to enter position mode. The current position appears in the front panel display. 2 Press W/X to shift the optimum listening area (L6, L5, L4, L3, L2, L1, CENTER, R1, R2, R3, R4, R5, R6).
AIR SURROUND XTREME Selecting the optimum listening area You can select the optimum listening area from two modes. Press AREA. AREA Each time you press AREA, NORMAL and WIDE modes change alternately. NORMAL Select this to sharpen the sound effect. “AREA NORMAL” appears in the front panel display when NORMAL mode is selected. WIDE Select this to widen the optimal listening area. y • The default setting is NORMAL. • The setting is set for all the input sources.
AIR SURROUND XTREME Using extended stereo mode An extended sound is achieved for a 2 channel source such as a CD player. Press STEREO to enter extended stereo mode. STEREO “EXTENDED” appears in the front panel display. Each time you press STEREO, the function is turned on (EXTENDED) and off (STEREO) alternately. y Note This operation is only available when surround mode is not activated. BASIC OPERATION • The default setting is STEREO.
OTHER FUNCTIONS LISTENING TO FM BROADCASTS Overview You can use two tuning modes to tune into the desired FM station: Frequency tuning mode You can search or specify the frequency of the desired FM station automatically or manually. (See “Basic tuning operation” on page 23.) Preset tuning mode You can preset the desired FM station in advance, and then recall the station by specifying the preset group and number. (See “Using station preset feature” on page 24.
LISTENING TO FM BROADCASTS Basic tuning operation Manual tuning If the signal received from the station you want to select is weak, you can tune into the desired station by specifying the frequency manually. In FM tuning mode, press AUTO/MAN’L repeatedly so that the AUTO indicator disappears, and then press +/– repeatedly to specify the frequency of the desired station.
LISTENING TO FM BROADCASTS Using station preset feature ■ Automatic station preset You can store up to 40 FM stations (A1 to E8: 8 preset numbers in each of the 5 preset groups). 1 Press FM to set the input to FM. “FM” appears in the front panel display. 2 Press and hold MEMORY for more than 3 seconds. The preset group and number as well as the MEMORY and AUTO indicators flash. After approximately 5 seconds, automatic presetting starts from the current frequency and proceeds through higher frequencies.
LISTENING TO FM BROADCASTS ■ Manual station preset Use this feature to preset your desired station manually. 1 Tune into a station. 4 Press +/– to select a preset number (1 to 8) See “Basic tuning operation” on page 23 for tuning instructions. while the MEMORY indicator is flashing. Flashes 2 Press MEMORY. The MEMORY indicator flashes in the front panel display for approximately 30 seconds.
LISTENING TO FM BROADCASTS ■ Recalling the preset stations 1 Press PRESET/TUNE to select preset tuning mode. 2 Press A_E or A`E repeatedly to select the desired preset group (A to E). 3 Press +/– repeatedly to select the desired preset number (1 to 8).
USING OPTIONAL EQUIPMENT Using iPod™ Once you have stationed your iPod in the Yamaha iPod universal dock (such as YDS-10/ YDS-11, sold separately) connected to the DOCK terminal of the subwoofer/system control (☞ P. 14), you can enjoy playback of your iPod.
USING OPTIONAL EQUIPMENT ■ Controlling your iPod in simple remote mode Docking your iPod in the Yamaha iPod universal dock (such as YDS-10 or YDS-11, sold separately) enters simple remote mode. You can perform the basic operations of your iPod (play, stop, skip backward/forward, etc.) using the supplied remote control in this mode. y Operations can be also done with the controls on your iPod. Refer to the instruction manuals of your iPod for its operations.
USING OPTIONAL EQUIPMENT Using Bluetooth™ components You can connect the Yamaha Bluetooth audio receiver (such as YBA-10, sold separately) to the DOCK terminal of the subwoofer/system control and enjoy the music contents stored in your Bluetooth component (such as a portable music player or computer equipped with a Bluetooth transmitter, etc.) without wiring between the system and the Bluetooth component.
USING OPTIONAL EQUIPMENT 4 Press and hold BLUETOOTH ON for more than 3 seconds to start pairing. “Searching...” appears when the pairing starts. While the Yamaha Bluetooth audio receiver is in pairing mode, the DOCK indicator flashes in the front panel display. y To cancel the pairing, press BLUETOOTH OFF. 5 Check that the Bluetooth component detects the Yamaha Bluetooth audio receiver.
USEFUL OPERATION ADJUSTING THE AUDIO DELAY FPD TV images sometimes lag behind the sound. You can use this function to delay the sound output to synchronize it with the video image. 1 Press AUDIO DELAY to enter adjusting mode. 2 Press S/T to adjust the delay time. Options: 0 to 240 ms You can adjust the delay time by the 10 ms. Setting value 3 Press AUDIO DELAY again or ENTER to exit adjusting mode. y • The default setting is 0 ms and “DELAY OFF” appears in the front panel display.
LISTENING AT LOW VOLUME (NIGHT LISTENING MODE) Night listening mode enables you to listen to dialog or vocals more clearly at lower volume by suppressing louder sound effects. This function is useful when you enjoy movies or music at night. Press NIGHT. “NIGHT ON” appears in the front panel display. The NIGHT indicator lights up when Night listening mode is selected. Lights up NIGHT y • To cancel night listening mode, press NIGHT again.
CHANGING THE BRIGHTNESS OF THE FRONT PANEL DISPLAY You can change the brightness of the front panel display. You can also turn off the front panel display to view a movie in a darker environment. Press DISP. MODE repeatedly. Each time you press DISP. MODE, the brightness of the front panel changes. DISP. MODE Bright Dark * Selecting DISPLAY OFF turns off the front panel display after “DISPLAY OFF” appears in the front panel display.
ADDITIONAL INFORMATION ADDITIONAL INFORMATION Troubleshooting If there is any problem with the system, check the following items. If you cannot solve a problem with the following remedies, or if the problem is not listed below, turn off and unplug the system, and then consult your nearest authorized Yamaha dealer or Service Center. Problem Power turns on but immediately shuts off. Cause Solution See page The power cable may be connected improperly.
ADDITIONAL INFORMATION Problem Solution See page The system may be outside the remote control operation range. For information on the remote control operation range, refer to “Using the remote control”. 7 The remote control sensor of this system may be exposed to direct sunlight or lighting. Change the lighting. The batteries may be worn out. Replace the batteries. Cause The remote control does not operate the system. — 7 ■ Tuner Problem Cause FM stereo reception is noisy.
ADDITIONAL INFORMATION ■ Bluetooth Note In case of a transmission error without a status message appearing in the front panel, check your Bluetooth component. Status message Searching... Cause Remedy See page The Yamaha Bluetooth audio receiver (such as YBA-10, sold separately) and the Bluetooth component are in the process of the pairing. The Yamaha Bluetooth audio receiver (such as YBA-10, sold separately) and the Bluetooth component are in the process of establishing the connection.
ADDITIONAL INFORMATION Glossary ■ AIR SURROUND XTREME ■ Dolby Pro Logic II New surround technology developed by Yamaha enables surround sound with fewer speakers. In comparison to traditional front surround technology, the AIR SURROUND XTREME provides a natural surround sound field.
ADDITIONAL INFORMATION Specifications YAS-71CU FM Tuner • Type...................2 way acoustic suspension magnetic shielding type • Driver Woofer............ 8 cm (3”) cone magnetic shielding type × 4 (L2, R2) Tweeter.............2.5 cm (1”) balanced dome magnetic shielding type × 2 (L1, R1) • Frequency Response................................ 120 Hz to 20 kHz (-10 dB) • Dimensions (W × H × D) ..................................800 × 105 × 100 mm (Approx. 31-1/2” × 4-1/8” × 3-15/16”) • Weight ...........
Precaución: lea las indicaciones siguientes antes de utilizar este aparato. 1 Para asegurar el mejor rendimiento de este aparato, lea atentamente este manual. Y luego guárdelo en un lugar seguro para poder consultarlo en el futuro en caso de ser necesario. 2 Instale este sistema de sonido en un lugar bien ventilado, fresco, seco y limpio, alejado de la luz solar directa, fuentes de calor, vibraciones, polvo, humedad y/o frío.
INTRODUCCIÓN OTRAS FUNCIONES ESCUCHAR EMISIONES FM ...............................22 Piezas incluidas.............................................................. 2 Controles y funciones .................................................... 3 Visión general.............................................................. 22 Controles y funciones para la sintonización de FM..... 22 Operación de sintonización básica............................... 23 Utilización de la función de presintonización de emisoras...
INTRODUCCIÓN PRIMEROS PASOS Piezas incluidas Este producto consta de los siguientes elementos. Antes de realizar las conexiones, asegúrese de haber recibido todos los elementos siguientes.
PRIMEROS PASOS INTRODUCCIÓN Controles y funciones ■ Panel frontal del sistema central 1 Pantalla del panel frontal Muestra información acerca del estado operativo del sistema. (☞ P. 4) 2 Sensor del mando a distancia Recibe señales de infrarrojos del mando a distancia. (☞ P. 5, 7) 3 Indicador de alimentación Se enciende cuando el sistema está activado. (☞ P. 16) 4 STANDBY/ON Enciende el sistema o lo ajusta en el modo de espera. (☞ P.
PRIMEROS PASOS ■ Pantalla del panel frontal del sistema central 1 Indicadores de decodificadores El indicador correspondiente se enciende cuando alguno de los decodificadores del sistema está en funcionamiento. 2 Indicador DOCK • Se enciende cuando el sistema recibe una señal de un iPod instalado en la base universal de Yamaha iPod (como por ejemplo YDS-10 o YDS-11, que se venden por separado) conectado a un terminal DOCK del control de sistema/subwoofer. (☞ P.
PRIMEROS PASOS Transmisor de señales de infrarrojos 1 Botones de entrada Permite seleccionar la fuente de entrada que desee escuchar. (☞ P. 16) 2 STEREO • Activa y desactiva el modo estéreo ampliado. (☞ P. 21) • Desactiva el modo envolvente. (☞ P. 18) INTRODUCCIÓN ■ Mando a distancia 3 Cursores (W / X / S / T)/ENTER Posición: Cambiar el ajuste. (☞ P. 19) Retardo de audio: Cambiar el ajuste. (☞ P. 31) iPod: Mover el cursor. (☞ P.
PRIMEROS PASOS B POSITION Cambia la zona de escucha óptima según su posición de escucha. (☞ P. 19) C TEST Emite el tono de prueba. (☞ P. 20) D ENHANCER Activa y desactiva el modo de mejora de música comprimida. (☞ P. 21) E NIGHT Activa y desactiva el modo de escucha nocturna. (☞ P. 32) F AREA Selecciona la zona de escucha óptima. (☞ P. 20) G AUDIO DELAY Retarda el sonido de salida para sincronizarlo con la imagen de vídeo. (☞ P. 31) H DISP. MODE Cambia el brillo de la pantalla del panel frontal. (☞ P.
PRIMEROS PASOS INTRODUCCIÓN ■ Utilización del mando a distancia En 6 m Utilice el mando a distancia en una distancia de 6 m del sistema central y apunte hacia el sensor del mando a distancia. Notas • Tenga cuidado de no derramar líquido sobre el mando a distancia. • Tenga cuidado de no dejar caer el mando a distancia.
PREPARATIVOS COLOCACIÓN DE ESTE SISTEMA Para disfrutar de un sonido de alta calidad, debe colocar este sistema en las posiciones adecuadas e instalar los componentes de forma correcta. Tras decidir la disposición, siga el siguiente procedimiento para instalar este sistema.
COLOCACIÓN DE ESTE SISTEMA ■ Fijación del sistema central a una pared Instalación del sistema central utilizando los orificios de alineación Puede fijar el sistema central a una pared utilizando tornillos disponibles en el mercado (#8, diámetro: 7,5 mm o más). Al instalar el sistema central en una pared, todo el trabajo de instalación debe realizarlo un contratista o distribuidor cualificado. El cliente nunca debe intentar realizar este trabajo de instalación.
COLOCACIÓN DE ESTE SISTEMA Instalación del sistema central utilizando los orificios para tornillos También puede utilizar los orificios para tornillos exteriores o interiores ubicados en la parte posterior del sistema central para instalar el sistema central, utilizando una estantería o soporte disponible en el mercado. Soporte o estantería, etc.
CONEXIÓN • No conecte el cable de alimentación hasta que todas las conexiones se hayan completado. • No emplee demasiada fuerza al insertar el conector del cable. De lo contrario, podría dañar el conector del cable y/o el terminal. Siga el procedimiento que se muestra a continuación para conectar el sistema central y el control del sistema/subwoofer. Conexión de los cables de los altavoces Conecte el conector del cable a la clavija de conexión del altavoz del mismo color.
CONEXIÓN Conexión de los componentes externos El control de sistema/subwoofer tiene 3 clavijas de conexión de entrada digital (digital óptica × 2, digital coaxial × 1) y 1 clavija de conexión de entrada analógica. Antes de conectar los componentes externos, compruebe las clavijas de conexión de salida de los componentes y asegúrese de utilizar los cables de conexión correctos.
CONEXIÓN [INPUT 3] Clavija de conexión COAXIAL Reproductor de CD PREPARATIVOS Cable digital coaxial ■ Conexión analógica [INPUT 4] Clavijas de conexión ANALOG Ejemplo 1: Televisor Televisor Ejemplo 2: VCR o cámara de vídeo VCR o cámara de vídeo, etc., sin salida digital. VCR, etc.
CONEXIÓN Conexión de la base universal de iPod de Yamaha El sistema está equipado con el terminal DOCK, que le permite conectar la base universal iPod de Yamaha (como por ejemplo YDS-10 o YDS-11, que se venden por separado) en un lugar en el que pueda conectar el iPod. Conecte la base universal de iPod de Yamaha al terminal DOCK del control del sistema/subwoofer utilizando el cable específico. Consulte “Utilización del iPod™” en la página 27 para más información.
CONEXIÓN Conexión del cable de alimentación Tras haber realizado todas las conexiones, conecte el cable de alimentación del control de sistema/subwoofer. PREPARATIVOS A una toma de pared de CA y Puede fijar la cubierta después de haber realizado todas las conexiones, o quitarla, según sus preferencias. Fije la cubierta al panel posterior del control de sistema/subwoofer utilizando los 6 tornillos suministrados tal y como se muestra a continuación.
FUNCIONAMIENTO BÁSICO FUNCIONAMIENTO DE REPRODUCCIÓN BÁSICO Una vez finalizadas todas las conexiones de los cables (☞ P. 11 a 15) y los preparativos del mando a distancia (☞ P. 7), siga el siguiente procedimiento para iniciar el funcionamiento de reproducción básico. y Para desactivar el volumen temporalmente, pulse MUTE. Mientras esté activada la función de silencio, el indicador MUTE parpadeará. Para reanudar el volumen, pulse MUTE de nuevo.
AIR SURROUND XTREME ¿Qué es AIR SURROUND XTREME ? Generalmente, se necesitan dos altavoces frontales, un altavoz central, dos altavoces envolventes y un subwoofer para disfrutar de un sonido envolvente de 5.1 canales. ■ 7.1 canales virtuales La tecnología AIR SURROUND XTREME le permite disfrutar de un sonido real de 7.
AIR SURROUND XTREME Escucha del modo envolvente de AIR SURROUND XTREME Pulse uno de los botones del modo envolvente. Botones del modo envolvente Los nombres de la fuente de entrada seleccionada y del modo envolvente seleccionado aparecen en la pantalla del panel frontal. Descripciones del modo envolvente Película Este modo resulta útil cuando disfruta de contenido de película en soportes, como por ejemplo, DVD, etc.
AIR SURROUND XTREME Cambio a la zona de escucha óptima de lado a lado Esta función alterna la zona de escucha óptima de lado a lado según su posición de escucha para obtener el mejor efecto envolvente virtual. 1 Pulse POSITION para acceder al modo de posición. La posición actual aparecerá en la pantalla del panel frontal. 2 Pulse W/X para cambiar la zona de escucha FUNCIONAMIENTO BÁSICO óptima (L6, L5, L4, L3, L2, L1, CENTER, R1, R2, R3, R4, R5, R6).
AIR SURROUND XTREME Selección de la zona de escucha óptima Puede seleccionar la zona de escucha óptima de dos modos. Pulse AREA. AREA Cada vez que pulse AREA, los modos NORMAL y WIDE cambian de forma alternativa. NORMAL Selecciónelo para mejorar el efecto de sonido. “AREA NORMAL” aparece en la pantalla del panel frontal cuando se selecciona el modo NORMAL. WIDE Selecciónelo para ampliar la zona de escucha óptima. y • El ajuste predeterminado es NORMAL.
AIR SURROUND XTREME Utilización del modo estéreo ampliado Una fuente de 2 canales, como por ejemplo un reproductor de CD, consigue un sonido ampliado. Pulse STEREO para acceder al modo estéreo ampliado. STEREO “EXTENDED” aparecerá en la pantalla del panel frontal. Cada vez que pulse STEREO, la función se activa (EXTENDED) y se desactiva (STEREO). y Nota Esta operación sólo está disponible cuando el modo envolvente no está activado. FUNCIONAMIENTO BÁSICO • El ajuste predeterminado es STEREO.
OTRAS FUNCIONES ESCUCHAR EMISIONES FM Visión general Para sintonizar la emisora FM que desee puede utilizar dos modos de sintonización: Modo de sintonización por frecuencia Puede buscar o especificar la frecuencia de la emisora FM deseada tanto automática como manualmente. (Consulte “Operación de sintonización básica” en la página 23.
ESCUCHAR EMISIONES FM Operación de sintonización básica Sintonización manual Si la señal recibida de la emisora que desea es débil, puede sintonizarla especificando la frecuencia manualmente. En el modo de sintonización FM, pulse AUTO/MAN’L varias veces para que desaparezca el indicador AUTO y, a continuación, pulse +/– varias veces para especificar la frecuencia de la emisora deseada.
ESCUCHAR EMISIONES FM Utilización de la función de presintonización de emisoras ■ Presintonización automática de emisoras Puede almacenar hasta 40 FM emisoras (de A1 a E8: 8 números de presintonía en cada uno de los 5 grupos de presintonías). 1 Pulse FM para ajustar la entrada en FM. “FM” aparecerá en la pantalla del panel frontal. 2 Mantenga pulsado MEMORY durante más de 3 segundos. Parpadean tanto el número como el grupo de presintonías, además de los indicadores MEMORY y AUTO.
ESCUCHAR EMISIONES FM ■ Presintonización manual de emisoras Utilice esta función para presintonizar la emisora deseada de forma manual. 1 Sintonice una estación. Consulte “Operación de sintonización básica” en la página 23 para acceder a las instrucciones de sintonización. 4 Pulse +/– para seleccionar un número de presintonía (de 1 a 8) mientras está parpadeando el indicador MEMORY. Parpadea 2 Pulse MEMORY. Pulse MEMORY de nuevo para cancelar el proceso, mientras esté parpadeando el indicador MEMORY.
ESCUCHAR EMISIONES FM ■ Activación de las emisoras presintonizadas 1 Pulse PRESET/TUNE para seleccionar el modo de sintonización por presintonía. 2 Pulse A_E o A`E varias veces para seleccionar el grupo de presintonías que desee (de A a E). 3 Pulse +/– varias veces para seleccionar el número de presintonía deseado (1 a 8).
UTILIZACIÓN DE DISPOSITIVOS OPCIONALES Utilización de iPod™ Una vez haya colocado el iPod en la base universal para iPod de Yamaha (como por ejemplo YDS-10/YDS-11, no incluido) y haya conectado el terminal DOCK del subwoofer/control del sistema (☞ P. 14), podrá disfrutar de la reproducción de la música de su iPod.
UTILIZACIÓN DE DISPOSITIVOS OPCIONALES ■ Control del iPod en el modo remoto sencillo Al conectar el iPod en la base universal para iPod de Yamaha (como por ejemplo YDS-10 o YDS-11, no incluido), éste pasa al modo remoto sencillo. En este modo, puede realizar las operaciones básicas del iPod (reproducir, detener, avanzar/retroceder, etc.) utilizando el mando a distancia suministrado. y También es posible realizar estas operaciones utilizando los controles del iPod.
UTILIZACIÓN DE DISPOSITIVOS OPCIONALES Utilización de componentes Bluetooth™ Es posible conectar el receptor de audio Yamaha Bluetooth (como por ejemplo YBA-10, se vende por separado) al terminal DOCK del subwoofer/control del sistema, y disfrutar así del contenido almacenado en un dispositivo Bluetooth (como por ejemplo un reproductor de música portátil o un ordenador equipado con un transmisor Bluetooth, etc.) sin conectar cables entre el sistema y el dispositivo Bluetooth.
UTILIZACIÓN DE DISPOSITIVOS OPCIONALES 4 Mantenga pulsado BLUETOOTH ON durante más de 3 segundos para comenzar el emparejado. “Searching...” aparecerá cuando comience el proceso de emparejado. Mientras el receptor de audio Yamaha Bluetooth está en el modo de emparejado, el indicador DOCK parpadea en la pantalla del panel frontal. y Para cancelar el proceso de emparejado, pulse BLUETOOTH OFF. 5 Compruebe que el dispositivo Bluetooth detecta el receptor de audio Yamaha Bluetooth.
OPERACIONES ÚTILES AJUSTE DEL RETARDO DE AUDIO A veces, existe cierto retraso entre las imágenes de televisión FPD y el sonido. Puede utilizar esta función para retrasar la salida de sonido, y sincronizarlo así con la imagen de vídeo. 1 Pulse AUDIO DELAY para acceder al modo de ajuste. 2 Pulse S/T para ajustar el tiempo de retardo. Opciones: 0 a 240 mseg Puede ajustar el tiempo de retardo en valores de 10 mseg. Valor de ajuste 3 Pulse AUDIO DELAY de nuevo, o pulse ENTER para salir del modo de ajuste.
ESCUCHA A BAJO VOLUMEN (MODO DE ESCUCHA NOCTURNA) El modo de escucha nocturna le permite escuchar diálogos o canciones con más claridad a volúmenes más bajos, suprimiendo los efectos de sonido. Esta función resulta útil cuando disfruta de películas o música por la noche. Pulse NIGHT. “NIGHT ON” aparecerá en la pantalla del panel frontal. El indicador NIGHT se ilumina cuando está seleccionado el modo de escucha nocturna.
CAMBIO DE BRILLO DE LA PANTALLA DEL PANEL FRONTAL Es posible cambiar el brillo de la pantalla del panel frontal. Además, también puede desactivar la pantalla del panel frontal para ver la película en un entorno más oscuro. Pulse DISP. MODE varias veces. Cada vez que pulse DISP. MODE, cambiará el brillo del panel frontal. DISP. MODE Brillante Oscuro * Al seleccionar DISPLAY OFF, la pantalla del panel frontal después de que “DISPLAY OFF” aparezca en la pantalla del panel frontal.
INFORMACIÓN ADICIONAL INFORMACIÓN ADICIONAL Solución de problemas Si surge algún tipo de problema con el sistema, compruebe los siguientes elementos. Si las soluciones que se enumeran a continuación no le permiten resolver el problema, o si el problema no aparece a continuación, apague y desenchufe el sistema y, a continuación, póngase en contacto con el distribuidor o Centro de servicio Yamaha más cercano. Solución Consulte la página El cable de alimentación podría estar conectado incorrectamente.
INFORMACIÓN ADICIONAL Problema Causa El mando a distancia no controla el sistema. Solución El sistema podría encontrarse fuera del alcance del mando a distancia. Si desea obtener información acerca del alcance de funcionamiento del mando a distancia, consulte “Utilización del mando a distancia”. El sensor del mando a distancia de este sistema podría estar expuesto a la luz del sol directa o a una fuente de iluminación. Cambie la iluminación. Puede que las baterías estén agotadas.
INFORMACIÓN ADICIONAL ■ Bluetooth Nota Si se produce un error de transmisión sin que aparezca un mensaje de estado en el panel frontal, compruebe el dispositivo Bluetooth. Mensaje de estado Searching... Causa Solución Consulte la página El receptor de audio Yamaha Bluetooth (como por ejemplo YBA-10, se vende por separado) y el dispositivo Bluetooth se encuentran en proceso de emparejado.
INFORMACIÓN ADICIONAL Glosario ■ AIR SURROUND XTREME ■ Dolby Pro Logic II Nueva tecnología envolvente desarrollada por Yamaha que permite crear sonido envolvente con un número de altavoces más reducido. En comparación con la tecnología envolvente frontal tradicional, la tecnología AIR SURROUND XTREME proporciona un campo de sonido envolvente natural.
INFORMACIÓN ADICIONAL Especificaciones YAS-71CU FM Sintonizador • Tipo ........ Tipo blindaje magnético con suspensión acústica y 2 vías • Explorador Woofer.....................................Tipo blindaje magnético con cono de 8 cm × 4 (L2, R2) Tweeter......... Tipo de blindaje magnético con cúpula equilibrada de 2,5 cm × 2 (L1, R1) • Respuesta de frecuencia ........................... 120 Hz a 20 kHz (-10 dB) • Dimensiones (An. × Al. × Prof.) .......................800 × 105 × 100 mm • Peso ..........
警告:操作本机前请认真阅读。 1 为了保证最佳的性能,请仔细阅读本手册。请妥善保管以 备日后查阅。 2 请将本音响系统安装在通风良好、阴凉、干燥、干净的位 置 - 远离直射阳光、热源、振动、灰尘、潮湿和 / 或寒 冷。请在本机的上方、左方、右方和背后留出至少 5 cm 的通风空间。 3 将本机远离其他电器,马达或变压器放置,以避免产生蜂 鸣噪声。 4 不要将本机突然从低温环境转移到高温环境,也不要将其 置于高湿场所 (例如,放置有加湿器的房间),以防止机 器内部结露。结露可能导致触电,火灾,机器损坏甚至人 员伤害。 5 不要将本机放置于异物容易落入的场所,也不要放置在液 体飞溅的地方。在本机顶部,不要放置以下物品: – 其他装置,因为它们可能损害本机或使本机的外表变 色。 – 易燃物品 (比如,腊烛等),因为它们会引起火灾, 机器损坏甚至人员伤害。 – 盛有液体的容器,因为其中的液体有可能倾倒进入本 机,使得用户触电或损坏本机。 6 不要使用报纸,桌布,窗帘等物遮盖本机,以免妨碍散 热。如果本机内部温度升高,会引起火灾,机器损坏甚至 人员伤害。 7 在所有连接完成之前,不要将电源插头插入墙壁上的插 座。 8
目录 前言 前言 其它功能 初始工作 ................................... 2 附件 ....................................... 2 控制器和功能 ............................... 3 准备 收听 FM 广播 ...............................22 概述 ...................................... FM 调谐控制器和功能 ....................... 基本调谐操作 .............................. 使用电台预设功能 .......................... 22 22 23 24 使用选购装置 ..............................27 放置系统 ................................... 8 使用 iPod™ ................................ 27 使用 Bluetooth™ 装置 .....
前言 初始工作 附件 本产品由以下部件组成。连接之前,请确认收到以下所有部件。 ■ 单位 超低音扬声器 / 系统控制器 (YAS-71SPX) 中央系统 (YAS-71CU) ■ 附件 系统控制电缆 (4 m) 垫块× 2 双面胶 (2 片) 防滑垫 (2 块) 螺丝× 6 室内 FM 天线 遥控器 扬声器电缆 (4 m) 安装模板 电池× 2 (AAA,R03,UM4) 盖子 使用说明书 TLV Front Surround System (CENTER SYSTEM + SUBWOOFER/SYSTEM CONTROL) YAS-71 (YAS-71CU + YAS-71SPX) OWNER’S MANUAL MANUAL DE INSTRUCCIONES ợ䒌存㕲᷊ 2 Zh
初始工作 控制器和功能 1 前面板显示屏 显示有关系统操作状态的信息。(☞ 第 4 页 ) 2 遥控感应器 接收遥控器红外线信号。(☞ 第 5,7 页 ) 3 电源指示灯 系统电源打开时点亮。(☞ 第 16 页 ) 前言 ■ 中央系统前面板 4 STANDBY/ON 打开系统电源,或将系统设定为待机模式。 (☞ 第 16 页 ) 注意 即使系统处于待机模式,接收遥控器红外线信号仍然要 消耗很少的电量。 5 INPUT 选择您要收听的输入源。(☞ 第 16 页 ) 6 VOLUME –/+ 控制系统音量。(☞ 第 16 页 ) 中文 3 Zh
初始工作 ■ 中央系统前面板显示屏 1 解码器指示灯 当系统任何一个解码器工作时,相应的指示灯将 点亮。 2 DOCK 指示灯 • 当系统接收到固定在与超低音扬声器 / 系统控 制器的 DOCK 端口连接的 Yamaha iPod 通用基座 (如 YDS-10 或 YDS-11,另购)中的 iPod 信号 时点亮。(☞ 第 27 页 ) • 当 Yamaha Bluetooth 音频接收机(如 YBA-10, 另购)与 Bluetooth 装置连接时点亮。 (☞ 第 29 页 ) • 当所连接的 Yamaha Bluetooth 音频接收机(如 YBA-10,另购)与 Bluetooth 装置正在配对时 闪烁,或 Yamaha Bluetooth 音频接收机正在搜 索 Bluetooth 装置时闪烁。(☞ 第 29 页 ) 3 ENHANCER 指示灯 当选择了压缩音乐增强器模式时点亮。 (☞ 第 21 页 ) 4 NIGHT 指示灯 当选择夜晚收听模式时点亮。(☞ 第 32 页 ) 4 Zh 5 调谐器指示灯 (AUTO/TUNED/STEREO/MEMORY) AUTO 指示灯 当系统处于自动调谐
初始工作 ■ 遥控器 1 输入按钮 选择您要收听的输入源。(☞ 第 16 页 ) 红外线信号发射器 前言 2 STEREO • 打开或关闭扩展立体声模式。 (☞ 第 21 页 ) • 关闭环绕模式。 (☞ 第 18 页 ) 3 光标 (W/X/S/T)/ENTER 定位:改变设定。(☞ 第 19 页 ) 音频延迟:改变设定。(☞ 第 31 页 ) iPod:移动光标。(☞ 第 27 页 ) FM:向前或向后移动预设组和数字。 (☞ 第 22 页 ) 4 PRESET/TUNE, AUTO/MAN’L, MEMORY 控制 FM 调谐器。(☞ 第 22 页 ) 5 s/e/p/b/a 控制 iPod 或 Bluetooth 装置。 (☞ 第 27,29 页 ) 6 BLUETOOTH ON/BLUETOOTH OFF 连接或断开 Bluetooth 装置。(☞ 第 30 页 ) 7 STANDBY/ON 打开系统电源,或将系统设定为待机模式。 (☞ 第 16 页 ) 8 MOVIE/MUSIC/SPORTS/GAME 选择环绕模式。(☞ 第 18 页 ) 9 VOLUME (+/-)/MUTE 控制系统
初始工作 B POSITION 根据收听位置转换最佳收听区域。 (☞ 第 19 页 ) C TEST 输出测试音调。(☞ 第 20 页 ) D ENHANCER 打开或关闭压缩音乐增强器模式。 (☞ 第 21 页 ) E NIGHT 打开或关闭夜晚收听模式。(☞ 第 32 页 ) F AREA 选择最佳收听区域。(☞ 第 20 页 ) G AUDIO DELAY 延迟输出的声音,使之与视频图像同步。 (☞ 第 31 页 ) H DISP.
初始工作 ■ 使用遥控器 前言 6 m内 请在中央系统的 6 m 范围内使用遥控器,并将遥控器指向遥控感应器。 注意 • 请小心,不要将液体泼洒在遥控器上。 • 请小心,不要掉落遥控器。 • 切勿将遥控器遗留在以下场所: – 炎热或潮湿的地方,如加热器附近或浴室内。 – 极冷的地方 – 多尘的地方 ■ 安装电池 1 取下电池舱盖。 2 插入 2 节附带的电池 (AAA,R03,UM4),必须按照电池舱内的极 性标记 (+ 和 -)。 3 重新盖上电池舱盖。 注意 • • • • • • 如果遥控器的有效操作距离明显缩短,请尽快更换两节新电池。 切勿新旧电池混合使用。 切勿混用不同类型电池 (例如,碱性电池和锰电池)。即使形状相同,但它们的性能不同。 如果电池耗尽,请立即将电池从遥控器中取出,以防止电池爆炸或电池液渗漏。 请根据当地法规废弃电池。 如果电池开始渗漏,请立即废弃。请小心,不要让渗漏的电池液接触到皮肤或衣服。插入新电池之前,请将电池舱擦拭干 净。 中文 7 Zh
准备 放置系统 为了充分欣赏到良好的音质,您需要将本系统放置在适当的位置,并正确安装装置。确定布局后,请按照以下 步骤安装本系统。 中央系统 (YAS-71CU) 超低音扬声器 / 系统控制器 (YAS-71SPX) 中央系统 (YAS-71CU) 将中央系统放置在电视机下 / 下方,使中央系统与电视机垂 直对齐。确保中央系统与墙壁平行放置。 主要作用:产生前声道 (立体声)声音。同时使用 Yamaha 前环绕系统产生有效的虚拟中央声道声音 (对话等)和虚 拟环绕声道声音。 超低音扬声器 / 系统控制器 (YAS-71SPX) 将超低音扬声器靠近中央系统放置,并稍转动朝着房间的中 央,以减轻墙壁的反射。 主要作用:产生低频 (LFE)声音。 注意 • 本系统已经过磁场屏蔽处理。但是,如果电视图像模糊或失真,则建议将系统远离电视机放置。 • 视聆听位置和超低音扬声器的摆放位置而定,由超低音扬声器 / 系统控制器产生的低频可能难以听到。若要欣赏到理想的声 音,请尝试改变超低音扬声器的位置。 • 视安装环境而定,可以在安装本系统之前先连接外接装置。为了能确定哪一种操作步骤最佳,我们建议您临时摆放所有装 置
放置系统 ■ 将中央系统安装在墙壁上 使用锁孔安装中央系统 使用市售的螺丝 (#8,直径:7.5 mm 或更大)可以将中央系统安装在墙上。 若要将中央系统安装在墙上,所有安装作业必须由专业施工人员或经销商进行。消费者切勿尝试自行安装。安装 错误或安装不当会造成中央系统翻倒,导致人员受伤。 1 将附带的安装模板固定在墙上,然后在安装模板 上标出孔的位置。 将电缆安装在中央系统上方 若要将电缆朝上穿过,则需要粘贴垫块,从而在中 央系统的背后留出空间。 胶带或图钉 准备 标记 2 取下安装模板,然后将市售的螺丝安装在标记位 置。 左栏步骤 2 ; 2-a:使用附带的双面胶将附带的垫块粘贴在中央 系统的后面板上。A 面或 B 面都可以使用。 直径: 7.
放置系统 使用螺丝孔安装中央系统 您也可以使用中央系统背后的内外螺丝孔,并使用市售的支架或组合柜架安装中央系统。 支架或组合柜架等, 15 mm 550 mm 290 mm 77 mm 螺丝 (M6) 螺丝孔 52.
连接 • 在完成所有连接之前切勿连接电源线。 • 插入电缆插头时切勿用力过猛。否则可能损坏电缆插头和 / 或端子。 连接中央系统和超低音扬声器 / 系统控制器 请按照以下操作步骤连接中央系统和超低音扬声器 / 系统控制器。 准备 连接扬声器电缆 将电缆插头连接至相 同颜色的扬声器插孔。 将电缆插头 连接至相同 颜色的扬声 器插孔。 扬声器电缆 (附带) 连接系统控制电缆 系统控制电缆 (附带) 拧紧螺丝。 拧紧螺丝。 中文 11 Zh
连接 连接外部装置 超低音扬声器 / 系统控制器有 3 个数字输入插孔 (光纤数字× 2,同轴数字× 1)和 1 个模拟输入插孔。连接 外部装置之前,请先检查装置的输出插孔,且必须使用正确的连接电缆。 ■ 数字连接 注意 • 本系统的数字插孔支持 PCM、Dolby Digital 和 DTS 位流。 • 数字插孔支持 96 kHz 或更低采样频率的数字信号。 [INPUT 1,2] OPTICAL 插孔 例 1:DVD 播放机 电视机 DVD 播放机 光纤数字电缆 例 2:电视游戏机 游戏机 电视机 光纤数字电缆 12 Zh
连接 [INPUT 3] COAXIAL 插孔 CD 播放机 同轴数字电缆 准备 ■ 模拟连接 [INPUT 4] ANALOG 插孔 例 1:电视机 电视机 例 2:录像机或摄像机 无数字输出的录像机或摄像机等。 录像机等 中文 摄像机 13 Zh
连接 连接 Yamaha iPod 通用基座 系统配备了 DOCK 端口,允许连接 Yamaha iPod 通用基座 (如 YDS-10 或 YDS-11,另购),可以作为 iPod 的基 座。使用专用电缆将 Yamaha iPod 通用基座连接至超低音扬声器 / 系统控制器的 DOCK 端口。详细说明,请参 阅第 27 页上的 “使用 iPod™”。 Yamaha iPod 通用基座 (如 YDS-10 或 YDS-11,另购) 连接 Yamaha Bluetooth 音频接收机 您也可以将 Yamaha Bluetooth 音频接收机 (如 YBA-10,另购)连接至 DOCK 端口。使用专用电缆将 Yamaha Bluetooth 音频接收机连接至超低音扬声器 / 系统控制器的 DOCK 端口。详细说明,请参阅第 29 页上的 “使用 Bluetooth™ 装置”。 Yamaha Bluetooth 音频接收机 (如 YBA-10,另购) 连接室内 FM 天线 若要收听 FM 电台广播,请连接附带的室内 FM 天线。 室内 FM 天线 (附带) y 如果您的地区电台接收电波微弱,或想要提高
连接 连接电源线 完成所有连接后,再连接超低音扬声器 / 系统控制器的电源线。 准备 连接至交流电源插座 y 完成所有连接后,您可以根据自己的习惯盖上或取下盖子。 如图所示,使用 6 个附带的螺丝将盖子固定到超低音扬声器 / 系统控制器的后面板上。 中文 15 Zh
基本操作 基本播放操作 完成所有电缆连接 (☞ 第 11 至 15 页)和遥控器准备 (☞ 第 7 页)后,请按照以下步骤开始基本播放操作。 y 若要暂时关闭音量,按 MUTE。静音功能处于启用情况 下时,MUTE 指示灯闪烁。若要恢复音量,再按一下 MUTE。 现在开始尝试本系统的各种功能! 使用各种声音特性 • 以环绕模式欣赏逼真音效 ☞ 第 18 页 • 从一侧到另一侧变换最佳聆听区域 ☞ 第 19 页 • 选择最佳收听区域 ☞ 第 20 页 • 在不启用环绕模式情况下体验更宽广的立体声 音效 ☞ 第 21 页 • 播放高品质音效的压缩音频信号 ☞ 第 21 页 • 延迟声音输出,使之与视频图像同步 1 按 STANDBY/ON。 本系统打开,且电源指示灯亮起。若要将系统设 定为待机模式,则再按一下 STANDBY/ON。 y 本系统具有自动睡眠功能,如果系统保持开启状态达 24 小时而没有执行任何操作,则系统将自动切换到待 机模式。 2 按一个输入按钮选择一个输入源。 例如,如果超低音扬声器 / 系统控制器的 INPUT 1 插孔连接了 DVD 播放机,则按 INPUT 1 选择
AIR SURROUND XTREME 什么是 AIR SURROUND XTREME? 通常,欣赏 5.1 声道环绕声需要两个前置扬声器、一个中置扬声 器、两个环绕扬声器和一个超低音扬声器。 典型 5.1 声道扬声器系统 前置扬声器 ■ 虚拟 7.1 声道 超低音扬声器 AIR SURROUND XTREME 技术仅使用中央系统的前置左右扬声器和超 低音扬声器,通过模拟出中置、环绕和后环绕位置的虚拟扬声器声 音,能让您欣赏到逼真的 7.1 声道音效。 中置扬声器 环绕扬声器 系统的声音图像 基本操作 系统通过中央系统和超低音扬声器 / 系统控制器创造出虚拟 7.
AIR SURROUND XTREME 聆听 AIR SURROUND XTREME 的环绕模式 按一个环绕模式按钮。 所选输入源和环绕模式的名称出现在前面板显示屏 中。 环绕模式按钮 环绕模式说明 电影 欣赏 DVD 等媒体中的电影时,此模式非常有 效。 音乐 欣赏 DVD 等媒体中的音乐时,此模式非常有 效。 体育 欣赏体育节目或电视新闻时,此模式非常有 效。 游戏 玩游戏时,此模式非常有效。 y • 若要重现原有声音,则按 STEREO。 • 系统自动记忆每个输入源指定的设定。当您选择其他输入 时,系统将自动调用所选输入的最后一次设定。 18 Zh
AIR SURROUND XTREME 从一侧到另一侧变换最佳聆听区域 此功能将根据您的聆听位置将最佳聆听区域从一侧变换到另一侧,以获得最佳虚拟环绕效果。 1 按 POSITION 进入定位模式。 当前位置出现在前面板显示屏中。 2 按 W/X 变换最佳聆听区域 (L6, L5, L4, L3, L2, L1, CENTER, R1, R2, R3, R4, R5, R6)。 如果聆听位置处于中央系统的左侧,则从 L1 至 L6 调节最佳聆听区域,如果聆听位置处于中央系 统的右侧,则从 R1 至 R6 调节最佳聆听区域。 位置出现在前面板显示屏中。 例如:“POSITION L1” y • 默认设定为 CENTER。 • 执行步骤1之后如果按 TEST,则系统将输出虚拟中置扬声器 的测试音调,使您能够调节位置设定。(☞ 第 20 页 ) • 对所有输入源均作此设定。 • 即使关闭环绕模式,此功能仍然有效。 基本操作 3 再按一下 POSITION 或 ENTER 退出定位模式。 注意 进入定位模式后,如果在 30 秒钟内未操作此功能,则系统 自动退出定位模式。 最佳聆听区域 中文 19
AIR SURROUND XTREME 选择最佳收听区域 您可以从两个模式中选择最佳聆听模式。 按 AREA。 每按一次 AREA,NORMAL 和 WIDE 模式将交替改变。 AREA NORMAL 选择此项可加强音响效果。 选择 NORMAL 模式时,前面板显示屏中出现 “AREA NORMAL”。 WIDE 选择此项可扩大最佳聆听区域。 y • 默认设定为 NORMAL。 • 所有输入源均可作此设定。 注意 仅环绕模式启用时此操作才有效。 NORMAL WIDE 检查虚拟环绕效果 您可以使用扬声器发出的测试音调检查虚拟环绕音效。 按 TEST 输出测试音调。 系统输出测试音调,前面板显示屏中出现测试音调的 输出声道。 活动 (虚拟)扬声器 声道 TEST 测试音调的输出声道如下循环。每个声道输出测试音 调约 2 秒钟。 y 若要取消测试音调模式,再按一下 TEST。 注意 后环绕虚拟扬声器包含在 SL 和 SR 中。 20 Zh
AIR SURROUND XTREME 使用扩展立体声模式 CD 播放机等 2 声道音源实现扩展音效。 按 STEREO 进入扩展立体声模式。 “EXTENDED”出现在前面板显示屏中。 STEREO 每按一次 STEREO,此功能将交替打开 (EXTENDED) 和关闭 (STEREO)。 y • 默认设定为 STEREO。 • 系统将记忆每个输入源指定的设定。 • 您也可以在扩展立体声模式打开的情况下打开压缩音乐增 强器模式。 注意 基本操作 仅在不启用环绕模式时此操作才有效。 设定压缩音乐增强器 此功能通过复原压缩作品中丢失的和声增强您的聆听体验。 当播放 iPod 或数字音乐播放器中储存的压缩音乐数据时,此功能非常有效。 按 ENHANCER。 此功能开启时,前面板显示屏中 ENHANCER 指示灯亮 起。 每按一次 ENHANCER,此功能将交替打开和关闭。即使 关闭电源,所选择的模式仍然储存在内存中。 ENHANCER y • 默认设定为 OFF。 • 系统将记忆每个输入源指定的设定。 • 此功能开启时,夜晚收听模式自动设定为关闭。 (☞ 第 32 页 ) 中文 21 Zh
其它功能 收听 FM 广播 概述 您可以使用两种调谐模式调入想要的 FM 电台: 频率调谐模式 您可以自动或手动搜索或指定想要的 FM 电台频率。(请参阅第 23 页中的 “基本调谐操作”。) 预设调谐模式 您可以预先设定想要的 FM 电台,然后通过指定预设组和数字调出电台 (请参阅第 24 页中的 “使用电台预设 功能”。) FM 调谐控制器和功能 A _ E/A ` E FM 选择预设组 (A 至 E)。 将输入设定至 FM。 +/– PRESET/TUNE 切换频率调谐模式和预设调谐 模式。 AUTO/MAN’L 切换自动和手动调谐模式。 22 Zh • 在频率调谐模式中选择想 要的频率。 • 在预设调谐模式中选择想 要的预设数字 (1 至 8)。 MEMORY 启用预设记忆模式。
收听 FM 广播 基本调谐操作 手动调谐 如果从您想要选择的电台接收到的信号微弱,则您 可以通过手动指定频率调入想要的电台。在 FM 调 谐模式中,反复按 AUTO/MAN’L 使 AUTO 指示灯消 失,然后反复按 +/– 指定想要电台的频率。 如果使用手动调谐功能调入电台,则系统将以单声 道接收模式接收 FM 电台信号,以提高信号质量。 1 按 FM 将输入设定至 FM。 “FM”出现在前面板显示屏中。 2 按 AUTO/MAN’L 切换自动 / 手动。 其它功能 当系统设定至自动调谐模式时,AUTO 指示灯亮 起。 点亮 无冒号 (:) y 如果出现冒号 (:),系统被设定至预设调谐模式。 (☞ 第 24 页 ) 3 按一次 +/– 开始自动调谐。 当系统调谐到某个电台时,TUNED 指示灯亮起, 所接收电台的频率显示在前面板显示屏中。 点亮 y 中文 当使用自动调谐模式调谐到 FM 电台时,系统将以立体 声接收模式接收 FM 电台信号。STEREO 指示灯出现在前 面板显示屏中。 23 Zh
收听 FM 广播 使用电台预设功能 ■ 自动电台预设 您最多可以储存 40 个 FM 电台 (A1 至 E8:5 个预设组的每个组中有 8 个预设数字)。 1 按 FM 将输入设定至 FM。 “FM”出现在前面板显示屏中。 2 按住 MEMORY 超过 3 秒钟。 预设组和数字,以及 MEMORY 和 AUTO 指示灯闪烁。约 5 秒钟后,从当前频率开始自动预设,并继续预设到更 高的频率。 在 MEMORY 指示灯正在闪烁时,再按一下 MEMORY 即可 取消。 闪烁 闪烁 自动预设调谐完成时,前面板显示屏中将显示最后预 设电台的频率。 y 按 A_E 或 A`E 选择一个预设组,然后反复按 +/- 选择一个预设数字,操作完步骤 2 之后,第一个电台将储存在此数字上。 注意 • 如果您将一个新的电台储存在相同预设数字下,则预设数字下目前储存的所有电台数据将被清除。 • 如果接收到的电台个数没有达到 40 个 (A1 至 E8),则搜索到所有有效电台后将自动停止自动预设调谐。 如果想要的电台未储存,或电台未储存到想要的预设组和数字,则请手动预设该电台。详细说明,请参阅 第 25 页中的 “手动电
收听 FM 广播 ■ 手动电台预设 使用此功能手动预设想要的电台。 1 调入电台。 4 当 MEMORY 指示灯正在闪烁时,按 +/– 选择一个预 有关调谐说明,请参阅第 23 页中的 “基本调谐 操作”。 设数字 (1 至 8)。 闪烁 2 按 MEMORY。 前面板显示屏中的 MEMORY 指示灯约闪烁 30 秒 钟。 闪烁 3 当MEMORY指示灯正在闪烁时,反复按A_E或A`E 选择一个预设组 (A 至 E)。 出现所选择的预设组。 闪烁 预设组 其它功能 在 MEMORY 指示灯正在闪烁时,再按 MEMORY 即可 取消。 预设数字 5 按 MEMORY 确认预设。 所选择的电台已存储为 A1。 前面板显示屏中出现 “A1:PRESET OK”后,该频 率将随所选择的预设组一起出现。MEMORY 指示灯 从前面板显示屏中消失。 注意 • 如果您将一个新的电台储存在相同预设数字下,则预 设数字下目前储存的所有电台数据将被清除。 • 接收模式 (立体声或单声道)将随电台频率一起储 存。 中文 25 Zh
收听 FM 广播 ■ 调出预设电台 1 按 PRESET/TUNE 选择预设调谐模式。 2 反复按 A_E 或 A`E 选择想要的预设组 (A 至 E)。 3 反复按 +/– 选择想要的预设数字 (1 至 8)。 预设组和数字 预设 FM 电台 26 Zh
使用选购装置 使用 iPod ™ 如果将 iPod 固定在与超低音扬声器 / 系统控制器 (☞ 第 14 页)的 DOCK 端口相连接的 Yamaha iPod 通用基座 中 (如 YDS-10/YDS-11,另购),便能欣赏 iPod 的播放。 支持的 iPod iPod (Click and Wheel) iPod nano iPod mini 电池充电功能 本系统打开后,即可对超低音扬声器 / 系统控制器的 DOCK 端口上连接的 Yamaha iPod 通用基座中的 iPod 内的 电池进行充电。 将 iPod 放置在 Yamaha iPod 通用基座中 一旦将 iPod 放置在 Yamaha iPod 通用基座中,前面板显示屏中将出现 “iPod connected”和 DOCK 指示灯。 注意 • 视 iPod 的型号或软件版本而定,有些功能可能无效。 • 有关前面板显示屏中出现的全部状态讯息列表,请参阅第 35 页 “故障排除”中的 “iPod”章节。 • 将 iPod 放入基座或从中取出之前必须将音量设定至最小。 ■ iPod™ 的控制器和功能 其它功能 您可以以简易遥控模式或菜单浏览模式
使用选购装置 ■ 以简易遥控模式控制 iPod 将 iPod 置入 Yamaha iPod 通用基座 (如 YDS-10 或 YDS-11,另购)即可进入简易遥控模式。以此模式使用附 带的遥控器便能执行 iPod 基本操作 (播放,停止,向后 / 向前跳过等)。 y 使用 iPod 上的控制器也能进行这些操作。相关操作,请参阅 iPod 的使用说明书。 ■ 以菜单浏览模式控制 iPod 前面板显示屏中显示歌曲列表或播放信息,您可以以此模式使用附带的遥控器来选择并播放歌曲,或调节设 定。 注意 • 使用 iPod 上的控制器无法进行这些操作。 • 前面板显示屏中无法显示的字符用下划线 “_”代替。 1 按 DOCK MODE 进入菜单浏览模式。 2 反复按 S/T/W/X 选择想要的菜单,然后按 ENTER 播放所选歌曲。 选项 第1层 第2层 Playlists 播放列表 歌曲列表 Artists 艺术家列表 专辑列表 Albums 专辑列表 歌曲列表 Songs 歌曲列表 第3层 第4层 歌曲列表 Genres 流派列表 艺术家列表 专辑列表 Composer
使用选购装置 使用 Bluetooth™ 装置 您可以将 Yamaha Bluetooth 音频接收机 (如 YBA-10,另购)连接至超低音扬声器 / 系统控制器上的 DOCK 端 口,并欣赏 Bluetooth 装置 (如配备 Bluetooth 发射器的便携式音乐播放器或电脑等)中储存的音乐,而无 需在系统和 Bluetooth 装置之间进行连线。您预先需要对所连接 Yamaha Bluetooth 音频接收机与 Bluetooth 装置进行 “配对”。 ■ Bluetooth 装置的控制器和功能 DOCK 将输入设定至 DOCK。 播放控制按钮 BLUETOOTH ON/OFF • 开始或取消配对。 • 连接或断开 Bluetooth 装置。 控制 Bluetooth 装置的播放。 p:播放 e:暂停 s:停止 b/a: 向后 / 向前跳过 其它功能 ■ Yamaha Bluetooth™ 音频接收机与 Bluetooth™ 装置配对 Bluetooth 装置与系统连接的 Yamaha Bluetooth 音频接收机第一次配合使用前,或删除了注册的配对数据,必 须先进行配对。“配对”是指
使用选购装置 4 按住 BLUETOOTH ON 超过 3 秒钟开始配对。 配对开始时出现 “Searching...
实用操作 调节音频延迟 FPD 电视图像有时会落后于声音。您可以使用此功能延迟声音输出,使声音与视频图像同步。 1 按 AUDIO DELAY 进入调节模式。 2 按 S/T 调节延迟时间。 选项:0 至 240 ms 您可以间隔 10 ms 调节延迟时间。 设定数值 3 再按一下AUDIO DELAY或ENTER退出调节模 式。 y • 默认设定为 0 ms,前面板显示屏中出现 “DELAY OFF”。 • 系统将记忆每个输入源指定的设定。 注意 进入调节模式后,如果在 30 秒钟内未操作此功能,则系统 自动退出调节模式。 实用操作 中文 31 Zh
低音量收听 (夜晚收听模式) 夜晚收听模式能让您抑制很响的音效,以较低的音量清晰地聆听对话或歌声。在夜晚欣赏电影或音乐时,此功 能非常有效。 按 NIGHT。 “NIGHT ON”出现在前面板显示屏中。 当选择了夜晚收听模式时,NIGHT 指示灯亮起。 点亮 NIGHT y • 若要取消夜晚收听模式,再按一下 NIGHT。 • 此功能开启时,压缩音乐增强器模式自动设定为关闭。 (☞ 第 21 页 ) • 对所有输入源均作此设定。 播放中调节音量平衡 您可以调节虚拟扬声器和超低音扬声器的音量平衡。 SW +/– 调节超低音扬声器声道的输出电平。 控制范围:+6 至 -6 CENTER +/– 调节中置虚拟扬声器声道的输出电平。 控制范围:+6 至 -6 SUR.
改变前面板显示屏亮度 您可以改变前面板显示屏亮度。您也可以在黑暗环境中关闭前面板显示屏来观看电影。 反复按 DISP. MODE。 每按一次 DISP. MODE,前面板显示屏亮度将发生变 化。 DISP.
附加信息 附加信息 故障排除 如果系统有任何问题,请检查以下项目。如果以下措施无法解决问题,或问题并未列出,请关闭系统并拔掉电 源插头,然后联络附近授权的 Yamaha 经销商或服务中心。 问题 原因 解决方法 参见页 电源线可能连接不当。 确认电源线插头牢固插入电源插座。 15 扬声器电缆可能短路。 确认所有扬声器电缆连接正确。 11 本系统可能已经受到强烈电击,如来 自闪电或过强的静电。 将系统设定为待机模式,然后断开电源线连 接。请等待 30 秒钟,连接电源线,然后重 新打开系统。 16 音量可能设定为最小。 调节音量。 可能启用了静音功能。 取消静音功能。 16 输入源或输入设定可能错误。 选择正确的输入源或输入设定。 16 电缆可能连接不当。 确认所有电缆连接正确。 11 一侧的声音太低。 电缆可能连接不当。 确认所有电缆连接正确。 11 除一个前置声道以外,其 他扬声器声道没有声音。 您可能没有用环绕模式听立体声声 音。 按环绕模式按钮启用声场效果。 中置扬声器声道没有声 音。 中置虚拟扬声器声道的音量可能设定 为最小。 调节中置
附加信息 ■ 调谐器 问题 原因 FM 立体声接收嘈杂。 当发射装置太远或天线质量不良,则 FM 立体声广播的性质可能引起此问 题。 即使使用良好的 FM 天线 仍然有失真,无法获得清 晰接收。 有多途径干扰。 使用自动调谐方法无法调 入想要的电台。 信号太弱。 纠正措施 参见页 检查天线连接。 14 尝试使用高质量定向 FM 天线。 — 使用手动调谐方法。 23 调节天线位置,以消除多途径干扰。 — 尝试使用高质量定向 FM 天线。 — 使用手动调谐方法。 23 ■ iPod 注意 在发生发送错误,但前面板中未出现状态讯息的情况下,请检查与 iPod 的连接 (☞ 第 14 页)。 状态讯息 原因 Unknown iPod 本系统不支持正在使用的 iPod。 iPod connected 您的 iPod 正确固定在与本系统 DOCK 端口连接的 Yamaha iPod 通用基座 (如 YDS-10 或 YDS-11,另购)内, iPod 和本系统之间的连接已经完成。 Disconnected 您的 iPod 已经从与本系统 DOCK 端口 连接的 Ya
附加信息 ■ Bluetooth 注意 在发生发送错误,但前面板中未出现状态讯息的情况下,请检查 Bluetooth 装置。 状态讯息 Searching...
附加信息 术语表 ■ AIR SURROUND XTREME 由 Yamaha 研发的新环绕技术只需更少的扬声器便能 产生环绕声。相比传统的前置环绕技术,AIR SURROUND XTREME 能提供自然的环绕声场。 ■ 声道 (ch) 声道是根据范围和其他特性划分的音频类型。 如 7.1 声道 • 前置扬声器,左 (1ch),右 (1ch) • 中置扬声器 (1ch) • 环绕扬声器,左 (1ch),右 (1ch) • 后环绕扬声器,左 (1ch),右 (1ch) • 超低音扬声器 (1ch × 0.1* = 0.1ch) * 相比完整的 1 个声道波段,这是一个为增强低频声音而设 计的一个分量,以增加效果。 ■ Dolby Digital 由 Dolby Laboratories 研发的数字环绕声音系统能 提供完全独立的多声道音频。通过 3 个前置声道 (左,中,右)和 2 个环绕立体声声道,Dolby Digital 能提供五个全范围音频声道。加上专为低音 效果 (称为 LFE 或低频效果)的附加声道,系统总共 具有 5.1 个声道 (LFE 计为 0.
附加信息 规格 YAS-71CU FM 调谐器 • 类型 ............................... 双向声悬浮磁屏蔽式 • 驱动器 低音扬声器 ............. 8 cm 锥形磁屏蔽式× 4 (L2,R2) 高音扬声器 ....... 2.5 cm 平衡圆顶磁屏蔽式× 2 (L1,R1) • 频率响应 .................... 120 Hz - 20 kHz (-10 dB) • 尺寸 (宽×高×深)................. 800 × 105 × 100 mm • 重量 ............................................. 5 kg • 调谐范围 [ 美国和加拿大型号 ] ................ 87.50 - 107.90 MHz [ 其他型号 ] ........................ 87.50 - 108.00 MHz • 天线输入 (非平衡) ...............................75 Ω 超低音扬声器 YAS-71SPX • 类型 ......
Printed in China WP54440