OPERATOR’S MANUAL Chipper - Shredders Model Series 462 thru 465 (Model 465A shown) IMPORTANT: READ SAFETY RULES AND INSTRUCTIONS CAREFULLY Warning: This unit is equipped with an internal combustion engine and should not be used on or near any unimproved forestcovered, brush-covered or grass-covered land unless the engine’s exhaust system is equipped with a spark arrester meeting applicable local or state laws (if any).
SECTION 1: FINDING YOUR MODEL NUMBER This Operator’s Manual is an important part of your new chipper-shredder. It will help you assemble, prepare and maintain your chipper-shredder. Please read and understand what it says. Before you prepare your chipper-shredder for its first use, please locate the model plate and copy the information from it in this Operator’s Manual. The information on the model plate is very important if you need help from your dealer or the MTD Customer Support Department.
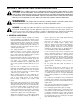
SECTION 3: IMPORTANT SAFE OPERATION PRACTICES WARNING: THIS SYMBOL POINTS OUT IMPORTANT SAFETY INSTRUCTIONS WHICH, IF NOT FOLLOWED, COULD ENDANGER THE PERSONAL SAFETY AND/OR PROPERTY OF YOURSELF AND OTHERS. READ AND FOLLOW ALL INSTRUCTIONS IN THIS MANUAL BEFORE ATTEMPTING TO OPERATE YOUR CHIPPER-SHREDDER. FAILURE TO COMPLY WITH THESE INSTRUCTIONS MAY RESULT IN PERSONAL INJURY. WHEN YOU SEE THIS SYMBOL: HEED ITS WARNING.
3. SERVICE • Inspect for damage. • Repair or replace any damaged parts. • Use extreme care in handling gasoline and other fuels. They are extremely flammable and the vapors are explosive. • Check for any loose parts and tighten to assure continued safe operation. • Store fuel and oil in approved containers, away from heat and open flame, and out of the reach of children. Check and add fuel before starting the engine. Never remove gas cap or add fuel while the engine is running.
DANGER TO AVOID SERIOUS INJURY: • DO NOT DEPOSIT BRANCHES LARGER THAN 1/2 INCH DIAMETER INTO THIS HOPPER. • WEAR APPROVED SAFETY GLASSES, GLOVES AND EAR PROTECTION. AVOID LOOSE FITTING CLOTHING. • Read the Owner’s Manual before starting and using this chipper/shredder. • Keep hands, feet, face and clothing out of shredder hopper inlet and chipper chute inlet. • Keep hands, feet, face and clothing away from discharge area and moving parts.
SECTION 4: SET-UP INSTRUCTIONS IMPORTANT: After assembly, service engine 2. Remove six hex nuts (A) and six washers (B) from the weld studs on the flail housing. Leave the support plate in place on the weld studs. See Figure 4. with gasoline, and check oil level as instructed in the separate engine manual packed with your unit. NOTE: All references to right or left side of the snow thrower are determined from behind the unit in the operating position. Flail Housing UNPACKING Weld Stud Washer (B) 1.
9. Use wrenches to remove hex lock nut (D). Remove two spacers (E), and hex bolt (F) from top of the housing assembly. For easy assembly, do not remove the second spacer from the hex bolt. See Figure 5. 4. Replace the three cupped washers (cupped side against the chipper chute) and hex nuts that you removed in step 1. Do not tighten the nuts at this time. Make sure to place the cupped side of the washer against the chipper chute. 10. Place the discharge chute in position on the discharge opening.
SECTION 5: CONTROLS SECTION 6: OPERATION STOPPING ENGINE Move throttle control lever to STOP position. Disconnect spark plug wire and move away from spark plug to prevent accidental starting. Release Rod WARNING: Before using your chippershredder, again refer to practices of this manual. careful.
LOWERING THE HOPPER ASSEMBLY 5. Pull rope with a rapid full arm stroke. Let rope return to starter slowly. 1. To lower the hopper assembly, use one hand to grasp the hand-hold at the top of the hopper assembly and lift slightly. 6. When engine starts, move choke lever to half choke position until engine runs smoothly and then to No Choke position. 2. Pull out on the release rod, and lower the hopper assembly to the ground. 7.
WARNING: Temperature of muffler and nearby areas may exceed 150 Avoid these areas. o AIR CLEANER F(65oC). The air cleaner prevents damaging dirt, dust, etc., from entering the carburetor and being forced into the engine and is important to engine life and performance. Never run the engine without air cleaner completely assembled. LUBRICATION • Service the air cleaner according to the separate engine owner’s guide supplied with your chipper shredder.
7. Reinstall the screen. 8. Put the discharge chute back to its original position and tighten the hand knobs. Slot NOTE: Be certain to reassemble the flail screen Blade with the curved side down. Clevis Pin Hex Nuts Washers Discharge Chute Figure 10 6. Remove the other blade in the same manner. Flail Screen Chipper Chute 7. Replace or sharpen blades. 8. If sharpening, make certain to remove an equal amount from each blade. Hairpin Clip 9. Reassemble in reverse order.
3. Remove the six hex lock nuts and flat washers from the housing weld bolts using a 1/2" wrench. Separate the chipper-shredder into two halves. SECTION 8: OFF-SEASON STORAGE 4. Remove the support plate. Prepare your chipper-shredder for storage at the end of the season or if the unit will not be used for 30 days or more. The following steps should be taken to prepare your shredder for storage. NOTE: When reassembling, make certain the embossed tab faces inward towards the impeller. 5.
SECTION 9: TROUBLE SHOOTING GUIDE Trouble Possible Cause(s) Corrective Action Engine fails to start Dirty air cleaner. Choke not in ON position. Spark plug wire disconnected. Cannot pull recoil cord. Refer to the engine manual packed with your unit. Move switch to ON position. Connect wire to spark plug. Obstruction lodged in impeller. Stop immediately and disconnect spark plug wire. Remove lodged object. Fill tank with clean, fresh gasoline.
Model Series 462 thru 465 1 3 2 4 5 7 14 8 9 5 6 15 10 10 17 11 12 18 19 13 24 16 22 10 23 26 15 27 28 25 32 21 42 45 53 20 44 39 40 29 31 23 46 24 29 47 54 76 32 39 41 48 26 23 34 49 23 33 35 30 41 50 37 52 44 36 43 52 51 38 30 56 61 66 70 65 64 63 69 62 57 60 71 69 51 67 68 72 69 55 58 69 68 58 73 69 71 59 69 69 68 71 68 75 74 70 68 72 69 14
Model Series 462 thru 465 REF. NO. 1 2 3 4 5 6 7 8 9 10 11 12 13 14 15 16 17 18 19 20 21 22 23 24 25 26 27 28 29 30 31 32 33 34 35 36 37 38 39 40 41 42 43 PART NO.
MANUFACTURER’S LIMITED WARRANTY FOR: The limited warranty set forth below is given by MTD PRODUCTS INC (“MTD”) with respect to new merchandise purchased and used in the United States, its possessions and territories. MTD warrants this product against defects in material and workmanship for a period of two (2) years commencing on the date of original purchase and will, at its option, repair or replace, free of charge, any part found to be defective in material or workmanship.