Operator’s Manual SNOW THROWER MODEL 31AH7S3G701 IMPORTANT: READ SAFETY RULES AND INSTRUCTIONS CAREFULLY Warning: This unit is equipped with an internal combustion engine and should not be used on or near any unimproved forestcovered, brush-covered or grass-covered land unless the engine’s exhaust system is equipped with a spark arrester meeting applicable local or state laws (if any). If a spark arrester is used, it should be maintained in effective working order by the operator.
TABLE OF CONTENTS Content Important Safe Operation Practices Assembling Your Snow Thrower Know Your Snow Thrower Operating Your Snow Thrower Adjusting Your Snow Thrower Page 3 5 6 8 10 Content Maintaining Your Snow Thrower Servicing Your Snow Thrower Trouble Shooting Illustrated Parts List Warranty Page 12 13 16 18 28 FINDING MODEL NUMBER This Operator’s Manual is an important part of your new snow thrower. It will help you assemble, prepare and maintain the unit for best performance.
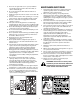
SECTION 1: IMPORTANT SAFE OPERATION PRACTICES WARNING: This symbol points out important safety instructions which, if not followed, could endanger the personal safety and/or property of yourself and others. Read and follow all instructions in this manual before attempting to operate this machine. Failure to comply with these instructions may result in personal injury. When you see this symbol—heed its warning.
5. 6. 7. 8. 9. 10. 11. 12. 13. 14. 15. 16. 17. 18. 19. 20. MAINTENANCE AND STORAGE Never run an engine indoors or in a poorly ventilated area. Engine exhaust contains carbon monoxide, an odorless and deadly gas. Do not operate machine while under the influence of alcohol or drugs. Muffler and engine become hot and can cause a burn. Do not touch. Exercise extreme caution when operating on or crossing gravel surfaces. Stay alert for hidden hazards or traffic.
SECTION 2: ASSEMBLING YOUR SNOW THROWER • NOTE: References to right or left side of the snow thrower are determined from behind the unit in the operating position. The “operator’s position” is defined as standing directly behind the snow thrower, facing the handle panel. • • Unpacking • • • • • Remove screws from the top sides and ends of the shipping crate. Set panel aside to avoid tire punctures or personal injury. Remove and discard plastic bag that covers unit.
• • If not already attached, slip the cables that run from the handle panel to the chute into the cable guide located on top of the engine. See Figure 4. Unwrap the headlight wire, which is attached to the headlight beneath the handle panel. Wind the headlight wire around the right handle until excess slack is removed. Plug the wire from the headlight into the wire lead coming from the right side of the engine, beneath the fuel tank.
Chute Tilt Control NOTE: It is easier to maneuver a non-running snow thrower with both track steering controls held in simultaneously. The distance snow is thrown can be changed by adjusting the angle of the upper chute. Move the chute tilt control forward to decrease the distance, and backwards to increase distance. See Figure 5. Throttle Control The throttle control is located on the engine. It regulates the speed of the engine and will shut off the engine when pushed down completely. See Figure 5.
SECTION 4: OPERATING YOUR SNOW THROWER Before Starting • WARNING: Read, understand, and follow all instructions and warnings on the machine and in this manual before operating. • • Gas And Oil Fill-up • Service the engine with gasoline and oil as instructed in the separate engine manual packed with your snow thrower. Read instructions carefully. • WARNING: Use extreme care when handling gasoline. Gasoline is extremely flammable and the vapors are explosive.
Recoil Starter IMPORTANT: If the auger shows ANY signs of rotating, • immediately return to the operator’s position and shut off the engine. Wait for ALL moving parts to stop before re-adjusting the auger control. • • With engine running, pull starter rope with a rapid, continuous full arm stroke three or four times. Pulling the starter rope will produce a loud clattering sound, which is not harmful to the engine or starter. To stop engine, move throttle control to “stop” or “off” position.
Drift Cutters (If Equipped) WARNING: The temperature of the muffler and the surrounding areas may exceed 150°F. Avoid these areas. Drift cutters should be used when operating the snow thrower in heavy drift conditions. • If your unit is not equipped with drift cutters, contact Customer Support as instructed on page 2 for information regarding price and availability. Snow Thrower Model Drift Cutter Kit All models OEM-390-679 • • • Operating Tips NOTE: Allow the engine to warm up for a few minutes.
With the drive control engaged, the friction wheel must contact the drive plate. See Figure 9. If adjustment is necessary: • • IMPORTANT: Make certain to check for correct • • • Loosen the jam nut on the drive cable. Adjust the cable as necessary. Refer to Figure 7. Retighten the jam nut to secure the cable when correct adjustment is reached. Reassemble the frame cover.
SECTION 6: MAINTAINING YOUR SNOW THROWER Auger Shaft WARNING: Before lubricating, repairing, or inspecting, disengage all controls and stop engine. Wait until all moving parts have come to a complete stop. Disconnect spark plug wire and ground it against the engine to prevent unintended starting. Always wear safety glasses during operation or while performing any adjustments or repairs. At least once a season, remove the shear pins on the auger shaft.
SECTION 7: SERVICING YOUR SNOW THROWER WARNING: Before servicing, repairing, or inspecting, disengage all clutch levers and stop engine. Wait until all moving parts have come to a complete stop. Disconnect spark plug wire and ground it against the engine to prevent unintended starting. Always wear safety glasses during operation or while performing any adjustments or repairs. • Engine Auger Belts Refer to the separate engine manual packed with your unit for all engine maintenance procedures.
NOTE: Loosening the six nuts that connect the frame to the auger housing may aid in belt removal. Friction Wheel Drive Pulley Auger Pulley Drive Plate Stop Bolt Drive Belt Idler Pulley Idler Pulley Auger Belts Support Bracket Frame Auger Pulley Figure 17 • • Replacing Friction Wheel Rubber Figure 15 Lift the auger belt from the auger pulley, and slip belt between the support bracket and the auger pulley. Repeat this step for the front auger belt.
Off-season Storage Move the gear shaft to the right and slide the friction wheel assembly from the shaft. See Figure 19. WARNING: Never store the machine or fuel container indoors where there is an open flame, spark, or pilot light such as on water heater, furnace, clothes dryer, or other gas appliance. Shift Rod Assembly Sprocket Spacer Pin WARNING: Drain fuel into an approved container outdoors, away from an open flame. Allow engine to cool.
SECTION 8: TROUBLESHOOTING Problem Engine fails to start Cause Remedy 1. Fuel tank empty, or stale fuel. 1. 2. 3. 4. 5. 6. 7. Blocked fuel line. Choke not in the ON position Faulty spark plug. Safety key not in ignition switch on engine. Spark plug wire disconnected. Primer button not being used properly. 2. 3. 4. 5. 6. 7. 1. 2. Unit running on CHOKE. Blocked fuel line or stale fuel. 1. 2. 3. Water or dirt in the fuel system. 3. Loss of power 1. 2. Spark plug wire loose.
NOTES 17
SECTION 9: PARTS LIST FOR MODEL 7S3 33 45 40 80 37 54 58 55 54 53 31 41 48 60 45 40 46 29 35 84 34 59 49 52 38 80 11 53 30 42 47 83 40 57 32 56 68 50 36 82 51 16 43 67 39 23 11 43 65 64 63 19 13 61 62 8 28 21 78 4 27 9 Part of handle panel for reference only 25 11 9 77 22 26 24 20 3 64 6 1 11 14 81 68 79 19 76 12 15 75 66 75 2 9 74 17 44 5 16 73 72 69 75 19 17 7 70 71 18 43 10 9 11 75 18 70
Model 7S3 Ref. No. 1. 2. 3. 4. 5. 6. 7. 8. 9. 10. 11. 12. 13. 14. 15. 16. 17. 18. 19. 20. 21. 22. 23. 24. 25. 26. 27. 28. 29. 30. 31. 32. 33. 34. 35. 36. 37. 38. 39. 40. 41. 42. Part No.
Model 7S3 2 3 20 4 5 6 9 13 12 8 7 14 10 13 14 16 11 20 15 11 19 25 18 22 14 23 14 46 44 28 33 38 26 47 27 40 42 39 43 49 41 48 45 35 34 37 32 36 30 31 1 29 17 21 24 20
Model 7S3 Ref. No. 1. 2. 3. 4. 5. 6. 7. 8. 9. 10. 11. 12. 13. 14. 15. 16. 17. 18. 19. 20. 21. 22. 23. 24. 25. Part No. 731-04870 756-0178 784-5632B 710-0347 738-0281 736-0174 732-0611 712-3068 05931A 741-0309 710-0451 705-5226 684-04129A 712-04063 731-2635 731-2643 790-00087A 710-0604A 725-0157 712-04065 741-0245 784-5580 790-00118 714-04040 684-0065 Ref. No. Part Description Spacer, 1.25OD x.75ID x 1.00 Lg Flat Idler Auger Idler Arm Hex Cap Screw 3/8-16 x 1.
Model 7S3 17 1 27 2 26 3 4 9 8 4 7 11 10 16 19 12 15 6 5 16 19 16 21 16 22 13 23 14 18 25 20 24 22
Model 7S3 Ref. No. 1. 2. 3. 4. 5. 6. 7. 8. 9. 10. 11. 12. 13. 14. 15. 16. 17. 18. 19. 20. 21. 22. 23. 24. 25. 26. 27. Part No. 710-1652 731-1324 732-0710 710-0627 710-3005 05896A 748-0234 756-0987 754-0346 756-0986 736-0270 710-0230 756-0313 710-1245B 712-0181 756-0569 710-0602 736-0505 754-0430B 756-0967 736-0247 736-0331 710-0696 748-0360 710-0654A 629-0071 732-0705 Part Description Hex Washer Screw 1/4-20 x.625 Belt Cover Extension Spring Hex Screw 5/16-24 x.75 Hex Cap Screw 3/8-16 x 1.
Model 7L3 22 23 25 19 21 30 31 26 34 33 32 32 29 32 27 24 35 20 30 16 19 18 29 17 27 32 26 19 25 24 22 20 18 15 28 14 11 10 23 19 2 36 30 3 29 8 13 4 9 1 7 5 2 6 38 39 2 40 41 37 24 12 21
Model 7S3 Ref. No. 1. 2. 3. 4. 5. 6. 7. 8. 9. 10. 11. 12. 13. 14. 15. 16. 17. 18. 19. 20. 21. Part No. 784-5648 710-1652 748-0190 732-0264 712-0711 736-0105 684-0021 746-0898B 656-0012A 784-5689A 713-0413 746-0897 750-0997 711-1042 684-0042C 736-0160 714-0474 741-0563 736-0242 710-0538 710-0875 Ref. No. Part Description 22. 23. 24. 25. 26. 27. 28. 29. 30. 31. 32. 33. 34. 35. 36. 37. 38. 39. 40. 41. Frame Cover AB Screw 1/4-20 x.
Model 7S3 44 45 54 1 50 51 47 46 2 54 42 41 56 51 56 53 55 52 3 48 46 5 4 49 9 11 6 10 8 30 12 7 37 16 36 19 13 38 20 26 15 17 23 33 29 22 31 25 30 33 19 21 24 22 26 37 28 20 14 39 27 34 18 40 35 32 21 16 18 15 17 14 26 13 32
Model 7S3 Ref. No. 1. 2. 3. 4. 5. 6. 7. 8. 9. 10. 11. 12. 13. 14. 15. 16. 17. 18. 19. 20. 21. 22. 23. 24. 25. 26. 27. 28. Part No. 720-0223 710-0604A 784-5642 710-0157 736-0242 684-0038 710-0459A 712-0214 748-0353A 750-0547 784-5609 684-0009 712-0346 731-1292 736-0272 731-1538A 631-0032 750-0995 738-0140 736-0406 750-0909 712-04063 618-0044 684-0024 710-1231 784-5639 711-0911 713-0233 Ref. No. Part Description Grip Tap Screw, 5/16-18 x.625 Track Lockout Plate Hex Cap Screw, 5/16-24 x.
MANUFACTURER’S LIMITED WARRANTY FOR: The limited warranty set forth below is given by MTD LLC with respect to new merchandise purchased and used in the United States, its possessions and territories. “MTD” warrants this product against defects in material and workmanship for a period of two (2) years commencing on the date of original purchase and will, at its option, repair or replace, free of charge, any part found to be defective in materials or workmanship.