Yealink MeetingBar A20 Teams Edition User Guide V15.
| Contents | ii Contents About This Guide........................................................................................ 4 Related Documentations..................................................................................................................... 4 Getting Started.............................................................................................4 Hardware of MeetingBar A20....................................................................................................
| Contents | iii Teams Device Settings..............................................................................22 Changing the Backlight Time............................................................................................................ 22 Screen Savers................................................................................................................................... 23 Changing the Waiting Time for Screen Saver...............................................................
| About This Guide | 4 About This Guide Thank you for choosing Yealink MeetingBar A20 video collaboration bar, which is mainly designed to work with the Microsoft Teams client. This guide provides everything you need to quickly use your new device. Firstly, verify with your system administrator that the IP network is ready for device configuration. Also, be sure to read the Quick Start Guide in the product package.
| Getting Started | 5 Front Panel of MeetingBar A20 No. Item Description 1 LED Indicator Indicates the device status. 2 Camera Camera with an electric privacy shutter. Related information LED Instructions of MeetingBar A20 Rear Panel of MeetingBar A20 No. Port Name Description 1 Reset Key Reset the MeetingBar A20 device to factory defaults.
| Getting Started | 6 No. Port Name Description 2 DC48V Connect to the power source via a power adapter. 3 HDMI Connect to a monitor for video images output. 4 VC Hub/ Phone Coming soon: • • • If you want to use wired sharing to present, connect this port to the PoE port on the VCH51 video conferencing hub. Connect to VCM34/VCM38. Connect to MSpeaker Ⅱ. 5 Internet Connect to the network device.
| Getting Started | 7 If you have scheduled meetings, the monitor idle screen is shown as below: No. Item Description 1 Time The current time of the system. 2 Profile The current account name and account number. 3 More Configure the video conferencing device. 4 New meeting Initiate a Meet Now conference at any time, without any reservation. 5 Dialpad Join the meeting by calling a meeting number.
| Getting Started | 8 No. Item Description 6 Schedule When you log into your Teams account, you can view the conference schedule. In the example: Meeting theme: Demo Test All Day Meeting time: All day Moderator: Vincent Gao Interactive Mode If you connect a touch display device, you can operate the Meetingbar A20 either by remote control or touch control. If you connect a non-touch display device, you can use the remote control, mouse, or CTP18 (coming soon).
| Getting Started | 9 Remote Control Remote Controller The following table introduces the keys on the remote control: No. Name Description 1 Answer Key Press to answer a call. 2 Scroll Wheel/OK Key • • • 3 Mute Key Press to mute or unmute the microphone. 4 Teams Key Press to join a meeting. 5 End Call Key Press to leave a meeting. 6 Navigation Key Navigate through menu items. 7 Back Key Press to return to the previous menu.
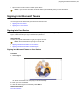
| Signing into Microsoft Teams | 10 • Tap the touch monitor screen to wake up the device. Note: If your monitor with CEC, the device wake up automatically when you near the device. Signing into Microsoft Teams You can sign into the device with your Microsoft online account.
| Signing into Microsoft Teams | 11 Signing into Microsoft Teams via Web Sign-in Procedure 1. Select Sign in. You will be connected to the Company Portal automatically. 2. Tap Sign in from another device from the Sign in screen. 3. Go to https://microsoft.com/devicelogin on your computer. 4. Enter the code shown on your device and select Next. 5. Enter your user credentials or select the desired account to sign in.
| Meeting | 12 Meeting Teams meetings are a great way to come together with your colleagues and clients both inside and outside of your organization. You can initiate meetings, view scheduled meetings, join meetings, and manage meetings. • • • • Creating a Meeting Joining a Meeting Managing a Meeting Leaving a Meeting Creating a Meeting When you register a Teams account, you can initiate a Meet Now conference at any time, without any reservation. Procedure 1.
| Meeting | 13 Joining a Meeting • • • • One-button/One-touch Join Call Meeting Number Join Proximity Join Joining a Scheduled Meeting One-button/One-touch Join You can join a Teams meeting scheduled on the Teams phone, the Teams client, or the Outlook. Procedure Press the navigation key to find your meeting, and do one of the following to join the meeting: • Select Join to join the scheduled meeting. • On your remote control, press the Teams button .
| Meeting | 14 Procedure 1. Do one of the following: • Select Dialpad. • Select More > Dialpad. 2. Enter the meeting number and dial out. Proximity Join You can move a Teams meeting on your mobile phone or laptop to the nearby device by the option of Add a room. Before you begin Make sure the Bluetooth mode is activated.
| Meeting | 15 Procedure 1. Before starting a meeting, do one of the following: On the mobile phone: go to Join now > Join and add a room and select the desired device. On the laptop: select Room audio (suggested) > Join now.
| Meeting | 16 2. During a meeting, go to > Add a room and select the desired device on the mobile phone. Related tasks Activating or Deactivating the Bluetooth Mode Joining a Scheduled Meeting If you have scheduled meetings or are invited to a scheduled meeting, the meeting schedule will be displayed on your device.You can select the desired one to join. Before you begin The device synchronizes the meeting information from the server every 5 minutes.
| Meeting | 17 Procedure 1. On the idle screen, press the navigation key to view the upcoming meetings of today. 2. Select Join to join the meeting. Managing a Meeting You can manage meetings in the following ways: • • • • • Adding Participants Removing a Participant Managing Audio Managing Video Holding and Resuming the Meeting Adding Participants Before you begin To use the dialpad to add a participant, make sure the calling plan has been configured for your Teams account.
| Meeting | 18 Removing a Participant You can remove participants, and the meeting continues. Procedure 1. Select to view the participants list. 2. Select the desired participant and select Remove from meeting to remove the participant. Managing Audio • • • Muting/Unmuting the Microphone Muting a Participant Adjusting the Volume Muting/Unmuting the Microphone You can mute/unmute the microphone during the meeting. Procedure Select / to mute/unmute the microphone.
| Meeting | 19 Adjusting the Volume You can adjust the speaker volume. Procedure Do one of the following: • • Select / to adjust volume. On the remote control, press the Volume Down/Up key to adjust volume. Managing Video • • Turning off/on the Local Camera Turning off/on Incoming Video Turning off/on the Local Camera You can turn off/on your camera during the meeting. Procedure Select / to turn the camera off or on. Turning off/on Incoming Video Procedure 1.
| Camera Settings | 20 Camera Settings You can set multiple camera parameters to make the MeetingBar A20 have better framing in the different meeting room environments. • • • • • • • • Controlling Camera Position Configuring the Exposure Settings Configuring the White Balance Setting Adjusting Display Image of the Camera Enabling Auto-framing for Camera Enabling Voice-tracking for Camera Adjusting Hangup Mode and Camera Pan Direction Resetting the Camera Controlling Camera Position Procedure 1.
| Camera Settings | 21 Configuring the White Balance Setting Procedure 1. Go to More > Settings > Device Settings > White Balance Setting. 2. Select the desired value from the White Balance Mode field and select OK. • • • • • • Auto (default), it calculates the best white balance setting based on lighting conditions in the room. Indoor Outdoor One push ATW, it automatically adjusts the white balance according to the picture taken by the camera.
| Teams Device Settings | 22 2. Turn on Voice Tracking in Framing Mode field. Note: When you turn on voice-tracking, auto-framing will turn on automatically. Adjusting Hangup Mode and Camera Pan Direction Procedure 1. Go to More > Settings > Device Settings > Others. 2. Turn on Hangup Mode. The picture took by the camera is upside down. This mode is applicable when you install the camera upside down. 3. Select the desired value from the Camera Pan Direction field.
| Teams Device Settings | 23 Procedure 1. Go to More > Settings > Device Settings > Display. 2. Select the desired time from the Backlight Time field. 3. Press OK. Screen Savers The screen saver automatically starts each time your device is idle for a certain amount of time. You can stop the screen saver at any time by pressing any key on your remote control or tapping the touch screen. When your device is idle again for a preset waiting time, the screen saver starts again.
| Teams Device Settings | 24 2. Select New Mic-Wireless. 3. Place the MIC on the charger and long press Mute key for 5s into phone registration. Note: You can connect up to 4 CPW90 (wireless expansion mic). In order to ensure the stability of the device, we recommend that you connect 2 CPW90. Bluetooth The Teams device supports Bluetooth.
| Teams Device Settings | 25 • Disconnecting the Wireless Network Connection Activating or Deactivating the Wi-Fi Mode You can activate the Wi-Fi mode if you need to connect your device to the wireless work or deactivate the Wi-Fi mode when you need to connect your device to the wired network. Procedure 1. Go to More > Settings > Device Settings > Wi-Fi (Admin only, default password: 0000). 2. Turn on/off Wi-Fi.
| Teams Device Settings | 26 3. Enter the SSID and then select a security mode from the Security drop-down menu: • • • If you select None, select Save. If you select WEP or WPA/WPA2-PSK , enter the password and then select Save. If you select 802.1×EAP, select the desired EAP method and Phase-2 authentication , enter the desired values in the Identity, Anonymous identity, and Password fields and then select Save.
| Getting More Information About Microsoft Teams | 27 2. Turn on High Contrast Mode. Color Correction You can change color mode if any difficulties in color recognition. Procedure 1. Go to More > Settings > Device Settings > Accessibility. 2. Select the desired value from the Color Correction field. • Off • Deuteranomaly (red-green) • Protanomaly (red-green) • Tritanomaly (blue-yellow) 3. Select OK.
| Maintaining Teams Devices | 28 • • View and manage your enrolled devices and wipe them if they get lost or stolen Get help directly from your IT department through the available contact information Note: Every organization has different access requirements and will use Intune in ways that they determine will best manage their information. Some functionality might be unavailable in certain countries.
| Troubleshooting | 29 Viewing Device Status Your system administrator may ask you to view the device status such as network, MAC, firmware, Partner APP version, Company Portal version, and Teams version. Procedure Go to More > Settings > Device Settings > About. Resetting Your Device You can reset the device to factory settings with the need for entering the Administrator's password. Procedure 1. Go to More > Settings > Device Settings > Debug (Admin only, default password: 0000). 2.
| Troubleshooting | 30 How can I obtain the MAC address of a device when the device is not powered on? You can use one of the following ways to obtain the MAC address of a device: • • • The PO (Purchase Order) provided by the supplier. The label of the carton box. The device’s bar code on the back of the device. How can I switch to Teams edition? If your device is not the Teams edition, you can switch to the Teams edition. Procedure 1.