Exmoor/Exe/Devon/County Free Standing Stove Instructions for Use, Installation & Servicing For use in GB & IE (Great Britain & Republic of Ireland). IMPORTANT THE OUTER CASING, FRONT AND GLASS PANEL BECOME EXTREMELY HOT DURING OPERATION AND WILL RESULT IN SERIOUS INJURY AND BURNS IF TOUCHED. IT IS THEREFORE RECOMMENDED THAT A FIREGUARD COMPLYING WITH BS 8423:2002 IS USED IN THE PRESENCE OF YOUNG CHILDREN, THE ELDERLY OR INFIRM. Do not attempt to burn rubbish in this appliance.
Contents Exmoor/ Exe/ Devon/ County - Freestanding Stove Range Covering the following models: YM-EXM-W1/YM-EXM-MF1/YM-EXM-WLC1/YM-EXM-MFLC1/YM-EXE-W1/YM-EXE-W2/YM-EXE-WLC1/YM-EXE-WLC2/YM-EXE-MF1/ YM-EXE-MF2/YM-EXE-MFLC1/YM-EXE-MFLC2/YM-DEV-W1/YM-DEV-W2/YM-DEV-WLC1/YM-DEV-WLC2/YM-DEV-WHC1/YM-DEV-WHC2/ YM-DEV-MF1/YM-DEV-MF2/YM-DEV-MFLC1/YM-DEV-MFLC2/YM-DEV-MFHC1/YM-DEV-MFHC2/YM-COU-W1/YM-COU-W2/YM-COU-WLC1/ YM-COU-WLC2/YM-COU-WHC1/YM-COU-WHC2 Appliance Commissioning Checklist.......................
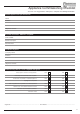
Appliance Commissioning Checklist To assist us in any guarantee claim please complete the following information:Retailer appliance was purchased from: Name: Address: Telephone number: Essential information - MUST be completed: Date Installed: Model Description: Serial Number: Installation Engineer: Company Name: Address: Telephone number: Commissioning Checks - to be completed and signed: Is flue system correct for the appliance: YES NO Flue swept and soundness test complete: YES NO Smoke test co
Getting Started Welcome Congratulations on purchasing your Yeoman Stove, if installed correctly Yeoman hope it will give you many years of warmth and pleasure for which it was designed. The purpose of this manual is to familiarise you with your stove, and give guidelines for its installation, operation and maintenance. If, after reading, you need further information, please do not hesitate to contact your Yeoman retailer. 1. General Points 1.1 1.10 The chimney must be swept at least once a year.
Getting Started AIRWASH & PRIMARY AIR CONTROLS 1.13 WARNING Use the stub on the end of the tool or a gloved hand to operate air controls. 3 Properly installed, operated and maintained, this appliance will not emit fumes into the room. Occasional fumes from de-ashing and refuelling may occur. Airwash Control CLOSE OPEN 1 DOOR 2 DOOR Persistent fume emission is potentially dangerous and must not be tolerated. If fume emission does persist: • Open doors and windows to ventilate the room.
Getting Started/User Instructions 3. Recommended Fuels 3.1 4. Lighting the Appliance Wood Logs: Burn only seasoned timber with a moisture content of less than 20%. To ensure this allow cut wood to dry for 12 to 18 months. 6 4.1 Whether using wood or solid fuel the process for lighting the appliance is the same. 4.2 For best results manually set air controls as shown in Diagram 7.
User Instructions 4.6 Add larger pieces of wood. Do not use full sized logs at this stage, build up gradually in size. Too many logs may smother the fire. . Do not load fuel above the log guard and the Secondary Combustion Inlets at the back of the firebox, see Diagram 9. 9 Wood burns best on a bed of ash (approx. 25mm (1") deep). Rake the embers evenly over the firebed and open the Airwash Control fully for a few minutes before re-fuelling. 5.
User Instructions Multi-fuel Stove 5.10 To burn wood and smokeless fuels a cast iron multi-fuel kit must be fitted. Allow the fire to become established before adding the solid fuel, see section 4. —Set air controls, see Diagram 11. 5.11 To burn solid fuel efficiently it is best to control the combustion using the Primary air control only. 11 Air Wash: 25% Open Primary Air: Adjust Secondary Air: Fully Closed 5.
User Instructions/Care & Maintenance 7.2 Multi-fuel Versions De-ash the appliance before filling with new fuel. Do not allow ash to build up on the underside of the grate as this can cause premature failure. 8. Over-Firing 8.1 Do not over-fill with fuel or run at high temperatures for long periods or over-firing can occur. DO NOT OPERATE THE APPLIANCE WITH THE PRIMARY AIR CONTROL FULLY OPEN FOR LONG PERIODS OF TIME AS THIS COULD CAUSE OVERFIRING AND MAY CAUSE PERMANENT DAMAGE. 8.
User Instructions — Remove the baffles and clear the debris (see Pre-Installation Instructions, Section 4). 10.6 10.7 12.4 To refresh painted finishes a touch up spray is available. Contact your Yeoman retailer quoting the serial number found on the appliance data badge. 13. Care Of Stove Yeoman has a range of cleaning and maintenance products and accessories to keep your appliance in good working order.
User Instructions 15. Optional Extras Smoke Control Kit 15.1 Some appliances can be modified to burn wood in a smoke control zone. For more details on the Smoke Control Kit for this appliance contact your retailer. Product Code Appliance Smoke Control Kit Part No.
Troubleshooting Troubleshooting Symptom Cause Solution Low flue draught Consult your installer Wet wood (over 20% moisture) Use dry seasoned wood (less than 20% moisture content) Poor burning control High flue draught Consult your installer Short burn times Wet wood (over 20% moisture) Use dry seasoned wood (less than 20% moisture content) High flue draught Consult your installer Air control left fully open Close air control to reduce output Low flue draught Consult your installer for advi
Troubleshooting Symptom Cause Solution Wet wood (over 20% moisture) Use dry seasoned wood (less than 20% moisture content). Operate at a high temperature for short periods each time the appliance is used to avoid large build-ups of tars and creosotes Appliance operated at continuous low temperatures Operate at a high temperature for short periods each time the appliance is used to avoid large build-ups of tars and creosotes.
Installation Checklist Please Note This section is intended to give an overview of the product performance and essential information required for installing the appliance. It is intended for qualified engineers who are already familiar with Yeoman products. For full details and expanded information please see the Technical Appendix at the back of this manual. 1.
Installation Checklist 2. Essential Information Model: County CO @ 13% O2 Devon Efficiency Exe Nominal Heat Output Exmoor GENERAL Exmoor Exe Devon County Wood kW 4.9 4.9 9 13 Solid Fuel kW 4.9 4.9 9 13 Wood % 78 78 81 78 Solid Fuel % 85 85 78 84 Wood % 0.29 0.41 0.24 0.25 % 0.17 0.35 0.19 0.
Installation Checklist 3. Minimum Dimensions - Hearth 3.1 The appliance must stand on a non-combustible constructional hearth which is at least 125mm thick with the minimum dimensions as shown in Diagram 2. Fireplace: Minimum Clearances to the Rear 4 Combustible Materials Non-Combustible Materials 2 B Decorative Hearth E Constructional Hearth A 150mm minimum 150mm minimum Floor Hearth 840mm minimum 840mm minimum 3.
Installation Checklist Freestanding Installation Multi-fuel Grate To burn wood and smokeless fuels efficiently in a woodburning appliance a cast iron multi-fuel kit must be fitted. This also allows the efficient combustion of wood. 5 See User Section 15 - Optional Extras A A C 150 150 B Non Combustible Material Combustible Materials 4.3 It is essential for safety to ensure the following clearances to combustible materials are maintained. See Diagrams 3 & 4 and table below.
Pre-Installation Instructions 1. General 1.1 3. Removal of the Firebricks To make the installation of the appliance easier it is best to remove the internal components before fitting into the builders opening/studwork. PACKING LIST Note: On Exmoor Products only, the baffle must be removed and refitted before the Firebricks. 3.1 Remove the firebricks as part of the routine maintenance. This can be carried out without the use of tools after removing the log guard. 3.
Pre-Installation Instructions 4.4 The front lip of the Baffle should point downwards. 3 Exmoor, Exe & Devon Models 5.4 Lift the Centre Grate at an angle in order to unhook the Riddling Arm. Remove the Centre Grate, see Diagram 4. 4 Baffle Extension Tubes Support Pin Rear Lip 4.5 Lift the Baffle and slide the two baffle extension tubes off of the support pins on the sides of the firebox. 4.6 Lift and slide the baffle to one side and lower. 4.
Installation Instructions 1.3 1. Installing the Appliance Top flue pipe installation 2 Flue Pipe 915mm (3ft) Each installation is unique to the property so it is not possible to give details to suit every setting. The installation must comply with Building Regulations† and be made using "best practice" construction methods‡. Part No. 5" 4502 6" 4602 Self Tapping Screw Many fireplace openings have a supporting lintel. Do not remove without supporting the remaining structure of the building.
Installation Instructions 1.3 Rear flue pipe installation 2. Fitting the Multi-fuel kit 5 Exmoor M/F Kit - YM-EXM-MFKIT fits all Exmoor products Exe M/F Kit - YM-EXE-MFKIT fits all Exe products Devon M/F Kit - YM-DEV-MFKIT fits all Devon products County M/F Kit - YM-COU-MFKIT fits all County products Self Tapping Screw 2.1 Tee Size Part No.
Installation Instructions Connect the Riddling Arm to the Operating Rod and secure with the 2 lock nuts. The nuts must sit above and below the Operating Rod, see Diagram 9. 2.15 Fit the Multi-fuel Log Guard into slots in the front sides of the front grate. 2.16 Place the ashpan under the grate. 2.7 Set the rotational position of the operating rod and secure with the small screw on the end. 2.17 Check that the door closes and seals correctly. 2.
Commissioning Commissioning 1.1 To commission: — Replace all internal components. — Check the door alignment and catch operation, adjust if required, (see Maintenance & Servicing Section 5 & 6). — Explain the requirement to use a suitable fireguard when children, elderly or infirm persons are near the appliance. — Record retailer/supplier and installer details in Appliance Commissioning Checklist (page 3, Instructions for Use).
Certificate Of Compliance Upon completing the installation, the form below must be filled in by your installer to comply with the requirements of HETAS and the building regulations. The installer must give theses details, including their HETAS registration number, for the purposes of any insurance details that may change as a result of the appliance being installed.
Maintenance & Servicing For a complete list of spare parts and accessories contact your Yeoman retailer or call 01392 474011 1. Annual Service 1.1 Before the start of the heating season strip, inspect and clean the appliance as detailed: —Allow appliance to cool. —Remove all internal parts: log guard, baffle, firebricks. For Multi-fuel versions remove the complete grate and ash pan. Take care handling firebricks as they can become fragile after a period of use.
Maintenance & Servicing 3. Fitting a new Door Glass 3.7 Fit a new sealing rope and place the glass into position in the door. 3.8 To do this: Place the glass fixing clips into position and re-fix with the clean fixing screws, tightening the screws evenly until glass is held securely. 3.1 Remove the door, by opening and lifting the door free of the hinge blocks. Do not over tighten the screws as this could break the glass. 3.
Maintenance & Servicing 4.4 Clean the locating groove with a clean, dry cloth to remove all old dust and debris. 4.5 Squeeze a generous bead of fresh Stovax Thermic Seal glue into the rope locating groove. 4.6 Press the new rope into the locating groove, placing the joint in the middle of the lower edge of the door (one door version only). 4.7 Refit door and close to apply pressure to new rope. 4.
Maintenance & Servicing 5 7 To loosen View Underneath Appliance Use 2 x 13A/F ring spanners as shown Note: This should only be carried out by a competent person. Cap Head Screws Leg 8 Wind clockwise to tighten door gap IMPORTANT: IT IS ESSENTIAL THAT THE BRACKET AND SCREWS ARE REPLACED ON COMPLETION OF THIS OPERATION IN ORDER TO RESEAL THE FIREBOX BEFORE NEXT USE. Ensure 90° when tight 6.
Maintenance & Servicing 10 — Fit the fixing stubs on the canopy into the position previous occupied by the Top Plate studs. — Use the M8 washers and nuts to secure the canopy in place.
Technical Appendix Legal Requirements Before installation and/or use of this appliance please read these instructions carefully to ensure that all requirements are fully understood. Works must be carried out with care to meet the requirements of Health and Safety and comply with the Health and Safety rules, and any new regulations introduced during the lifetime of these instructions. Particular attention should be drawn to: —Handling: The appliance is heavy.
Technical Appendix - Flues 1. Flue or Chimney 1.1 The flue or chimney system must be in good condition. It must be inspected by a competent person and passed for use with the appliance before installation. Products of combustion entering the room can cause serious health risks. 1.2 The following must be checked: — The construction of the masonry chimneys, flue block chimneys and connecting flue pipe system must meet the requirements of the Building Regulations†.
Ventilation - Technical Appendix 2. Ventilation 2.1 Many older buildings are sufficiently ventilated by natural leakage of air to provide suitable air supply for an appliance of 5kW output or less. Modern building techniques have reduced the amount of air that leaks in or out of a house. A modern construction with an air tightness of less than 5m3 per hour per m2 requires an air vent for ALL solid fuel appliances including those with a rated heat output of less than 5kW.
Technical Appendix 4. Fitting Appliances On A Boat 4.1 If an appliance is to be fitted in a boat it must be done in accordance with the latest edition of BS 8511 (Code of Practice for the Installation of Solid Fuel Heating Appliances on Boats).
Basic Spare Parts TYPICAL WOOD APPLIANCE Ref No.
Basic Spare Parts EXMOOR DOOR Ref No. 1 Description STANDARD GLASS CLIP 2 DOOR GLASS 3 GLASS ROPE 4 DOOR ROPE 5 SPRING 6 SPIROL PIN 7 SINGLE DOOR KNOB 8 DOOR CASTING 9 PRIMARY AIR SPINNER 10 SINGLE DOOR SHAFT 11 DOOR SPINDLE CATCH BLOCK ASSEMBLY EXE, DEVON, COUNTY SINGLE DOOR Ref No.
Basic Spare Parts EXE, DEVON, COUNTY DOUBLE DOOR Ref No.
COUNTY MULTI-FUEL KIT Ref No. 1 2 3 4 Description LOG GUARD - MF MAIN GRATE STATIC BACK MAIN GRATE STATIC FRONT ASHPAN ASSEMBLY Due to continual technical improvements please check online at www.yeoman-stoves.co.uk for the most up to date parts lists.
Service Records 1ST SERVICE 2ND SERVICE Date of Service:................................................................. Date of Service:................................................................. Next Service Due:............................................................ Next Service Due:............................................................ Signed:............................................................................. Signed:.....................................................
HETAS Approval These appliances have been approved by HETAS as an intermittent operating appliance for burning dry seasoned wood logs and anthracite or manufactured briquette smokeless fuels. Recommended Fuels Please note that HETAS Appliance Approval only covers the use of dry seasoned wood logs and anthracite or manufactured briquette smokeless fuels on these appliances.