OPTIVIEWTM REMOTE CONTROL CENTER INSTALLATION, OPERATION & SERVICE New Release Form 50.
IMPORTANT! READ BEFORE PROCEEDING! GENERAL SAFETY GUIDELINES This equipment is a relatively complicated apparatus. During installation, operation, maintenance or service, individuals may be exposed to certain components or conditions including, but not limited to: refrigerants, oils, materials under pressure, rotating components, and both high and low voltage. Each of these items has the potential, if misused or handled improperly, to cause bodily injury or death.
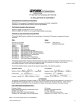
FORM 50.40-OM2 CHANGEABILITY OF THIS DOCUMENT In complying with YORK’s policy for continuous product improvement, the information contained in this document is subject to change without notice. While YORK makes no commitment to update or provide current information automatically to the manual owner, that information, if applicable, can be obtained by contacting the nearest YORK Applied Systems Service office.
TABLE OF CONTENTS SECTION 1 PRODUCT DESCRIPTION ....................................................................... 8 Chiller/Condensing Control Panel(s) .......................................................... 9 SECTION 2 INSTALLATION........................................................................................ 10 Mounting .................................................................................................. 10 Installation Checklist ........................................
FORM 50.40-OM2 System Architecture.................................................................................. 66 Microboard................................................................................................ 68 Microboard Program Jumpers .................................................................. 76 Microboard Program Switches ................................................................. 78 Liquid Crystal Display.................................................................
LIST OF FIGURES FIG. 1 – EU DECLARATION OF CONFORMITY ............... 7 FIG. 31 – MICROBOARD ................................................... 73 FIG. 2 – FIELD WIRING ................................................... 12 FIG. 32 – FLASH MEMORY CARD.................................... 74 FIG. 3 – CONTROL INSTALLATION ................................ 16 FIG. 33 – BLOCK DIAGRAM, MICROBOARD .................. 75 FIG. 4 – GROUNDING ..................................................... 16 FIG.
FORM 50.40-OM2 FIG.
Product Description SECTION 1 – PRODUCT DESCRIPTION The YORK OptiView Remote Control Center is a microprocessor based control system capable of remotely monitoring certain chillers and condensing units. It can monitor and individually control 1 to 8 of these chiller/condensing units. 1. Start Command The panel comes configured with a full screen color LCD Graphic Display mounted in the middle of a keypad interface. The graphic display allows the presentation of the current information all at once.
FORM 50.40-OM2 CHILLER/CONDENSING CONTROL PANEL(S) All communication with the chiller/condensing units will occur over a single RS-485 port. Reference Figure 2 and the Installation instructions. When the OptiView RCC is first turned on it will initialize by requesting current data and history buffer information from the units connected. After the history buffers are filled, only current data will be continuously requested. Every eight hours the OptiView RCC will reinitialize.
Installation SECTION 2 – INSTALLATION MOUNTING Mount the Remote Control Center at a level that provides for easy viewing of the color graphic display by all users. Securely mount it at the desired location. The panel may be mounted away from the chiller as far as 4000 ft. (1219 m.) of wiring will allow.
FORM 50.40-OM2 REQUIRED SOFTWARE VERSION OF THE CHILLER / CONDENSING UNIT EPROMS TABLE 1 – REQUIRED SOFTWARE VERSION OF THE CHILLER/CONDENSING UNIT EPROMS UNIT TYPE YCAL / YCUL w/microboard 031-01314-000 YCAL / YCUL w/microboard 031-02050-000 YCAS - F 2 Compressors YCAS - F 3 & 4 Compressors YCAR 2 Compressors EPROM PART NO. 031-02011-001 031-02049-001 031-01798-001 031-01798-002 031-02013-001 VERSION C.MMC.01.05 C.MMC.03.02 C.ACS.09.03 C.ACS.10.02 C.RCP.23.
Installation OPTIVIEW REMOTE CONTROL CENTER A Transient Voltage Suppressor (031-02076-000) (Factory Installed) A A Tie Wrap (To help keep wires connected) Ferrite (025-35154-000) (FCC & CE Requirement) LD06725 FIG.
FORM 50.40-OM2 RED BLK SHLD (COMPONENT SIDE UP) WHT (TOTAL NOT TO EXCEED 8) 2 RED BLK SHLD X CUT PINS X AS SHORT AS POSSIBLE (COMPONENT SIDE DOWN) WHT RED BLK SHLD X CUT PINS AS SHORT X AS POSSIBLE (COMPONENT SIDE DOWN) WHT FROM OPTIVIEW RCC LD06726 FIG. 2 – FIELD WIRING OPTIVIEW RCC PANEL (CONT.
Installation LAN TRANSIENT INSTALLATION EPROM COMPATIBILITY The properly installed Lan Transient Protection Module, (part number 031-01586-000) will limit the voltage levels seen by the chiller control panel’s RS-485 driver while allowing normal RS-485 network operation under non-transient conditions. For installation of the module refer to Fig. 2 and the specific installation instructions for the microboard.
FORM 50.40-OM2 There can be electrical circuitry that presents an electrocution hazard. Be sure that the sources of all power supplies have been properly isolated and secured before attempting any service related activities. External wiring, unless specified as an optional connection in the manufacturer’s product line, is not to be connected inside the OptiView Remote Control Center cabinet.
Installation equipment in the plant on the same circuits will ground themselves to the ground stake causing large ground flow at the electronic equipment. LD06728 FIG 4 – GROUNDING Wiring Practices (Figure 5) LD06727 FIG. 3 – CONTROL INSTALLATION Grounding Grounding is the most important factor for successful operation. Electronic equipment reacts to very small currents and must have a good ground in order to operate properly.
FORM 50.40-OM2 Never run refrigerant, water or brine tubing inside an electronic control panel. A leak could damage or in some cases totally destroy the electronics. If the electronic control panel has a starter built into the same panel, be sure to run the higher voltage wires where indicated by the manufacturer. EMI from the wires can interfere with the electronics if run too close to the circuitry. LD06738 FIG.
Operation SECTION 3 – OPERATION OPTIVIEW REMOTE CONTROL CENTER FIG. 7 The OptiView Remote Control Center display is highlighted by a full screen graphics display. This display is nested within a standard keypad, and is surrounded by “soft” keys which are redefined based on the currently displayed screen. Eight buttons are available on the right side of the panel, and are primarily used for navigation between the system screens. At the base of the display are 5 additional buttons.
FORM 50.40-OM2 SCREEN DESCRIPTIONS AND USAGE OVERVIEW The new graphical display on each control panel allows a wide variety of information to be presented to the user. Each screen description in this document will begin with a section entitled Overview which will describe the graphical elements on the screen and give a short summary of the functions available. Each element on the screen will then be categorized into three distinct groups: Display Only, Programmable, and Navigation.
Operation move “forward” to a sub-screen of the present screen, or move “backward” to the previous screen. Except for the Home Screen display, the upper-right “soft” key will always return the user to the Home Screen. Navigating with “soft” keys is as simple as pressing the key next to the label containing the name of the desired screen. The system will immediately refresh the display with the graphics for that screen. Following is a layout of all the screens and how they are connected.
FORM 50.
Operation HOME SCREEN FIG. 9 – HOME SCREEN - EXAMPLE OVERVIEW When the OptiView Remote Control Center is powered on, the above default display appears. This screen gives a general overview of the operating status of each unit connected to the OptiView Remote Control Center. The data and control of an individual unit is accessed from the Home Screen display. Fig. 9 is an example that shows eight units were programmed.
FORM 50.40-OM2 is displayed, the unit’s button will be enabled allowing it to be selected. • Running / Faulted will be displayed when at least one system on the unit is running and at least one system is faulted. While this message is displayed, the unit’s button will be enabled allowing it to be selected. • Cannot Run will be displayed for any non-fault condition preventing the entire chiller from running.
Operation UNIT SCREEN - EXAMPLES FIG. 10A – YCAL CHILLER FIG.
FORM 50.40-OM2 UNIT SCREEN - EXAMPLES 3 FIG. 10C – YCAS CHILLER 00571VIPC 00572VIPC FIG.
UNIT SCREEN - EXAMPLES FIG.
FORM 50.40-OM2 UNIT SCREEN OVERVIEW This screen is accessed from the Home Screen. The primary values of the chiller or condensing unit which must be monitored and controlled are shown on this screen. The data available depends on the type of unit. This screen display depicts a visual representation of the unit itself. Animation indicates chilled liquid flow and condenser fans running. DISPLAY ONLY Systems Statuses Displays the individual refrigerant systems operational statuses.
Operation This page intentionally left blank.
FORM 50.40-OM2 SYSTEMS SCREEN - EXAMPLES 3 FIG. 11A – YCAL CHILLER FIG.
Operation SYSTEMS SCREEN - EXAMPLES FIG. 11C – YCAS CHILLER 00507VIPC FIG.
SYSTEMS SCREEN OVERVIEW This screen is accessed from the Unit Screen. A chiller can consist of separate refrigerant circuits. Each refrigerant circuit is referred to as a system. This screen shows system specific information for each of the unit’s refrigerant systems. This information can vary according to the type of chiller. Reference the chiller’s Installation, Operation, Maintenance Manual (IOM) for details. DISPLAY ONLY System Status Displays this refrigerant systems operational status.
Operation INDIVIDUAL SYSTEM SCREEN 32 FIG. 12A – YCAS CHILLER 00509VIPC FIG.
FORM 50.40-OM2 OVERVIEW This screen is accessible from the SYSTEM screen when there is much data to view about an individual system. It displays data only from the selected system. Reference the chiller’s Installation, Operation, Maintenance Manual (IOM) for details about the data.
Operation HOURS AND STARTS SCREEN 34 FIG. 13A – YCAL CHILLER 00511VIPC FIG.
FORM 50.40-OM2 OVERVIEW PROGRAMMABLE This screen, accessed from the UNIT screen, displays the total operating hours and the total number of starts for all systems on the unit. None DISPLAY ONLY Home Causes an instant return to the Home Screen. Total Starts Displays the number of times the compressor has been started. Unit Data Causes an instant return to the Unit Screen. NAVIGATION Operating Hours Displays the number of hours the compressor has run.
Operation OPTIONS SCREEN 36 FIG. 14A – YCAL CHILLER 00513VIPC FIG.
FORM 50.40-OM2 OVERVIEW This screen, accessed from the UNIT screen, displays all the dip switch settings and other programmable options at the chiller micro panel. These items can only be changed at the chiller micro panel and not at the OptiView Control Center. Depending on the type of chiller, the following data might be displayed: DISPLAY ONLY Units Display Mode The units selected at the OptiView Remote Control Center, either Imperial or SI, is displayed.
Operation TRENDING SCREEN 00574VIPC FIG. 15 TRENDING OVERVIEW This screen is accessed from the UNIT screen. As many as six Operator selected parameters can be plotted in an X/Y graph format. The X-Axis is scaled per the selected Data Collection Interval and displayed in a time of day or elapsed time format, as selected with the X-axis toggle key. The Y-Axis is scaled for each parameter per the selected minimum and maximum value for each parameter.
FORM 50.40-OM2 A red screen with the words “TREND MAX MUST BE > TREND MIN” will appear if the Y-Axis minimum has been programmed to a value that is greater than the Y-Axis maximum for any parameter. If this appears, proceed to the Trend Setup Screen to change the values. PROGRAMMABLE Start Pressing this key clears the graph, starts a new graph and begins the trending. The trending will continue until the STOP key is pressed, the Home screen is displayed, or a power failure occurs.
Operation TREND SETUP SCREEN FIG. 16 TREND SETUP OVERVIEW This screen is accessed from the Trending screen. This screen is used to configure the trending screen. The parameters to be trended are selected from the Common Slots Screen or Common Slots Master list and entered as Slot Numbers for Data Points 1 through 6. The Y-Axis minimum and maximum values for each parameter are entered as Data Point Min and Data Point Max for Data Points 1 through 6.
FORM 50.40-OM2 Select This key is used to enter the slot numbers and the minimum and maximum Y-Axis values of each parameter to be trended. Pressing this key places a yellow box around Data Point 1 Slot Number. Use the ▲ and ▼ navigation keys to place the box around the value of Data Points 1 through 6 to be changed. With the desired value selected, press the ‘4’ (Enter) key. A dialog box is displayed permitting data entry.
This page intentionally left blank.
FORM 50.40-OM2 This page intentionally left blank.
Operation SETPOINTS SCREEN - EXAMPLES 44 FIG. 17A – YCAL CHILLER 00515VIPC FIG.
FORM 50.40-OM2 FIG.
Operation SETPOINTS SCREEN OVERVIEW This screen, accessed from the Unit screen, provides a convenient location for programming the most common setpoints involved in the chiller/condensing unit control. The setpoints depend on the type of unit. Values on this screen are only programmable if the chiller/condensing unit is in remote control mode. These values are only viewable if the unit is in local mode.
FORM 50.40-OM2 HISTORY SCREEN 3 FIG. 18 00518VIPC OVERVIEW PROGRAMMABLE This screen allows the user to browse through the faults. In order to get a more thorough reporting of the system conditions at the time of the recorded shutdown, move to the sub-screen HISTORY DETAILS. Print History This generates a report listing the status of the chiller parameters at the time of the selected shutdown. The user may use the Select Fault button to select the history to view.
Operation HISTORY DETAILS SCREEN FIG. 19 00519VIPC OVERVIEW NAVIGATION This screen allows the user to see an on-screen printout of all the system parameters at the time of the selected shutdown. Not all screens are shown above. The number of screens required to display all of the data varies according to the type of unit selected. Home Causes an instant return to the Home Screen. DISPLAY ONLY History Causes a return to the History Screen.
FORM 50.40-OM2 RCC SETPOINTS SCREEN 3 FIG. 20 00520VIPC OVERVIEW NAVIGATION This screen is accessed from the Home Screen. This screen shows configuration parameters for this OptiView Remote Control Center. This screen also serves as a gateway to more sub-screens for defining general system parameters. Home Causes an instant return to the Home Screen. DISPLAY ONLY None Setup This screen provides a single location to program the general system setup parameters such as Date/Time.
Operation RCC SETUP SCREEN FIG. 21 OVERVIEW This screen is accessed from the RCC Setpoint Screen. This screen shows the general configuration parameters for this OptiView Remote Control Center. It allows programming of the time and date, along with specifications as to how the time will be displayed (12 or 24 hour format). This time is used for display purposes on the OptiView Remote Control Center. It is not used to reset individual chiller clocks and has no effect on individual chiller schedules.
FORM 50.40-OM2 Units Define the unit system (Imperial or SI) used by the OptiView RCC display. This selection has no effect on the chiller/condensing unit micro panel. NAVIGATION Home Causes an instant return to the Home Screen. Setpoints Causes a return to the Setpoints Screen. Comms Moves to the sub-screen allowing configuration of system communications. Printer Moves to the sub-screen allowing configuration and control of printer functions.
Operation COMMS SCREEN FIG. 22 00522VIPC OVERVIEW PROGRAMMABLE This screen is accessed from the RCC Setup Screen. This screen allows definition of the necessary communications parameters. Refer to PRINTER Section of this book for details of the Printer connections and setup. RCC Poll Time (5-30 sec.) Define the poll time (how frequently) this panel requests for data from another panel through the Com3 port. DISPLAY ONLY Home Causes an instant return to the Home Screen.
FORM 50.40-OM2 PRINTER SCREEN 3 FIG. 23 OVERVIEW This screen is accessed from the RCC Setup Screen. This screen allows definition of the necessary communications parameters for the printer. Refer to PRINTER section of this book for details of the Printer connections and setup. DISPLAY ONLY None. PROGRAMMABLE Automatic Printer Logging (Enabled / Disabled) Enable the printer to begin printing status reports beginning at the programmed start time and recurring at the interval defined above.
Operation DIAGNOSTICS SCREEN FIG. 24 00524VIPC OVERVIEW PROGRAMMABLE This screen is accessed from the RCC Setup Screen. This screen provides a view of what software is in use and provides access to a screen for troubleshooting analog and digital inputs. None DISPLAY ONLY Home Causes an instant return to the Home Screen.
FORM 50.40-OM2 DIAGNOSTICS I/O SCREEN OVERVIEW This screen is accessed from the Diagnostics Screen. This screen provides a view of the analog and digital inputs for troubleshooting . DISPLAY ONLY Diagnostics is used to analyze the Analog Inputs at the Microboard. The voltage level of each Analog Input, as interpreted by the Microboard, is displayed. “Counts” is an Analog-to-Digital (A/D) converter value and is for manufacturing and engineering use only.
Operation DIAGNOSTICS RCC COMMS SCREEN 00526VIPC FIG. 26 OVERVIEW DISPLAY ONLY This screen is accessed from the Diagnostics Screen. This screen provides a view of communication for troubleshooting . Unit Type Displays the chiller type, whether it is a “Screw”, “Recip”, or Scroll” and the number of compressors for the “Unit x”, where x is the number of the unit.
FORM 50.40-OM2 Timeout Count A count of each poll request through the Com3 port to a chiller/condenser control panel that did not get a reply within the timeout period (time to wait for a reply). PROGRAMMABLE NAVIGATION Home Causes an instant return to the Home Screen. Diagnostics Causes a return to the previous screen. Clear Counters Resets all the counts to zero.
Operation DISPLAY MESSAGES A title bar will be displayed on all screens. This title bar will contain the OptiView Remote Control Center date and time on all RCC screens. This title bar will contain the Chiller/Condensing unit’s date and time on all unit screens. On the Home Screen the message will read “YORK REMOTE CONTROL CENTER”. On all other screens it will contain the unit selected and either the chiller type or will be based on the number of compressors of that unit.
FORM 50.40-OM2 SECTION 4 – PRINTERS 23887A OKIDATA MICROLINE 184 4 23889A WEIGH-TRONIX 00085VIP SEIKO DPU-414 FIG.
Printers PRINTERS A printer can be connected to the OptiView Remote Control Center’s Microboard to print the following reports. The screen from which each report can be generated is listed in parenthesis. • Operating Data - Present system parameters (Unit) • History - System parameters at the time of the last fault while running and last saved faults (History) The printer can be permanently connected to the Remote Control Center or connected as required to produce a report.
FORM 50.40-OM2 • SEIKO Microboard J2-4 J2-2 J2-9 Cabinet Printer pin 3 pin 8 pin 5 Function Tx (data to printer) DSR (busy signal from printer) Gnd shield Hardware required: Cable – #18 AWG stranded 50ft. maximum length. Connectors – - Microboard: None. Strip 1/4" insulation from wire and insert into screw terminal block. - Printers: Okidata - 25 pin plug DB-25P or equivalent; Shell DB-C2-J9 or equivalent. Weigh-Tronix - Same as Okidata. Cable assembly available from Weigh-Tronix.
Printers DipSW 2-1= on 2-2 = on 2-3 = on 2-4 = off 2-5 = on 2-6 = on 2-7 = on 2-8 = off DipSW 3-1= on 3-2 = on 3-3 = on 3-4 = on 3-5 = on 3-6 = off 3-7 = on 3-8 = off Printing Columns - 40 User Font Back-up - on Character Select - normal Zero - slash International character set American International character set American International character set American International character set American Data length - 8 bits Parity Setting - no Parity condition - odd Busy control - H/W busy Baud rate select - 1200
FORM 50.
Printers The history printout is similar to the operational data printout shown previously. The differences are in the header and the schedule information. The daily schedule is not printed for a history print. One example history buffer header printout is shown following. The data part of the printout will be exactly the same as the operating data printout.
FORM 50.40-OM2 SECTION 5 – SERVICE INTRODUCTION This document explains the operation of the printed circuit boards and major components of the OptiView Remote Control Center to a level that allows a Service Technician to troubleshoot and locate the source of a problem. The overall system architecture is described and illustrated with block diagrams. This describes the general function of each component and provides the system interface and signal flow.
Service SYSTEM ARCHITECTURE (REFER TO FIG. 28) The OptiView Remote Control Center (RCC) performs the following functions: • Displays chiller operating conditions, alarms, shutdown messages and history data. • Accepts operator-programmed setpoints. • Provides chiller operating data and status to remote devices via serial communications. • Allows real-time data and history data to be printed on an optional printer.
YORK INTERNATIONAL FIG. 30 – CONTROL CENTER LIQUID CRYSTAL DISPLAY LAMP KEYPAD DISPLAY INTERFACE BOARD BACKLIGHT INVERTER BOARD COLUMN OUT ROW IN DISPLAY DATA LAMP CONTROL MICRO BOARD LD06742 +12 / +5 VDC RS-232 / RS-485 SERIAL DATA POWER SUPPLY FORM 50.
Service MICROBOARD (REFER TO FIG. 31 - 36) The Microboard contains the operating software (Program), microprocessor (Micro), and supporting circuits for the Micro. The Program is a set of instructions to control remote chillers and the display. It also contains the Display messages and screens. It is stored in a memory device called a flash memory card. This is a type of nonvolatile memory that can be read from or written to, but requires the locations to be erased before they are written to.
FORM 50.40-OM2 The DRAM (dynamic random access memory) is a non battery-backed memory device. The Micro stores data here temporarily for further processing. Data in this device is lost during power failures. DRAM differs from RAM in that DRAM must be periodically refreshed in circuit. The BIOS EPROM (basic input/output system erasable programmable read only memory) is a memory device that contains the bootstrap or power-up program. It is located in socket location U45. This EPROM is replaceable.
Service The BRAM (battery backed random access memory) is a memory device that contains a battery that preserves the data during power failures. It is a replaceable part. Refer to the YORK Renewal Parts List. It is located in socket location U52. The Micro stores the setpoints programmed by the Operator or Service Technician, History Data and other data that requires preservation, in this device. Also, the day of week, time of day and calendar date time-keeping are done here.
FORM 50.40-OM2 COM 1 is connected directly to the Micro. COM 2 through 5 are connected directly to the UART (Universal Asynchronous Receive Transmit). The UART converts the parallel data to serial form for transmission to the peripheral device and converts the incoming serial data to parallel form for use by the Micro. It also generates and processes control signals for the Modem communications (DTR, CTS, DSR, RTS).
Service Program Jumper JP5) to high voltage AC (500 to 1500VAC). This high voltage AC is applied to the lamp to cause it to illuminate. The Backlight is turned on and off with the “Enable Backlight” (J6-5) signal. The position of Program Jumper JP4 determines whether this is a +12VDC or +5VDC signal. In some displays, the Backlight turns on when this signal transitions from low to high; others turn on when it transitions from high to low.
FORM 50.40-OM2 BIOS EPROM BRAM RS485 Driver RS485 Driver FLASH MEMORY CARD 5 LD06743 FIG.
Service MEMORY CARD SOCKET MEMORY CARD TOP SURFACE ELASTOMERIC CONNECTOR R AUGAT R LD06745 PRESS DOWN TO RELEASE CARD MEMORY CARD RETAINER CLIP TOP SURFACE LD06744 MEMORY CARD - BOTTOM SURFACE WRITE PROTECT SWITCH (OPTIONAL) (MUST BE IN "ENABLED POSITION") PAD 60 PAD 31 PAD 30 PAD 1 VCC 3V/5V KEY ALIGNMENT NOTCH CINS GND LD06746 MEMORY CARD - SIDE VIEW WRITE ENABLED WRITE DISABLED LD06747 FIG.
FIG. 33 – MICROBOARD YORK INTERNATIONAL FROM POWER SUPPLY +5VDC REF LVG CHILLED WATER TEMP ANALOG INPUTS GND + 5VDC + 12VDC R25 MUX MUX VOLTAGE REG TP3 VOLTAGE REG Y Y PROGRAM SWITCHES WATCHDOG Y TP1 + 3.
Service TABLE 2 – MICROBOARD PROGRAM JUMPERS MICROBOARD PROGRAM JUMPERS JP1 - Watchdog enable/disable. The position of this jumper, in conjunction with Program switch SW 1 position 12 enables or disables the program Watchdog protection. Never disable the watchdog protection. Severe compressor or chiller damage could result. The ability to disable the watchdog protection is provided for factory testing only!!! IN - Watchdog protection enabled.
FORM 50.40-OM2 JP27 - COM 4 serial communications port. Configures COM 4 port to be either RS-485 for Multi-Unit Communications (COM 4A) or RS-232 for MicroGateway board (COM4B). Pins 1-2: Enables port 4A. Allows an RS-485 connection to Microboard J11 for MultiUnit Communications. Pins 2-3: Enables port 4B. Allows an RS-232 connection to Microboard J2 for MicroGateway communications. JP28 - PC-104 Port interrupt assignment. Assigns selected PC-104 interrupt request to PDRQ7 on the microprocessor.
Service TABLE 3 – MICROBOARD PROGRAM SWITCHES 5 - 11 Not Used SW1 1- Simulator mode - When this switch is closed or in the ON position, the RCC simulates the data from 4 chillers and will not communicate with any attached units. ON: Simulator mode enabled. Used for demonstration. 12 - Watchdog Protection -Used in conjunction with Program Jumper JP1 (see above) to enable/disable the program watchdog protection. With JP1 IN, this switch setting has no effect.
FORM 50.
Service J7 NOT USED 0 10 VDC 4 - 20 MA 2 13 0-10 VDC 4 - 20 MA 2 14 1 NOT USED 71.5 K +5V 3 7.5 K 1 47K JP21 200 4 16 15 +5V 2 1 3 JP22 3 MUX J22 NOT USED NOT USED 0-10 VDC / 2-10 VDC 1 0 - 20 MA / 4 - 20 MA 2 0-10 VDC / 2-10 VDC 3 0 - 20 MA / 4 - 20 MA 4 2 1 3 JP23 2 1 3 JP24 LD04636 NOTE: 1. Program Jumpers JP21 – JP24 must be positioned on pins 1-2 or 3-4 according to input signal type. Refer to Table 2. FIG.
FORM 50.40-OM2 LIQUID CRYSTAL DISPLAY (REFER TO FIG. 37 - 42) A 10.4 inch color Liquid Crystal Display, along with supporting components Display Interface Board and Backlight Inverter Board are mounted on a plate that is attached to the OptiView Control Center door. A clear plexiglass faceplate prevents display surface damage. System operating parameters are displayed on various color graphic screens. The various display screens are selected for display using the Keypad keys.
Service to the next HSYNC pulse. All YORK applications operate in the DISPLAY ENABLE mode. The state of the ENABLE (Display Interface Board J1-27) signal from the Microboard places the Display in the desired mode as follows: • LG SEMICON Display does not have the fixed mode feature. As described above, in OptiView Control Center applications, the Display scan is left to right, beginning with the top row and continuing sequentially through the rows to the last row.
FORM 50.40-OM2 Display mounting plate lists the YORK part numbers of the Display supporting components mounted on the Display mounting plate and the required Microboard Program Jumper (JP2 through 8) configurations. Microboard Program Jumpers JP2 - JP8 will have to be configured appropriately for the replacement display. Refer to Table 2 “Program Jumpers”. Display Handling: 1. The display is made of glass. It could break if dropped. 2. The display front surface is easily scratched.
Service LD06751 FIG. 37 – DISPLAY, MOUNTING 480 ROWS 16MS VSYNC 31US HSYNC ROW 1 BP ENABLE 39.72 NS CLK (25.18 MHz) 640 COLUMNS DISPLAY PERIOD ROW 2 ROW 480 DISPLAY PERIOD DISPLAY PERIOD FP 640 CLKS NOTES: 1. BP = Back Porch = 4-48 CLKS 2. FP = Front Porch = 2-16 CLKS RGB LD04066 FIG.
FORM 50.40-OM2 BACKLIGHT BULB 025-34564-000 LABEL LIQUID CRYSTAL DISPLAY LG SEMICON LP104V2 DISPLAY INTERFACE BOARD 031-01765-001 MOUNTING PLATE 331-02053-000 031-01789-000 031-02054-001 025-34564-000 031-01765-001 035-17813-002 BACKLIGHT INVERTER BOARD 031-01789-000 INVERTER CABLE 031-02054-001 DISPLAY CABLE 031-02055-000 NOTE: LD06752 1. Configure Microboard Program Jumpers per label. FIG.
Service BEZEL LAMP HOLDER PROTRUSION WIRE (white/GND side) HOLE LOCKING TAB WIRE (pink/HOT side) DIRECTION A DIRECTION B DIRECTION C LD04067 FIG. 41 – DISPLAY (SHARP LQ10D367) LAMP REPLACEMENT BEZEL LAMP HOLDER WIRE (white/GND side) RETAINING SCREW WIRE (pink/HOT side) DIRECTION B LD06754 DIRECTION C FIG.
FORM 50.40-OM2 DISPLAY INTERFACE BOARD (REFER TO FIG. 43) The Display Interface Board is located on the Liquid Crystal Display mounting plate and is part of the Microboard interface to the Display. It permits the use of Displays by different manufacturers, by providing the Microboard with a means of automatically determining which Display is present.
031-01765-002 SHARP LQ10D367 031-01765-001 - - OUT IN OUT IN PID2, 3 P30, 31 OUT P30, P31 PID1 OUT PID1-3 PID0 IN PID0 LG SEMICON LP104V2 LD04070 Service FIG.
FORM 50.40-OM2 DISPLAY BACKLIGHT INVERTER BOARD (REFER TO FIG. 44) The Display Backlight Inverter Board generates a high voltage AC signal that is applied to the backlight lamp, causing it to illuminate. The magnitude of the signal determines the lamp brightness. Displays by some manufacturers have two lamps; one at the top and one at the bottom of the display. Other Display manufacturers have only a lamp at the top of the display.
Service RETURN BACKLIGHT LAMP DISPLAY BACKLIGHT INVERTER BOARD N.C. 500 - 1400 VAC 3 2 1 NOTES: 1. OFF = 0VDC; ON = +5VDC. Refer to Microboard Program Jumpers JP3 & JP4 in Table 2. CN2 2. 0 - +3.0VDC. 0VDC = MAX (100%) Brightness; +3.0VDC = MIN (0%) Brightness. Refer to Fig. 34 and Microboard Jumpers JP7 & JP8. INVERTER BOARD 3. Refer to Microboard Program Jumper JP5. 4. N.C. = No Connection.
FORM 50.40-OM2 KEYPAD (REFER TO FIGURES 45 & 46) The Keypad contains touch-sensitive keys that allow the Operator to interface with the Control Center. The Operator presses the keys to request the desired screens of information and enter System Setpoints. The top layer of the Keypad contains embossed areas identifying the keys. Under each embossed key area are two conductors, one on top of the other, separated by an air space.
Service LD06756 FIG.
FORM 50.40-OM2 LD04075 5 FIG.
Service POWER SUPPLY (REFER TO FIG 47) The Power Supply provides the DC power for the LCD Display and all the printed circuit boards in the Control Center. It receives a 100 to 250VAC input from an external power source and provides the following DC outputs: • +12VDC • +5VDC • Ground The +12VDC, Gnd and +5VDC outputs are applied to the Microboard. There, these voltages are applied to the circuits requiring the respective voltage.
YORK INTERNATIONAL +5VDC GND MICRO BOARD GND +V (NOTE 2) GND VDD (NOTE 1) GND +12VDC LD06757 DISPLAY BACKLIGHT INVERTER BOARD LCD DISPLAY MICROGATEWAY ALL TRANSDUCERS & THERMISTORS FIG. 47 – POWER SUPPLY – DC POWER DISTRIBUTION (REFER TO CONTROL CENTER WIRING DIAGRAM FOR WIRE CONNECTIONS) 2. +12 or +5VDC as determined by Microboard Program Jumper JP5 & display requirements. 1. +5 or +3.3VDC as determined by Microboard Program Jumper JP2 & display requirements.
Service OFFLINE DIAGNOSTICS & TROUBLESHOOTING (REFER TO FIG 48 & 49) The problems that could be encountered in the Control Center are in the following categories: • Keypad • Display • Serial Input/Output (I/O) • Digital Input/Output (I/O) • Analog Inputs There is a Diagnostic and associated Troubleshooting procedure for each category. They are described on the following pages. The offline diagnostics are accessed from the Diagnostics Main Screen, which is entered using the procedure below.
FORM 50.40-OM2 MAIN DIAGNOSTICS SCREEN FIG. 48 00527VIPC Each of the Offline Diagnostics is accessed from this screen. Press the appropriate key to select the desired diagnostic. After each diagnostic is performed, return to this MAIN Screen, from which the next diagnostic can be selected. Some of the diagnostics have sub-screens that are accessed from the selected diagnostic screen.
Service KEYPAD TEST FIG. 49 This diagnostic is used to verify Keypad operation and the Microboard’s ability to respond to a pressed key. Refer to description of Keypad operation in Section 5 of this book. Procedure 1. Press each keypad key. As the key is pressed, an illuminated LED is displayed corresponding to the key location on the keypad. 2. Press the DIAGNOSTICS key to return to the MAIN DIAGNOSTICS Screen.
FORM 50.40-OM2 DISPLAY TEST 00528VIPC FIG. 50 Each of the Display Diagnostics is accessed from this screen. After each diagnostic is performed, return to this screen, from which the next diagnostic can be selected. Refer to description of Display operation in Section 5 of this book. PROCEDURE 1. Press the appropriate keypad key to perform the desired test from the list below. 2.
Service BIT PATTERNS TEST SCREEN 00529VIPC FIG. 51 TROUBLESHOOTING If any of the above tests do not perform correctly as described above, perform the applicable procedure below: Test Failed: Bit Patterns - If the vertical bars are not straight or if the red border is not completely visible, either the Microboard Program Jumpers are not configured correctly or for the installed Display or the Microboard is defective.
FORM 50.40-OM2 SERIAL INPUTS / OUTPUTS TESTS 00530VIPC FIG. 52 This diagnostic is used to verify correct operation of the Serial Data Ports. There is a test for each of the five Serial Data Ports. Each RS-232 port (COM 1, 2 and 4b) is tested by transmitting serial test data from outputs to inputs of each port. Both the transmit and receive functions as well as the control lines are tested. The RS-485 ports (COM 3 and 4a) are tested by transmitting serial test data from one RS-485 port to another.
Service displayed, indicating the Serial Port is defective. A FAIL result would be indicative of a defective Microboard. The following is a description of each test. COM 1 – Two tests are performed. Test data is sent from TX (J2-4) to RX (J2-3) at 9600 Baud and DTR (J2-5) is set to a Logic High level and read at DSR (J2-2). If any test fails, COM 1 tests are terminated. COM 2 – Three tests are performed. Test data is sent from TX (J13-5) to RX (J13-3) at 19200 Baud.
FORM 50.40-OM2 DIGITAL INPUTS / OUTPUTS TESTS 00531VIPC FIG. 53 This diagnostic is used to analyze the digital inputs and outputs of the Microboard. 2. The state of each Microboard Program Jumper and Program DIP Switch, as interpreted by the Microboard, is depicted by an LED. If the Microboard interprets its input as being at a Logic Low (<1.0VDC) level, the LED is illuminated. If interpreted as being at a Logic High (>4.0VDC) level, the LED is extinguished. 3. PROCEDURE Digital Inputs: 1.
Service ANALOG INPUTS TESTS FIG. 54 00532VIPC This diagnostic is used to analyze the Analog Inputs to the Microboard. The voltage level of each Analog input, as interpreted by the Microboard, is displayed. The “Counts” listed for each parameter is the Analog-toDigital (A/D) converter value and is for manufacturing and engineering use only. The following is a list of the Analog inputs displayed. Channel 0Presently Not Used. 1Presently Not Used.
FORM 50.40-OM2 SYSTEM COMMISSIONING CHECKLIST Use the following checklist during commissioning to assure all Setpoints have been programmed to the desired value and all calibrations have been performed. The Setpoints are grouped under the Display Screen in which they appear. The indented screens are subscreens of the numbered screens and are accessed from the numbered screens.
Renewal Parts SECTION 6 – PART NUMBER AND RENEWAL PARTS TABLE 4 - PART NUMBER DESCRIPTION COMPLETE OPTIVIEW RCC PANEL PART NO. 371-02750-101 TABLE 5 - RENEWAL PARTS ITEM 1 2 3 4 5 6 7 8 9 10 11 12 13 14 15 16 17 18 19 20 21 22 23 DESCRIPTION MICROPROCESSOR BOARD (NOTE 2) POWER SUPPLY ASSY KEYPAD TERMINAL BLOCK DISPLAY KIT (NOTE 1) CABLE ASSY.
FORM 50.40-OM2 5 3 00533VIP FIG. 55 – FRONT OF OPTIVIEW REMOTE CONTROL CENTER 9 1 20 23 22 6 11 2 6 12 7 10 8 4 00534VIP FIG.
Renewal Parts 14 15 13 16 FIG.
FORM 50.40-OM2 21 LD06513 FIG.
Renewal Parts SI METRIC CONVERSION The following factors can be used to convert from English to the most common SI Metric values. MEASUREMENT CAPACITY POWER HORSEPOWER (hp) FLOW RATE LENGTH WEIGHT VELOCITY PRESSURE DROP MULTIPLY THIS ENGLISH VALUE TONS REFRIGERANT EFFECT (ton) KILOWATTS (kW) 0.7457 GALLONS/MINUTE (gpm) FEET (ft) INCHES (in.) POUNDS (lb.) FEET/SECOND (fps) FEET OF WATER (ft) POUNDS/SQ. INCH (psi) BY 3,516 NO CHANGE KILOWATTS (kW) 0.0631 304.8 25.4 0.4536 0.3048 2.989 6.
P.O. Box 1592, York, Pennsylvania USA 17405-1592 Copyright © by York International Corporation 2001 Form 50.40-OM2 (601) New Release Subject to change without notice.