E-II-YDEFS-YDCFS-0508 ENGLISH INSTALLATION MANUAL FLOOR STANDING TYPE INDOOR UNIT Exposed models: YDEFS-022C15B YDEFS-056C15B YDEFS-028C15B YDEFS-071C15B YDEFS-036C15B YDEFS-080C15B YDEFS-045C15B Concealed models: YDCFS-022C15B YDCFS-056C15B YDCFS-028C15B YDCFS-071C15B YDCFS-036C15B YDCFS-080C15B YDCFS-045C15B For correct installation, read this manual before starting installation. Only trained and qualified service personnel should install, repair or service air conditioning equipment.
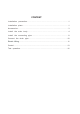
CONTENT Installation precaution...........................................................................1 Installation place ......................................................................................1 Accessories..................................................................................................3 Install the main body..........................................................................4 Install the connecting pipe..............................................................
INSTALLATION PRECAUTION To install properly, please read this manual at first. The air conditioner must be installed by qualified persons. When installing the indoor unit or its tubing, please follow this manual as strictly as possible. When all the installation work is finished, please turn on the power only after a thorough check. No further announcement if there is any change of this manual caused by product improvement.
Notes Before Installation 1. Select the correct carry-in path. 2. Move this unit as originally packaged as possible. 3. If the air conditioner is installed on a metal part of the building, it must be electrically insulated according to the relevant standards to electrical appliances. NOTE: Remark per EMC Directive 89/336/EEC For to prevent flicker impressions during the start of the compressor (technical process), following installation conditions apply. 1.
ACCESSORIES Name of Accessories Owner's manual Installation manual Pipe insulation material Signal receiver display board Mounting screw(ST3.9x12-C-H) Q'ty 1 1 2 1 4 Qutline Usage (This manual) Heat insulation Receive Signal 3 Mounting screw B ST2.9x10-C-H Remote controller & Its Frame 1. Remote controller..................1 1 Remote controller 2 Remote controller holder 2. Frame...................................1 Cautions on remote controller installation 3. Mounting screw (ST2.9x10-C-H)......
Install the main body The units may be mounted vertically ,provided that the correct clearances for positioning are maintained.(Refer to Chart 1 -3 ) Version Version Vertical unit with casing,with air intake from front and air outlet on top, for installation on a wall or on feet on the floor. Vertical unit with casing,with air intake from below and air outlet on top, for installation on a wall or on feet on the floor..
Version Installation For installation,follow the instructions set out below: Remove the external casing,unscrewing the screws which secure it to the structure,as following indicated.(Refer to Chart 4) Chart 4 Mark out the fixing points on the wall,either by marking through the drillings in the unit itself,or by referring to the measurements given in Table 2. Secure the unit by driving the four fixing screws into suitable masonry plugs.
The dimension of the unit Capacity(W) A(mm) B(mm) C(mm) 2200-2800W type 6.35 12.7 725 3600-4500W type 6.35 12.7 925 5600-8000W type 9.52 16 1225 Table 2 Version Installation For installation,follow the instructions set out below: Remove the external casing,unscrewing the screws which secure it to the structure.(Refer to Chart 7) Chart 7 Put the unit onto the feet, and fix it by screws.
Version Installation For installation,follow the instructions set out below: Mark out the fixing points on the wall,either by marking through the drillings in the unit itself,or by referring to the measurements given in Table 2. Secure the unit by driving the four fixing screws into suitable masonry plugs.(Refer to Chart 10) Chart 10 ATTENTION: The figures above are based on model with 2200-2800W type as rated capacity, which may differ from the unit you purchased.
INSTALL THE CONNECTING PIPE Do not let air, dust, or other impurities fall in the pipe system during the time of installation. The connecting pipe should not be installed until the indoor and outdoor units have been fixed already. Keep the connecting pipe dry, and do not let moisture in during installation. The Procedure of Connecting Pipes 1. Measure the necessary length of the connecting pipe, and make it by the following way. 1) Connect the indoor unit at first, then the outdoor unit.
Use the market brass pipe. Be sure to use the same insulating materials when you buy the brass pipe. (More than 9mm thick) Use frozen oil Bend the pipe with thumb Make the ends straight Min-radius 100mm Chart 11 Chart 12 Chart 13 2. Locate The Pipe 1) Drill a hole in the wall (suitable just for the size of the wall conduit, 90mm in general), then set on the fittings such as the wall conduit and its cover. 2) Bind the connecting pipe and the cables together tightly with binding tapes.
CONNECT THE DRAIN PIPE 1. Install indoor unit drain pipe The outlet has PTI screw bread, Please use sealing materials and pipe sheath (fitting) when connecting PVC pipes. CAUTIONS The drain pipe of indoor unit must be heat insulated, or it will condense dew, as well as the connections of the indoor unit. Hard PVC binder must be used for pipe connection, and make sure there is no leakage. With the connection part to the indoor unit, please be noted not to impose pressure on the side of indoor unit pipes.
ELECTRIC WIRING ! WARNING Specified power cables should be used. Do not apply any pressure on the terminals used to connect. Improper connection may cause fire. Grounding must be properly done. The grounding wire should be away from gas pipes, water pipes, telephone, lightening rods or other grounding wires. Improper grounding may cause electric shock. Electric Wiring must be done by professionals. Use a separate circuit according to national regulations.
The Specification of Power 2200-8000W type TYPE(W) 1-PHASE PHASE POWER 220-240V~ 50Hz FREQUENCY AND VOLT CIRCUIT BREAKER/FUSE (A) 5/3 2 INDOOR UNIT POWER WIRING(mm ) 2.0 2 INDOOR/OUTDOOR GROUND WIRING (mm ) CONNECTING 2 WEAK ELECTRIC WIRING ( mm ) SIGNAL 2.0 1.0 Table 3 Caution: A disconnection device having an air gap contact separation in all active conductors should be incorporated in the fixed wiring according to the National Wiring Regulation.
Indoor/Outdoor Unit Signal Wire Connect the wire according to their numbers. Wrong connection may cause malfunction . Wiring Connection Seal the wiring connection with the insulation material , or the condensing dew will be caused. Panel Wiring Connect the Swing Motor terminal block according to the Panel Installation Manual. Terminal Board Diagram Please refer to the indoor unit wiring diagram for the wiring. Note: The air-conditioners can connect with Central Control Monitor (CCM).
the the the the 1 2 SW1 ENC2 Model 3 Model 2 CD CD 1 ENC2 AB 8 67 9 Model 1 show Model 2 show Model 3 show Model 4 show AB CD AB CD AB 8 67 9 Model 1 8 67 9 2 SW1 address `0-F` respectively, that address `0-F` respectively, that address `0-F` respectively, that address `0-F` respectively, that EF 01 2345 1 ENC2 NUM_S ON EF 01 2345 2 NUM_S ON EF 01 2345 2345 1 SW1 NUM_S ON EF 01 8 67 9 NUM_S ON 2 SW1 ENC2 Model 4 is, `0-15` indoor unit; is, `16-31` indoor unit; is
Network address set Every air-conditioner in network has only one network address to distinguish each other. Address code of air-conditioner in LAN is set by code switch on Network Interface Module ( NIM ), and the set range is 0-63. Toggle switch set S1 DE BC BC 9A DE BC DE BC DE BC 78 BC 012 9A DE BC BC 78 DE 9A DE 9A 9A Contents F 32~47 48-63 78 78 No.
TEST OPERATION 1. The test operation must be carried out after the entire installation has been completed. 2. Please confirm the following points before the test operation: The indoor unit and outdoor unit are installed properly. Tubing and wiring are correctly completed. The refrigerant pipe system is leakage-checked. The drainage is unimpeded. The heating insulation works well. The ground wiring is connected correctly.
DE - COMMISSIONING DISMANTLING & DISPOSAL This product contains refrigerant under pressure, rotating parts, and electrical connections which may be a danger and cause injury! All work must only be carried out by competent persons using suitable protective clothing and safety precautions. Read the Manual Risk of electric shock Unit is remotely controlled and may start without warning 1. Isolate all sources of electrical supply to the unit including any control system supplies switched by the unit.