
Installation Guide


3
7. Assign an IP address to your Wireless LAN Compact Flash Card. You may either choose
to give a fixed IP address or have the Wireless LAN Compact Flash Card automatically
obtain an IP address from your DHCP server. Set the Proxy server, DNS, WINS if needed
(Most of IP addresses are automatically assigned.)
8. Reset your PDA (only for hand-held) to complete the installation.
Ø
Caveat
n When the Pocket PC is idle (not in use) without A/C power being present, it is highly
advised to remove the 11Mbps Wireless LAN CF Card in order to prevent from
complete battery drain.
n Due to WinCE's nature of the first application at power-on resuming to that at power-off,
if you are stuck at the utility program, you may use the PDA's (only for hand-held) reset
bottom to terminate it. And activate it again when needed.
n Sometimes, your wireless connection to AP may disconnect for any reason. You can
reset and force a connection request by going to utility program, then select
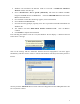
"
Configuration
", check parameters, then select "
Apply
" to force a re-scan.
n If your device roams to a new AP which is in a different subnet, you may need the
following two actions: (1) Unplug and re-insert the Wireless LAN Compact Flash Card,
or (2) Hard reset your device to force an execution of "release and renew" of an
re-assignment of IP address in a DHCP Access Point environment.
IV. Wireless LAN CF Card and Utility Installation under Windows XP/2000/NT/98/ME
Installation of the11Mbps Wireless LAN CF Card under Windows XP
1. If your PC has a compact flash type I slot, simply insert the Wireless LAN CF Card into the
CF slot. If not, use a CF/PCMCIA Adapter as described in the next procedure.
2. Firmly insert the 11Mbps Wireless LAN CF Card into the CF/PCMCIA Adapter, figured as
below. Then insert the 11Mbps Wireless LAN CF Card into the PCMCIA slot and start
Windows.
CF/PCMCIA Adapter CF Card