EN User Manual Oven KOB20722XK
Contents Safety information Safety instructions Product description Before first use Daily use Using the accessories 2 3 5 5 5 6 Additional functions Hints and tips Care and cleaning Troubleshooting Installation Energy efficiency 7 7 14 16 17 18 Subject to change without notice. Safety information Before the installation and use of the appliance, carefully read the supplied instructions.
• • • • • • • Always use oven gloves to remove or put in accessories or ovenware. Before carrying out any maintenance, disconnect the appliance from the power supply. Ensure that the appliance is switched off before replacing the lamp to avoid the possibility of electric shock. Do not use a steam cleaner to clean the appliance. Do not use harsh abrasive cleaners or sharp metal scrapers to clean the glass door since they can scratch the surface, which may result in shattering of the glass.
Use Warning! Risk of injury, burns and electric shock or explosion. • • • • • • • • • • • • • • • • • • 4 This appliance is for household use only. Do not change the specification of this appliance. Make sure that the ventilation openings are not blocked. Do not let the appliance stay unattended during operation. Deactivate the appliance after each use. Be careful when you open the appliance door while the appliance is in operation. Hot air can release.
Product description General overview 1 2 3 4 5 6 4 7 8 3 11 9 2 1 10 Accessories • 1 2 3 4 5 6 7 8 9 10 11 • Wire shelf For cookware, cake tins, roasts. Control panel Power lamp / symbol Knob for the heating functions Control knob (for the temperature) Temperature indicator / symbol Air vents for the cooling fan Heating element Lamp Fan Shelf support, removable Shelf positions Baking tray For cakes and biscuits. Before first use Warning! Refer to Safety chapters.
Oven function Fan Cooking Application Oven function To roast or roast and bake food with the same cooking temperature on more than one shelf position, without flavour transference. Moist Baking To bake and roast food on one shelf position. Conventional Cooking (Top / Bottom Heat) To bake cakes with crispy bottom and to preserve food. Bottom Heat Turbo Grilling To roast larger meat joints or poultry with bones on one shelf position. To make gratins and to brown.
Wire shelf and baking tray together: Push the baking tray between the guide bars of the shelf support and the wire shelf on the guide bars above. Small indentation at the top increase safety. The indentations are also anti-tip devices. The high rim around the shelf prevents cookware from slipping of the shelf. Additional functions Cooling fan Safety thermostat When the oven operates, the cooling fan turns on automatically to keep the surfaces of the oven cool.
Baking and roasting table Cakes Food Top / Bottom Heat Temperature (°C) 8 Shelf position Fan Cooking Temperature (°C) Time (min) Comments Shelf position Whisked recipes 170 2 165 2 (1 and 3) 45 - 60 In a cake mould Shortbread dough 170 2 160 2 (1 and 3) 20 - 30 In a cake mould Butter-milk cheese cake 170 1 165 2 70 - 80 In a 26 cm cake mould Apple cake (Apple pie) 170 1 160 2 (1 and 3) 80 - 100 In two 20 cm cake moulds on a wire shelf Strudel 175 2 150 2 60 - 80 In
Food Top / Bottom Heat Temperature (°C) Shelf position Fan Cooking Temperature (°C) Time (min) Comments Shelf position Plate tarts 180 3 170 2 25 - 35 In a 20 cm cake mould Victoria sandwich 180 1 or 2 170 2 45 - 70 Left + right in a 20 cm cake mould Rich fruit cake 160 1 150 2 110 - 120 In a 24 cm cake mould Victoria 170 1 160 1 50 - 60 In a 20 cm cake mould sandwich1) 1) Preheat the oven for 10 minutes.
Food Top / Bottom Heat Temperature (°C) Shelf position Fan Cooking Temperature (°C) Time (min) Comments Shelf position Vegetable flan 200 2 200 2 45 - 60 In a mould Quiches 190 1 190 1 40 - 50 In a mould Lasagne 200 2 200 2 25 - 40 In a mould Cannelloni 200 2 200 2 25 - 40 In a mould Yorkshire pudding1) 220 2 210 2 20 - 30 6 pudding mould 1) Preheat the oven for 10 minutes.
Food Top / Bottom Heat Temperature (°C) Fan Cooking Shelf position Temperature (°C) Time (min) Comments Shelf position Lamb 190 2 190 2 110 - 130 Leg Chicken 200 2 200 2 70 - 85 Whole Turkey 180 1 160 1 210 - 240 Whole Duck 175 2 160 2 120 - 150 Whole Goose 175 1 160 1 150 - 200 Whole Rabbit 190 2 175 2 60 - 80 Cut in pieces Hare 190 2 175 2 150 - 200 Cut in pieces Pheasant 190 2 175 2 90 - 120 Whole Fish Food Top / Bottom Heat Temperature (°C
Food Quantity Pieces Time (min) Quantity (kg) 1st side 2nd side Kebabs 4 - 10 - 15 10 - 12 Breast of chicken 4 0.4 12 - 15 12 - 14 Hamburger 6 0.6 20 - 30 - Fish fillet 4 0.4 12 - 14 10 - 12 Toasted sandwiches 4-6 - 5-7 - Toast 4-6 - 2-4 2-3 Turbo Grilling Use the third shelf position. Set the maximum temperature of 200 °C.
Food Accessories Temperature (°C) Shelf position Time (min) Pizza, frozen, 0.35 kg wire shelf 220 2 35 - 40 Swiss roll baking tray or dripping pan 170 2 30 - 40 Brownie baking tray or dripping pan 180 2 30 - 40 Soufflè, 6 pieces ceramic ramekins on wire shelf 200 3 30 - 40 Sponge flan base flan base tin on wire shelf 170 2 20 - 30 Victoria Sandwich baking dish on wire shelf 170 2 35 - 45 Poached fish, 0.3 kg baking tray or dripping pan 180 3 35 - 45 Whole fish, 0.
Food Function Accessories Shelf position Temperature (°C) Time (min) Comments Small cake Conventional Cooking Baking tray 3 170 20 - 30 Put 20 small cakes per one baking tray. Apple pie Conventional Cooking Wire shelf 1 170 80 - 120 Use 2 tins (20 cm diameter), diagonally shifted. Sponge cake Conventional Cooking Wire shelf 2 170 35 - 45 Use a cake mould (26 cm diameter). Short bread Conventional Cooking Baking tray 3 150 20 - 35 Preheat the oven for 10 minutes.
use the oven if the door gasket is damaged. Contact an Authorised Service Centre. To clean the door gasket, refer to the general information about cleaning. Removing the shelf supports To clean the oven, remove the shelf supports. Caution! Be careful when you remove the shelf supports. 1. 2. Pull the front of the shelf support away from the side wall. 2. Lift and turn the levers fully on both hinges. 3. Close the oven door halfway to the first opening position.
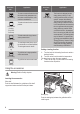
8. Clean the glass panels with water and soap. Dry the glass panels carefully. Do not clean the glass panels in the dishwasher. When the cleaning is completed, install the glass panel and the oven door. When installed correctly the door trim clicks. Make sure that you install the internal glass panel in the seats correctly. A 5. Release the locking system to remove the internal glass panel. Replacing the lamp Warning! Risk of electric shock. The lamp can be hot. 1. Turn off the oven.
What to do if... Problem Possible cause Remedy The oven does not heat up. The oven is deactivated. Activate the oven. The oven does not heat up. The fuse is blown. Make sure that the fuse is the cause of the malfunction. If the fuse is blown again and again, contact a qualified electrician. The lamp does not operate. The lamp is defective. Replace the lamp. Steam and condensation settle on the food and in the cavity of the oven. You left the dish in the oven for too long.
This appliance is supplied with a main plug and a main cable. Cable 540 21 min. 550 20 590 558 19 Cable types applicable for installation or replacement: 114 min. 560 589 598 570 H07 RN-F, H05 RN-F, H05 RRF, H05 VV-F, H05 V2V2F (T90), H05 BB-F For the section of the cable refer to the total power on the rating plate. You can also refer to the table: 594 Total power (W) 9 3 Securing the appliance to the cabinet maximum 1380 3 x 0.75 maximum 2300 3x1 maximum 3680 3 x 1.
Volume 57 l Type of oven Built-In Oven Mass 26.6 kg EN 60350-1 - Household electric cooking appliances Part 1: Ranges, ovens, steam ovens and grills Methods for measuring performance. When the cooking duration is longer than 30 minutes, reduce the oven temperature to minimum 3 - 10 minutes before the end of the cooking time, depending on the duration of the cooking. The residual heat inside the oven will continue to cook. Energy saving Use the residual heat to warm up other dishes.
www.electrolux.