Page 2 Page 3 Page 4 Page 6 Page 7 Page 11 Technical specifications Warnings The control panel Your machine Installation instructions Use of controls Page 14-15 The washing programmed Page 16 Page 18 Page 20 Page 22 Page 23 Page 2 Page 27 Page M Page 35 Use of detergent and additives Washing 4 kg of white cotton at 95°C Washing 2 kg of delicate synthetic fabrics at 40°C ‘Washing hints Maintenance Cleaning the filter Servicing Gaussian guarantee conditions 5 Year cover TECHNICAL SPECIFICATIONS DIMENSIONS Wid
1t is most important that this instruction book should be retained with the appliance for future reference. Should the appliance be sold or transferred to another owner, or should you move house and leave the appliance, always ensure that the book is supplied with the appliance in order that the new owner can be acquainted with the functioning of the appliance and the relevant warnings. These warnings are provided in the interest of safety.
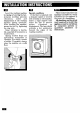
i Keep this page open while reading the booklet Symbols provided on the control panel have the following meaning: fg Pilot light WU Rewash compartment (D stardust button W Wash compartment T@ Fast spin % Softener cor apartment [X] Rinse Hold &) Quick wash
Programmer chart Pilot light Start/Stop bunion «Fast Spiny push button «Rinse Hold» push button «Quick wash» push button Programmer control
1 Washing powder dispenser drawer Control panel Door pilot light Door catch Drain Filter Adjustable feet.
the Before machine up, the packing must be removed as follows. starting You are advised to keep all the packing for re-use in case the machine has to be transported again. Unscrew and remove the bear right resew (using a screwdriver or spanner). Remove the hottie panel by unscrewing the b resews. Carefully remove the central and right polythene bag. Carefully remove the left polythene bag. Remove the polystyrene base, set the machine upright and unscrew the two remaining rear resews.
L AR D RES G LS Your new Gaussian washing machine hag been designed to ‘e permanently plumbed in to your home’s water supply and drainage system, However, if this is not possible, it may be connected to suitable existing taps, with the drain hose discharging into a sink. The appliance has two inlet valves, hot and cold, with female 3/4” BSP thread connectors.
1f you intend the drain hose from the machine to empty into a sink, make grue the sink is empty and that the plug hole is not blocked. If the machine is permanently plumbed in hook the end of the hose into a standpipe installed for the purpose. The standpipe must have an internal diameter of at least in), in order that there is an sir gap between the drain hose and standpipe. Make sure, that it is designed in cinch a way, that the end of the drain hose cannot be covered with water.
NITA Level the washing machine by raising or lowering the feet. Accurate leveling prevents vibrations, noses and displacement of the washing machine during operation. After leveling the machine, secure the feet by tightening the ring nuts. Some vibration is inevitable ble, especially if mounted on s wooden floor, Sprung wooden floors are particularly susceptible to vibration.
SE OF CONTROLS The user must be familiar with the machine controls and use them correctly for best washing results, Lkt [N The washing powder and additives must be placed in this drawer before starting the programmer. Pull-out programmer chart is available inside the drawer LTS It lights up when the start/stop button is depressed and goes out when it is pressed again, depressing this button the machine starts operating. ‘When depressing it again, the machine stops.
HOW AND WHEN TO USE THE CONTROL START After loading the laundry, place the washing powder and additives into the appropriate compartments. Before starting up the washing machine, check t aty — the appliance is plugged in ~ the water supply taps are tared on — the drain hose is correctly and securely positioned — the door and the washing powder dispenser drawer are closed. If necessary, press the half lead and/or heavy soil button(s).
The familiar wash code symbols which are found on the care labels in most clothes will gradually disappear and a new set of codes will be introduced. This change s due to changes in fabrics and detergents and because people are tending to use fewer programmed and mix fabrics in one load. The change will bring the odes into line with the labeling used in the rest of Europe.
Recommended load: max. DEGREE COMPARTMENTS PROGRAMMER OF T4 {88 DIAL DESCRIPTION SO, (it required) POSITION : P Demand REWASH 1 Short spin PROGRAMMER Wash at $5°C AR s San. Normal WHITES il B Abjurer 4 ties Spin WHITES Light il Normal FAST B Wash at °C COLOREDS soft 4 rinses By NON FAST Normal c Wash at 4°C COLOREDS £ 4 rinses Pie Long spin approx. § min. TONG SPIN D Abvusprocededbra low-speed draining phase Hart spin approx.
N IRV Choosing the right washing powder. Always use a low lather powder. This is important as too much lather prevents the articles from being properly cleansed and you may damage the machine, Ariel Automatic is specially designed to complement, the leaning action of the machine.
USE OF LIQUID [T ADDITIVES Any liquid additives for softening or dressing the laundry must be poured into the appropriate compartment of the washing powder dispenser drawer before starting the programmer, The compartment marked with the symbol & is for softeners and dressing agents; never exceed the MAX level. Pl Suitable liquid detergent such as Ariel can be used instead of washing powder.
WASHING 4 KG OF WHITE COTTON AT 95° C Suppose you have 4 kg of normally dirty laundry to wash. It is white cotton and is suitable for high temperature washing. i LOAD THE [EXTOL Open the door by pulling the cater outwards. Load the items to be washed one at a time and close the door. B MEASURE DUT THE PRI DT H MEASURE OUT DR R Following the table (page 15), measure the required quantity of washing powder and pour into the compartment U, the main wash compartment.
WASHING 4 KG OF WHITE COTTON the and programmer dial clockwise until letter A on the dial collides with the red marker Line. Press turn Check that: — the appliance is plugged in, — the water taps are on, ~ the drain hose is correctly positioned. Then pygmy in the «start/stopbutton "The pilot lamp comes on and the washing machine starts to work. o AR LT The machine automatically stops. The door is controlled by a safety devise which releases 1 2 minutes after the end of the programmer.
WASHING ! UMT L Suppose you have MEASLES [l LEERS et v a3 synthetic fabric laundry to wash. They are rather delicate faeries and shod not be washed at high temperature. THE LAUNDRY Open the door by pulling the cater outwards. Load the items to be washed one at a time and close the door. Following the table (page 15), measure the required quantity of washing pewter and pour into the compartment . the main wash compartment.
Press and turn the programmer dial clockwise until letter H on the dial coincides with the red marker e, Check that: ~ the appliance is plugged in, — the water taps are on, — the drain hose is correctly positioned. Then pi in the «start/stop» button The pilot lamp comes on and the washing machine starts to work. a REIGN RS LT The machine automatically e door is controlled by a safety devise which releases 1 2 minutes after the end of the programmer.
e Do not overload the washing machine. Weigh the laundry the first few times you use the washing machine. The average weights of the most common items are listed below as guide: sheet T00-1000 gr. 100200 gr. pillow tablecloth serviette a2 towel tine hand towel 106156 gr. toweling hand towel toweling bath towel 700-1600 gr. 1000-1500 250 gr. bath robe o Load the laundry loosely alternating large items with small ans. ® Sort the laundry according to the type of faerie, color fastness and how dirty it is.
MAINTENANCE Successful washing and smooth running of our machine depend on a series of routine maintenance operations which should be tarried out from time to time. IMPORTANT You are advised to unplug the appliance before all leaning and maintenance operations. Il The water we normally nse containing lime. From time to time, and more often for hard water, it is a good idea to use a water softening powder in the machine.
LEANING THE FILTER LR A DRAIN FILTER A clean filter is important for correct functioning of the washing machine, and should therefore be cleaned after every wash. Unscrew the filter, Clean carefully under a fast running tap. LR INLET FILTERS Tf your water is very had or contains traces of lime deposit, the water inlet filter may become clogged. Otis therefore a good idea to elan them from time to time. Torn off the water taps. Unscrew the water inlet hoses.
DOOR REVERSAL & BUILDING-UNDER DOOR ASSEMBLY INSTRUCTIONS This machine is per-arranged for assembly of a reversible doer (bight or left side opening) 5o as to match it perfectly wit the rest of the kitchen furniture, The machine is originally per-arvanged for assembly of & door with right side opening. In this case it’s sufficient to assemble on the door the two hinges (1} provided with the machine, taking care to comply with the dimensions given in the picture.
AT BUILDING IN UNDER This washing machine is designed to be built into a Kitchen unit due to its standard dimensions. The machine should be inserted inch a recess having the dimensions shown in the picture, making sure that the fill and drain hoses are not bent or kinked in such a way as to obstruct the normal water flow. As for water & electricity connection, please follow the rules given in this operator's handbook.
e Certain problems are due to lack of simple maintenance or oversights sand can be solved easily without having to call the Servicing Department.
B PROBLEM & CAUSE ® THE MACHINE LEAKS OR OVERFLOWS ® oo ranch washing powder ® Unsuitable washing powder The inlet hose ring is loose The detergent dispenser drawer or recess are clogged ® The end of the ruin hose s not securely positioned Rt » Reduce the quantities of washing powder P Only use washing powder suitable Tor automate marines P Tighten the ring (see page §) » Clean the drawer and recross (see page 23) W Position the drain hes covertly W THE MACHINE VIBRATES OR 18 NOISY ® The internal packing he
How to find the telephone number of your Gaussian Service Force listed in this leaflet Amusing Service areas are allocated by postcodes which are sifted in alphabetical order for easy reference. 1. Look for the two letters of your address stood in the fac Tet “Postcode’ column. 2. Match up the bummer of your postcode against the number listed in the *Postcode Numbers® column, 3., Look across the column to the Service Force Key Number for your area.
e Gaussian Standard Guarantee Renditions This guarantee is in addition to your statutory and other legal rights which will not he excluded or in any way diminished by the return of this guarantee ex rd. We, Gaussian Ltd.
LT TETANUS 5 YEAR It VAN 1. Products supplied as “seconds”, refurbished, For s once-only payment you damaged, or shop-soiled are an extend your Standard ot eligible for Gaussian 5 guarantee to 5 years, Year Cover. All the conditions and . delusions of the Standard 2. The issue of a cover does guarantee apply. NOT by virtue of our having done so, nullify the exclusions. 3.