NL EN ES Gebruiksaanwijzing User manual Manual de instrucciones Vriezer Freezer Congelador ZBF7226 2 13 24
Inhoud Veiligheidsinformatie _ _ _ _ _ _ _ _ _ _ _ _ _ _ _ Bedieningspaneel _ _ _ _ _ _ _ _ _ _ _ _ _ _ _ _ _ Het eerste gebruik _ _ _ _ _ _ _ _ _ _ _ _ _ _ _ _ _ Dagelijks gebruik _ _ _ _ _ _ _ _ _ _ _ _ _ _ _ _ _ Handige aanwijzingen en tips _ _ _ _ _ _ _ _ _ _ _ 2 4 5 6 6 Onderhoud en reiniging _ _ _ _ _ _ _ _ _ _ _ _ _ _ 7 Problemen oplossen _ _ _ _ _ _ _ _ _ _ _ _ _ _ _ 8 Technische gegevens _ _ _ _ _ _ _ _ _ _ _ _ _ _ _ 9 Montage _ _ _ _ _ _ _ _ _ _ _ _ _ _ _ _ _ _ _ _ _ 9 Het milieu _ _ _ _ _ _ _ _
Waarschuwing! Alle elektrische onderdelen (netsnoer, stekker, compressor) mogen uitsluitend vervangen worden door een erkende onderhoudsdienst of gekwalificeerd onderhoudspersoneel. 1. Het netsnoer mag niet verlengd worden. 2. Verzeker u ervan dat de stekker niet platgedrukt of beschadigd wordt door de achterkant van het apparaat. Een platgedrukte of beschadigde stekker kan oververhit raken en brand veroorzaken. 3. Verzeker u ervan dat u de stekker van het apparaat kunt bereiken. 4. Trek niet aan het snoer.
• Sluit het apparaat alleen aan op een drinkwaterleiding. 4) min in de isolatiematerialen. Het apparaat mag niet worden weggegooid bij het normale huishoudelijke afval. Het isolatieschuim bevat ontvlambare gassen: het apparaat moet weggegooid worden conform de van toepassing zijnde regels die u bij de lokale overheidsinstanties kunt verkrijgen. Voorkom beschadiging aan de koeleenheid, vooral aan de achterkant bij de warmtewisselaar. De materialen die gebruikt zijn voor dit apparaat en die zijn recyclebaar.
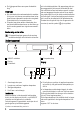
Functiemenu Elke keer als de functietoets wordt ingedrukt, worden de volgende functies met de klok mee geactiveerd: • Fast Freeze functie • geen symbool: normale werking. Uitschakelen Het apparaat wordt uitgeschakeld door de AAN/UIT schakelaar langer dan 1 seconde ingedrukt te houden. Daarna wordt het aftellen van de temperatuur van -3 -2 -1 weergegeven. Wanneer het apparaat wordt uitgeschakeld, gaat het display ook uit.
Dagelijks gebruik Levensmiddelen invriezen Het vriesvak is geschikt om levensmiddelen in te vriezen en diepgevroren levensmiddelen gedurende een lange tijd te bewaren. Om levensmiddelen in te vriezen, activeert u de functie Fast Freeze minimaal 24 uur voordat u deze in het vriesvak legt. Leg de levensmiddelen in de twee bovenste vakken.
Tips voor het bewaren van ingevroren voedsel Om de beste resultaten van dit apparaat te verkrijgen, dient u: • er zich van te verzekeren dat de commercieel ingevroren levensmiddelen op geschikte wijze door de detailhandelaar werden opgeslagen; • ervoor te zorgen dat de ingevroren levensmiddelen zo snel mogelijk van de winkel naar uw vriezer gebracht worden; • de deur niet vaker te openen of open te laten staan dan strikt noodzakelijk.
Problemen oplossen Waarschuwing! Voordat u storingen opspoort, de stekker uit het stopcontact trekken. Het opsporen van storingen die niet in deze handleiding vermeld zijn, dient te worden verricht door een gekwalificeerd technicus of competent persoon. Probleem Belangrijk! Er zijn tijdens de normale werking geluiden te horen (compressor, koelcircuit). Mogelijke oorzaak Het apparaat werkt niet. Het con- Het apparaat is uitgeschakeld. trolelampje knippert niet. Oplossing Schakel het apparaat in.
Probleem Mogelijke oorzaak Oplossing De producten liggen te dicht op elkaar. Bewaar de producten zodanig dat er koude lucht kan circuleren. Er is te veel rijp. Het voedsel is niet goed verpakt. Verpak het voedsel op de juiste manier. De deur is niet goed gesloten. Zie 'De deur sluiten'. De temperatuurregelaar is niet goed ingesteld. Stel een hogere temperatuur in. De deur sluiten 1. Maak de afdichtingen van de deur schoon. 2. Stel de deur, indien nodig, af. Raadpleeg "Montage". 3.
Omkeerbaarheid van de deur Op de tegenoverliggende zijde: • Monteer de onderste pen. • Monteer de deur. • Zet de afstandhouder en de bovenste pen vast. De deur van het apparaat gaat naar rechts open. Als u wilt dat de deur naar links open gaat, ga dan, voordat u het apparaat installeert, als volgt te werk: • Maak de bovenste pen los en verwijder de afstandhouder. • Verwijder de bovenste pen en de deur. Ventilatievereisten De luchtstroom achter het apparaat moet voldoende zijn.
13mm Ø 2,5 2 I 4mm 1 44mm I Boor gaten in het apparaat met een boor van Ø 2,5 mm (max. doordringdiepte 10 mm). Bevestig het vierkante montagestuk aan het apparaat. Installeer het apparaat in de nis. Duw het apparaat in de richting van de pijlen (1) totdat de afdekking van de opening tegen het keukenmeubel aankomt. Zorg ervoor dat de afstand tussen het apparaat en de voorste rand van de kast 44 mm is. Duw het apparaat in de richting van de pijlen (2) tegen de kast aan de andere kant van het scharnier.
50 mm Ha 90° 8 mm 21 mm Ha Hc 21 mm 50 mm Monteer onderdeel (Ha) aan de binnenkant van het keukenmeubel. Hb Duw onderdeel (Hc) op on- Zet de deur van het appaderdeel (Ha). raat en de deur van het keukenmeubel open onder een hoek van 90°. Plaats het kleine vierkantje (Hb) in de geleider (Ha). Zet de deur van het apparaat en de deur van het keukenmeubel tegen elkaar en markeer de gaten. Hb Plaats het kleine vierkantje op de geleider terug en bevestig het met de bijgeleverde schroeven.
Contents Safety information _ _ _ _ _ _ _ _ _ _ _ _ _ _ _ _ Control panel _ _ _ _ _ _ _ _ _ _ _ _ _ _ _ _ _ _ First use _ _ _ _ _ _ _ _ _ _ _ _ _ _ _ _ _ _ _ _ Daily use _ _ _ _ _ _ _ _ _ _ _ _ _ _ _ _ _ _ _ _ Helpful Hints and Tips _ _ _ _ _ _ _ _ _ _ _ _ _ _ 13 15 16 16 17 Care and cleaning _ _ _ _ _ _ _ _ _ _ _ _ _ _ _ _ What to do if… _ _ _ _ _ _ _ _ _ _ _ _ _ _ _ _ _ Technical data _ _ _ _ _ _ _ _ _ _ _ _ _ _ _ _ _ _ Installation _ _ _ _ _ _ _ _ _ _ _ _ _ _ _ _ _ _ _ Environmental concerns _ _ _ _ _
squashed or damaged power plug may overheat and cause a fire. 3. Make sure that you can come to the mains plug of the appliance. 4. Do not pull the mains cable. 5. If the power plug socket is loose, do not insert the power plug. There is a risk of electric shock or fire. 6. You must not operate the appliance without the lamp cover6) of interior lighting. • This appliance is heavy. Care should be taken when moving it.
Environment Protection bish. The insulation foam contains flammable gases: the appliance shall be disposed according to the applicable regulations to obtain from your local authorities. Avoid damaging the cooling unit, especially at the rear near the heat exchanger. The materials used on this apare recyclable. pliance marked by the symbol This appliance does not contain gasses which could damage the ozone layer, in either its refrigerant circuit or insulation materials.
• turn the knob counter- clockwise to obtain the minimum coldness. The intermediate position is usually the most suitable. However, the exact setting should be chosen keeping in mind that the temperature inside the appliance depends on: • room temperature • how often the door is opened • the quantity of food stored • the location of the appliance. Fast Freeze Function To freeze fresh foods, you will need to activate the Fast Freeze function.
Warning! Make sure that foods do not exceed the load limit stated on the side of the upper section (where applicable) Important! In the event of accidental defrosting, for example due to a power failure, if the power has been off for longer that the value shown in the technical characteristics chart under "rising time", the defrosted food must be consumed quickly or cooked immediately and then re-frozen (after cooling).
• rinse and dry thoroughly. Defrosting of the freezer Important! Do not pull, move or damage any pipes and/ or cables inside the cabinet. Never use detergents, abrasive powders, highly perfumed cleaning products or wax polishes to clean the interior as this will damage the surface and leave a strong odour. The freezer compartment of this model, on the other hand, is a "no frost" type. This means that there is no buildup of frost when it is in operation, neither on the internal walls nor on the foods.
Problem Possible cause Do not keep the door open longer than necessary. The product temperature is too high. Let the product temperature decrease to room temperature before storage. The room temperature is too high. Decrease the room temperature. The Fast Freeze function is switched on. Refer to "Fast Freeze function". The temperature in the freezer is The temperature regulator is not set too low. correctly. TheFast Freeze function is switched on.
The technical information are situated in the rating plate on the internal left side of the appliance and in the energy label. Installation Caution! Read the "Safety Information" carefully for your safety and correct operation of the appliance before installing the appliance.
Ventilation requirements The airflow behind the appliance must be sufficient. Installing the appliance 50 mm Caution! Make sure that the mains cable can move freely. min. 200 cm2 Do the following steps: min. 200 cm2 13mm Ø 2,5 2 I 4mm 1 44mm I Drill the unit using a Ø 2.5 mm drill (10 mm max. penetration). Fix the square fitting to the appliance. Install the appliance in the niche.
Ha D C Hb E E Push the sealing strip between the appliance and the adjacent cabinet. 50 mm Remove the correct part from the hinge cover (E). Make sure to remove the part DX, in the case of right hinge, SX in opposite case. Ha 90° B Hc Hd Attach the covers (C, D) to Disconnect the parts (Ha), the lugs and the hinge (Hb), (Hc) and (Hd). holes. Install the vent grille (B). Attach the hinge covers (E) to the hinge.
Environmental concerns The symbol on the product or on its packaging indicates that this product may not be treated as household waste. Instead it should be taken to the appropriate collection point for the recycling of electrical and electronic equipment. By ensuring this product is disposed of correctly, you will help prevent potential negative consequences for the environment and human health, which could otherwise be caused by inappropriate waste handling of this product.
Índice de materias Información sobre seguridad _ _ _ _ _ _ _ _ _ _ _ Panel de mandos _ _ _ _ _ _ _ _ _ _ _ _ _ _ _ _ Primer uso _ _ _ _ _ _ _ _ _ _ _ _ _ _ _ _ _ _ _ Uso diario _ _ _ _ _ _ _ _ _ _ _ _ _ _ _ _ _ _ _ _ Consejos y sugerencias útiles _ _ _ _ _ _ _ _ _ _ 24 26 27 27 28 Mantenimiento y limpieza _ _ _ _ _ _ _ _ _ _ _ _ Qué hacer si… _ _ _ _ _ _ _ _ _ _ _ _ _ _ _ _ _ Datos técnicos _ _ _ _ _ _ _ _ _ _ _ _ _ _ _ _ _ _ Instalación _ _ _ _ _ _ _ _ _ _ _ _ _ _ _ _ _ _ _ Aspectos medioambientales _ _
2. Compruebe que la parte posterior del aparato no aplaste ni dañe el enchufe. Un enchufe aplastado o dañado puede recalentarse y provocar un incendio. 3. Cerciórese de que tiene acceso al enchufe del aparato. 4. No tire del cable de alimentación. 5. Si la toma de corriente está floja, no inserte el enchufe. Existe riesgo de descarga eléctrica o incendio. 6. No debe utilizar el aparato sin la tapa de la bombilla. 11) para la iluminación interior. • Este aparato es pesado.
Servicio técnico ni en los materiales aislantes. El aparato no se debe desechar junto con los residuos urbanos. La espuma aislante contiene gases inflamables: el aparato se debe desechar de acuerdo con la normativa vigente, que puede solicitar a las autoridades locales. No dañe la unidad de refrigeración, en especial la parte trasera, cerca del intercambiador de calor. Los materiales de este aparato marson reciclables.
El indicador se apaga a la misma vez que el aparato. Regulación de la temperatura La temperatura del interior del aparato se controla mediante el regulador de temperatura situado en la parte superior de la unidad. Para utilizar el aparato, proceda de la manera siguiente: • Gire el regulador hacia la derecha para obtener el frío máximo. • Gire el regulador hacia la izquierda para obtener el frío mínimo. La posición intermedia suele ser la más adecuada.
La cantidad máxima de alimentos que puede congelarse en 24 horas se indica en la placa de datos técnicos , una etiqueta situada en el interior del aparato. El proceso de congelación tarda 24 horas: durante ese tiempo no deben añadirse otros alimentos para su congelación. Al cabo de 24 horas, cuando haya finalizado el proceso de congelación, vuelva a ajustar la temperatura adecuada (consulte "Regulación de la temperatura").
• procurar que los alimentos congelados pasen de la tienda al congelador en el menor tiempo posible; • evitar la apertura frecuente de la puerta o dejarla abierta más del tiempo estrictamente necesario. • Una vez descongelados, los alimentos se deterioran con rapidez y no pueden congelarse otra vez. • No supere el tiempo de almacenamiento indicado por el fabricante de los alimentos. Mantenimiento y limpieza Precaución Antes de realizar tareas de mantenimiento, desenchufe el aparato.
Problema El aparato no funciona. La luz del piloto no parpadea. Causa posible Solución El aparato está apagado. Encienda el aparato. El aparato no está correctamente enchufado a la toma de corriente. Enchufe el aparato correctamente a la toma de red. El aparato no recibe suministro eléctrico. No hay tensión en la toma de corriente. Enchufe un aparato eléctrico diferente a la toma de corriente. Llame a un electricista cualificado. La luz del piloto de control parpadea.
Problema Causa posible Solución La puerta no está bien cerrada. Consulte la sección "Cierre de la puerta". El regulador de temperatura no se ha ajustado correctamente. Seleccione una temperatura más alta. Cierre de la puerta 1. Limpie las juntas de la puerta. 2. Si es necesario, ajuste la puerta. Consulte "Instalación". 3. Si es necesario, cambie las juntas de puerta defectuosas. Contacte al Centro de servicio técnico.
Cambio del sentido de apertura de la puerta En el lado opuesto: • Instale el pasador inferior. • Instale la puerta. • Apriete el espaciador y el pasador superior. La puerta del aparato se abre hacia la derecha. Si desea abrir la puerta hacia la izquierda, siga estas instrucciones antes de instalar el aparato: • Afloje el pasador supe- • Retire la puerta. rior y extraiga el separa- • Afloje el pasador infedor. rior. • Retire el pasador superior y la puerta.
13mm Ø 2,5 2 I 4mm 1 44mm I Taladre la unidad con una broca de Ø 2,5 mm (10 mm de penetración máxima). Aplique el cuadrado de fijación al aparato. Instale el aparato en el hueco. Empuje el aparato en el sentido de las flechas (1) hasta que la cubierta de separación superior haga tope contra el mueble de cocina. Asegúrese de que haya una distancia de 44 mm entre el aparato y el borde delantero del mueble.
50 mm Ha 90° 8 mm 21 mm Ha Hc 21 mm 50 mm Instale la pieza (Ha) en el Empuje la pieza (Hc) conlado interno del mueble de tra la pieza (Ha). cocina. Hb Abra la puerta del aparato y la del mueble de cocina en un ángulo de 90°. Introduzca el cuadrado pequeño (Hb) en la guía (Ha). Coloque juntas las puertas del aparato y del mueble de cocina y marque los orificios. Hb Vuelva a colocar el cuadrado pequeño en la guía y fíjelo con los tornillos suministrados.
222336206-00-052010 www.zanussi.