EN User manual Cooker ZCG43200BA ZCG43200WA ZCG43200XA GB IE
Contents Safety information _ _ _ _ _ _ _ _ _ _ _ _ _ _ 2 Safety instructions _ _ _ _ _ _ _ _ _ _ _ _ _ _ 3 Product description _ _ _ _ _ _ _ _ _ _ _ _ _ 7 Before first use _ _ _ _ _ _ _ _ _ _ _ _ _ _ _ 8 Hob - Daily use _ _ _ _ _ _ _ _ _ _ _ _ _ _ _ 8 Hob - Helpful hints and tips _ _ _ _ _ _ _ _ _ 9 Hob - Care and cleaning _ _ _ _ _ _ _ _ _ _ 9 Oven - Daily use _ _ _ _ _ _ _ _ _ _ _ _ _ _ 10 Oven - Clock functions _ _ _ _ _ _ _ _ _ _ 12 Oven - Helpful hints and tips _ _ _ _ _ _ _ Oven - Care and cleaning
General Safety • The appliance and its accessible parts become hot during use. Do not touch the heating elements. • Do not operate the appliance by means of an external timer or separate remote-control system. • Unattended cooking on a hob with fat or oil can be dangerous and may result in fire. • Never try to extinguish a fire with water, but switch off the appliance and then cover flame e.g. with a lid or a fire blanket. • Do not store items on the cooking surfaces.
• The sides of the appliance must stay adjacent to appliances or to units with the same height. • Do not install the appliance on a platform. • Do not install the appliance adjacent to a door or under a window. This prevents hot cookware to fall from the appliance when the door or the window is opened. Electrical connection Warning! Risk of fire and electrical shock. • All electrical connections should be made by a qualified electrician. • The appliance must be earthed.
• Always keep the appliance door closed when the appliance is in operation. • Do not put cutlery or saucepan lids on the cooking zones. They become hot. • Set the cooking zone to “off” after use. • Do not use the appliance as a work surface or as a storage surface. • Provide good ventilation in the room where the appliance is installed. • Use only stable cookware with the correct shape and diameter larger than the dimensions of the burners.
• Clean the lid regularly. • Do not open the lid, when there are spills on the surface. • Before you close the lid turn all burners off. • Do not close the lid until the hob and oven are completely cold. • Glass lids can shatter, when heated (if applicable). • Clean the appliance with a moist soft cloth. Only use neutral detergents. Do not use abrasive products, abrasive cleaning pads, solvents or metal objects. • If you use an oven spray, obey the safety instructions on the packaging.
Product description General overview 1 2 3 3 2 1 6 3 Grill 4 Oven lamp 5 Shelf positions of the main oven 6 Shelf positions of the top oven 5 4 3 2 1 5 1 Control panel and hob 2 Air vents for cooling fan 4 Cooking surface layout 1 2 5 3 4 1 Steam outlet 2 Semi-rapid burner 3 Auxiliary burner 4 Rapid burner 5 Semi-rapid burner Control panel 1 2 3 4 1 1 Knobs for the hob 2 Knob for the main oven 3 Electronic programmer 4 Knob for the top oven / Grill Accessories • Oven shelf For cookware, c
Before first use Warning! Refer to the Safety chapters. Initial Cleaning • Remove all accessories and removable shelf supports (if applicable). • Clean the appliance before first use. Important! Refer to the chapter "Care and cleaning". Setting the time You must set the time before you operate the oven. When you connect the appliance to the electrical supply or after a power cut, the indicator for the Time of Day function flashes. Press the + or - button to set the correct time.
Replacing burner parts 1. Carefully put the burner crown on the burner body. Do not use force. a) Make sure that the hole in the crown is above the ignition candle. b) Make sure that the location pegs are in the slots in the burner body. c) Let the crown fall freely onto the body. d) Make sure that you can move the crown a small distance from side to side. 2. Put the burner cap centrally on top of the crown (enamel side up).
• The pan supports are not dishwasher proof; they must be washed by hand. • Make sure you position the pan supports correctly after cleaning. • To make burners work correctly, make sure that the arms of the pan supports are in the centre of the burner. • Be very careful when you replace the pan supports to prevent the hob top from damage. After cleaning, dry the appliance with a soft cloth. Oven - Daily use Warning! Refer to the Safety chapters.
Oven function Application To activate the oven. Ignition Gas mark 1 - 8 Range of temperature adjustment Range of temperature adjustment for conventional cooking. To set the temperature, turn the knob counterclockwise. Grill To grill flat food in the middle of the shelf. To make toast. To activate the grill, turn the knob clockwise.
Only put the grilling set on the first or second shelf level of top oven. Oven - Clock functions Electronic programmer 1 2 3 1 Minute minder indicator 2 Time display 3 Time of day indicator 4 Button + 5 Selection button 6 Button - 6 5 4 Clock function Time of day Minute Minder Application To set, change or check the time of day. To set a countdown time. This function has no effect on the operation of the oven. Minute Minder function This function has no effect on oven operations. 1.
Main oven The main oven is particularly suitable for cooking larger quantities of food. Baking General instructions • Your new oven may bake or roast differently to the appliance you had before. Adapt your usual settings (temperature, cooking times) and shelf levels to the values in the tables. • With longer baking times, the oven can be switched off about 10 minutes before the end of baking time, to use the residual heat. • Use deep roasting pan in middle or top shelf level of top oven.
Top oven cooking chart Food Shelf position Gas mark Cooking Time (Total Hours) Biscuits 1-2 4 0:10 - 0:20 Small / Queen Cake 1-2 5 0:18 - 0:25 Sponge 1-2 4 0:18 - 0:20 Victoria Sandwich 1-2 4 0:18 - 0:25 Gingerbread 1-2 2 1:15 - 1:30 Flapjack 1-2 5 0:25 - 0:30 Shortbread 1-2 3 0:45 - 1:05 Fruit Pies, Crumbles 1-2 6 0:40 - 0:50 Milk Puddings 1-2 3 1:30 - 2:00 Scones 1-2 7 0:08 - 0:12 Choux Pastry 1-2 6 0:30 - 0:35 Éclairs / Profiteroles 1-2 5 0:20 - 0:30 Fl
Food Shelf position Gas mark Cooking Time (Total Hours) Bread rolls/buns 3-4 81) 0:15 - 0:20 Small / Queen Cake 1+4 5 0:18 - 0:25 Sponge 1+4 4 0:20 - 0:30 Victoria Sandwich 1+4 4 0:18 - 0:25 Madeira Cake 2-3 4 1:15 - 1:30 Rich Fruit Cake 2-3 2 2:15 - 2:30 Christmas Cake 2-3 2 3:00 - 4:30 Gingerbread 2-3 2 1:15 - 1:30 Flapjack 3 5 0:25 - 0:30 Shortbread 3 3 0:45 - 1:05 Fruit Pies, Crumbles 3 6 0:40 - 0:60 Milk Puddings 3 3 1:30 - 2:00 1+4 7 0:08 - 0:12 C
Roasting Roasting dishes • Use heat-resistant ovenware to roast (please read the instructions of the manufacturer). • Large roasting joints can be roasted directly in the deep roasting pan or on the oven shelf above the deep roasting pan. (If present) • Roast lean meats in a roasting tin with a lid. This well keep the meat more succulent. • All types of meat, that can be browned or have crackling, can be roasted in the roasting tin without the lid.
Always pre-heat the empty oven with the grill functions for 5 minutes. • Set the shelf in the shelf level as recommended in the grilling table. • When use grilling set in top oven, always remove the oven shelf. • Grill only flat pieces of meat or fish.
To support this self-cleaning process heat the oven without any food regularly: 1. Open the oven door. 2. Remove all accessories from the oven. 3. Close the door. 4. Set the maximum oven temperature and let the oven operate for 1 hour. 5. Clean the oven cavity with a soft and damp sponge. Caution! Do not attempt to clean catalytic surfaces with oven sprays, abrasive cleaners, soap or other cleaning agents. This may damage the catalytic surface.
Replacing the oven lamp 1. You can find the lamp glass cover at the back of the cavity. Turn the lamp glass cover counterclockwise to remove it. 2. Clean the glass cover. 3. Replace the oven lamp with an applicable 300 °C heat-resistant oven lamp. Important! Use the same oven lamp type. 4. Install the glass cover. What to do if… Warning! Refer to the Safety chapters. Problem Possible cause Remedy The appliance does not operate. The fuse in the fuse box is released. Control the fuse.
Problem Possible cause Remedy The display shows “12.00” and "LED". A power cut. Reset the clock. Steam and condensation settle on the food and in the oven cavity. You left the dish in the oven for too long. Do not leave the dishes in the oven for longer than 15-20 minutes after the cooking process ends. The appliance makes noises or popping sounds. When the gas is drawn through the burner, it can compress as they heat up.
The stability chain Caution! You must install the stability chain. If you do not install it the appliance can tilt. Before you install stability chain, adjust the appliance to the correct height. D A E Measure down 180 mm from the appliance top surface, then measure right 30 mm (See picture). Mark the position of the wall and this gives anchor point for the stability chain.
BURNER NORMAL POWER NATURAL GAS kW inj. 100/mm Semi-rapid burner 1,9 96 Btu/h 6483 Rapid burner 3,0 119 10236 Grill 2,7 122 9212 Top Oven 1,9 99 6483 Main Oven 1,9 99 6483 Gas Connection Use a flexible pipe in compliance with the regulation in force. Be careful they do not come in touch with mobile parts or they are not squeezed. A Warning! Only a qualified and competent person must do the gas installation.
b) 29 mbar for LPG, butane only c) 37 mbar for LPG, propane only. 3. Turn the taps off and disconnect the pressure gauge. 4. Make sure that all burners work correctly. Checking the grill 1. Put in the grill pan containing the grid. 2. Light the grill burner by turning the grill . control knob to the symbol 3. Release the knob when the burner comes on. Checking the hob burners 1. Lift the lid. 2. Put in the burner crowns and caps. Make sure that they are correctly seated. 3. Put in the pan supports. 4.
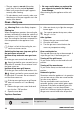
GREAT BRITAIN & IRELAND - Guarantee/Customer Service GB IE Standard guarantee conditions: We, Electrolux, undertake that if within 12 months of the date of the purchase this Electrolux appliance or any part thereof is proved to be defective by reason only of faulty workmanship or materials, we will, at our option repair or replace the same FREE OF CHARGE for labour, materials or carriage on condition that: • Appliance has been correctly installed and used only on the electricity supply stated on the ratin
European Guarantee GB This appliance is guaranteed by Electrolux in each of the countries listed at the back of this user manual, for the period specified in the appliance guarantee or otherwise by law.
Magyarország (06-1)467-3205 +361 252 1773 H-1142 Budapest XIV, Erzsébet Királyné útja 87 Nederland +31 17 24 68 300 Vennootsweg 1, 2404 CG - Alphen aan den Rijn Norge +47 81 5 30 222 Risløkkvn. 2 , 0508 Oslo Österreich 0810 955030 Herziggasse 9, 1230 Wien Polska +48 22 43 47 300 ul. Kolejowa 5/7, 01–217 Warszawa Portugal +35 12 14 40 39 39 Quinta da Fonte - Edifício Gonçalves Zarco - Q 35 -2774-518 Paço de Arcos Romania +40 21 451 20 30 Str.
www.zanussi.
892957529-A-352013 www.zanussi.