User manual EN Cooker ZCG662 GB IE
Contents Safety information _ _ _ _ _ _ _ _ _ _ _ _ _ _ _ _ _ _ 2 Product description _ _ _ _ _ _ _ _ _ _ _ _ _ _ _ _ _ 5 Before first use _ _ _ _ _ _ _ _ _ _ _ _ _ _ _ _ _ _ _ 6 Hob - Daily Use _ _ _ _ _ _ _ _ _ _ _ _ _ _ _ _ _ _ _ 6 Hob - Helpful hints and tips _ _ _ _ _ _ _ _ _ _ _ _ _ 7 Hob - Care and Cleaning _ _ _ _ _ _ _ _ _ _ _ _ _ _ 7 Oven - Daily Use _ _ _ _ _ _ _ _ _ _ _ _ _ _ _ _ _ _ 8 Oven - Helpful hints and tips _ _ _ _ _ _ _ _ _ _ _ _ 10 Oven - Care and Cleaning _ _ _ _ _ _ _ _ _ _ _ _ _ Wh
• The electrical installation must have an isolation device which lets you disconnect the appliance from the mains at all poles. The isolation device must have a contact opening width of minimum 3 mm. • The shock protection parts must be fixed in such a way that they cannot be undone without tools. • Always use a correctly installed shockproof socket. • When you connect electrical appliances to mains sockets, do not let cables touch or come near the hot appliance door.
• Do not apply pressure on the open door. • Do not put flammable materials in the compartment below the oven. Keep there only heat-resistant accessories (if applicable). • Do not cover oven steam outlets. They are at the rear side of the top surface (if applicable). • This appliance is for cooking purposes only. It must not be used for other purposes, for example room heating. • Use only stable cookware with the correct shape and diameter to prevent accidental tilting or spilling. There is a risk of burns.
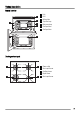
Product description General overview 1 7 2 3 2 1 6 5 4 3 4 1 2 3 4 5 6 7 Hob Grill Rating plate Top oven lamp Main oven lamp Shelf positions Shelf positions 1 2 3 4 5 Steam outlet Semi-rapid burner Auxiliary burner Rapid burner Semi-rapid burner 5 3 2 1 Cooking surface layout 1 5 2 4 3 5
Control panel 1 1 2 3 4 2 Hob control knobs Main oven temperature control Electronic programmer Top oven / Grill control Accessories 3 4 1 For cookware, cake tins, roasts. • Deep roasting pan To bake and roast or as pan to collect fat. • The roasting pan grid To put in the deep roasting pan. • Oven shelf Before first use Warning! Refer to "Safety information" chapter. Remove all packaging, both inside and outside the oven, before using the appliance. Do not remove the rating plate.
Ignition of the burner Warning! Be very careful when you use open fire in kitchen environment. Manufacturer decline any responsibility in case misuse of the flame Always light the burner before you put cookware. To light the burner: 1. Turn the control knob counterclockwise to the maxi) and push it down. mum position ( 2. Keep the control knob pushed for approximately 5 seconds; this will let thermocouple to warm up. If not, the gas supply will be interrupted. 3. Adjust the flame after it is regular.
Warning! Do not use abrasive cleaners, steel wool pads or acids, they can cause damage to the appliance. • To clean the enamelled parts, cap and crown, wash it with warm soapy water. • Stainless steel parts wash with water, and then dry with a soft cloth. • The pan supports are not dishwasher proof; they must be washed by hand . • Make sure you position the pan supports correctly after cleaning. • To make burners work correctly, make sure that the arms of the pan supports are in the centre of the burner.
Oven function Application To grill flat food in the middle of the grill an to toast. To set grill turn the knob clockwise. Grill Main Oven Functions The oven has these functions: Oven function Application The appliance is off. Off position Range of temperature adjustment Gas mark 1 - 9 Range of temperature adjustment for conventional cooking. To prepare very lean, tender roasted food.
Setting the clock functions Important! The flame protection on the shelf must point up. Use the shelf with flame protection only on the first and second level in the top oven, and on all the levels in the main oven. Grilling set 1. Push the Selection button again and again until necessary function indicator flashes. 2. To set the time for Minute minder , Duration or End , use " + " or " - " button. The related function indicator comes on.
that you cook at the lowest temperatures and do not brown food too much. Top oven The top oven is the smaller of the two ovens. It has 3 shelf levels. Use is to cook smaller quantities of food. It gives especially good results when used to cook fruitcakes, sweets and savoury flants or quiche. Main oven The main oven is particularly suitable for cooking larger quantities of food. Baking General instructions • Your new oven may bake or roast differently to the appliance you had before.
Top oven cooking chart Food Shelf position Gas mark Cooking Time (Total Hours) Biscuits 1-2 4 0:10 - 0:20 Small / Queen Cake 1-2 5 0:18 - 0:25 Sponge 1-2 4 0:18 - 0:20 Victoria Sandwich 1-2 4 0:18 - 0:25 Gingerbread 1-2 2 1:15 - 1:30 Meringues 1-2 1 2:30 - 3:00 Flapjack 1-2 5 0:25 - 0:30 Shortbread 1-2 3 0:45 - 1:05 Fruit Pies, Crumbles 1-2 6 0:40 - 0:50 Milk Puddings 1-2 3 1:30 - 2:00 Scones 1-2 7 0:08 - 0:12 Choux Pastry 1-2 6 0:30 - 0:35 Éclairs / Profi
Main oven cooking chart Food Shelf position Gas mark Cooking Time (Total Hours) Biscuits 1+4 4 0:10 - 0:20 Bread 2-3 81) 0:25 - 0:30 Bread rolls/buns 3-4 81) 0:15 - 0:20 Small / Queen Cake 1+4 5 0:18 - 0:25 Sponge 1+4 4 0:20 - 0:30 Victoria Sandwich 1+4 4 0:18 - 0:25 Madeira Cake 2-3 4 1:15 - 1:30 Rich Fruit Cake 2-3 2 2:15 - 2:30 Christmas Cake 2-3 2 3:00 - 4:30 Gingerbread 2-3 2 1:15 - 1:30 Meringues 3-4 1 2:30 - 3:00 Flapjack 3 5 0:25 - 0:30 Shortbread
Food Shelf position Gas mark Cooking Time (Total Hours) Large Yorkshire Puddings 3-4 7 0:25 - 0:40 Individual Yorkshire Puddings 3-4 7 0:15 - 0:25 1) When baking bread cook for 10 minutes at gas mark 8 then reduce to mark 6 for the remaining cook time. Roasting Roasting dishes • Use heat-resistant ovenware to roast (please read the instructions of the manufacturer). • Large roasting joints can be roasted directly in the deep roasting pan or on the oven shelf above the deep roasting pan.
• The grilling area is set in centre of the shelf. • Make sure that the grilling set or roasting pan is set in middle of shelf between front and rear of the oven cavity Caution! Accessible parts may be hot when grill is in use. Young children should be kept away. • Set the shelf in the shelf level as recommended in the grilling table. • When use grilling set in top oven, always remove the oven shelf. • Grill only flat pieces of meat or fish.
You cannot use Slow Cook together with the clock functions: Duration and End. Slow Cook - use General points : Frozen Foods • Fully thaw the food before cooking. Thickening • Cover the meat with the flour for casseroles or mix the cornflour with the water and add it at the end of cooking Flavouring • Flavours are held in the food because there is small evaporation. Adjust flavouring at the end of the cooking time. Liquid • Use less liquid as there is small evaporation during cooking.
Stainless steel or aluminium appliances: Clean the oven door with a wet sponge only. Dry it with a soft cloth. Do not use steel wool, acids or abrasive materials as they can damage the oven surface. Clean the oven control panel with the same precautions 2. Pull up the trim. 3. Remove the glass panels. A Cleaning the top oven glass panels The door glass on your product can be different in type and shape from what you see in diagrams. The number of glasses can be different. 2 1 Removing the glass: 1.
What to do if… Possible cause Remedy The appliance does not operate. Problem The fuse in the fuse box is released. Control the fuse. If the fuse is released more than one time, refer to a qualified electrician. The appliance does not operate. The appliance is too hot. Cool down the appliance for some hours The grill, burners, ovens and timer do There is no electrical supply. not work. Make sure that the unit is connected and the electrical supply is switched on.
Problem Possible cause Remedy The appliance makes noises or popping sounds. When the gas is drawn through the burner, it can compress as they heat up. Some metal parts of the appliance expand and contract when they heat up or cool down. The noises are normal. The flame colour is orange or yellow. The flame can look orange or yellow (flame disturbance) in some areas of the burner because of how the burner is made. This is normal.
The stability chain Minimal distances Dimension mm A 650 B 150 C 2 D 400 E 450 F less then 400 Caution! You must install the stability chain. If you do not install it the appliance can tilt. Before you install stability chain, adjust the appliance to the correct height. Measure down 180 mm from the appliance top surface, then measure right 30 mm (See picture). Mark the position of the wall and this gives anchor point for the stability chain.
Supply piping should not be less than R3/8. Connection is made to the Rc ½ (1/2 “ B.S.P.) female threaded. Entry pipe located just below the hob level on the rear left hand side of the appliance. The gas supply ramp is on the rear side of the appliance. Warning! Only liquid sealants to be used when inlet gas pipe is fitted i.e.: do not use P.T.F.E. sealant a) 20 mbar for Natural Gas b) 29 mbar for LPG, butane only c) 37 mbar for LPG, propane only. 3. Turn the taps off and disconnect the pressure gauge. 4.
Electrical installation Warning! Only a qualified and competent person must do the electrical installation. The manufacturer is not responsible if you do not follow safety precautions from chapter "Safety information". Connect the phases correctly, if you do not connect, spark generator will work all the time. MANUFACTURER: ELECTROLUX POLAND Sp.z o.o.. ul.Kazimierza Odnowiciela 28 58-100 Świdnica - POLAND This appliance is supplied with a main plug and a main cable.
out an engineer, please ensure you have read the details under the heading "What to do if...". When you contact the Service Force Centre you will need to give the following details: Your name, address and postcode, your telephone number, clear concise details of the fault, model and serial number of the appliance (found on the rating plate), the purchase date. Please note a valid purchase receipt or guarantee documentation is required for in guarantee service calls. Customer Care.
Eesti +37 2 66 50 030 Pärnu mnt. 153, 11624 Tallinn España +34 902 11 63 88 Carretera M-300, Km. 29,900 Alcalá de Henares Madrid France 08 44 62 26 53 www.electrolux.fr Great Britain +44 8445 616 616 Addington Way, Luton, Bedfordshire LU4 9QQ Hellas +30 23 10 56 19 70 4, Limnou Str., 54627 Thessaloniki Hrvatska +385 1 63 23 338 Slavonska avenija 3, 10000 Zagreb Ireland +353 1 40 90 753 Long Mile Road Dublin 12 Italia +39 (0) 434 558500 C.
892937880-M-372010 www.zanussi.