EN User Manual Oven ZOP37902BK ZOP37902XK
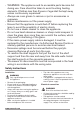
Contents Safety information Safety instructions Product description Before first use Daily use Clock functions Using the accessories 2 3 6 6 6 8 10 Additional functions Hints and tips Care and cleaning Troubleshooting Installation Energy efficiency 11 12 20 23 24 26 Subject to change without notice. Safety information Before the installation and use of the appliance, carefully read the supplied instructions.
• • • • • • • • • • WARNING: The appliance and its accessible parts become hot during use. Care should be taken to avoid touching heating elements. Children less than 8 years of age shall be kept away unless continuously supervised. Always use oven gloves to remove or put in accessories or ovenware. Before maintenance cut the power supply. Ensure that the appliance is switched off before replacing the lamp to avoid the possibility of electric shock. Do not use a steam cleaner to clean the appliance.
• • • • • • • • • • • • Always use a correctly installed shockproof socket. Do not use multi-plug adapters and extension cables. Make sure not to cause damage to the mains plug and to the mains cable. Should the mains cable need to be replaced, this must be carried out by our Authorised Service Centre. Do not let mains cables touch or come near the appliance door, especially when the door is hot.
• • • • • • Replace immediately the door glass panels when they are damaged. Contact the Authorised Service Centre. Be careful when you remove the door from the appliance. The door is heavy! Clean regularly the appliance to prevent the deterioration of the surface material. Clean the appliance with a moist soft cloth. Only use neutral detergents. Do not use any abrasive products, abrasive cleaning pads, solvents or metal objects. If you use an oven spray, obey the safety instructions on the packaging.
Product description General overview 1 2 3 4 5 5 6 4 9 3 7 2 1 1 2 3 4 5 6 7 8 9 Control panel Knob for the oven functions Electronic programmer Knob for the temperature Heating element Lamp Fan Shelf support, removable Shelf positions 8 Accessories • • Wire shelf For cookware, cake tins, roasts. Grill- / Roasting pan To bake and roast or as pan to collect fat. • Trivet For roasting and grilling. Use the trivet only with the Grill- / roasting pan.
Activating and deactivating the appliance It depends on the model if your appliance has lamps, knob symbols or indicators: • The lamp comes on when the appliance operates. • The symbol shows whether the knob controls the oven functions or the temperature. • The indicator comes on when the oven heats up. 1. Turn the knob for the oven functions to select an oven function. 2. Turn the knob for the temperature to select a temperature. 3.
Oven function Application Defrost This function can be used for defrosting frozen foods, such as vegetables and fruits. The defrosting time depends on the amount and size of the frozen food. Pyrolysis To activate the automatic pyrolytic cleaning of the oven. This function burns off residual dirt in the oven. Display A G B F E C D A. B. C. D. Timer Heat-up and residual heat indicator Water drawer (selected models only) Core temperature sensor (selected models only) E.
Clock function 00:00 Application TIME DELAY To combine DURATION and END function. MINUTE MINDER Use to set a countdown time. This function has no effect on the operation of the appliance. You can set the MINUTE MINDER at any time, also if the appliance is off. COUNT UP TIMER If you do not set any other clock function the COUNT UP TIMER automatically monitor how long the appliance operates. It is on immediately when the oven starts to heat.
8. Turn the knob for the oven functions to the off position. Setting the MINUTE MINDER 1. Press again and again until flash in the display. and "00" or to set the MINUTE 2. Press MINDER. First you set the seconds, then the minutes. When the time you set is longer than 60 minutes, flash in the display. 3. Set the hours. 4. The MINUTE MINDER starts automatically after 5 seconds. After 90% of the set time, an acoustic signal sounds. 5. When the set time ends, an acoustic signal sounds for 2 minutes.
You can use the trivet to grill flat dishes in large quantities and to toast. 2. Put the deep pan into the oven on the necessary shelf position. 1. Put the trivet into the deep pan so that the supports of the wire shelf point down. Additional functions Using the Child Lock When the Child Lock is on, the appliance cannot be activated accidentally. The door is locked , symbols SAFE and come on the display also when Pyrolysis function operates. It can be checked on the knob. 1.
Hints and tips on the components when you cook. This can change the baking results and cause damage to the enamel. WARNING! Refer to Safety chapters. The temperature and baking times in the tables are guidelines only. They depend on the recipes and the quality and quantity of the ingredients used. Baking cakes • • General information • The appliance has five shelf positions. Count the shelf positions from the bottom of the appliance floor.
Food Top / Bottom Heat Temperature (°C) Apple cake Shelf position True Fan Cooking Temperature (°C) Time (min) Comments Shelf position 170 2 160 2 (left and right) 80 - 100 In two 20 cm cake moulds on a wire shelf Strudel 175 3 150 2 60 - 80 In a baking tray Jam-tart 170 2 165 2 (left and right) 30 - 40 In a 26 cm cake mould Sponge cake 170 2 150 2 40 - 50 In a 26 cm cake mould Christmas cake / Rich 160 2 150 2 90 - 120 In a 20 cm cake mould Plum cake1) 175 1 160
Food Top / Bottom Heat Temperature (°C) Shelf position True Fan Cooking Temperature (°C) Time (min) Comments Shelf position Buns1) 190 3 190 3 12 - 20 In a baking tray Eclairs - one level 190 3 170 3 25 - 35 In a baking tray Eclairs - two levels - - 170 2 and 4 35 - 45 In a baking tray Plate tarts 180 2 170 2 45 - 70 In a 20 cm cake mould Rich fruit cake 160 1 150 2 110 - 120 In a 24 cm cake mould Victoria 170 1 160 2 (left and right) 30 - 50 In a 20 cm cake m
Flans Food Top / Bottom Heat Temperature (°C) Shelf position True Fan Cooking Temperature (°C) Time (min) Comments Shelf position Pasta flan 200 2 180 2 40 - 50 In a mould Vegetable flan 200 2 175 2 45 - 60 In a mould Quiches1) 180 1 180 1 50 - 60 In a mould Lasagne1) 180 - 190 2 180 - 190 2 25 - 40 In a mould Cannelloni1) 180 - 190 2 180 - 190 2 25 - 40 In a mould 1) Preheat the oven for 10 minutes.
Food Top / Bottom Heat Temperature (°C) Shelf position True Fan Cooking Temperature (°C) Time (min) Comments Shelf position Duck 175 2 220 2 120 - 150 Whole Goose 175 2 160 1 150 - 200 Whole Rabbit 190 2 175 2 60 - 80 Cut in pieces Hare 190 2 175 2 150 - 200 Cut in pieces Pheasant 190 2 175 2 90 - 120 Whole Fish Food Top / Bottom Heat Temperature (°C) Shelf position True Fan Cooking Temperature (°C) Time (min) Comments Shelf position Trout / Sea bream 190 2
Food Quantity Pieces Temperature (°C) Time (min) (g) 1st side Shelf position 2nd side Hamburger 6 600 max. 20 - 30 - 4 Fish fillet 4 400 max. 12 - 14 10 - 12 4 Toasted sandwiches 4-6 - max. 5-7 - 4 Toast 4-6 - max.
Lamb Food Quantity (kg) Temperature (°C) Time (min) Shelf position Leg of lamb, roast lamb 1 - 1.5 150 - 170 100 - 120 1 or 2 Saddle of lamb 1 - 1.5 160 - 180 40 - 60 1 or 2 Poultry Food Quantity (kg) Temperature (°C) Time (min) Shelf position Poultry portions 0.2 - 0.25 each 200 - 220 30 - 50 1 or 2 Chicken, half 0.4 - 0.5 each 190 - 210 35 - 50 1 or 2 Chicken, poulard 1 - 1.5 190 - 210 50 - 70 1 or 2 Duck 1.5 - 2 180 - 200 80 - 100 1 or 2 Goose 3.
Food Temperature (°C) Time (min) Shelf position Apple cake 150 - 160 75 - 85 2 White bread 180 - 190 50 - 60 2 Defrost Food Quantity (g) Defrosting time (min) Further defrosting time (min) Chicken 1000 100 - 140 20 - 30 Place the chicken on an upturned saucer placed on a large plate. Turn halfway through. Meat 1000 100 - 140 20 - 30 Turn halfway through. Meat 500 90 - 120 20 - 30 Turn halfway through.
Fruit Food Temperature (°C) Time (h) Shelf position 1 position 2 positions Plums 60 - 70 8 - 10 3 1/4 Apricots 60 - 70 8 - 10 3 1/4 Apple slices 60 - 70 6-8 3 1/4 Pears 60 - 70 6-9 3 1/4 Care and cleaning WARNING! Refer to Safety chapters. Notes on cleaning • • • • • • Clean the front of the appliance with a soft cloth with warm water and a cleaning agent. To clean metal surfaces, use a dedicated cleaning agent. Clean the appliance interior after each use.
CAUTION! If there are other appliances installed in the same cabinet, do not use them when the Pyrolysis function operates. It can cause damage to the appliance. 1. Remove the worst dirt manually. 2. Clean the inner side of the door with hot water, so that the residues do not burn from the hot air. 3. Set the Pyrolysis function. Refer to "Oven functions". 4. When flashes, press the necessary procedure: Option or to set Description P1 If the oven is not very dirty. Time of the procedure: 1 h.
A B 2 B 1 Hold the door trim (B) on the top edge of the door at the two sides and push inwards to release the clip seal. Pull the door trim to the front to remove it. Make sure that you install the middle panel of glass in the seats correctly. Hold the door glass panels by their top edge and carefully pull them out one by one. Start from the top panel. Make sure the glass slides out of the supports completely. A B Clean the glass panels with water and soap. Dry the glass panels carefully.
1. Turn the lamp glass cover counterclockwise to remove it. 2. Clean the glass cover. 3. Replace the lamp with a suitable 300 °C heat-resistant lamp. 4. Install the glass cover. Troubleshooting WARNING! Refer to Safety chapters. What to do if... Problem Possible cause Remedy You cannot activate or operate the oven. The oven is not connected to an electrical supply or it is connected incorrectly.
Problem Possible cause • The display shows "F102". • You did not fully close the door. The door lock is defective. Remedy • • • The display shows an error code that is not in this table. There is an electrical fault. • • The appliance is activated and does not heat up. The fan does not operate. The display shows "Demo". The demo mode is activated. Fully close the door. Deactivate the oven with the house fuse or the safety switch in the fuse box and activate it again.
Securing the appliance to the cabinet Building In min. 550 A 558 min. 560 6 B 114 16 20 600 589 573 548 594 21 6 3 Electrical installation min. 550 558 114 16 20 580 The manufacturer is not responsible if you do not follow the safety precautions from the Safety chapters. min. 560 589 573 This appliance is supplied without a main plug and a main cable.
Energy efficiency Product Fiche and information according to EU 65-66/2014 Supplier's name Zanussi Model identification ZOP37902BK ZOP37902XK Energy Efficiency Index 100.0 Energy efficiency class A Energy consumption with a standard load, conventional mode 0.93 kWh/cycle Energy consumption with a standard load, fan-forced mode 0.
ENVIRONMENTAL CONCERNS appliances marked with the symbol with the household waste. Return the product to your local recycling facility or contact your municipal office. Recycle the materials with the symbol . Put the packaging in applicable containers to recycle it. Help protect the environment and human health and to recycle waste of electrical and electronic appliances. Do not dispose www.zanussi.
867324929-B-342016 www.zanussi.