NL EN FR DE Gebruiksaanwijzing User Manual Notice d'utilisation Benutzerinformation 2 16 29 43 Koel-vriescombinatie Fridge Freezer Réfrigérateur/congélateur Kühl - Gefrierschrank ZRB34210WA ZRB34210XA
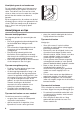
Inhoudsopgave Veiligheidsinformatie Veiligheidsvoorschriften Beschrijving van het product Bediening Dagelijks gebruik 2 3 5 6 6 Aanwijzingen en tips Onderhoud en reiniging Probleemoplossing Montage Technische informatie 8 9 10 12 14 Wijzigingen voorbehouden. Veiligheidsinformatie Lees zorgvuldig de meegeleverde instructies voor installatie en gebruik van het apparaat. De fabrikant is niet verantwoordelijk voor letsel en schade veroorzaakt door een foutieve installatie.
• • • • • • • • • • Gebruik geen mechanische of andere middelen om het ontdooiproces te versnellen, behalve die middelen die door de fabrikant zijn aanbevolen. Let op dat u het koelcircuit niet beschadigt. Gebruik geen elektrische apparaten in de koelkast, tenzij deze door de fabrikant worden aanbevolen. Gebruik geen waterstralen of stoom om het apparaat te reinigen. Maak het apparaat schoon met een vochtige, zachte doek. Gebruik alleen neutrale schoonmaakmiddelen.
• • • • • • • • Alle elektrische aansluitingen moeten door een gediplomeerd elektromonteur worden gemaakt. Controleer of de elektrische informatie op het typeplaatje overeenkomt met de stroomvoorziening. Zo niet, neem dan contact op met een elektromonteur. Gebruik altijd een correct geïnstalleerd, schokbestendig stopcontact. Gebruik geen meerwegstekkers en verlengsnoeren. Zorg dat u de elektrische onderdelen (hoofdstekker, kabel, compressor) niet beschadigt.
Beschrijving van het product Productoverzicht 1 2 3 7 1 2 3 4 Groentelades Kastplateaus Bedieningspaneel Deurplateaus www.zanussi.
Bediening Bedieningspaneel 1 Temperatuurweergave LED 2 QuickChill-toets 3 Temperatuurknop 1 3 2 Inschakelen Steek dan de stekker in het stopcontact. QuickChill-functie U kunt de QuickChill-functie inschakelen door te drukken op de QuickChill-knop. De LED die bij het symbool QuickChill hoort gaat branden. U kunt de QuickChill-functie uitschakelen door te drukken op de QuickChill-knop. Het QuickChill-indicatielampje gaat branden. Deze functie stopt automatisch na 52 uur.
Eerste inschakeling LET OP! Laat, voordat u de stekker in het stopcontact steekt en de koelkast voor de eerste keer aanzer, het apparaat eerst minimaal 4 uur rechtop staan. De olie heeft dan genoeg tijd om terug te keren naar de compressor. Anders kunnen de compressor of de elektronische onderdelen beschadigd raken.
Verwijdering van de vrriezerkorven De vriesmandjes hebben een limietstop om te voorkomen dat ze per ongeluk verschuiven of vallen. Trek de korf naar u toe om het uit de vriezer te halen, tot het niet verder kan, verwijder de korf door de voorkant naar boven te kantelen. 2 1 Bij het terugzetten tilt u de voorkant van de korf een beetje op en schuift u hem gekanteld in de vriezer. Zodra het mandje over de eindpunten heen is, kunt u hem terug op zijn plaats schuiven.
• • • • • • • vries alleen vers en grondig schoongemaakte levensmiddelen van uitstekende kwaliteit in bereid het voedsel in kleine porties voor, zo kan het snel en volledig worden ingevroren en zo kunt u later alleen die hoeveelheid laten ontdooien die u nodig heeft Wikkel het voedsel in aluminiumfolie of plastic en zorg ervoor dat de pakjes luchtdicht zijn leg vers, nog niet ingevroren voedsel niet tegen het al ingevroren voedsel, om te voorkomen dat dit laatste warm wordt Mager voedsel kan beter worden
1. Trek de stekker uit het stopcontact. 2. verwijder al het voedsel 3. Maak het apparaat en alle toebehoren schoon. 4. Laat de deur/deuren open staan om onaangename luchtjes te voorkomen. WAARSCHUWING! De vriezer ontdooien Het vriesvak is vorstvrij.
Probleem Mogelijke oorzaak Oplossing De omgevingstemperatuur is te hoog. Zie het typeplaatje voor de klimaatklasse. Het voedsel dat in het apparaat werd geplaatst, was te warm. Laat voedsel afkoelen tot kamertemperatuur voordat u het opslaat De deur is niet goed gesloten. Zie 'De deur sluiten'. De functie QuickChill is ingeschakeld. Raadpleeg "QuickChill-functie". De compressor start niet onmiddellijk na het drukken op QuickChill of na het veranderen van de temperatuur.
Probleem Mogelijke oorzaak Oplossing Er is geen koude luchtcirculatie in het apparaat aanwezig. Zorg ervoor dat er koude luchtcirculatie in het apparaat aanwezig is. De deur sluiten De bedieningseenheid vervangen 1. Maak de afdichtingen van de deur schoon. 2. Stel de deur, indien nodig, af. Raadpleeg "Montage". 3. Vervang, indien nodig, de defecte deurafdichtingen. Neem contact op met de klantenservice. Het apparaat is uitgerust met een LEDbinnenlampje dat een lange levensduur heeft.
Nivellering Zorg ervoor dat het apparaat waterpas staat wanneer u het plaatst. Deze stand kan bereikt worden met de twee afstelbare voetjes die aan de voorkant en onderkant van het apparaat bevestigd zijn. Aansluiting op het elektriciteitsnet • • • • Zorg er vóór het aansluiten voor dat het voltage en de frequentie op het typeplaatje overeenkomen met de stroomtoevoer in uw huis. Dit apparaat moet worden aangesloten op een geaard stopcontact.
7 13 12 8 12. Plaats de onderkant van de deur op de draaipen van het onderste scharnier (9). 13. Schroef de middelste afdekpluggen los en schroef ze in het gat aan de andere zijde (10). 14. Plaats het middelste scharnier aan de andere zijde en maak het vast d.m.v. de schroeven (11). Voer een eindcontrole uit en verzeker u ervan dat: • Alle schroeven zijn aangedraaid. • De magnetische afdichtstrip vast zit aan de kast. • De deur goed open en dicht gaat. Als de omgevingstemperatuur laag is (bijv.
MILIEUBESCHERMING Recycle de materialen met het symbool . Gooi de verpakking in een geschikte verzamelcontainer om het te recyclen. Help om het milieu en de volksgezondheid te beschermen en recycle het afval van elektrische en elektronische apparaten. Gooi apparaten gemarkeerd met het symbool niet weg met het huishoudelijk afval. Breng het product naar het milieustation bij u in de buurt of neem contact op met de gemeente. www.zanussi.
Contents Safety information Safety Instructions Product description Operation Daily use 16 17 19 20 20 Hints and tips Care and cleaning Troubleshooting Installation Technical information 22 23 24 26 28 Subject to change without notice. Safety information Before the installation and use of the appliance, carefully read the supplied instructions. The manufacturer is not responsible if an incorrect installation and use causes injuries and damages.
• • • • • • • • • • Do not use mechanical devices or other means to accelerate the defrosting process, other than those recommended by the manufacturer. Do not damage the refrigerant circuit. Do not use electrical appliances inside the food storage compartments of the appliance, unless they are of the type recommended by the manufacturer. Do not use water spray and steam to clean the appliance. Clean the appliance with a moist soft cloth. Only use neutral detergents.
• • • • • • Always use a correctly installed shockproof socket. Do not use multi-plug adapters and extension cables. Make sure not to cause damage to the electrical components (e.g. mains plug, mains cable, compressor). Contact the Service or an electrician to change the electrical components. The mains cable must stay below the level of the mains plug. Connect the mains plug to the mains socket only at the end of the installation. Make sure that there is access to the mains plug after the installation.
Product description Product overview 1 2 3 7 1 2 3 4 Vegetable drawers Cabinet shelves Control panel Door shelves www.zanussi.
Operation Control panel 1 Temperature indicators LED 2 QuickChill button 3 Temperature regulator 1 3 2 Switching on Insert the plug into the wall socket. QuickChill function You can activate the QuickChill function by pressing the QuickChill button. The LED corresponding to the symbol QuickChill indicator lights up. You can deactivate the QuickChill function by pressing the QuickChill button again. The QuickChill indicator will light off. This function stops automatically after 52 hours.
Initial power on CAUTION! Before inserting the power plug in to the outlet and switching on the cabinet for the first time, leave the appliance standing upright for at least 4 hours. This will assure a sufficient amount of time for the oil to return to the compressor. Otherwise the compressor or electronic components may sustain damage.
basket towards yourself and, upon reaching the end point, remove the basket by tilting its front upwards. At the time of putting it back, slightly lift the front of the basket to insert it into the freezer. Once you are over the end points, push the baskets back in their position. 2 1 Hints and tips Normal operating sounds Hints for refrigeration The following sounds are normal during operation: Useful hints: • • • • A faint gurgling and bubbling sound from coils sound when refrigerant is pumped.
• • • • do not allow fresh, unfrozen food to touch food which is already frozen, thus avoiding a rise in temperature of the latter; lean foods store better and longer than fatty ones; salt reduces the storage life of food; water ices, if consumed immediately after removal from the freezer compartment, can possibly cause the skin to be freeze burnt; it is advisable to show the freezing in date on each individual pack to enable you to keep tab of the storage time.
1. Disconnect the appliance from electricity supply. 2. Remove all food. 3. Clean the appliance and all accessories. 4. Leave the door/doors open to prevent unpleasant smells. WARNING! If the cabinet will be kept on, ask somebody to check it once in a while to prevent the food inside from spoiling in case of a power failure. Troubleshooting WARNING! Refer to Safety chapters. What to do if... Problem Possible cause The appliance does not operate. The appliance is switched off.
Problem Possible cause Solution Water flows on the rear plate of the refrigerator. During the automatic defrosting process, frost melts on the rear plate. This is correct. Water flows inside the refrigerator. The water outlet is clogged. Clean the water outlet. Food products prevent that water flows into the water collector. Make sure that food products do not touch the rear plate. Water flows on the floor. The melting water outlet is not connected to the evaporative tray above the compressor.
Installation WARNING! min 100mm Refer to Safety chapters. min 100mm Positioning This appliance can be installed in a dry, well ventilated indoor where the ambient temperature corresponds to the climate class indicated on the rating plate of the appliance: Climate class Ambient temperature SN +10°C to + 32°C N +16°C to + 32°C ST +16°C to + 38°C T +16°C to + 43°C Some functional problems might occur for some types of models when operating outside of that range.
Door reversibility WARNING! Before carrying out any operations, remove the plug from the power socket. 6 CAUTION! To carry out the following operations, we suggest that this be made with another person that will keep a firm hold on the doors of the appliance during the operations. 1. Open the door and empty the shelves. 2. Unscrew the screws of the upper hinge (1). 5 9. Screw off the screws of the lower hinge and remove the hinge (8). 10.
Do a final check to make sure that: • All screws are tightened. • The magnetic seal adheres to the cabinet. • The door opens and closes correctly. If the ambient temperature is cold (i.e. in Winter), the gasket may not fit perfectly to the cabinet. In that case, wait for the natural fitting of the gasket. In case you do not want to carry out the above mentioned operations, contact the nearest After Sales Service Force.
Table des matières Consignes de sécurité Instructions de sécurité Description de l'appareil Fonctionnement Utilisation quotidienne 29 30 32 33 33 Conseils Entretien et nettoyage En cas d'anomalie de fonctionnement Installation Caractéristiques techniques 35 36 37 39 42 Sous réserve de modifications. Consignes de sécurité Avant d'installer et d'utiliser cet appareil, lisez soigneusement les instructions fournies.
• • • • • • • • • • • Veillez à ce que les orifices de ventilation, situés dans l'enceinte de l'appareil ou dans la structure intégrée, ne soient pas obstrués. N'utilisez aucun dispositif mécanique ou autre appareil pour accélérer le processus de dégivrage que ceux recommandés par le fabricant. N'endommagez pas le circuit frigorifique. N'utilisez pas d'appareils électriques à l'intérieur des compartiments de conservation des aliments de l'appareil, sauf s'ils sont du type recommandé par le fabricant.
• • N'installez pas l'appareil dans un endroit exposé à la lumière directe du soleil. N'installez pas l'appareil dans un endroit trop humide ou trop froid, comme une dépendance extérieure, un garage ou une cave. Branchement électrique AVERTISSEMENT! Risque d'incendie ou d'électrocution. • • • • • • • • • L'appareil doit être relié à la terre. L'ensemble des branchements électriques doit être effectué par un technicien qualifié.
• • • Retirez la porte pour empêcher les enfants et les animaux de s'enfermer dans l'appareil. Le circuit frigorifique et les matériaux d'isolation de cet appareil préservent la couche d'ozone. La mousse isolante contient un gaz inflammable. Contactez votre service • municipal pour obtenir des informations sur la marche à suivre pour mettre l'appareil au rebut. N'endommagez pas la partie du circuit de réfrigération située à proximité du condenseur thermique.
Fonctionnement Bandeau de commande 1 Indicateurs de température LED 2 Touche QuickChill 3 Thermostat 1 3 2 Mise en marche Insérez la fiche dans la prise murale. Fonction QuickChill Pour activer la fonction QuickChill, appuyez sur la touche QuickChill. Le voyant LED correspondant au symbole QuickChill s'allume. Pour désactiver la fonction QuickChill, appuyez de nouveau sur la touche QuickChill. Le voyant QuickChill s'éteint. Cette fonction s'arrête automatiquement au bout de 52 heures.
Première mise sous tension ATTENTION! Avant d'insérer la fiche d'alimentation dans la prise murale et d'allumer l'appareil pour la première fois, laissez l'appareil en position verticale pendant au moins 4 heures. Cela laissera suffisamment de temps à l'huile de retourner jusqu'au compresseur. Sans cela, le compresseur et les composants électroniques pourraient être endommagés.
butée, retirez-le en inclinant la partie avant vers le haut. 1 3 2 Pour le remettre, relevez légèrement l'avant du bac et insérez-le dans le congélateur. Dès que vous avez dépassé la butée, poussez le bac dans la bonne position. Retrait des bacs de congélation Les bacs de congélation sont équipés d'une butée afin d'empêcher leur retrait accidentel ou leur chute.
• Bananes, pommes de terre, oignons et ail ne doivent pas être mis dans le réfrigérateur, s'ils ne sont pas emballés. • Conseils pour la congélation Voici quelques conseils importants pour obtenir un processus de congélation optimal : • • • • • • • respectez la quantité maximale de denrées fraîches que vous pouvez congeler par 24 heures figurant sur la plaque signalétique ; le processus de congélation dure 24 heures.
Dégivrage du réfrigérateur En fonctionnement normal, le givre est automatiquement éliminé de l'évaporateur du compartiment réfrigérateur à chaque fois que le compresseur s'arrête. L'eau de dégivrage est collectée, via une gouttière, dans un récipient spécial situé à l'arrière de l'appareil, au-dessus du compresseur, d'où elle s'évapore.
Problème 38 Cause probable Solution L'appareil est bruyant. L'appareil n'est pas stable. Assurez-vous de la stabilité de l'appareil. Le compresseur fonctionne en permanence. Il y a une erreur dans le réglage de la température. Reportez-vous au chapitre « Fonctionnement ». Trop de produits à congeler ont été introduits en même temps dans l'appareil. Attendez quelques heures et vérifiez de nouveau la température. La température ambiante est trop élevée.
Problème Cause probable Solution La température à l'intérieur de l'appareil est trop basse/ élevée. Le thermostat n'est pas réglé correctement. Augmentez/réduisez la température. La porte n'est pas fermée correctement. Reportez-vous au chapitre « Fermeture de la porte ». La température des produits est trop élevée. Laissez les aliments refroidir à température ambiante avant de les placer dans l'appareil. Trop de produits ont été introduits simultanément.
Des problèmes fonctionnels peuvent se produire sur certains types de modèles fonctionnant hors de cette plage de températures. Seul le respect de la plage de températures spécifiée peut garantir un bon fonctionnement de l'appareil. En cas de doute concernant l'emplacement d'installation de l'appareil, veuillez contacter le vendeur, notre service après-vente ou le centre de maintenance le plus proche.
3. Dégagez la porte du gond de la charnière centrale (2). 4. Placez le cache de la charnière supérieure dans les orifices du côté opposé. 5. Dévissez les vis de la charnière centrale (3). 6. Enlevez les caches situés sur l'arête supérieure des deux portes et placez-les sur le côté opposé. 7. Dégagez la porte inférieure du gond de la charnière inférieure (4). 3 4 8.
Caractéristiques techniques Caractéristiques techniques Hauteur mm 1845 Largeur mm 595 Profondeur mm 642 Autonomie de fonctionnement Heures 18 Tension Volts 230-240 Fréquence Hz 50 Les caractéristiques techniques figurent sur la plaque signalétique située sur le côté intérieur ou extérieur de l'appareil et sur l'étiquette énergétique. EN MATIÈRE DE PROTECTION DE L'ENVIRONNEMENT Recyclez les matériaux portant le symbole . Déposez les emballages dans les conteneurs prévus à cet effet.
Inhaltsverzeichnis Sicherheitsinformationen Sicherheitsanweisungen Gerätebeschreibung Betrieb Täglicher Gebrauch 43 44 46 47 47 Tipps und Hinweise Reinigung und Pflege Fehlersuche Montage Technische Daten 49 50 51 53 56 Änderungen vorbehalten. Sicherheitsinformationen Lesen Sie vor der Montage und dem Gebrauch des Geräts zuerst die Gebrauchsanleitung. Der Hersteller übernimmt keine Verantwortung für Verletzungen und Beschädigungen durch unsachgemäße Montage.
• • • • • • • • • • • Achten Sie darauf, dass die Belüftungsöffnungen im Gehäuse um das Gerät und in der Einbaunische nicht blockiert sind. Versuchen Sie nicht, den Abtauvorgang durch andere als vom Hersteller empfohlene mechanische oder sonstige Hilfsmittel zu beschleunigen. Beschädigen Sie nicht den Kältekreislauf. Betreiben Sie in den Lebensmittelfächern des Geräts keine anderen als die vom Hersteller empfohlenen Elektrogeräte. Reinigen Sie das Gerät nicht mit einem Wasser- oder Dampfstrahl.
• • • Die Geräterückseite muss gegen die Wand gestellt werden. Stellen Sie das Gerät nicht dort auf, wo es direktem Sonnenlicht ausgesetzt sein könnte. Stellen Sie das Gerät nicht an zu feuchten oder kalten Orten auf, wie z. B. in Nebengebäuden, Garagen oder Weinkellern. Elektrischer Anschluss • • • WARNUNG! Brand- und Stromschlaggefahr. • • • • • • • • • Das Gerät muss geerdet sein. Alle elektrischen Anschlüsse sind von einem geprüften Elektriker vorzunehmen.
• • • • Trennen Sie das Gerät von der Stromversorgung. Schneiden Sie das Netzkabel ab, und entsorgen Sie es. Entfernen Sie die Tür, um zu verhindern, dass sich Kinder oder Haustiere in dem Gerät einschließen. Der Kältekreislauf und die Isolierungsmaterialien dieses Gerätes sind ozonfreundlich. • • Die Isolierung enthält entzündliches Gas. Für Informationen zur korrekten Entsorgung des Gerätes wenden Sie sich an Ihre kommunale Behörde.
Betrieb Bedienfeld 1 Temperaturanzeige-LEDs 2 Taste QuickChill 3 Temperaturregler 1 3 2 Einschalten des Geräts Stecken Sie den Stecker in die Netzsteckdose. Funktion QuickChill Sie können die Funktion QuickChill durch Drücken der Taste QuickChill einschalten. Die entsprechende LED für die Funktion QuickChill leuchtet auf. Zum Ausschalten der Funktion QuickChill drücken Sie die Taste QuickChill erneut. Die Kontrolllampe für die Funktion QuickChill erlischt.
Erstes Einschalten ACHTUNG! Bevor Sie den Stecker in die Wandsteckdose stecken und das Gerät zum ersten Mal einschalten, lassen Sie es mindestens 4 Stunden aufrecht stehen. Diese Zeit ist ausreichend, damit das Öl in den Kompressor zurückfließen kann. Anderenfalls können der Kompressor oder elektronische Bauteile beschädigt werden.
1 3 2 Wenn Sie den Gefrierkorb wieder in das Gerät einschieben möchten, heben Sie die Vorderseite des Korbs leicht an und setzen Sie ihn in das Gefriergerät ein. Sobald der Gefrierkorb über den Anschlag hinweg ist, schieben Sie ihn wieder in seine ursprüngliche Position. Entnahme von Gefrierkörben Die Gefrierkörbe sind mit einem Anschlag ausgestattet, der ein versehentliches Herausziehen oder ein Herausfallen verhindert.
• • • Butter und Käse: Diese sollten stets in speziellen luftdichten Behältern verpackt sein oder in Aluminiumfolie bzw. in lebensmittelechte Tüten eingepackt werden, um so wenig Luft wie möglich in der Verpackung zu haben. Flaschen: Bitte bewahren Sie Flaschen stets mit Deckel im in der Türablage auf. Bananen, Kartoffeln, Zwiebeln und Knoblauch sollten im Kühlschrank nicht unverpackt aufbewahrt werden.
Reinigen Sie den Kondensator (schwarzes Gitter) und den Kompressor auf der Geräterückseite mit einer Bürste. Dadurch verbessert sich die Leistung des Geräts und es verbraucht weniger Strom. Bitte achten Sie darauf, das Kühlsystem nicht zu beschädigen. Wenn Sie das Gerät verschieben möchten, heben Sie es bitte an der Vorderkante an, um den Fußboden nicht zu verkratzen.
Problem Mögliche Ursache Abhilfe Der Netzstecker wurde nicht richtig in die Steckdose gesteckt. Stecken Sie den Netzstecker richtig in die Steckdose. Es liegt keine Spannung an der Netzsteckdose an. Testen Sie, ob ein anderes Gerät an dieser Steckdose funktioniert. Wenden Sie sich an einen qualifizierten Elektriker. Das Gerät ist zu laut. Unebenheiten im Boden wurden nicht ausgeglichen. Kontrollieren Sie, ob das Gerät stabil steht. Der Kompressor arbeitet ständig.
Problem Mögliche Ursache Abhilfe Die Temperatur lässt sich nicht einstellen. Die Funktion oder QuickChill ist eingeschaltet. Schalten Sie die Funktion oder QuickChill manuell aus, oder warten Sie mit dem Einstellen der Temperatur, bis die Funktion automatisch abgeschaltet wurde. Siehe hierzu Funktion „ oder Funktion QuickChill“. Die Temperatur im Gerät ist zu hoch/niedrig. Der Temperaturregler ist nicht richtig eingestellt. Stellen Sie eine höhere/niedrigere Temperatur ein.
Klimaklasse T Umgebungstemperatur +16 °C bis +43 °C gewährleisten, muss zwischen den Geräteseiten und den angrenzenden Küchenmöbeln ein Abstand von 30 mm eingehalten werden. Ausrichten Bei einigen Modellen können Funktionsstörungen auftreten, wenn sie außerhalb dieses Temperaturbereichs betrieben werden. Der ordnungsgemäße Betrieb wird nur innerhalb des angegebenen Temperaturbereichs gewährleistet.
2. Lösen Sie die Schrauben des oberen Türscharniers (1). 7 1 8 2 3. Entfernen Sie die Tür aus dem Stift des mittleren Scharniers (2). 4. Setzen Sie die Abdeckung des oberen Scharniers in die Löcher auf der gegenüberliegenden Seite. 5. Lösen Sie die Schrauben des mittleren Türscharniers (3). 6. Entfernen Sie die Kappen an der Oberseite beider Türen, und befestigen Sie diese an der anderen Seite. 7. Entfernen Sie die untere Tür aus dem Stift des unteren Scharniers (4). 3 4 8.
Führen Sie eine Endkontrolle durch, um sicherzustellen, dass: • Alle Schrauben fest angezogen sind. • Die Magnetdichtung am Gerät anliegt. • Die Tür ordnungsgemäß öffnet und schließt. Bei niedrigen Umgebungstemperaturen (z. B. im Winter) kann es vorkommen, dass die Türdichtung nicht richtig am Gerät anliegt. Warten Sie in diesem Fall ab, bis sich die Dichtung allmählich anpasst. Wenden Sie sich an den Kundendienst, wenn Sie bei den oben beschriebenen Schritten Unterstützung benötigen.
www.zanussi.
www.zanussi.
www.zanussi.
280153110-A-042014 www.zanussi.