Introduction Z8G 38 Introduction This gas oven has been desired and manufactured to all the necessary British Standards. It also carries the C.E. mark. The cooker complies with European Council Directive 90/396/EEC. It is important that you understand how to use and care for the oven properly before you use it for the first dime. We have written this booklet with your safety in mind. Read the booklet thoroughly before you use the oven.
Z5G 38 Contents Installing the oven General information The cooling fan for the controls ignition Oven lights Lighting the overkill The grill The grill pan and hand's The oven Baking trays and dishes Blank page Oven cooking charts Slow cooking The electronic timer Hints and tips for automatic cooking Care and cleaning What is wrong and why? Replacing an oven light bulb Service and spare parts Guarantee Contents
Installation Z5G 38 Installing the oven For your safety This oven must be installed and serviced by a competent person as called 0 e Gas Sally [installation & Use) regulations Current edition. It Is important that he oven is suitable for your gas supply. Your installer should check the data badge. Cabinet Dimensions This oven must be fitted into a cabinet with a suitable sized aperture.
Z5G 38 General information To get the best results from your new oven please read these instructions carefully. You should pay particular attention to cooking times and gas mark settings as these may differ rom your previous oven. You may find it necessary to adjust these unfit you are more familiar with the oven. For your safety Da not block any of the oven vents. Never line any pan of tie oven with aluminum foil.
General information Z5G 38 Ignition The grill and oven burners light automatically when you tum on the control. i, for any reason either of the boomers go out, the spark ignition will automatically relight it. Please note: You can only use the grill with the door fully or partially open. You cannot use the grill when the door is closed, You cannot use the oven and grill together. You cannot use the oven or grill in the event of a power failure. Oven lights Your oven has twa oven lights.
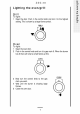
56G 38 Lighting the oven/grill Grill To light: 1 Open the door. Push in the control knob and tum it to the highest setting. This is shown by a large flame symbol. GRILL Oven To light: 1 Open the oven door. 2 Push in the control knob and furn it to gas mark 8. When the burner has lit there will only be small flames at first. 3 Now turn the control knob to the gas mark you want. 4 Wait until the boomer is showing large flames 5 Close the oven door.
Lighting the overfill Z5G 38 To turn off any burner 1 Push in the control knob and turn it to the off position. This is shown by a large dot.
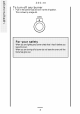
756G 38 The grill When you first turn the grill on, you will be able to smell residues from the grill surface being burnt off. It may be necessary to open & window for ventilation. The smell will disappear after using the grill a few times. For your safety You must keen the soot Tl or partially open when the gill butcher = it Accessible parks may be hot when the grill is used. Young children should be kel away Heat control The grill gives variable heat settings.
The grill Z5G 38 Cooking positions it Most food should be cooked on the grid in the grill pan. You can turn the grid over to suit different thicknesses of food. You can place some dishes straight on the grill shelf. This is useful when you are browning the top of food such as cauliflower A cheese. 220, Preheating You don't usually need to preheat the grill.
Z5G 38 For your safety Always remove e rill pan beriberi attempting to adjust the shelf notion. Oven doves should be used when removing the grill pan o pulling the elfin and ot Always remove the grill pan handle during grilling.
The grill Z5G 38 The grill pan and handle The grill pan has a removable handle. This should be removed during grilling. To attach the handle, press the button on the handle with your thumb. Lift the handle upwards slightly and put it in to the widest part of the grill pan bracket. Move the handle to the left and lower into position. You can now release the button. Make sure the handle is firmly located.
Z5G 38 To check the progress of the food when using the grill you should withdraw the grill pan on the shelf to attend to goad. After removing the grill pan you can rest it on a heat resistant work surface if you need to. Plate warming When using the grill, you can use the shelf below the grill pan to warm plates. Do not put plates on the shelf when the grill boomer is turned on and the grill pan is not in place. The heat from the burner will damage the plates.
The oven 256G 38 The oven Before you use the oven you should wipe it out ] . with a damp cloth. This will remove any dust. S e B When you first turn the oven on you will be able OAS MARK TEMPERATURE 1o smell residues from the oven surfaces being bunt off. It may be necessary to open a window for ventilation. The smell will disappear after using the oven a few times. Heat zones There are zones of heat within the oven. The temperature in the middle is the gas mark you have chosen.
Z5G 38 Oven shelves The two oven shelves can be slotted into place in any of 5 positions. The top shelf position should be reserved for grilling only. For safety the shelves will ably pull out so far. If you want to remove a shelf completely, pull it forward as far as it will go, raise the front edge and lift it out. To put the shelf info a different position, keep the front edge raised, slot the shelf onto the runtier, lower the front edge and slide the shelf in.
The oven Z5G 38 Baking trays and dishes Fot your safety Never lace cooking dishes, trays and so on over the oven burner. This will damage the oven as well 5 the ovenware and possibly the cabinet underneath the oven Leave a gap of 13mm between all dishes and the sides of the oven so the heat can circulate properly. not push dishes too far back as food will bum it it overhangs the boomer flames.
o Gas Shelf Approximate Food mark position cooking time Poultry: Chicken 5 4" 20 mind. per and 20 mind. Turkey below 4.5kg {10lbs) 4 5 25 mind. per and 25 mind. over 4.5kg {10 lbs) 4 5 15 mind. per % kg {11b) and 15 mind. Duck and duckling 5 4 25 mind. per Y2 kg {11b). Stuffed poultry Cook as above but calculate weight including stuffing Thoroughly thaw frozen joints before cooking them. The times given above are for when you are open roasting.
0z Gas Shelf Approximate Food Ark Position cooking time Pastries: Plate tart (shortcrust) 8 2 50 mind. interchange after 25 mind. Fruit pie {shortcrust) 6 2 50 mind. interchange after 25 mind. Wince pies (flan pastry) 5 284 15-25 mind, Profiteroles (couch pastry) 4 2 25 mind. To help pastry brown on the underside cook on a metal plate, or if plates are flat and have no rim underneath, place on baking tray to cook. Puddings: Milk puddings 2 3 1%-2 hours, Baked sponge pudding 4 4 45-80 mind.
Slow cooking Z5G 38 Soups, casseroles and stews ® Do not cook casseroles over 3kg (6lb). ® Do not cook two (1.8kg) {2Ib) casseroles on slow cook setting at the same time. ® Cook in the middle of the oven or above. ® Cover food with a tight fitting lid or tin foil. ® Cook for up to 9 hours, Vegetables & Cut into small pieces. ® Dried beans must be per-soaked then boiled in an open pan for 15 minutes before adding to any dish. ® Place vegetables under meat in casseroles.
Z5G 38 Milk and milk products, for example cream Add these towards the end of cooking to prevent them from curdling. Reheating Cool left over food quickly and then put it in the fridge. Do not reheat food using the slow cook setting. Reheat fed in the usual way of in a microwave. Only reheat food once.
The electronic timer Z5G 38 The electronic timer Please note that this is a 24 hour clock, for example 2pm is shown as 1400. Cook pot symbol In the following pages we explain how to set the controls. Read through them until you're familiar with the procedure. We have supplied a plastic card as a quick reference when setting the timer. Selector knob Setting knob f the oven is switched off on the wall or there is a loss of power, the clock will stop and you will not be able o use the oven.
Z5G 38 Automatic control When you use the automatic controls for the first time if's probably best to choose a time when you are at home. That way you can check to make sure you've set everything correctly and you'll feel much more confident when you are away from home in the future. Setting the controls for automatic use This is very easy. All you have to do is work through the steps below. The clock will work out the rest for itself.
The election timer Z5G 38 4 Whammed Turn the selector knob to youthfulness 'Stop’. Tum the setting food to be knob until the time the cooked by? oven is fo switch off shows in the display. The cook pot symbol {243 will go aut. The 'Stop’ time must not be more than 23 hours 59 minutes from the dime of day. For example i the time of day is 9.00 am the latest ‘Stop' time will be 8.59 am the next day. 5 Set to Turn the selector knob to automatic. ‘automatic’. The tme of day will show in the display.
Z5G 38 Hints and tips for automatic cooking 1 Check the instructions for setting the automatic controls until you are familiar with the timer operation 2 If the oven has been used, allow it to cool completely before using for automatic cooking. 3 You should leave food in the oven for as short a time as possible before automatic cooking starts. 4 Do not leave food to stand in the oven when it has finished cooking. You should remove it and if it is not going to be eaten at once, cool it quickly.
Cd re and cleaning Z5G 38 Care and cleaning For your safety For hygiene and sally recons you must keep this gas oven Clean A bulls other foodstuff could cause a fire. Trv 10 mop up slips and splashes as soon as they happen. BUt be careful as parts of the appliance will be hot. Do not use any polishes, caustic cleaners, abrasives, washing soda or soap powder except those recommended in this booklet.
Z5G 38 The oven Clean the base of the oven, the oven shelves, cake tray, and the oven door while they are still slightly warm. This way you can easily remove any splashes and spills. You may use mild abrasives. The heat in the oven will change the color of the metal plate on the shelf. You must not remove the solid plate from the shelf. You can soak the shelf for a few minutes in hot soapy water to make cleaning easier.
Cd re and cleaning Z5G 38 Oven cleaning cycle You need to follow the cycle o keep the inside of the oven in good condition. The type of cooking you do will affect how often you need to follow the cycle. If you do a lot of roasting and very lite baking you should follow the cleaning cycle once a week. If you do very little roasting you will only need to follow the cleaning cycle every 2-3 weeks. To carry out a cleaning cycle: 1 Remove the oven shelves. 2 Set the oven to mark 5 for at least 30 minutes.
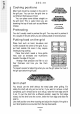
Z5G 38 Cleaning between the outer and inner door glass You can remove the glass from the oven door if you need to. To remove the outer glass 1 Open the oven door so you can get at the two cross head screws on the top of the oven door. 2 Loosen these screws using a overdrive screwdriver. 3 You should hold the door glass securely in place with one hand, whilst removing the screws completely, with the other hand. If you do not do this, the door glass could fall forward.
What = wing ane why? Z5G 38 What is wrong and why? We strongly recommend that you carry out the following checks on your oven before calling a Service Engineer. t may be that the problem is a simple one which you can solve yourself, without the expense of a service call. if the Service Engineer finds that the problem is listed below, you will be charged for the call whether or not the cooker is under guarantee. Problem The oven or grill will not fight, Check ® Check that the oven is switched on at the wall.
256G 38 Problem Having difficulty cleaning any part of the oven. Check @ Check that you are following the instructions for care and cleaning {See page 28). Problem The oven lights do not work. Check ® Check that the oven is not set for automatic cooking. The lights will illuminate when cooking begins. ® {f you have had your oven for some dime, you may need to replace an oven light bulb. (See page 34), Problem The timer does not work. Check ® Check that the timer instructions are being closely followed.
Replacing an oven light bulb Z5G 38 Replacing an oven light bulb You need a 25 Watt small Edison screw with a temperature rating of T300. & lake sure the oven is cool before you replace a bulb, Unplug the oven. Open the oven door and remove the oven shelves. Pull the glass bulb cover towards you and then pull it off, Unscrew the bulb by turning it to the left. Fit a new bulb and then replace the glass bulb cover, Replace the oven shelves. Plug the oven back into the electricity supply.
Z5G 38 Service and spare parts Far your safety Maintenance work must only be done by a competent person. Do not by [0 real the oven ourselves This could be dangerous. It 15 dangerous 1o alter or moodily the product in any way Help us to help you Please determine your type of inquiry before writing or telephoning. Service It is & recommendation by the manufacturer that annual servicing of the product is done by the manufacturers approved service organization.
Device and spare parts 756G 38 Customer care department For general inquiries conceding your Gaussian cooker or further information on Cooking, Cooling or Washing products, you are invited to contact our Customer Care Department by letter or telephone as follows: Customer Care Department Gaussian Limited Gaussian House Cambridge Road Aneurysm Berkshire REORG 5P Tol: (01635) 521313 The Gas Consumers’ Council The Gas Consumers’ Council (GCC) is an independent organization which protects the interests of gas u
286G 38 Peace of mind for twenty-four months Gaussian standard guarantee conditions This guarantee is in addition to your statutory and other legal rights which wil not be excluded or in any way diminished by the return of the guarantee card supplied with the canker.