Setup and Installation Guide Version 3.0 Copyright 2003-2004, MeshNetworks, Inc.
MEA Setup and Installation Foreword This document describes in detail the confidential and proprietary technology of MeshNetworks’ MEA™ Architecture. MeshNetworks products and technology are protected by US and international patent and patent pending technology. This document represents the current MEA design; the contents are subject to change at any time at the discretion of MeshNetworks, Inc.
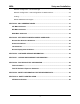
MEA Setup and Installation Table of Contents SECTION 1 - OVERVIEW ............................................................................................................ 1 Introduction .......................................................................................................................... 1 Documentation Overview.................................................................................................... 1 Acronyms .............................................................
MeshNetworks Subscriber Device (SD) ....................................................................................................... 1 Equipment ......................................................................................................................... 1 Record MAC Address of the WMC6300 ........................................................................... 1 Loading and Verifying WMC6300 Software ...................................................................... 1 Testing ....
MEA Setup and Installation Network Configuration – Device Manager ...................................................................... 18 Network Configuration – IAP Configuration Via Web Interface ....................................... 18 Testing ............................................................................................................................ 34 Default Addresses and Logins ........................................................................................
MeshNetworks List of Figures Figure 1. Elements of the MEA System.................................................................................3 Figure 2. Operational View of the MEA System....................................................................8 Figure 3. MEA Network Architecture .................................................................................9 Figure 4. Control Panel – Network and Dial-up Connections Icon ...................................11 Figure 5.
MEA Setup and Installation Figure 28. MEA Device Administration Update Confirmation Window ..........................25 Figure 29. MEA Device Administration Update Device Status Window .........................26 Figure 30. MEA Device Administration Restore Factory Defaults Window ...................27 Figure 31. Restore Factory Defaults Confirmation Message ..........................................27 Figure 32. MEA Device Administration Factory Settings Restored Window .................
MEA Setup and Installation Section 1 - Overview Introduction The MEA wireless broadband system allows a network operator to deploy a wireless, multihopping ad hoc network. This document describes how to setup, configure, and deploy a MEA system to operate in infrastructure mode. The MEA system is designed for easy installation. The infrastructure components of a MEA system are preinstalled with a default configuration for connection to a wired network.
MeshNetworks Acronyms HAS Hardware Authentication Server IAP Intelligent Access Point MEA Mesh Enabled Architecture MiSC Mobile Internet Switching Controller SD Subscriber Device (a host device with a WMC6300 installed and operational) WMC Wireless Modem Card WR Wireless Router PWR Portable Wireless Router VMM Vehicle Wireless Router EWR Enhanced Wireless Router Related Documentation MEA WMC6300 Wireless Modem Card User’s Guide for Windows 2000 MEA WMC6300 Wireless Modem Card User’s Guid
MEA Setup and Installation Section 2 - Description of the MEA System Introduction MeshNetworks develops Mobile Broadband communications systems with ad hoc architectures. That is, each node can connect directly, or indirectly (by hopping through other nodes), with any other node in the network.
MeshNetworks All network elements are designed to support mobile applications. Subscriber Devices can be either mobile or fixed, while the remaining components are typically fixed. Wireless Routers and IAPs can be mounted on utility poles, light poles, traffic apparatus, billboards, and buildings. Their fixed positions allow the Subscriber Device to pinpoint its location within one second. WRs and IAPs can also be mobile, attached to emergency vehicles, utility vehicles, or fleet vehicles.
MEA Setup and Installation Intelligent Access Points (IAPs) The Intelligent Access Point (IAP) is a low-cost, small device that acts as the transition point from the wireless network to the wired core network and from there, through media gateways, out to the Internet. Each IAP offers up to 6 Mbps burst data rate to subscribers. IAPs support the 10/100 base-T Ethernet interface. Other interfaces are supported through commercially available media translation devices.
MeshNetworks EWR6300 - Enhanced Wireless Router The Enhanced Wireless Router (EWR) is deployed to guarantee wireless coverage in large geographic areas while providing wireless network access to one or more IP devices via its built-in RJ45 Ethernet port. The EWR efficiently combines the functionality of a MeshNetworks Wireless Router and client modem in a single, cost-effective, wireless network component.
MEA Setup and Installation Mobile Internet Switching Controller (MiSC) The Mobile Internet Switching Controller (MiSC) provides connectivity between the IAPs and the wired world, and hosts the network’s management and provisioning functions. The MiSC is composed of off-the-shelf hardware components, such as LAN routers and application servers. MiSC software consists of both offthe-shelf and MeshNetworks’ proprietary software, MeshManager.
MeshNetworks Operational View of the MEA System Figure 2 shows the different ways a subscriber can reach an IAP. It can connect directly, or hop through any number or combination of WRs and SDs. Additionally, if the subscriber wishes to execute a peer-to-peer application such as a file transfer, the subscriber can communicate directly, or through any combination of SDs, WRs, and IAPs. The ability to use ad hoc routing to forward traffic improves the scalability of the mobile wireless network.
MEA Setup and Installation Network Architecture The basic MEA network utilizes two subnets, one for the MEA wireless elements and one for the server elements. For seamless IAP mobility, all of the MEA wireless elements must be in the same subnet. The subnets are connected together by the core router, and the edge router provides Internet connectivity. Figure 3 shows the logical network layout of a MEA network.
MeshNetworks Network DHCP Scheme Operation under the Network DHCP scheme is similar to that of MEARelease 2 in Infrastructure Mode. The primary difference is that users are now allowed to temporarily wander outside the network infrastructure without losing connectivity. Network DCHP requires that the user's host device be configured to request an address from a DHCP server and the inclusion of a DHCP server in the core network configuration to answer these requests.
MEA Setup and Installation IP address and subnet mask. The user is responsible for configuring options that would otherwise be configured by a DHCP server. It is also up to the user to ensure that the assigned address is routable on the core network (if core network access is needed) and that it does not conflict with other addresses in use. This is analogous to and carries the same caveats as plugging an Ethernet card into a LAN and manually assigning an address to the card.
MeshNetworks Figure 5. Network and Dial-up Connections Window On the Local Area Connection Properties dialog, click to select Internet Protocol (TCP/IP) then click on the Properties button. Figure 6. Local Area Connection Properties Dialog Box The Internet Protocol (TCP/IP) Properties dialog box will be displayed.
MEA Setup and Installation Figure 7. Internet Protocol (TCP/IP) Properties Dialog Box With the Use the following IP address: radio button selected, enter the IP address supplied by the Network Administrator in the IP Address: box. Double click in the Subnet Mask: box to set the default subnt mask. The Default gateway: and the DNS server addresses should have already been set by the Network Administrator. Click on the OK button to accept the changes and dismiss the dialog box.
MeshNetworks best effort traffic. User Priority allows a user to request that traffic to/from a node be given preferential treatment. The resulting priority order is reflective of queuing order. Quality of Service The primary objective for QoS is to provide the capability of differentiating traffic classes. The QoS provision will be implemented on a per-hop basis without explicit end-to-end QoS management.
MEA Setup and Installation Section 3 - Setup and Installation Subscriber Device (SD) A Subscriber Device consists of both a Wireless Modem Card (WMC6300) and an End User provided host device such as a notebook computer. The WMC6300 is designed for insertion into an industry-standard Type II PCMCIA card slot located in a Host device. The WMC6300 has an antenna port to connect the external antenna and two LED Indicators.
MeshNetworks operating system as there is a different sequence of events depending on the operating system. Detailed instructions can be found in the WMC6300 User’s Guide for each operating system. In addition, the MEA Administration Software and Documentation CD includes installation software to load the MeshView Administration Tool. MeshView may be installed as an option on a subscriber device to assist the Network Operator with network deployment.
MEA Setup and Installation 3. Highlight Internet Protocol (TCP/IP) in the Components window. 4. Click on the Properties button. 5. Click on the Advanced button. 6. Click on the DNS tab 7. Click on the DNS Add button. 8. Enter the DNS Server IP Address provided by the network administrator and then click the Add button. 9. Click the OK button to close the Advanced TCP/IP Settings windows. 10. Click the OK button to close the Internet Protocol (TCP/IP) Properties windows. 11.
MeshNetworks 2. Start driver install by clicking on d:\software\meaclientinstall.exe (where “d” is the CDROM drive) 3. The MEA Setup program will be displayed. Click the OK button. 4. Click the Next button to continue the software installation process. 5. Follow the onscreen prompts to complete the installation process. 6. Insert the antenna into the WMC6300 card. 7. Insert theWMC6300 card into the PCMCIA slot of the host computer.
MEA Setup and Installation • Weatherproof RJ-45 Connector • Mounting Bracket The Network Operator must supply the following: • Mounting Location • Power Source (120V A/C or 5V D/C, depending on IAP configuration) • Ethernet connection between the IAP and the MiSC • Hand tools for bracket installation (7/16 wrench (2), Phillips screwdriver) Optional Equipment: • DC powered IAP (IAP6300-DC-IN) • Power cord to connect to a photoelectric cell Optional FCC Approved Antennas: Manufacturer Part
MeshNetworks Record MAC Address of the IAP The transceiver MAC address is recorded on a label located on the antenna end of the IAP as shown in Figure 9. Record this number in Section 4 - MAC Address Tables, because it will be required later to configure and test the device. Both SBC ETH and XCVR MAC addresses should be recorded. Figure 9 IAP6300 Identification Label IAP Assembly The Figure 10 shows the external connection points on an IAP6300 box. Figure 11 show the mounting bracket.
MEA Setup and Installation Figure 11.
MeshNetworks Assemble the IAP using the following procedure: 1. If desired, mount the IAP6300 box using the enclosed bracket. Refer to Figure 11. 2. Place the bracket at the desired position on the pole The bracket can accommodate pole diameters between 1-3.5 inches. 3. Adjust the position of the box so that the antenna will be in a vertical position. Tighten the pivot and angle locking bolts on the shaft of the bracket as shown in Figure 12 4.
MEA Setup and Installation the MiSC is greater than 100 meters, the Network Operator may utilize a T1 with the optional Net-to-Net boxes. The IAP optionally has a 5V, 3-pin, power out connection on the side of the box to power the Net-to-Net boxes. Other media converters may be used at the network operator’s discretion. The installation location must provide power to the IAP.
MeshNetworks Wireless Router (WR) The MWR6300 (Wireless Router) is an infrastructure device positioned in a fixed location, such as on a pole, wall, or rooftop. The MWR6300 requires professional installation to ensure the installation is performed in accordance with FCC licensing regulations. The Wireless Routers provides range extension, a means to route around obstructions, and a fixed location reference for use in Geo-Location.
MEA Setup and Installation Record MAC Address of the MWR6300 The transceiver MAC address is recorded on the label located on the antenna end of the MWR6300 as shown in Figure 13. Record this number in Section 4 - MAC Address Tables, because it will be required later to configure and test the device. Figure 13. MWR6300 Identification Label MWR6300 Assembly Figure 14 shows the external; connection points on a MWR6300 box. Test Port Figure 14.
MeshNetworks 4. Verify the MAC address has been recorded in Section 4 - MAC Address Tables, as it will be required to configure and test the device. 5. The Test Port is unused during deployment. Deployment The MWR6300 can be mounted on a pole by using the provided bracket. When deploying the MWR6300, the antenna should be a minimum of 30 inches from any nearby metal poles to avoid distortion of the RF pattern.
MEA Setup and Installation • MeshManager Server (Server, Monitor, Keyboard, Mouse), pre-installed with the MeshManager software • 5 Ethernet Cables The Network Operator must supply the following: • Physical location and AC power for the routers, switch, and server(s) • Ethernet connection(s) from the switch to the IAP(s) • Ethernet connection to Internet or to Network Operator’s private network (Custom IP network configuration may be required depending on Network Operator’s network configuration)
MeshNetworks Network Setup Description The basic MiSC hardware configuration is shown in Figure 15. Figure 15. Basic MiSC Configuration The following describes the parameters for setting up the network: • All MEA wireless devices must be within the same subnet. • MEA currently uses the non-routable 10.x.x.x (8 bit) subnet as defined in RFC 1918. • The IAPs, WRs, and SDs will use DHCP to obtain an IP address, the default configuration returns a 10.x.x.x address.
MEA Setup and Installation MiSC Assembly The MiSC hardware consists of commercial off-the-shelf components. The components are pre-configured with a basic configuration that requires minimal site-specific changes. The SMC switch arrives configured as two virtual LANs. The upper row of Ethernet ports is for the server subnet; the lower row of ports is for the wireless subnet. Unpack the SMC switch and mount as desired (either in a rack or on a table top). Connect the switch to a power source.
MeshNetworks be handled automatically by the DHCP changes. These should refresh automatically when the DHCP lease time expires (600 seconds) and they refresh their DHCP lease. This can be hurried by simply resetting the devices once the other changes have been completed. Changing the Wireless Subnet The IP address of the default gateway used by any MEA device must not be within the either of the wireless subnets configured in all IAPs.
MEA Setup and Installation Onsite Configuration of Routers EdgeRTR Configuration The EdgeRTR must have on-site configuration done if there is a desire to connect to the Internet. Prior to performing the following steps, obtain the IP address, netmask, and default gateway for the public interface from the Internet Service Provider. These are shown as ip.ip.ip.ip, nm.nm.nm.nm, and gw.gw.gw.gw, respectively, in the instructions below. Also, obtain the IP address of the EdgeRTR, it will be in the form of 172.
MeshNetworks Network Configuration – Device Manager Device Manager is a utility located on the MeshManager server. It is used to configure and monitor the deployed network. Refer to the MeshManager User’s Guide for detailed instructions on how to use the Device Manager. MEA systems are delivered with the initial configuration of IAPs, WRs, and SDs in the MeshManager system. This allows for easy testing of the system as units are tested on site.
MEA Setup and Installation When the User Name and Password has been verified, the Administration window will be displayed as shown in Figure 19. Figure 19. MEA Device Administration Authentication Window At the completion of the logon, the Home Tab screen will be displayed as shown in Figure 20.
MeshNetworks Home Tab Figure 20.
MEA Setup and Installation Home Tab – Change Admin Password From the Home tab, the user can select the Change Admin Password to change the administrator password of the device. WARNING – If the password is lost, the password can only be reset at the factory. Do not forget to record the information in an appropriate location for future use. 1. To change the password, select Change Admin Password. 2. Enter the new password will be displayed on the Change Password window as shown in Figure 21.
MeshNetworks Figure 22. MEA Device Administration Confirmation Window 5. The browser will display a message that confirms the password change as shown in Figure 23. Click on the Finished button to continue. Figure 23. MEA Device Administration Password Changed Window 6. A Logon window will now prompt for the new password.
MEA Setup and Installation Figure 24. MEA Device Administration Logon Window Home Tab – Update Device Firmware From the Home Tab, select Update Device Firmware to load a new version of the firmware into the IAP. . A New Device Firmware window will be displayed as shown in Figure 25 Figure 25.
MeshNetworks 1. Specify the path and file name of the firmware bin file to be uploaded to the device. Or click on the Browse button to navigate to the correct location of the firmware bin file. If the Browse button is selected, the Choose file window is displayed as shown in Figure 26. Locate and select the desired firmware bin file to be uploaded to the device. Then click on the OK button. Figure 26.
MEA Setup and Installation Figure 27. MEA Device Administration Update Device Firmware Window (2) 2. If the Upload button is selected, an upload confirmation message is displayed as shown in Figure 28 to confirm that you want to continue the Firmware Update procedure. Click on the OK button to continue or select Cancel to terminate the Firmware Update procedure. Figure 28. MEA Device Administration Update Confirmation Window 3. If the OK button is selected, the new Firmware is loaded into the device.
MeshNetworks 4. As the Firmware is being uploaded, a status page is displayed as shown in 29. Figure 29. Figure MEA Device Administration Update Device Status Window 5. At the completion of the update, the IAP’s SBC must be reset for the update to take effect. Select the Finished button to navigate to the Reset Device window, and then click on the Reset button as described in the procedure located on page 30. The device will reset and return to the Home tab.
MEA Setup and Installation Figure 30. MEA Device Administration Restore Factory Defaults Window 6. Click on the Apply button to continue the restore process or select the Cancel button to terminate the process with out changing the device settings. 7. If the Apply button is selected, a confirmation message is displayed as shown in Figure 31 to confirm that you want to continue the Restore Factory Settings procedure. Figure 31. Restore Factory Defaults Confirmation Message 8.
MeshNetworks Figure 32.
MEA Setup and Installation Figure 33 MEA Device Administration Device Reset Window If the OK button is selected, the configuration settings will be restored and the device will reset automatically. Upon completion of the process, the browser will return automatically to the Home tab. Home Tab – Reset Device From the Home tab, the user can select the Reset the Device option to reset the device and reinitialize the IAP. The configuration settings are preserved during the initialization process.
MeshNetworks Figure 34. MEA Device Administration Device Reset Window 3. The Reset the Device window displays a message that describes the process and the time to completion as shown in Figure 35. The browser window will return to the Home tab at the completion of the reset.
MEA Setup and Installation Figure 35.
MeshNetworks System Settings Tab The System Settings Tab is shown in Figure 36. Figure 36. MEA Device Administration System Settings Tab The System Settings tab allows the network operator to change the following values: HAS IP Address – (Hardware Authentication Server) Network host from which authentication is requested. HAS Port Number – Port number on the Network host from which authorization is requested (a value of zero causes the IAP to not request authentication).
MEA Setup and Installation Backup Interface Subnet Prefix – Allows an alternate subnet prefix to be used for the IAPs in the event that the 10.x.x.x subnet is already in use. Click the Apply button to save the changes, or click the Cancel button to delete any changes. If the Apply button is selected, a confirmation window will appear as in Figure 37. Click on the OK button to continue or select Cancel to terminate the procedure. Figure 37.
MeshNetworks Associations Tab The Associations Tab is an information only window as is shown in Figure 39. Figure 39. MEA Device Administration Associations Tab This window displays all devices currently associated with an IAP. There will always be at least 2 entries: one for the IAP’s SBC and one for the IAP’s transceiver. For every wireless router and subscriber device currently associated with the IAP, there will be an additional entry in the table.
MEA Setup and Installation Wireless System Tests There are two basic tests to verify correct operation the system. The first test is to perform ping tests to each device and the second test is to verify access the Internet. Ping Test From Device Manager, complete the following to verify correct operation of the system: 1.
MeshNetworks Device Description Default Core Router Wireless subnet IP address for Core Router 10.0.0.1 Edge Router login password g0ld1 Edge Router enable password g0ld11 Edge Router IP address on Server 172.31.0.1 Sun Blade root password g0ld11 Sun Blade node name MeshManager Sun Blade IP address for next-level hierarchical DNS server (none) Sun Blade IP address if Mesh VPN support is provided 172.31.0.20 Sun Blade Secondary IP address for IAP rdate server 192.168.50.
MEA Setup and Installation Section 4 - MAC Address Tables This table has been included for recording the Ethernet MAC address and transceiver MAC address for a set of EWR devices as a quick reference. These addresses will be required for configuration and management of these devices.
MeshNetworks WMC MAC Addresses WMC MAC Address 00-05-12-0A-xx-yy 38
MEA Setup and Installation Section 5 - Site Selection/Deployment Guidelines General Site Selection Guidelines The IAP location(s) should be selected first since they have the additional requirement of routing information back to the MiSC. This may be done via an Ethernet cable if the IAP and MiSC are located within 100 meters (the max length permitted for standard Ethernet) of each other. If the distance is greater than 100 meters, a mechanism for extending the Ethernet connection will be required, e.g.
MeshNetworks Antenna Obstruction Antenna Obstruction Figure 40. Antenna Mounting Low gain rubber duck antennas that are mounted directly to Mesh transceivers are designed for transmitting and receiving vertically polarized radiation. Hence, care must be taken to insure close-to-vertical orientation of these antennas to avoid substantial signal loss due to polarization mismatch. Additionally, attenuation sustained by use of these antennas inside vehicles can be as high as 10 dB.
MEA Setup and Installation should be deployed in a near to far pattern; in other words, WRs that are 1 hop from an IAP should be deployed first, followed by WRs that are 2 hops from an IAP, etc. This allows the functionality of each WR to be determined at the time of installation, thus eliminating any extra truck rolls to trouble-shoot a WR.
MeshNetworks Section 6 - Customer Service Information If you have read this document, and made every effort to resolve installation or operation issues yourself and still require help, please contact MeshNetworks Customer Support using the following contact information: MeshNetworks, Inc.
MEA Setup and Installation Section 7 - License and Warranty Information MeshNetworks, Inc. End User License Agreement IMPORTANT NOTICE TO END USERS: This End User License Agreement (this Agreement) is a legal agreement between the licensee of the Licensed Software being made available for use with the MeshNetworks Equipment (either an individual person or a single legal entity, who will be referred to in this Agreement as You) and MeshNetworks. Inc. 1 DEFINITIONS.
MeshNetworks the Licensed Software and all rights not expressly granted herein are reserved by MeshNetworks. 5 RESTRICTIONS. You will not: 5.1 Use the Licensed Software in conjunction with any other equipment or for any purpose other than for the operation and monitoring of the MeshNetworks Equipment and for your internal business purposes in accordance with the operating instructions MeshNetworks or the Source may provide to you from time to time; 5.
MEA Setup and Installation MeshNetworks' control, or (d) You fail to incorporate all error fix releases that MeshNetworks or the Source has provided. In the event the Source fails to perform its responsibilities as described in this Section 6.1 within a reasonable period of time, MeshNetworks or one of its independent contractors will perform such obligations. The warranty period, but not the scope of obligations described above, may be extended by a written agreement between You and the Source. 6.
MeshNetworks 7 SUPPORT SERVICES. The Source may provide You with support services related to the Licensed Software (Support Services). Use of Support Services is governed by the Source’s policies and programs or in other materials from the Source. Any Updates or other supplemental software code provided to You as part of the Support Services are considered part of the Licensed Software and subject to the terms and conditions of this Agreement.
MEA Setup and Installation Government, then it is acquiring only restricted rights in the Licensed Software and its Documentation, all as defined in the applicable provisions of the Department of Defense Federal Acquisition Regulation Supplement and the Federal Acquisition Regulations. Such unit will include a restricted rights legend on the MeshNetworks Equipment and Licensed Software as may be necessary to insure the limitation of rights acquired by the government.
MeshNetworks Section 8 - FCC Regulatory Information FCC Information This device complies with Part 15 of the FCC Rules. Operation is subject to the following two conditions: (1) this device may not cause harmful interference, and (2) this device must accept any interference received; including interference that may cause undesired operation. The IAP6300 (Intelligent Access Point) is an infrastructure device that is positioned at a fixed location such as a building rooftop.
MEA Setup and Installation Section 9 - Safety Information for the MEA Products The Federal Communications Commission (FCC) with its action in ET Docket 96-8 has adopted a safety standard for human exposure to radio frequency (RF) electromagnetic energy emitted by FCC certified equipment. MeshNetworks’ MEA products meet the uncontrolled environmental limits found in OET-65 and ANSI C95.1, 1991.
MeshNetworks Products covered - IAP6300, EWR6300 , WMC6300, and MWR6300 ETSI EN 301 489-1 (2002-08) and 301 489-17 Products covered - IAP6300, EWR6300 , WMC6300, and MWR6300 EN 55022:1998 and EN 55024:1998 Products covered - IAP6300, EWR6300 , WMC6300, and MWR6300 CENELEC EN 50360 and EN50371 – Specific Absorption Test - SAR Products covered - WMC6300 The following countries are covered under the CE Mark: Austria, Belgium, Demark, Finland, Germany, Greece, Ireland, Italy, Luxemburg, Netherlands, Portugal, S