ZebraNet® Wireless User Guide for the ZebraNet Wireless Print Server, ZebraNet Wireless Plus Print Server, ZebraNet Internal Wireless Plus Print Server, and ZebraNet b/g Print Server with printer firmware versions X.15.
© 2011 ZIH Corp. The copyrights in this manual and the software and/or firmware in the printer described therein are owned by ZIH Corp. and Zebra’s licensors. Unauthorized reproduction of this manual or the software and/or firmware in the printer may result in imprisonment of up to one year and fines of up to $10,000 (17 U.S.C.506). Copyright violators may be subject to civil liability.
Contents About This Document . . . . . . . . . . . . . . . . . . . . . . . . . . . . . . . . . . . . . . . . . . . . . . . 5 Who Should Use This Document . . . . . . . . . . . . . . . . . . . . . . . . . . . . . . . . . . . . . . . . . . . . How This Document Is Organized . . . . . . . . . . . . . . . . . . . . . . . . . . . . . . . . . . . . . . . . . . . Contacts . . . . . . . . . . . . . . . . . . . . . . . . . . . . . . . . . . . . . . . . . . . . . . . . . . . . . . . . . . . . . . .
Contents Wireless Network Parameters on the LCD . . . . . . . . . . . . . . . . . . . . . . . . . . . . . . . . . . . . Xi4, R110Xi4, ZM400, ZM600, RZ400, and RZ600 Printers. . . . . . . . . . . . . . . . . . . . S4M Printers . . . . . . . . . . . . . . . . . . . . . . . . . . . . . . . . . . . . . . . . . . . . . . . . . . . . . . . . Other Printer Models. . . . . . . . . . . . . . . . . . . . . . . . . . . . . . . . . . . . . . . . . . . . . . . . . . Restore Network Parameters to Defaults . . . . . .
About This Document This section provides you with contact information, document structure and organization, and additional reference documents. Contents Who Should Use This Document . . . . . . . . . . . . . . . . . . . . . . . . . . . . . . . . . . . . . . . . . . . . How This Document Is Organized . . . . . . . . . . . . . . . . . . . . . . . . . . . . . . . . . . . . . . . . . . . Contacts . . . . . . . . . . . . . . . . . . . . . . . . . . . . . . . . . . . . . . . . . . . . . . . . . . . . . . . . .
About This Document Who Should Use This Document Who Should Use This Document This User Guide is intended for use by someone who needs to configure and use a wireless print server for use with a supported printer. This version of the User Guide supports the ZebraNet Wireless Print Server, the ZebraNet Wireless Plus Print Server, the ZebraNet Internal Wireless Plus Print Server, and the ZebraNet b/g Print Server with printer firmware versions X.15.x or later. Some features or printers require X.16.x, X.
About This Document Contacts Contacts Technical Support via the Internet is available 24 hours per day, 365 days per year. Web Site: www.zebra.com E-mail Back Technical Library: E-mail address: emb@zebra.com Subject line: Emaillist Self Service Knowledge Base: www.zebra.com/knowledgebase Online Case Registration: www.zebra.
About This Document Document Conventions Document Conventions The following conventions are used throughout this document to convey certain information. Alternate Color (online only) Cross-references contain hot links to other sections in this guide. If you are viewing this guide online in .pdf format, you can click the cross-reference (blue text) to jump directly to its location. LCD Display Examples Text from a printer’s Liquid Crystal Display (LCD) appears in Bubbledot ICG font.
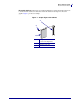
About This Document Document Conventions Illustration Callouts Callouts are used when an illustration contains information that needs to be labeled and described. A table that contains the labels and descriptions follows the graphic. Figure 1 provides an example.
About This Document Document Conventions Notes • ___________________________________________________________________ __________________________________________________________________________ __________________________________________________________________________ __________________________________________________________________________ __________________________________________________________________________ __________________________________________________________________________ ______________
1 Introduction This section provides an overview of the ZebraNet wireless print servers. Contents Printer Requirements and Print Server Features . . . . . . . . . . . . . . . . . . . . . . . . . . . . . . . Hardware . . . . . . . . . . . . . . . . . . . . . . . . . . . . . . . . . . . . . . . . . . . . . . . . . . . . . . . . . . . Firmware . . . . . . . . . . . . . . . . . . . . . . . . . . . . . . . . . . . . . . . . . . . . . . . . . . . . . . . . . . . Connecting to a Wireless Network . . . . . . . .
Introduction Printer Requirements and Print Server Features Printer Requirements and Print Server Features This section defines the requirements for using the different ZebraNet wireless print servers. It also defines features of and limitations to the wireless print servers on different printer models. Hardware PCMCIA and Compact Flash Memory Cards PCMCIA memory or Compact Flash memory cards will not work and are not supported on the Wireless Plus Print Server.
Introduction Printer Requirements and Print Server Features Table 1 • Zebra Part Numbers for ZebraNet Wireless Print Server Boards (Continued) Part Number Corresponds to the Following 29881-009 * Wireless Print Server 79077 79078 79079 79100 * Not supported by this manual. Refer to the Wireless Print Server User Guide, part number 13422L-XXX. Firmware After a wireless option board is installed, your printer must be running a supported firmware version to access the features in this manual.
Introduction Printer Requirements and Print Server Features Table 2 • Supported Firmware Versions Printer XiIIIPlus Xi4 Z4Mplus, Z6Mplus ZM400, ZM600 14143L-008 Rev. B ZebraNet b/g Print Server ZebraNet Internal Wireless Plus Print Server ZebraNet Wireless Plus Print Server ZebraNet Wireless Print Server — X60.16.X X60.15.X X60.15.X X53.17.11Z X53.17.X X53.17.X — — — — X60.15.X X53.17.11Z X53.16.X X53.15.
Introduction Connecting to a Wireless Network Connecting to a Wireless Network The ZebraNet wireless print servers are Ethernet connectivity options for your printer. With one of these wireless print servers, the printer communicates with a wireless Local Area Network (WLAN) through a wireless radio card instead of being connected to a wired Local Area Network (LAN) with physical wires. Figure 2 shows the network architecture of a typical WLAN setup.
Introduction Connecting to a Wireless Network Supported Wireless Radio Cards Note • The ZebraNet Internal Wireless Plus Print Server and the ZebraNet b/g Print Server have a built-in wireless radio card. This section applies only to the ZebraNet Wireless Print Server and the ZebraNet Wireless Plus Print Server. A supported third-party PCMCIA, Compact Flash™, or CardBus wireless radio card is required for the printer to qualify with the WLAN.
Introduction Connecting to a Wireless Network Cisco® Systems All Aironet® cards must have card firmware version 5.60.21 or later. • 802.11g Aironet CB21AG CardBus wireless radio card (for the Wireless Plus Print Sever only) • 802.11b Aironet AIR-PCMC340 • 802.11b Aironet AIR-PCMC341 • 802.11b Aironet AIR-PCMC342 • 802.11b Aironet PCMC350 • 802.11b Aironet PCMC351 • 802.11b Aironet PCMC352 2/16/11 Wireless User Guide 14143L-008 Rev.
Introduction Connecting to a Wireless Network Supported Security Types Your WLAN can use any of a number of different types of security and encryption, or it can use none at all. This section shows which security types you can use with the different ZebraNet wireless print servers. Note • Configuring a printer for WPA also allows the printer to be used in WPA2 environments. ZebraNet Wireless Plus Print Server Table 3 lists the security types that are supported by the Wireless Plus Print Server.
Introduction Connecting to a Wireless Network Table 3 • Security Types Supported on the Wireless Plus Print Server (Continued) Card Manufacturer Cisco Security Type Symbol Cisco CB21 Cisco 350 LA-4121 (PCMCIA) LA-4137 Compact Flash WPA2- EAP-TTLS Yes Not Supported Not Supported Not Supported WPA2- PEAP Yes Not Supported Not Supported Not Supported * Key rotation for WPA2 PSK is supported in firmware version V60.15.8Z or later, V53.15.8Z or later., V54.16.x or later, and RX.15.8Z or later.
Introduction Connecting to a Wireless Network Table 4 • Security Types Supported on the Internal Wireless Plus Print Server and the b/g Print Server (Continued) Security Type Supported? WPA2- EAP-TTLS Yes WPA2- PEAP Yes ZebraNet Wireless Print Server Table 5 lists the security types that are supported by the Wireless Print Server. Support varies by the card manufacturer and the card type.
Introduction Determining the Active Print Server Determining the Active Print Server Most printers can have wired and wireless print servers installed at the same time. However, only one of the installed print servers can be active at any given time. Viewing IP Addresses and the Active Print Server The wired and wireless print servers have different IP addresses. The printer’s control panel displays the IP address of the active print server (see View Wireless Status through the Control Panel on page 31).
Introduction Determining the Active Print Server Active Device Selection Your active print server selection is dependent on the model of printer or print engine that you have. If your printer is a(n)… Then… • S4M Only one print server (wired or wireless) can be installed at a time. Thus, the print server installed is the primary print server. • • • • • • • • 105SL XiIIIPlus R110Xi R170Xi Z4Mplus Z6Mplus PAX4 R110PAX4 You may select which installed device is the primary network device.
Introduction Determining the Active Print Server Table 6 • Results of Check for Wired Print Server for 105SL, XiIIIPlus, Z4Mplus, Z6Mplus, and PAX4 Series Printers Installed and Connected to a Live Ethernet Network If the Check for Wired Print Server is set to: Wired Wireless* X X Skip Then the Active Print Server will be: Wireless X Wired X Check X Wireless X Wired X Wired X Wireless * NOTE: A wireless option board must have an active radio that can properly associate to an access point
Introduction Install a Wireless Radio Card or Compact Flash Wireless Radio Card Install a Wireless Radio Card or Compact Flash Wireless Radio Card Note • The ZebraNet Internal Wireless Plus Print Server and the ZebraNet b/g Print Server have a built-in wireless radio card. This section applies only to the ZebraNet Wireless Print Server and the ZebraNet Wireless Plus Print Server.
Introduction Install a Wireless Radio Card or Compact Flash Wireless Radio Card 4. Place the RF card cover over the wireless radio card, and secure it with a small screw. Note • The S4M, ZM400, ZM600, RZ400, and RZ600 printers do not use the RF card cover. 3 2 1 1 2 3 Clear plastic RF card cover (not used on all printers) Screw Wireless radio card 5. Turn on (I) the printer. The printer restarts and uses the wireless radio card to communicate with your WLAN.
Introduction Install a Wireless Radio Card or Compact Flash Wireless Radio Card Compact Flash Wireless Radio Card This section applies to Compact Flash wireless radio cards, which require an adapter before they can be used in the wireless option card slot. To install a Compact Flash wireless radio card and adapter, complete these steps: 1. If you have not already done so, turn off (O) the printer. 2.
Introduction Install a Wireless Radio Card or Compact Flash Wireless Radio Card 5. Place the RF card cover over the wireless radio card, and secure it with a small screw. Note • The S4M, ZM400, ZM600, RZ400, and RZ600 printers do not use the RF card cover. 3 2 1 1 2 3 Clear plastic RF card cover (not used on all printers) Screw Compact Flash wireless radio card and adapter 6. Turn on (I) the printer. The printer restarts and uses the wireless radio card to communicate with your WLAN.
Introduction Install a Wireless Radio Card or Compact Flash Wireless Radio Card Notes • ___________________________________________________________________ __________________________________________________________________________ __________________________________________________________________________ __________________________________________________________________________ __________________________________________________________________________ __________________________________________________
2 Wireless Status and Settings This section presents several options for viewing or modifying the wireless status and settings. You may also use: • the printer web pages (see WebView Web Pages on page 51) • the ZPL commands • the Set/Get/Do commands Contents Configuration . . . . . . . . . . . . . . . . . . . . . . . . . . . . . . . . . . . . . . . . . . . . . . . . . . . . . . . . . . View Wireless Status through the Control Panel . . . . . . . . . . . . . . . . . . . . . . . . . . . . . . .
Wireless Status and Settings Configuration Configuration Important • A wireless option board must be installed on your printer before you can configure the printer to communicate using a wireless radio card. See Hardware on page 12 to determine if your printer has a wireless board. See Firmware on page 13 for the required firmware version. You may configure your printer for wireless operation in the following ways: Through the Network Setup Wizard.
Wireless Status and Settings View Wireless Status through the Control Panel View Wireless Status through the Control Panel After the wireless print server is configured, you may view the wireless status on the printer’s control panel. Printers with an LCD display text or symbols (see LCD Link Status and Wireless Signal Indicators). The HC100 printer does not have an LCD, so the wireless status is indicated by the control panel lights (see HC100 Wireless Status Indicator Lights on page 32).
Wireless Status and Settings View Wireless Status through the Control Panel Table 9 • Wireless Signal Indicators Wireless Signal Indicator Description SIGNAL STRENGTH and SIGNAL QUALITY When these indicators display percentages, the wireless radio card is communicating with the network. The higher the number is, the better the connection is between the printer and the network.
Wireless Status and Settings Print Network Configuration Information Print Network Configuration Information Most printers and print engines print the print server settings on a network configuration label. The HC100 printer prints the print server settings on a printer configuration wristband. Network Configuration Label A network configuration label (Figure 5) lists the settings for the print servers installed in your printer.
Wireless Status and Settings Print Network Configuration Information HC100 Printer Configuration Wristband An HC100 printer configuration wristband (Figure 6) shows the printer’s connectivity settings. The IP ADDRESS and MAC ADDRESS fields will have values only if a wired or wireless print server is active. Figure 6 • Sample Printer Configuration Wristband To print a printer configuration wristband, complete these steps: 1. Make sure that the printer is on (I) and ready to print. 2.
Wireless Status and Settings Wireless Network Parameters on the LCD Wireless Network Parameters on the LCD Note • The HC100 printer does not have an LCD. To view or change the wireless parameters, use the printer’s web pages, ZPL commands, or SGD commands. The control panel parameters are somewhat different for different printers. Refer to the User Guide for your printer for specific instructions on how to modify the control panel parameters.
Wireless Status and Settings Wireless Network Parameters on the LCD Table 11 • Wireless Parameters for Xi4, R110Xi4, ZM400, ZM600, RZ400, and RZ600 Printers (Continued) Parameter Function ACTIVE PRINTSRVR View the Active Print Server This menu item displays which print server is being used. This tells which device’s settings such as IP protocol and IP address are being displayed under those menu items. Selections: • WIRELESS indicates that the wireless device is active.
Wireless Status and Settings Wireless Network Parameters on the LCD Table 11 • Wireless Parameters for Xi4, R110Xi4, ZM400, ZM600, RZ400, and RZ600 Printers (Continued) Parameter Function SUBNET MASK View or Change the Subnet This parameter can be modified only when PERMANENT is selected for IP PROTOCOL. Selections: 0 to 255 for each field Default Value: 255.255.255.0 Note • Leading zeroes are not shown in the address. Corresponding ZPL Command: ^ND Corresponding SGD Command: ip.
Wireless Status and Settings Wireless Network Parameters on the LCD Table 11 • Wireless Parameters for Xi4, R110Xi4, ZM400, ZM600, RZ400, and RZ600 Printers (Continued) Parameter Function WLAN SECURITY View the WLAN Security Type This parameter displays the current security type. Corresponding ZPL Command: ^WX Corresponding SGD Command: wlan.
Wireless Status and Settings Wireless Network Parameters on the LCD S4M Printers Table 12 shows the wireless parameters that may be viewed or modified through the S4M control panel. Table 12 • Wireless Parameters for S4M Printers Parameter Explanation Password Level 3 Parameters OBTAIN IP ADDRESS Obtain an IP Address Selects the method by which an IP address will be assigned to the printer. If you choose AUTO SELECT, you may specify a value for CHANGE IP PROTOCOL.
Wireless Status and Settings Wireless Network Parameters on the LCD Table 12 • Wireless Parameters for S4M Printers (Continued) Parameter Explanation CHANGE SUBNET View or Change the Subnet This parameter can be modified only when PERMANENT is selected for OBTAIN IP ADDRESS. Selections: 0 to 255 for each field Default Value: 0.0.0.0 Note • Leading zeroes are not shown in the address.
Wireless Status and Settings Wireless Network Parameters on the LCD Table 12 • Wireless Parameters for S4M Printers (Continued) Parameter RESET NETWORK Explanation 1 Reset the Wired or Wireless Network Use this parameter to reinitialize the wireless radio card and the print server (wired or wireless) when the wireless print server is running. This parameter also causes any wireless radio card in the printer to reassociate to the wireless network.
Wireless Status and Settings Wireless Network Parameters on the LCD Other Printer Models Table 13 shows the wireless parameters that may be viewed or modified through the control panel on the following printers: • Non-RFID—105SL, PAX4, XiIIIPlus, Z4Mplus, Z6Mplus • RFID—R110PAX4, R4Mplus, R110Xi, R170Xi, R110Xi HF Printers with older versions of firmware have a different set of parameters. For those parameters, refer to the ZebraNet Wireless Print Server User Guide. You may download firmware V60.15.
Wireless Status and Settings Wireless Network Parameters on the LCD Table 13 • Wireless Parameters for Other Printer Models (Continued) Parameter Function SUBNET MASK View the Subnet Default Value: 255.255.255.0 Corresponding ZPL Command: ^ND Corresponding SGD Command: ip.netmask DEFAULT GATEWAY View the Gateway Default Value: 0.0.0.0 Corresponding ZPL Command: ^WI Corresponding SGD Command: ip.
Wireless Status and Settings Restore Network Parameters to Defaults Restore Network Parameters to Defaults You may need to restore the network parameters to the factory defaults under the following circumstances: • If you download a different version of firmware to your printer • If you need to reset the encryption keys (for instances where a key was entered incorrectly or was forgotten) After you return the network parameters to the defaults, you must reconfigure your printer to use the wireless print
3 Troubleshooting This section provides solutions to problems related specifically to the wireless print servers. For print quality or other printer-specific problems, refer to the troubleshooting section in the User Guide for your printer. For problems with the wireless radio card or access point not addressed here, refer to the appropriate third-party documentation. Contents Wireless Error Messages . . . . . . . . . . . . . . . . . . . . . . . . . . . . . . . . . . . . . . . . . . . . . . . . .
Troubleshooting Wireless Error Messages Wireless Error Messages Table 14 shows error messages that may appear on the control panel. Table 14 • Error Messages Message Description NO CARD INSERTED The wireless radio card is not inserted at all or is not fully seated. NOT ASSOCIATED The wireless radio card is present but cannot log on to the network.
Troubleshooting General Issues Table 15 • General Issues and Recommended Solutions (Continued) Issue Possible Cause Recommended Solution After a firmware upgrade, the printer will not connect to the network. Network settings need to be updated. 1. Through the printer’s control panel, press SETUP/EXIT to enter Setup mode. 2. Press SETUP/EXIT again to access the printer’s save and default options. 3. Scroll to DEFAULT NET. 4. Press SETUP/EXIT. The network settings are returned to factory defaults. 5.
Troubleshooting Encryption and Authentication Issues Encryption and Authentication Issues Table 16 • Encryption and Authentication Issues and Recommended Solutions Issue Possible Cause Recommended Solution The entry field for WEP keys on the printer’s web page does not display all 26 characters. The field accepts 26 characters, but they may not be able to display all at once because of your browser or system settings.
Troubleshooting IP Issues IP Issues Table 17 • IP Issues and Recommended Solutions Issue Possible Cause Recommended Solution The printer shows IP address 192.168.254.254, which does not appear to work. IP address 192.168.254.254 is a default address. The printer shows this address after it times out while trying to connect. The printer was likely set to an incorrect static IP address. Enter a valid static IP address. OR Set IP Protocol to All.
Troubleshooting IP Issues Notes • ___________________________________________________________________ __________________________________________________________________________ __________________________________________________________________________ __________________________________________________________________________ __________________________________________________________________________ __________________________________________________________________________ _____________________________
4 WebView Web Pages This section provides details about the ZebraLink WebView web pages for a printer that is running a ZebraNet wireless print server. Note • The web pages are available only on printers operating in ZPL mode. Printers operating in EPL, APL-I, or APL-D mode do not have web pages. Contents Web Page Overview . . . . . . . . . . . . . . . . . . . . . . . . . . . . . . . . . . . . . . . . . . . . . . . . . . . . Home Page . . . . . . . . . . . . . . . . . . . . . . . . . . . . . . . . . . .
WebView Web Pages Web Page Overview Web Page Overview ZebraLink WebView is a browser-based application that provides real-time configuration, control, and monitoring capabilities for your printer. The web pages display real-time information about the printer, including printer status, error conditions, and all printing parameters. You can use the printer’s web pages to view and modify many of the same parameters that appear on the printer’s control panel.
WebView Web Pages Home Page 5. In the address box, type the IP address for the printer (do not include www or any leading zeroes), and then press Enter. The printer’s home page displays.
WebView Web Pages View Printer Configuration View Printer Configuration The View Printer Configuration menu option provides accurate, up-to-the-minute information on the printer’s current state. An administrator can conveniently find information on the Virtual Configuration Label and also check on the status of printer ports. To view the printer configuration through WebView, complete these steps: 1. From the printer home page, click View Printer Configuration.
WebView Web Pages View and Modify Printer Settings View and Modify Printer Settings This section provides you with steps for accessing and modifying printer settings with a ZebraLink-enabled printer. It also provides illustrations of the various pages you can access. To access the View and Modify Printer Settings, complete these steps: 1. From the printer home page, click View and Modify Printer Settings. The printer prompts you for a password. 2. Enter the password for your printer.
WebView Web Pages View and Modify Printer Settings Table 18 • Subscreens: View and Modify Printer Settings Screen General Setup 14143L-008 Rev.
WebView Web Pages View and Modify Printer Settings Table 18 • Subscreens: View and Modify Printer Settings Screen (Continued) Network Configuration Menu (see Table 19 on page 61 for subscreens) RFID Setup (RFID Printers/Print Engines only) Print Listings on Label 2/16/11 Wireless User Guide 14143L-008 Rev.
WebView Web Pages View and Modify Printer Settings Table 18 • Subscreens: View and Modify Printer Settings Screen (Continued) Media Setup 14143L-008 Rev.
WebView Web Pages View and Modify Printer Settings Table 18 • Subscreens: View and Modify Printer Settings Screen (Continued) ZPL Control 2/16/11 Advanced Setup Wireless User Guide 14143L-008 Rev.
WebView Web Pages View and Modify Printer Settings Network Configuration Screens This section shows the shows the screens that appear when you click on the menu items on the Network Configuration menu. To access the Network Communications menu, complete these steps: 1. From the printer home page, click View and Modify Printer Settings. The printer prompts you for a password. 2. Enter the password for your printer. The default password is 1234. 3. Click Submit Changes.
WebView Web Pages View and Modify Printer Settings Table 19 • Subscreens: Network Communications Setup Primary/Secondary Settings X60.15.x SNMP Xi4, R110Xi4, ZM400, ZM600, RZ400, and RZ600 2/16/11 Wireless User Guide 14143L-008 Rev.
WebView Web Pages View and Modify Printer Settings Table 19 • Subscreens: Network Communications Setup (Continued) SMTP 14143L-008 Rev. B TCP/IP X60.15.
WebView Web Pages View and Modify Printer Settings Table 19 • Subscreens: Network Communications Setup (Continued) TCP/IP Xi4, R110Xi4, ZM400, ZM600, RZ400, and RZ600 2/16/11 Wireless User Guide 14143L-008 Rev.
WebView Web Pages View and Modify Printer Settings Table 19 • Subscreens: Network Communications Setup (Continued) Wireless Setup 14143L-008 Rev.
WebView Web Pages Directory Listing Directory Listing The directory page lists all file system devices (A:, E:, R:, Z:). The size, name, and location for each stored object are displayed. To create a new item on the Directory Listing screen, complete these steps: 1. On the printer home page, click Directory Listing. The Directory Listing screen displays. 2/16/11 Wireless User Guide 14143L-008 Rev.
WebView Web Pages Directory Listing 2. From the Directory Listing screen, click Create New Script. The Create New Script screen displays. 3. Select a device type from the drop-down menu to indicate a memory location that is appropriate to your needs. • E: (ONBOARD FLASH)—non-volatile memory, which is persistent across a power cycle. • R: (RAM)—volatile memory, which is not persistent across a power cycle.
WebView Web Pages Directory Listing 5. Click Edit. The Edit ZPL Script screen displays. 6. Enter the ZPL code in the text field. 2/16/11 Wireless User Guide 14143L-008 Rev.
WebView Web Pages Directory Listing 7. Click one of the available buttons: Button Function/Operation Preview Label Displays a graphic representation of the label that results from the ZPL code. Print Label Sends the ZPL code to the printer. Reset Clears the text field. Save a. Enter the printer password in the password field. b. Click Save. If the correct password was entered, saves the label to the ZPL file name entered on the Create New Script screen.
WebView Web Pages Alert Setup Alert Setup For the printer to interact with ZebraNet Alert, SNMP settings must be established in these areas: • the printer, via the WebView interface • the Alert Printer Management Utility for logging SNMP traps The ZebraLink messaging system provides for more than SNMP notification. Alerts can be routed to various destinations: • TCP • UDP • e-mail • serial port • parallel port destinations To view Alert Setup, complete these steps: 1.
WebView Web Pages Alert Setup Establishing E-Mail Alert Messaging ZebraNet Alert allows printer errors to be sent directly to any valid e-mail address. You can set up multiple e-mail addresses for routing different error messages or split notifications between e-mail and other network management tools. To begin receiving e-mail notification of errors, complete these steps: 1. From the Alert Messaging System screen, click Add Alert Message. The Add Alert Message screen displays. 2.
WebView Web Pages Alert Setup 8. From the printer’s home page, click View and Modify Printer Settings. (You may be prompted for the printer’s password if it was not entered recently.) The View and Modify Printer Settings screen displays. 9. Click Network Configuration. The Network Configuration Menu displays. 10. Click SMTP. The SMTP Setup screen displays. 11. Specify your SMTP server address and Print Server domain. 12. Click Submit Changes.
WebView Web Pages Printer Controls Printer Controls This page offers control over basic printer functions. To view Printer Controls, complete these steps: 1. From the printer home page, click Printer Controls. The printer prompts you for a password. 2. Enter the password for your printer. The default password is 1234. 3. Click Submit Changes. The printer displays the following: Access Granted. This IP Address now has admin access to the restricted printer pages. Please Click here to proceed 4.
WebView Web Pages Printer Controls 5. Click one of the available buttons: Button Function Pause Toggles the pause option on the printer. Feed Causes printer to feed one label. Cancel One Format Cancels the currently printing format. Cancel All Formats Cancels all formats. Reset Printer Causes the printer to perform its standard reset without cycling power. a. Click Reset Printer. The printer prompts Are you sure you want to reset the printer? b. Click Reset. The printer resets itself.
WebView Web Pages Print Server Settings Print Server Settings This section provides you with instructions for viewing the current print server settings. To apply changes made in this section, use the default user ID and password: • User ID: admin • Password: 1234 To view the print server menu, complete these steps: 1. From the printer home page, click Print Server Settings. The Print Server screen opens. The Network Configuration Menu displays.
WebView Web Pages Print Server Settings Table 20 • Subscreens: Print Server Settings Printer Returns to printer home page. Print Server The Print Server Configuration screen allows you to configure the following print server categories. Click the links that follow to go to the screen descriptions. • TCP/IP Configuration • TCP/IP Logical Printing Ports • System (SNMP) • SMTP Email Alerts • Web Admin • POP3 E-Mail Printing 2/16/11 Wireless User Guide 14143L-008 Rev.
WebView Web Pages Print Server Settings Table 20 • Subscreens: Print Server Settings (Continued) Print Server: TCP/IP Configuration 14143L-008 Rev.
WebView Web Pages Print Server Settings Table 20 • Subscreens: Print Server Settings (Continued) Print Server: System (SNMP) Print Server: SMTP Email Alerts Print Server: Web Admin Print Server: POP3 E-Mail Printing 2/16/11 Wireless User Guide 14143L-008 Rev.
WebView Web Pages Print Server Settings Table 20 • Subscreens: Print Server Settings (Continued) Job Log Cancel Job 14143L-008 Rev.
WebView Web Pages Print Server Settings Table 20 • Subscreens: Print Server Settings (Continued) View Configuration Sheet View Port Status 2/16/11 Contact Wireless User Guide 14143L-008 Rev.
WebView Web Pages Print Server Settings Table 20 • Subscreens: Print Server Settings (Continued) FAQ Goes to http://support.zebra.com. Reset Printer Goes to the Printer Controls page. See Printer Controls on page 72. Reset Print Server (Restore) Factory Default Printer Settings Returns to the View and Modify Printer Settings page. See View and Modify Printer Settings on page 55. (Restore) Factory Print Server Settings 14143L-008 Rev.
Glossary alphanumeric Indicating letters, numerals, and characters such as punctuation marks. backfeed When the printer pulls the media and ribbon (if used) backward into the printer so that the beginning of the label to be printed is properly positioned behind the printhead. Backfeed occurs when operating the printer in Tear-Off and Applicator modes. bar code A code by which alphanumeric characters can be represented by a series of adjacent stripes of different widths.
Glossary dynamic RAM The memory devices used to store the label formats in electronic form while they are being printed. The amount of DRAM memory available in the printer determines the maximum size and number of label formats that can be printed. This is volatile memory that loses the stored information when power is turned off.
Glossary ips (inches-per-second) The speed at which the label or tag is printed. Zebra printers can print from 1 ips to 12 ips. Kerberos Network authentication protocol that uses the concept of a time-limited “ticket” for access to network resources. Kerberos uses key distribution and client/server authentication. light emitting diode (LED) Indicators of specific printer status conditions. Each LED is either off, on, or blinking depending on the feature being monitored.
Glossary printhead wear The degradation of the surface of the printhead and/or the print elements over time. Heat and abrasion can cause printhead wear. Therefore, to maximize the life of the printhead, use the lowest print darkness setting (sometimes called burn temperature or head temperature) and the lowest printhead pressure necessary to produce good print quality.
Index A access point as part of a WLAN, 15 selection, 15 troubleshooting problems, 47 accessing printer home page, 52 active print server IP address and network configuration label, 21 selecting primary network device, 22 Xi4, R110Xi4, ZM400/ZM600, and RZ400/RZ600 printers, 36 adaptor for Compact Flash card, 26 alert setup, 69 authentication troubleshooting, 48 C Compact Flash card insertion, 26 configuration, 30 connecting to a wireless network, 15 contacts, 7 control panel view wireless status, 31 wirel
Index I O inserting wireless radio card Compact Flash and adaptor, 26 standard, 24 interaction between wired and wireless, 21 IP address 192.168.254.254 showing, 49 all zeroes (000.000.000.
Index T TCP/IP setting via web pages, 62, 63 technical support, 7 troubleshooting connection problems after firmware upgrade, 47 encryption and authentication issues, 48 general issues, 46 inconsistent wireless connection, 47 IP issues, 49 not connecting, 46 system disabled after encryption set, 48 WEP key field not large enough, 48 wireless radio card not acknowledged, 46 U USB port to configure wireless print server, 30 V view printer configuration via web pages, 54 view wireless status through control
Index Notes • ___________________________________________________________________ __________________________________________________________________________ __________________________________________________________________________ __________________________________________________________________________ __________________________________________________________________________ __________________________________________________________________________ _________________________________________________
Zebra Technologies Corporation Zebra Technologies Corporation 475 Half Day Road, Suite 500 Lincolnshire, IL 60069 USA T: +1 847 634 6700 Toll-free +1 866 230 9494 F: +1 847 913 8766 Zebra Technologies Europe Limited Dukes Meadow Millboard Road Bourne End Buckinghamshire, SL8 5XF, UK T: +44 (0)1628 556000 F: +44 (0)1628 556001 Zebra Technologies Asia Pacific, LLC 120 Robinson Road #06-01 Parakou Building Singapore 068913 T: +65 6858 0722 F: +65 6885 0838 http://www.zebra.com © 2011 ZIH Corp.