MC 80 DX Microscope Camera Operating Manual
Carl Zeiss MC 80 DX Familiarity with the contents of this manual is a prerequisite for operating the equipment. Therefore study the manual carefully. In particular, it is imperative that you observe all warnings and notes concerning safe use of the equipment. Reflecting technical upgrading of the equipment, the descriptions and instructions contained in this manual are subject to change without prior notice or automatic updating.
MC 80 DX Carl Zeiss CONTENTS Page INTRODUCTION ................................................................................................................. I Title page ............................................................................................................................ I Copyright ........................................................................................................................... II Contents ..............................................................
Carl Zeiss MC 80 DX 2.6 2.6.1 2.6.2 2.6.3 2.6.4 2.7 2.8 2.8.1 2.8.2 2.8.3 2.8.4 2.8.5 Data Exposure via Control Console (for 35 mm frames only)........................................... 2-21 Selecting the data field .................................................................................................. 2-21 Selecting the data format .............................................................................................. 2-22 Data input in the selected format.............................
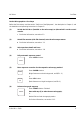
MC 80 DX Carl Zeiss Perfect Micrographs in a Few Steps Before the first startup, read the section "Safe Use of the Equipment", the description in Chapter 1, and the installation and operating instructions in Chapter 2! (1) Switch the MC 80 DX (installed on the microscope) on (the switch is on the control console. For further information, see section 2.2. (2) Attach film cassette (with film inserted) onto the microscope camera.
Carl Zeiss MC 80 DX Safe Use of the Equipment The MC 80 DX Microscope Camera including its original accessories may only be used for the photomicrographic documentation techniques described in this operating manual. The manufacturer will not assume liability for any malfunction or damage caused by any other than the intended use of the MC 80 DX or individual modules or parts of it, nor by any repair or other service operation performed or attempted by persons other than duly authorized service staff.
MC 80 DX Carl Zeiss If the protective measures are found to be no longer effective, the equipment must be switched off and safeguarded against inadvertent operation. For repair, you must contact an authorized service workshop or the manufacturer. Soiling and dust may deteriorate the proper function of the equipment You should therefore protect it against such influences as far as possible. Put the dust cover over the microscope and camera whenever you are not going to use them for some time.
Carl Zeiss MC 80 DX Notes on Warranty The manufacturer warrants that the product has been supplied in a state free from defects of material and/or workmanship. It is imperative that you report any defect to the manufacturer immediately and do everything to minimize the damage. Upon a defect being reported within the warranty period, the manufacturer is obliged to remedy the defect; at his sole discretion, this may be effected either by repair or replacement.
MC 80 DX Carl Zeiss Overall View of the MC 80 DX Microscope Camera B 40-036 e 03/99 IX
Carl Zeiss X MC 80 DX B 40-036 e 03/99
MC 80 DX Carl Zeiss DESCRIPTION Contents 1 1.1 1.2 1.3 1.4 1.4 DESCRIPTION .................................................................................................................1-3 Designation, Intended Use ...............................................................................................1-3 Equipment Description.....................................................................................................1-3 System Overview ..................................................
Carl Zeiss 1-2 MC 80 DX B 40-036 e 03/99
MC 80 DX Carl Zeiss 1 DESCRIPTION 1.1 Designation, Intended Use Model designation: MC 80 DX Microscope Camera The MC 80 DX Microscope Camera is a photomicrographic camera, which fits all Zeiss microscopes having a standard camera port. 1.2 Equipment Description The MC 80 DX Microscope Camera fits to the standard camera port of Zeiss microscopes via a camera adapter sleeve.
Carl Zeiss MC 80 DX 1.3 System Overview Fig.
MC 80 DX Carl Zeiss MC 80 DX Microscope Camera outfit Catalogue No. 1 MC 80 DX control console 456048-0000-000 2 MC 80 DX camera body 456031-0000-000 3 35 mm Mot DX film cassette 456071-0000-000 4 D4 databack 456073-0000-000 5 M 4 5” large-frame attachment (MC 200 CHIP / MC 80 DX) 456060-0000-000 6.1 Polaroid film-pack holder 545 Polaroid film-pack holder 550 416128-0000-000 416127-0000-000 6.2 Double sheet-film holder 416131-0000-000 7.1 PK 2.
Carl Zeiss 1.4 MC 80 DX Overview of image positions (tube connections), appropriate camera tubes and microscope stands Image position connection) 60 mm 1-6 (tube Cat. No.
MC 80 DX Image position connection) Carl Zeiss (tube Cat. No.
Carl Zeiss 1.5 (1) MC 80 DX Specification Dimensions (Width Depth Height) MC 80 DX camera body ............................................................................................130 85 150 mm 35 mm Mot DX film cassette .......................................................................................115 40 65 mm D4 databack...............................................................................................................
MC 80 DX Carl Zeiss OPERATION Contents 2 2.1 2.1.1 2.1.2 2.1.3 2.2 2.3 2.3.1 2.3.2 2.3.3 2.3.4 2.3.5 2.3.6 2.3.7 2.3.8 2.3.9 2.4 2.5 2.6 2.6.1 2.6.2 2.6.3 2.6.4 2.7 2.8 2.8.1 2.8.2 2.8.3 2.8.4 2.8.5 OPERATION ...................................................................................................................2-3 Equipment Installation .....................................................................................................2-3 MC 80 DX Microscope Camera for 35 mm film ...........
Carl Zeiss MC 80 DX Illustrations Fig. 2-1 Fig. 2-2 Fig. 2-3 Fig. 2-4 Fig. 2-5 Fig. 2-6 Fig. 2-7 Fig. 2-8 Fig. 2-9 Fig. 2-10 2-2 Attaching the camera adapter and the projection lens...................................................... 2-3 Attaching the camera body and the 35 mm Mot DX film cassette ..................................... 2-4 35 mm Mot DX film cassette ............................................................................................
MC 80 DX 2 Carl Zeiss OPERATION The MC 80 DX Microscope Camera comes packed together with its accessories. Remove all modules from their packing containers and check for completeness against delivery note. We recommend that you keep the packing containers for the event that you may have to relocate the equipment, return it to the manufacturer for repair, or keep it in a storeroom for some time. It is important that you read the information on "Safe Use of Equipment" (page V)! 2.
Carl Zeiss (2) MC 80 DX Inserting the projection lens Push the projection lens (2-1/1, 2) into the camera adapter (2-1/3, 4, 5, 6) as far as it will go. Mind the following assignment: Use projection lens P 2.5 (2-1/2) on 44 mm image distance adapter (2-1/5) or on 60 mm adapter (21/4) or on MC 80 DX – 1,0 camera adapter (2-1/6). With Standard 20/25 microscope: Use projection lens PK 2.5 (2-1/1) on 60 mm image distance adapter (2-1/3).
MC 80 DX Carl Zeiss The 35 mm Mot DX film cassette R 2.1.2 (1) Removing the film cassette Use your two hands to grasp the film cassette on the right and left, press unlocking button (2-3/2) until stop using your thumb, and only then pull cassette off in upward direction. For No. 135 (35 mm) film you may use film cartridges with or without DX coding. We advise you not to use bulk film (see section 2.8.1.2). (2) Inserting the film Push locking slider (2-3/11) in arrow direction.
Carl Zeiss MC 80 DX The film and the cartridge are lying flat on the support ! The film leader is pulled out until the insertion marking is reached. 2-6 Now, and only now, press in the cartridge holder ! Insert plain back (2-3/7) or D4 databack (23/6) on left side (see arrows on the backs and on the cassette), close the cassette and lock the lid by pressing tightly. The mechanical frame counter (2-3/3) shows „S“ (Start).
MC 80 DX (3) Carl Zeiss Attaching the film cassette Hold film cassette with both hands on the right and left of the camera body. The unlocking button (23/2) shows to the user and must not be pressed during attachment. Hold the film cassette parallel to the upper edge of the camera body and insert it in the basic body (2-3/4) until the unlocking button (2-3/2) jumps out. The film leader is wound automatically until the mechanical counter reads 1.
Carl Zeiss 2.1.3 MC 80 DX MC 80 DX Microscope Camera with M 4 5” large-frame attachment The equipment is designed to be installed by the user. Proceed as follows: (1) Attaching the camera adapter Insert camera adapter (2-4/2, 3) for the MC 80 DX into the microscope's camera port (2-4/4, 5) as far as it will go, and tighten setscrew (2-4/6) at the camera port. Mind the following assignment of adapters: Use the 44 mm image distance adapter (2-4/3) on camera ports with 44 mm image distance (2-4/5).
MC 80 DX (3) Carl Zeiss Attaching the MC 80 DX camera body Attach the MC 80 DX camera body (2-5/5) on to the camera adapter with inserted projection lens (2-5/9), with the body aligned so that the product name and company logo face you. Push body down as far as it will go. Lock by anticlockwise turning of the clamping ring (25/8). Push plug(2-5/10) of camera body into the socket labeled CAMERA BODY on the control console (see section 2.2).
Carl Zeiss 2.2 MC 80 DX Switches and Connectors (1) Connecting the camera body Push plug of camera body (2-2/5) or (2-5/10) into the CAMERA BODY socket (2-6/5). Tighten the two screws on the plug. Ser. Nr. (2) Connecting a keyboard To the 6-point KEYBOARD socket (2-6/4) you can connect any IBM-MF keyboard that is compatible with AT & PS/2 systems and has a mini-DIN plug. Via an adapter for PS/2 systems you can also connect a keyboard with the somewhat bigger 5-point DIN plug.
MC 80 DX (5) Carl Zeiss Switching on the control console To switch the control console on or off, actuate the power on/off switch (2-6/1). To switch on, press the switch half that is marked “l”. The display windows will light up and indicate the current parameters in alphanumeric form (i.e. the initial state, or the parameters valid when the unit was last switched off). To switch off, press the switch half that is marked “O”.
Carl Zeiss 2.3.1 MC 80 DX Exposure control for 35 mm frames When you use 35 mm film, the windows display the following information: Left window: AUTO - MAN - TIME exposure mode with the exposure time. Method-specific exposure correction in AUTO mode. Right window: Parameters of data exposure for two data fields, if you use the 35 mm Mot DX film cassette with D4 databack (see section 2.6). 2.3.
MC 80 DX 2.3.3 Carl Zeiss AUTO mode (Automatic exposure control) Pressing the button activates automatic exposure control. The exposure time shown by the LCD display is determined by the existing light intensity, the film speed, the method-specific exposure correction, and the camera factor. During the exposure, the time indication is running back to zero. 2.3.3.
Carl Zeiss MC 80 DX The following multiplying factors apply to the selected exposure corrections: Exposure correction Multiplying factor BF +2 Factor 4 BF +1 Factor 2 PH/DIC 0 Factor 1 DF/FL -1 Factor 0.5 DF/FL -2 Factor 0.25 DF/FL -3 Factor 0.125 Example: BF +1 means that an exposure with brightfield (BF=Brightfield) is longer by one exposure increment (+1) than that recommended by the automatic system (i.e.
MC 80 DX 2.3.5 Carl Zeiss TIME mode (long-time exposure control) Pressing the
Carl Zeiss 2.3.7 MC 80 DX Multiple exposure DOU- Multiple exposure is only possible with 35 mm film. To activate the multiple exposure mode, press the button. BLE Pressing the button causes the letter "D" to appear at the last digit of the bottom line of the left display window. The first exposure released with the button is not followed by data exposure nor by power film advance. The letter “D” blinks.
MC 80 DX 2.3.8 Carl Zeiss Exposure interruption / Film advance Pressing the button stops any running exposure. In case of 35 mm film, this is followed immediately by film advance, while data exposure is skipped. WIND Pressing the button stops the multiple exposure mode after an exposure made while the "D" symbol was on. This is followed immediately by film advance, while data exposure is skipped.
Carl Zeiss MC 80 DX Input of the speed of non-DX-coded 35 mm ISO filmand of large-frame sheet film: Press button for about 1.5 s until the film speed display shows the blinking "ISO" symbol. As long as “ISO” is blinking, you can use the and buttons to increase or decrease film speed by steps of 1/3. Keep or depressed to DOWN UP browse through the film speed range.
MC 80 DX 2.4 Carl Zeiss Exposure Control for Large Frames With the M 4 5” camera attachment installed, pressing the <4 5”> button converts 4 x 5" the exposure control for large-frame micrography and disables the “FILM END” warning. The MC 80 DX does not automatically recognize the M 4 5” camera attachment. If the “FILM END” warning is still on after you have installed the attachment, press the <4 5”> button again.
Carl Zeiss 2.5 MC 80 DX Warning Messages In the AUTO mode, the following warning messages may appear on the LCD display: AUTO OVER - Image is too bright, i.e. beyond the upper limit of the MC 80 DX measuring range. No exposure can be released by pressing the button (the same applies in case of the "STORE OVER" warning). Remedy: Use gray filter in illuminating beam path. UNDER - Image light is missing or insufficient, i.e. below the lower limit of the MC 80 DX measuring range.
MC 80 DX 2.6 Carl Zeiss Data Exposure via Control Console (for 35 mm frames only) If the D4 databack is installed on the 35 mm Mot DX film cassette, data can be exposed either on the margin of the shorter side of the frame ( = PIC data field) or on the space ("bridge") between two successive frames ( = BRI data field). The data in either the PIC or BRI data field consist of one line of 8 alphanumeric characters. The data can be entered via the control console or a keyboard connected to it.
Carl Zeiss 2.6.2 MC 80 DX Selecting the data format While the symbol of the selected data field, DATABACK “PIC” or “BRI”, is blinking, the data formats described below can be selected in succession by pressing the or button. PICTURE DOWN UP During data format selection you cannot release an exposure. Conclude the selection of a data format by pressing the or button again. The “PIC” or “BRI” symbols will then stop blinking. 2.6.2.
MC 80 DX 2.6.2.3 Carl Zeiss Data format F-Count (frame counter) This data format is coupled to film advance. Every film advance increases the frame count displayed by 1. Frame counts that can be exposed range from “01” to “99”. Example: Frame no. 32 of the film appears as “32”. Upon installation of a 35 mm Mot film cassette with newly loaded film, the film leader is automatically wound to frame number “01”.
Carl Zeiss 2.6.2.5 MC 80 DX Data exposure via keyboard The data for the Keyboard and Keyboard-Scale formats cannot be entered via the control console. Data input for these formats is through an external keyboard (UK English type), which connects to the socket marked "Keyboard" at the rear of the control console via a Mini-DIN connector. The following characters can be entered through the keyboard: Letters: a - z and A - Z Numerals: 0 - 9 Signs: - + _ * = [ ] ; , .
MC 80 DX Carl Zeiss Before, the length L in the specimen plane must be computed by the formula given below, for the respective objective magnification and intermediate magnification. This formula already allows for the length of the scaling bar in the 35 mm format (12.5 mm) and for the projection lens factor (2.5 ).
Carl Zeiss 2.6.2.6 MC 80 DX OFF state In this state, the data field displaying the "OFF" message does not contain any data. One data field containing data, the other one being in "OFF" state: A data strip in "OFF" state may still show on the film by its faintly lit background and the darker rectangles of the 8 matrix elements (see section 2.8.3). If the "OFF" message appears on both data fields, data exposure is disabled.
MC 80 DX 2.6.3 Carl Zeiss Data input in the selected format During data input, the “BRI” or “PIC“ symbol for the respective data field is blinking. During data input, no micrograph can be exposed. 2.6.3.1 In the data formats DMY, YMD, DHM, F-Count and S-Count Use the
Carl Zeiss 2.6.3.2 MC 80 DX In the Keyboard and Keyboard-Scale data formats Pressing the
MC 80 DX 2.6.3.3 (1) Carl Zeiss Examples of data input Time updating in the BRI data field with data format DHM From 08:13 to 13:30 for the 10th day of a month on the control console. Make entries for data formats DMY, YMD, F-Count and S-Count correspondingly.
Carl Zeiss (2) MC 80 DX Input of scaling bar in the PIC data field with Keyboard-Scale data format Enter the length of the scaling bar: 125 µm (overwrite an existing reading of 4000 µm). Make entry for the Keyboard data format correspondingly.
MC 80 DX 2.6.4 Carl Zeiss Location of the PIC data field The location of the PIC data field inside the micrograph is not marked on the various MC 2.5 frame size reticles. With reference to the image of the reticle seen in the eyepieces of the trinocular tube, the data field is located at the left frame margin (with manufacturer's logo and product name “MC 80 DX” on the camera body facing the operator). 2.
Carl Zeiss MC 80 DX Frame size reticle in eyepiece of microscope MC 2.5 /dia. 26 mm PL 10 /18 Br. foc. Standard 25 ICS 454075-0000-000 E-PL 10 /20 Br. foc. Axiolab E-PL 10 /23 Br. foc. Axioskop, Axioskop 20, Axioskop 2 W-PL 10 /23 Br. foc. Axioplan, Axioplan 2 PL 10 /25 Br. foc. Axiotron, Axiotron 2 E-PL 10 /25 Br. foc. Axiotech Axiovert S 100/135 Stemi DRC Stemi SV 6, Stemi SV 11 Stemi 2000-C/CS MC 2.5 /dia. 21 mm Kpl 10 /20 Br. foc. Standard 20/25 MC 2.5 /dia. 19 mm KF 10 /18 Br.
MC 80 DX Carl Zeiss Carefully select the specimen area of interest and focus on it. If the focusing crosshairs and the specimen are in focus at the same time, the image on the film will also be in focus. If necessary, focus the eyepieces for your individual eyesight. In order to obtain correct focusing with low-power objectives, we recommend the use of the 3x12B monocular prism glass, focused at infinity, as a focusing aid. To release an exposure, press the button.
Carl Zeiss MC 80 DX Cut the film tongue always as specified in DIN 4536 or ISO 1977 (Fig. 2-9). 7 ... 9 P The cut must not run across any sprocket hole. +0 23 -5 mm Cut the tongue parallel to the film edge, over a length of 7 - 9 sprocket holes. Round the corners to ensure that the film does not get caught at the cartridge lip or parts of the cassette. Cut the film end at right angles with the long Fig.
MC 80 DX 2.8.2.2 Carl Zeiss Correcting the color balance Place a CC filter of the color complementary to the color bias on the transparency to be corrected. Color bias Color of the CC filter Blue Yellow Y Green Magenta M Red Cyan C Yellow Blue B Magenta Green G Cyan (bluish green) Red R If, for example, a filter of density 10 produces the required color balance on viewing, you should use a CC filter of half the density for the following exposures, i.e. 05 in this case.
Carl Zeiss MC 80 DX mounts, or picture file cards). Important data characterizing a micrograph (e.g. the scaling bar) belongs in the PIC data field inside the frame! Data exposure is automatically adapted to the film's ISO rating. As the data is exposed from the rear of the film (through the protective coating and film base), data exposures on films of equal speed but different make and type may differ in brightness.
MC 80 DX 2.8.4 Carl Zeiss Darkfield and fluorescence micrography Compared with common (brightfield) micrography, the following special conditions apply to darkfield and fluorescence work: The low brightness level frequently encountered calls for long exposure times. With low light, switch the beam splitter on the trinocular tube so as to send 100% of the light to the camera port. Fluorescence is neither daylight nor artificial light, but is generated inside the specimen.
Carl Zeiss 2.8.5 MC 80 DX Exposure times and filters The "UNDER" warning (see section 2.5) appears in case of 35 mm film and "PH/DIC 0" exposure correction, if the following exposure times are exceeded: Film speed Exposure time 25 ISO 1024 s 100 ISO 252 s 400 ISO 63 s 1600 ISO 16 s 6400 ISO 4s The following filters are available for photomicrography: Filter 32 mm dia. 25 mm dia. 18 mm dia. Gray filter 0.50 (50 % transmittance) 467840 Gray filter 0.
MC 80 DX Carl Zeiss CARE AND MAINTENANCE Contents 3 3.1 3.2 3.3 3.4 CARE AND MAINTENANCE ...........................................................................................3-3 Care................................................................................................................................3-3 Fuses ...............................................................................................................................3-4 Line Power Conversion...............................
Carl Zeiss 3-2 MC 80 DX B 40-036 e 03/99
MC 80 DX Carl Zeiss 3 CARE AND MAINTENANCE 3.1 Care The MC 80 DX Microscope Camera requires no care beyond the following precautions and actions: Always protect the camera from dust and moisture. Always put the dust cover on the camera after use. Remove dust from optical surfaces with a soft natural hair brush or a rubber blowbulb. Remove persistent dirt or fingerprints with commercial optical cleaning cloth or eyeglass tissue.
Carl Zeiss 3.2 MC 80 DX Fuses Ser. Nr. 45 60 48 25 VA The two fuse holders (3-1/2) are inside the power input socket/fuse combination (3-1/1) at the rear of the control console. Each fuse holder contains a T 2.5 A/250 V fuse (3-1/3), which operates with all line voltages in a range of 100 to 240 V AC. The letter T designates a slow-blow fuse. Changing a fuse Pull plug of line power cord. Use a coin to unscrew the fuse holders (3-1/2) and pull the fuse holders out of the receptacles (3-1/4) .
MC 80 DX 3.4 Carl Zeiss Requesting Service All repairs of mechanical, optical or electronic components inside the instrument and of the electrical components of the MC 80 DX may only be performed by Carl Zeiss service staff or specially authorized personnel. To ensure the optimum setting and trouble-free function of your microscope even for a longer period of time, we would recommend you to conclude a service/maintenance contract with Carl Zeiss.
Carl Zeiss 3-6 MC 80 DX B 40-036 e 03/99
MC 80 DX Carl Zeiss ANNEX - List of Acronyms and Abbreviations Subject Index Certification acc.
Carl Zeiss A-2 MC 80 DX B 40-036 e 03/99
MC 80 DX Carl Zeiss List of Acronyms and Abbreviations BF Br. BRI Brightfield High eyepoint eyepiece (for eyeglass wearers) Bridge (data strip on the web between two successive frames) CB CC CSA Color Blue Color Compensation Canadian Standards Association DF DIC DIN DX Darkfield Differential Interference Contrast Deutsches Institut für Normung (German Standardization Institute) Film speed coding EN European standard FL foc.
Carl Zeiss MC 80 DX Subject Index A AUTO and MAN(ual) modes............................................................................................................. 2-12 AUTO mode .................................................................................................................................... 2-13 B Bulk film.......................................................................................................................................... 2-33 C Camera adapter ................
MC 80 DX Carl Zeiss Film advance......................................................................................................................................1-3 Film cartridges ..........................................................................................................................2-5; 2-32 Film cassette .............................................................................................................................2-6; 2-32 Film cassette 35 mm Mot DX ................
Carl Zeiss MC 80 DX P PIC data field................................................................................................................................... 2-30 Power inlet receptacle ....................................................................................................................... 2-8 Power winding ................................................................................................................................ 2-15 Projection lens ..........................