Installation and Operating Guide | Warranty Model Number | DVR313 | DVD Recorder © Copyright 2003, Zenith Electronics Corporation
Safety Precautions CAUTION RISK OF ELECTRIC SHOCK DO NOT OPEN CAUTION: TO REDUCE THE RISK OF ELECTRIC SHOCK DO NOT REMOVE COVER (OR BACK) NO USER-SERVICEABLE PARTS INSIDE REFER SERVICING TO QUALIFIED SERVICE PERSONNEL. This lightning flash with arrowhead symbol within an equilateral triangle is intended to alert the user to the presence of uninsulated dangerous voltage within the product’s enclosure that may be of sufficient magnitude to constitute a risk of electric shock to persons.
CAUTION: PLEASE READ AND OBSERVE ALL WARNINGS AND INSTRUCTIONS IN THIS OWNER’S MANUAL. AND THOSE MARKED ON THE PRODUCT. RETAIN THIS MANUAL FOR FUTURE REFERENCE. This product has been designed and manufactured to assure personal safety. Improper use can result in electric shock or fire hazard. The safeguards incorporated in this product will protect you if you observe the following procedures for installation, use, and servicing. This product does not contain any parts that can be repaired by the user.
Table of Contents INTRODUCTION Safety Precautions. . . . . . . . . . . . . . . . . . . . . . . 2 IMPORTANT SAFETY INSTRUCTIONS . . . . . . . 3 Table of Contents . . . . . . . . . . . . . . . . . . . . . . 4-5 DVR313 Overview . . . . . . . . . . . . . . . . . . . . . . 6-9 Recordable Discs . . . . . . . . . . . . . . . . . . . . . . . 6 Playable Discs . . . . . . . . . . . . . . . . . . . . . . . . . 6 Disc-related terms . . . . . . . . . . . . . . . . . . . . . . 6 Types of video CDs. . . . . . . . . . . .
Table of Contents Operation with DVD and Video CD . . . . . . . 30-33 Playing a DVD or Video CD. . . . . . . . . . . . . . . 30 • Moving to another TITLE . . . . . . . . . . . . . 30 • Moving to another CHAPTER/TRACK. . . . 30 • Slow Motion . . . . . . . . . . . . . . . . . . . . . . . 30 • Still Picture and Frame-by-Frame Playback . 31 • Search . . . . . . . . . . . . . . . . . . . . . . . . . . . 31 • Random . . . . . . . . . . . . . . . . . . . . . . . . . . 31 • Repeat . . . . . . . . . . . . . . . . .
DVR313 Overview Recordable Discs 12cm/8cm, single-sided, single layer disc Approx. max. recording time (LQ mode): 240 minutes (4.7GB), 80 minutes (1.46GB) 12cm/8cm, single-sided, single layer disc Approx. max. recording time (LQ mode): 240 minutes (4.7GB), 80 minutes (1.46GB) otes – This recorder cannot record CD-R or CD-RW discs.
About DVD-R and DVD-RW disc Is editing a DVD like editing a video tape? How are DVD-R and DVD-RW discs different? The essential difference between DVD-R and DVD-RW is that DVD-R is a record-once medium, while DVD-RW is a re-recordable/erasable medium. You can re-record/ erase a DVD-RW disc approximately 1,000 times. No. When you edit a video tape you need one video deck to play the original tape and another to record the edits.
DVR313 Overview Notes for recording Restrictions on video recording • The recording times shown are not exact because the recorder uses variable bit-rate video compression. This means that the exact recording time will depend on the material being recorded. • When recording a TV broadcast, if the reception is poor or the picture contains interference, the recording times may be shorter. • If you record still pictures or audio only, the recording time may be longer.
DVR313 Overview (Continued) Handling the unit When shipping the unit The original shipping carton and packing materials come in handy. For maximum protection, re-pack the unit as it was originally packaged at the factory. When setting up the unit The picture and sound of a nearby TV, VCR, or radio may be distorted during playback. In this case, position the unit away from the TV, VCR, or radio, or turn off the unit after removing the disc.
Front Panel POWER button and indicator Switches the DVD Recorder ON and OFF. Lights blue when the DVD Recorder is turned on. CHANNEL (+/-) Scans up or down through memorized channels. >/M Go to NEXT chapter/track. Press and hold for two seconds for a fast forward search. m/. Go to beginning of current chapter/ track or to previous chapter/track. Press and hold for a fast reverse search. REC (z) button and indicator Starts recording. Press repeatedly to set the recording time.
Function Display Window Disc type indicators Indicates the type of disc loaded. Audio type indicators Indicates encoding format of the current disc. Character indicators Indicates clock, total playing time, elapsed time, remaining time, title number, chapter/track number, channel, etc. PROG Programmed playback active. SAP Indicates when a SAP BILINGUAL broadcast is being received. STEREO Indicates a stereo broadcast is being received. ANGLE available on disc. Lights when rating is set.
Remote Control Overview POWER OPEN/CLOSE Switches the DVD Recorder ON and OFF. Opens and closes the disc tray. INPUT Changes the input to use for recording (Tuner, AV INPUT 1 - 2, S-V, or DV IN). SOUND/MUTE - Selects 3D SURROUND during disc playback. - Turns off TV sound. power po er TV, CATV, DVD buttons Selects operational mode of remote control. 0-9 numerical buttons Selects numbered options in a menu. input open/close tv catv dvd Add or erase channels manually from memory.
Controlling TVs and Cable Boxes (DBS) power po er input open/close tv catv Programming the Remote chart, find the code corresponding to 1 Inyourthebrand of operational device. holding down the TV or CATV button, 2 While press 2 number buttons (0 - 9) to enter the code. Some manufacturers have more than one code number. If the remote control does not operate the Cable box (DBS), or TV after setting a code number, try a different code.
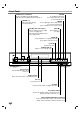
Rear Panel ANT.IN Connect the VHF/UHF/CATV antenna to this terminal. COAXIAL (Digital audio out jack) Connect to digital (coaxial) audio equipment. COMPONENT VIDEO OUT (Y Pb Pr) Connect to a TV with Y Pb Pr inputs. VIDEO OUT/AUDIO OUT (Left/Right) Connect to a TV with video and audio inputs. INPUT 1 (VIDEO IN/AUDIO IN (Left/Right)) Connect the audio/video output of an external source (Audio system, TV/Monitor, VCR, Camcorder). AC Power Cord Plug into the power source.
Connections the antenna leads from the rear of the 1 Disconnect TV. the type of cable from your antenna. If it is a 2 Identify round cable as illustrated, it is a 75 ohm coaxial antenna cable. This cable will connect directly to the jack marked ANT.IN on your DVD Recorder. ip If your antenna lead wire is a flat type antenna cable, connect it to an Antenna Adapter (300-ohm to 75-ohm) (not supplied) and slip the Adapter onto the ANT.IN jack.
Connections (Continued) ips Depending on your TV and other equipment you wish to connect, there are various ways you could connect the recorder. Use only one of the connections described below. Please refer to the manuals of your TV, VCR, Stereo System or other devices as necessary to make the best connections. For better sound reproduction, connect the recorder’s AUDIO OUT jacks to the audio in jacks of your amplifier, receiver, stereo or audio/video equipment.
Connections (Continued) Connecting to Optional Equipment Rear of DVD Recorder DVR HOOKUP Connecting to an amplifier equipped with two channel analog stereo or Dolby Pro Logic ll/ Pro Logic Connect the Left and Right AUDIO OUT jacks on the DVD Recorder to the audio left and right in jacks on your amplifier, receiver, or stereo system, using the audio cables (A).
Connections (Continued) Accessory Audio/Video (A/V) Connections to DVD Recorder Connect the INPUT 1 or INPUT 2 jacks on the DVD Recorder to the audio/video out jacks on your accessory component, using optional audio/video cables. ote If you use the S-V INPUT jack on the front panel, the signal of VIDEO OUT jack on the front panel is not output. Jack panel of Accessory Component (VCR, Camcorder, etc.
Initial Settings In this menu system, there are several ways to customize the settings provided. Most menus consist of three levels to set up the options, but some require greater depth for the variety of settings. If you press SETUP, only the first and second level of the menu system will appear on the TV screen. The third level can be displayed by pressing B. For navigating the menu levels, you will see “B” on the right side of the menu label to help you go to the next level.
Before Operation Auto Clock Set ote The DVD Recorder gives you two ways to set the time and date: the Auto Clock Feature or manually. The Auto Clock Feature enables the DVD Recorder to set up the clock when the DVD Recorder is turned off or during PBS channel tuning. The Clock Set feature is set to Auto at the factory. In the ON setting, the DVD Recorder looks for a channel carrying XDS (Extended Data Services) information. XDS updates the clock using the Coordinated Universal Time.
Progressive Scan Set Initialize Progressive Scan Video provides the highest quality pictures with less flickering. If you are using the COMPONENT VIDEO OUT jacks, but are connecting the DVD recorder to a standard (analog) television, set Progressive Scan to OFF. If you are using the COMPONENT VIDEO OUT jacks for connection to a TV or monitor that is compatible with a progressive scan signal, set Progressive Scan to ON. If you need to, you can reset the recorder to all its factory settings.
Before Operation Audio Sampling Freq. (Frequency) Each DVD disc has a variety of audio output options. Set the recorder’s Audio Output according to the type of audio system you use. Dolby Digital PCM: Select when connected to a 2-channel digital stereo amplifier. The DVD Recorder’s digital audio outputs sounds in the PCM 2ch format when you play a DVD video disc recorded on the Dolby Digital recording system.
Before Operation (Continued) Lock (Parental Control) Rating Movies on DVDs may contain scenes not suitable for children. Therefore, discs may contain Parental Control information that applies to the complete disc or to certain scenes on the disc. These scenes are rated from Level 1 to 8, and alternatively, more suitable scenes are available for selection on some discs. Ratings are country-dependent.
Before Operation (Continued) Country Code Recording Enter the code of a country/area whose standards were used to rate the DVD video disc, referring to the list (See “Country Code List”, page 48.). Record Mode Set Setup Language You can set the picture quality for recording; HQ (High Quality), SQ (Standard Quality), LQ (Low Quality). Rating Setup Set Password U Country Code S Language Audio Audio SQ Video Mode SQ DV Rec Audio Lock Recording Recording Prev. Select Disc Press SETUP.
Auto Chapter When recording in Video mode, chapter markers are put in every three minutes on the default setting. You can change this interval to 3 minutes, 5 minutes or 10 minutes. If you select Not Use, switch off automatic chapter marking altogether with the No Separation setting Setup Language Audio Rec Mode Set Rec Aspect Auto Chapter Not Use DV Rec Audio 3 Min 5 Min Lock 10 Min SETUP. 1 Press The Setup menu appears. 2 Use v / V to select the Disc option.
Before Operation (Continued) Finalize Disc Name Finalizing ‘fixes’ the recordings in place so that the disc can be played on a regular DVD player or computer equipped with a suitable DVD-ROM drive. Finalizing a Video mode disc creates a menu screen for navigating the disc. This is accessed by pressing MENU or TITLE. Use this to enter a name for the disc. This name appears when you load the disc and when you display disc information on-screen. • The disc name can be up to 32 characters long.
Before Operation General Explanation of On-Screen Display This manual gives basic instructions for operating the DVD Recorder. Some DVDs require specific operation or allow only limited operation during playback. When this occurs, the symbol appears on the TV screen, indicating that the operation is not permitted by the DVD Recorder or is not available on the disc. On-Screen Display b / B to change the setting of an option. 3 Use The number buttons can be also be used for setting numbers (e.g.
Before Operation VR Menu Options Function (Use v / V to select desired option) Title Number TITLE 1/6 Chapter Number CHAPTER 4/26 Time search TIME 0:10:30 Digital Audio Output mode Subtitle language Sound DVD-VR TITLE 1 Shows the current title number and total number of titles, and skips to the desired title number. b / B, or Numbers, ENTER Shows the current chapter number and total number of chapters, and skips to the desired chapter number.
Using the Built-in TV Tuner Displaying OSD While Watching TV If no disc is playing, you can change TV channels using the number or CH (v / V) buttons on the remote control, or the CH (+/–) buttons on the front panel. Press ENTER to display/remove the information displayed on-screen. ote Antenna channels are numbered 2 through 69. Cable channels are numbered 1 through 125. Changing TV Audio Channel DVR HOOKUP Changing TV Channels Indicates channel number and audio signal received by the tuner.
Operation with DVD and Video CD Playing a DVD or Video CD Playback Setup Turn the TV on and select the video input source connected to the DVD Recorder. Audio system: Turn the audio system on and select the input source connected to the DVD Recorder. ote Unless stated otherwise, all operations described use the remote control. Some features may also be available on the Setup menu. Moving to another TITLE DVD Press OPEN/CLOSE to open the disc tray.
Operation with DVD and Video CD (Continued) Still Picture and Frame-by-Frame Playback DVD Video VR VCD2.0 VCD1.1 ote The picture frame-by-frame in reverse is not available for Video CD. DVD Video VR VCD2.0 VCD1.1 1 Press and hold SKIP/SCAN (. or >) for about two seconds during playback. 2 Press and hold SKIP/SCAN (. or >) to select the required speed: mX2, mX4, mX8, mX16, mX100 (backward) or MX2, MX4, MX8, MX16, MX100 (forward).
Operation with DVD and Video CD (Continued) General Features (continued) Zoom To clear a Marked Scene 1 During disc playback, press SEARCH. DVD Video VCD2.0 VR VCD1.1 The Marker Search menu will appear on the TV screen. The Zoom function allows you to enlarge the video image and to move through the enlarged image. 2 Use b B v V to select the Marked scene that you want to erase. 1 Press ZOOM during playback or still playback to activate the Zoom function. 3 Press CLEAR.
Operation with DVD and Video CD (Continued) VCD2.0 VCD1.1 Finding Locations on a Disc VCD2.0 AUDIO STEREO VR With a Video CD, press AUDIO then press b / B repeatedly during playback to hear a different audio channel (STEREO, LEFT or RIGHT). With DVD-RW discs recorded in VR mode that have both a main and a Sub audio channel, you can switch between Main (L), SAP (R), or a mix of both (Main+Sub) by pressing AUDIO. 3D Surround DVD Video VCD2.0 VR The progress bar appears on the TV screen.
Audio CD and MP3 Operation Playing an Audio CD or MP3 Disc CD MP3 About MP3 The DVD Recorder can play audio CDs. Also, the DVD Recorder can play MP3 formatted recordings on CD-ROM, CD-R or CD-RW discs. Before playing MP3 recordings, read the notes on MP3 Recordings on the right side of this page. 1 Insert a disc and close the tray. AUDIO CD or MP3 CD menu appears on the TV screen. AUDIO CD MP3 CD 0:42:12 List Program 00:00 Disc List Program 1/14 01/14 0/0 View All TRACK 1 ADD MUSIC 1.
Audio CD and MP3 Operation (Continued) CD 3D Surround MP3 1 Press PAUSE during playback. 2 To return to playback, press PLAY or press PAUSE again. Moving to Another Track CD MP3 CD MP3 This unit can produce a 3D Surround effect, which simulates multi-channel audio playback from two conventional stereo speakers, instead of the five or more speakers normally required to listen to multichannel audio from a home theater system. 1 Press SOUND to select “3D SUR.” during playback. Press SKIP/SCAN .
Programmed Playback with Audio CD and MP3 The Program function enables you to store your favorite tracks from any disc in the recorder memory. Program can contain 30 tracks (Audio CD) or 256 tracks (MP3). Insert an Audio CD or MP3 disc. 1 2 Use v V b B to select a track on the List. v V b B to highlight the “ADD” or “Add 3 Use One” icon then press ENTER. Or, press PROGRAM. Repeat Programmed Tracks The Repeat icon and “TRK” appear on the menu screen. Audio CD or MP3 CD menu will appear.
Basic Recording from a TV Instant Timer Recording Follow the instructions below to record a TV program. Recording starts immediately and continues until the disc is full or you stop the recording. Instant Timer Recording allows you to make a recording easily of a preset length without using the program timer. 1 Switch on the recorder and load a recordable disc. Also make sure that the TV input is set to this recorder.
Timer Recording This DVD Recorder can be programmed to record up to 8 programs within a period of 1 month. For unattended recording, the timer needs to know the channels to be recorded, the starting time and length. 1 Press TIMER REC. The Timer Record menu will appear. Timer Record LQ Checking Timer Recording Details Programming can be checked whenever the DVD Recorder is turned on. Press TIMER REC twice. • Use v / V to select a timer recording. • Press ENTER to edit the selected program.
Recording from an External Input You can record from an external component, such as a camcorder or VCR, connected to any of the recorder’s external inputs. 1 Make sure that the component you want to record from is connected properly to the DVD Recorder. See page 18. 2 Press INPUT repeatedly to select the external input to record from.
Recording from an External Input (Continued) What is DV? DV-Related Messages Using DV, also known as i.LINK, you can connect a DV-equipped camcorder to this recorder using a single DV cable for input and output of audio, video, data and control signals. The i.LINK interface is also known as IEEE 1394-1995. “i.LINK” and the “i.LINK” logo are trademarks. • This recorder is only compatible with DV-format (DVCSD) camcorders. Digital satellite tuners and Digital VHS video recorders are not compatible.
VR Mode: Original and Playlist Editing Titles and Chapters VR Titles in the disc’s original content contain one or more chapters. When you insert a Original title into the Playlist (Program), all the chapters within that title also appear. In other words, chapters in the Playlist (Program) behave exactly as chapters on a DVD-Video disc. Adding a title or chapter to the Playlist (Program) creates a new title made up of chapters of an Original title.
VR Mode: Original and Playlist Editing (Continued) Naming a Title Using the Chapter List VR You can name Original and Playlist titles independently. Names can be up to 22 characters long. 1 Press REC LIST to display Title List. To switch between the Original (Title/Chapter List) and Playlist (Program) screens, press REC LIST. 2 Use v V b B to choose the title you want to name then press ENTER. Title List options appears on the left side of the Title List screen.
VR Mode: Original and Playlist Editing (Continued) VR Use this function to add an Original title or chapter to the Playlist (Program). When you do this, the whole title is put into the Playlist (you can erase bits you don’t need later — see Erasing an Original or Playlist title/chapter on page 44). The title appears in the Playlist complete with the chapter markers that appear in the Original.
VR Mode: Original and Playlist Editing (Continued) Changing Title or Chapter Thumbnails Thumb. VR Each title and chapter displayed in the Original (Title/Chapter List) or Playlist (Program) screen is represented by a thumbnail picture taken from the start of that title or chapter. If you prefer, select a different still picture from within a title. 1 Play the title (Original or Playlist).
VR Mode: Original and Playlist Editing (Continued) VR Use this function to combine two adjacent Playlist or Original chapters into one. ENTER. 3 Press Playlist (Program) options appears on the left side of the screen. Use v / V to select ‘Move’ from Playlist 4 options then press ENTER. Play ote This function is not available if there is only one chapter within the title. 1 Press REC LIST repeatedly to display Playlist (Program).
Video Mode: Original Editing Using the Title List Erasing a Title Video From the Title List display you can play, name and erase titles. Once a Video mode disc is finalized, the Title List screen changes its appearance and all you can do is select titles to play. 1 Press REC LIST to display the Title List.
Language Code List Code Language Code Language Code Language Code Language 6566 Abkhazian 7074 Fiji 7678 Lingala 8373 Singhalese 6565 Afar 7073 Finnish 7684 Lithuanian 8375 Slovak 6570 Afrikaans 7082 French 7775 Macedonian 8376 Slovenian 8381 Albanian 7089 Frisian 7771 Malagasy 8379 Somali 6577 Amharic 7176 Galician 7783 Malay 6983 Spanish 6582 Arabic 7565 Georgian 7776 Malayalam 8385 Sudanese 7289 Armenian 6869 German 7784 Maltese 8387 Swahili
Country Code List Enter the appropriate code number for the initial setting “Country Code” (See page 24).
Troubleshooting Check the following guide for the possible cause of a problem before contacting service. Cause Solution No power. The power cord is disconnected. Plug the power cord into the wall outlet securely. No picture. The TV is not set to receive DVD Recorder signal output. Select the appropriate video input mode on the TV so the picture from the DVD Recorder appears on the TV screen. The video cable is not connected securely. Connect the video cable securely.
Troubleshooting (Continued) Cause Symptom Can’t play a disc recorded using this recorder on another player. Cannot record or did not record successfully. Timer recording is not possible. Stereo Audio Record and/or Playback is not present. The remote control does not work properly. Solution The disc was recorded in Video mode. Finalize the disc. (page 26) Some players will not play even a finalized disc recorded in Video mode. No solution.
Specifications General AC 120V, 60 Hz 44W 430 X 92 X 382.5 mm (16.9 x 3.6 x 15 inches) (w x h x d) 6.4 kg (14.1 lbs) 5˚C to 35˚C (41˚F to 95˚F) 5 % to 90 % NTSC REFERENCE Power requirements Power consumption Dimensions (approx.) Mass (approx.
ZENITH ELECTRONICS CORPORATION DVD Recorder DVR313 LIMITED WARRANTY – USA Zenith will repair or replace your product, at Zenith’s option, if it proves to be defective in material or workmanship under normal use, during the warranty period (“Warranty Period”) listed below, effective from the date (“Date of Purchase”) of original consumer purchase of the product. This limited warranty is good only to the original purchaser of the product and effective only when used in the United States, excluding U.S.