Operating Guide | Warranty Model Number | HD-SAT520 | DIRECTV ® High-Definition Receiver © Copyright 2002, Zenith Electronics Corporation
CAUTION RISK OF ELECTRIC SHOCK DO NOT OPEN CAUTION: TO REDUCE THE RISK OF ELECTRONIC SHOCK DO NOT REMOVE COVER (OR BACK). NO USER SERVICEABLE PARTS INSIDE. REFER TO QUALIFIED SERVICE PERSONNEL. THE LIGHTNING FLASH WITH ARROWHEAD SYMBOL, WITHIN AN EQUILATERAL TRIANGLE, IS INTENDED TO ALERT THE USER TO THE PRESENCE OF UNINSULATED “DANGEROUS VOLTAGE” WITHIN THE PRODUCT’S ENCLOSURE THAT MAY BE OF SUFFICIENT MAGNITUDE TO CONSTITUTE A RISK OF ELECTRIC SHOCK TO PERSONS.
DECLARATION OF CONFORMITY This device complies with Part 15 of the FCC Rules. Operation is subject to the following two conditions : (1) this device may not cause harmful interference, and (2) this device must accept any interference received, including interference that may cause undesired operation. Trade Name / Model : Zenith / HD-SAT520 Responsible Party : LG Electronics Inc., Chicago office Address : 6133 North River RD Suite 1100 Rosemont, IL. 60018, U.S.A. Contact Person : Mr. P. H.
IMPORTANT SAFETY INSTRUCTIONS CAUTION: PLEASE READ AND OBSERVE ALL WARNINGS AND INSTRUCTIONS IN THIS OWNER’S MANUAL AND THOSE MARKED ON THE UNIT. RETAIN THIS BOOKLET FOR FUTURE REFERENCE. This set has been designed and manufactured to assure personal safety. Improper use can result in electric shock or fire hazard. The safeguards incorporated in this unit will protect you if you observe the following procedures for installation, use, and servicing.
IMPORTANT INFORMATION Due to copyright restrictions, you may not be able to view some high definition programs in high definition format using this product. If HD viewing is prohibited due to copyright restrictions, you would need to connect SD interfaces to view the program. In certain markets, access to local channels requires a DIRECTV® Multi-Satellite Dish Antenna. For the most current information about the availability of local channels in your area, contact your retailer or visit DIRECTV.com.
TABLE OF CONTENTS Safety Warning . . . . . . . . . . . . . . . . . . . . . . . . . . . . . . . . Declaration of Conformity . . . . . . . . . . . . . . . . . . . . . . . . Important Safety Instructions . . . . . . . . . . . . . . . . . . . . . Important Information . . . . . . . . . . . . . . . . . . . . . . . . . . . Table of Contents . . . . . . . . . . . . . . . . . . . . . . . . . . . . . . 1 2 3 4 5 1. Introduction 1-1. A New World of Digital Entertainment . . . . . . . . . 1-2. Main Features . . .
. Advanced Program Guide 7-1. 7-2. 7-3. 7-4. 7-5. 7-6. 7-7. 7-8. 7-9. 7-10. About the Advanced Program Guide . . . . . . . . . Layout of the Advanced Program Guide Screen . Moving through the Advanced Program Guide . . Selecting a Program . . . . . . . . . . . . . . . . . . . . . . . Getting More Information . . . . . . . . . . . . . . . . . . . Referring to EZ Help . . . . . . . . . . . . . . . . . . . . . . . Making a Remind List for Future Viewing . . . . . . .
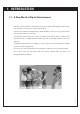
1. INTRODUCTION 1-1. A New World of Digital Entertainment Welcome to the new DIRECTV® High-Definition Receiver, an advanced HDTV/digital satellite receiver that showcases a new generation of digital entertainment. Different from conventional analog broadcasts, digital broadcasts allow you to enjoy superior quality video and audio right in your own home.
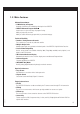
1-2. Main Features Ultimate Entertainment • A Wide Variety of Programs Hundreds of channels are available by subscription from DIRECTV. • DIRECTV Advanced Program Guide Instant access to up to three days of program listings. Ability to jump a day at a time. Ability to search and tune by program title, key word and category. Technical Flexibility • Seamless Tuning between Channels Tune seamlessly to over-the-air, cable and satellite.
2. IMPORTANT OVERVIEW 2-1. Sending Signals Satellite Sat A 101 Sat B 110 Sat C 119 Digital signal Analog signal DIRECTV TV HD Receiver Phone Jack Analog Cable service Digital broadcasting is a new way of sending programs over the airwaves with superior quality video and audio. The DIRECTV® High-Definition Receiver enables you to take full advantage of digital broadcasting. To fully enjoy it, you need to understand the ways the program signals are sent.
2-2. TV Signal Format Standard Comparison Table Signal Format Active Lines Sound Aspect Ratio Resolution Analog (NTSC) 480 Stereo (2 ch) 4:3 720 x 480 Digital (ATSC/DIRECTV) SD HD 480 720 or 1080 Dolby Digital (5.1 ch) Dolby Digital (5.1 ch) MPEG Audio (2 ch) 4 : 3 or 16 : 9 16 : 9 640 x 480 1280 x 720 704 x 480 1920 x 1080 The digital TV standards allow several different formats.
2. IMPORTANT OVERVIEW 2-3. Display Formats The DIRECTV® High-Definition Receiver provides several display formats. Display Format button in the front panel changes the display format in the cycle of 1080i, 720p, 480p, 480i, native, hybrid-1, hybrid-2, EZ DVI modes. In 1080i, 720p, 480p and 480i modes, all input signal formats are converted to the chosen display format. In native, hybrid-1, and hybrid-2 modes, output display format is automatically adapted depending on input signal format, as follows.
2-4. Normal and Wide Format Signals When you view a high definition picture(16:9) with 480i or 480p format setting, the ratio button on the remote control changes the wide mode in the cycle of Letterbox, Cropped, to Squeezed. When you view a standard definition picture(4:3) with 720p or 1080i format setting, the ratio button on the remote control changes the wide mode in the cycle of Normal, Wide, Panorama, Zoom1, to Zoom2. (Refer to section 8.
2. IMPORTANT OVERVIEW 2-4. Normal and Wide Format Signals WHEN YOU SET THE DISPLAY FORMAT TO HDTV (1080i/720p) High Definition Output Format(16:9) Program Format No Adjustment Required High Definition (16:9) Normal Choose when you want to view a picture with an original 4:3 aspect ratio on your 16:9 TV. Black or gray bars will show at the left and right sides. antenna Wide Choose when you want to evenly stretch the width of a normal picture to fill the entire screen.
2-5. Audio Signals Digital Audio Signals center channel speaker left speaker surround sound speaker right speaker sub-woofer surround sound speaker Dolby Digital Sound with 5.1 Channels The DIRECTV® High-Definition Receiver will be the focal center of your home entertainment system comprising a variety of components, such as TV, DVD, VCR, etc. and external audio systems.
The analog audio outputs may be used to drive an external Hi-Fi audio system instead of the TV speakers. These stereo outputs are activated by setting the Analog Mode in the Audio menu to Stereo. 15 206-3813 If you set the Analog Mode to SAP (Second Audio Program), you can hear the program’s dialog in another language such as French or Spanish, if provided on the broadcast.
2-6. On-Screen Display Main Menu You can adjust the setup through a user-friendly on-screen menu using the remote control. While viewing a program, the on-screen menu will appear on your TV screen if you press the Menu button on your remote control. The on-screen menu is operated using a simple, straight-forward ‘Highlight and Select’ process. You just highlight a menu item by using “DEF G ” on your remote control, and select it by pressing “ ”. The on-screen menu also offers visual cues for easy guidance.
2. IMPORTANT OVERVIEW 2-6. On-Screen Display EZ Help First, certain features and terminologies used in the on-screen menus require your basic understanding to fully utilize their capabilities. The DIRECTV® High-Definition Receiver provides a powerful feature called “EZ Help” that describes highlighted menu item to help you understand the features. Press and hold the “Help (?)” button to display the “EZ Help”. Once you release the button, the EZ Help menu disappears from the screen.
3. SETUP AND CONNECTIONS 3-1. Unpacking Make sure you have received all these items listed below with the DIRECTV® High-Definition Receiver.
3. SETUP AND CONNECTIONS 3-1. Unpacking DIRECTV® High-Definition Receiver The DIRECTV HD Receiver is capable of receiving signals from the satellite dish, cable, and/or over-the-air antenna and sending the decoder signals to your TV. Remote Control In addition to the DIRECTV HD Receiver, the remote control can be programmed to control many other devices. Batteries To install the batteries, slide open the battery compartment and insert the two AA batteries provided.
206-3813 3-2.
3. SETUP AND CONNECTIONS 3-2. Back Panel of the DIRECTV® High-Definition Receiver Ant In Is used to connect an over-the-air or terrestrial antenna. Cable In Is used to connect a coaxial cable coming from your cable TV service outlet or cable box. Out to TV Provides an RF connection between the DIRECTV HD Receiver and the TV. Decoded signals are provided on channel 3 or 4 as selected in the Output Channel section of the PREFERENCE menu.
3-3. General Recommendations CAUTION: Make all connections before plugging the power supply cord into a standard 120V, 60Hz AC power outlet. You can connect the DIRECTV® High-Definition Receiver in a variety of configurations. The answers to the following questions will determine the correct setup for you. - What type of antennas do you have? Satellite dish, cable, and/or over-the-air antennas.
3. SETUP AND CONNECTIONS 3-4. Connecting to Antennas - No Dish Antenna Cable TV wall jack Receiving Signals 1. Connect the “Antenna” to the “ANT IN” jack on the DIRECTV® High-Definition Receiver using a coaxial RF cable. 23 206-3813 2. Connect the cable TV signal to the “CABLE IN” jack on the DIRECTV HD Receiver using a coaxial RF cable.
3-4. Connecting to Antennas - Round Dish (Satellite A) Antenna LNB Sat A Cable TV wall jack Dish Jack 1 Phone wall jack Receiving Signals 1. Connect the “Antenna” to the “ANT IN” jack on the DIRECTV® High-Definition Receiver using a coaxial RF cable. 2. Connect the cable TV signal to the “CABLE IN” jack on the DIRECTV HD Receiver using a coaxial RF cable. 3. Connect the “Jack 1” of the dish antenna to the “SATELLITE IN” jack on the DIRECTV HD Receiver using a coaxial RF cable.
3. SETUP AND CONNECTIONS 3-4. Connecting to Antennas - Oval Dish (Satellite A, B) Receiving Signals 1. Connect the “Antenna” to the “ANT IN” jack on the DIRECTV® High-Definition Receiver using a coaxial RF cable. 2. Connect the cable TV signal to the “CABLE IN” jack on the DIRECTV HD Receiver using a coaxial RF cable. 3. Connect the “Jack 1” of the multi-switch to the “SATELLITE IN” jack on the DIRECTV HD Receiver using a coaxial RF cable.
3-4. Connecting to Antennas - Oval Dish (Satellite A, B, C) LNB Sat A LNB Sat C LNB Sat B Antenna Cable TV wall jack Dish 5x4 Multi-switch Output Phone wall jack Receiving Signals 1. Connect the “Antenna” to the “ANT IN” jack on the DIRECTV® High-Definition Receiver using a coaxial RF cable. 2. Connect the cable TV signal to the “CABLE IN” jack on the DIRECTV HD Receiver using a coaxial RF cable. 3.
3. SETUP AND CONNECTIONS 3-5. TV Connection - Analog TV TV Viewing 1. Connect the “OUT TO TV” jack on the DIRECTV® High-Definition Receiver to the “ANT IN” jack on your TV using a coaxial RF cable. 27 206-3813 2. Connect the “AUDIO OUT” and “VIDEO OUT” jacks on the DIRECTV HD Receiver to the “A/V IN” jack on your TV using RCA-type cables. (Note : These connections are only available when 480i display format is selected.
3-5. TV Connection - HD Monitor (Y/PB/PR type) TV Viewing 1. Connect the “OUT TO TV” jack on the DIRECTV® High-Definition Receiver to the “ANT IN” jack on your TV using a coaxial RF cable. 2. Connect the “COMPONENT OUT” jacks on the DIRECTV HD Receiver to the “COMPONENT IN” jacks of your TV using RCA-type cables. (The “TYPE” switch must be set toward the “Y/PB/PR” jacks.) 206-3813 3. Connect the L/R “AUDIO OUT” jacks on the DIRECTV HD Receiver to the L/R “AUDIO IN” jacks on your TV using RCA-type cables.
3. SETUP AND CONNECTIONS 3-5. TV Connection - HD Monitor (RGB type) LNB Sat A LNB Sat C LNB Sat B Antenna Dish Cable TV wall jack HD-Ready TV ANT.IN Y Pb Pr L R 5x4 Multi-switch Output Phone wall jack TV Viewing 1. Connect the “OUT TO TV” jack on the DIRECTV® High-Definition Receiver to the “ANT IN” jack on your TV using a coaxial RF cable. 2. Connect the “RGB OUT” jack on the DIRECTV HD Receiver to the “RGB IN” jack of your TV using VGA-type connector.
3-5. TV Connection - HD Monitor with HDCP (DVI-HDTV type) TV Viewing 1. Connect the “OUT TO TV” jack on the DIRECTV® High-Definition Receiver to the “ANT IN” jack on your TV using a coaxial RF cable. 2. Connect the “DVI-HDTV OUT” jack on the DIRECTV HD Receiver to the “DVI-HDTV IN” jack of your TV using DVI-HDTV type connector. (The “TYPE” switch must be set toward the “RGB/DVI-HDTV” jacks.) 206-3813 3.
3. SETUP AND CONNECTIONS 3-6. VCR Connection LNB Sat A LNB Sat C LNB Sat B Antenna Dish Cable TV wall jack VCR IN ANT.
3-7. Audio Connection - Digital Audio System SPDIF IN Dolby AC-3 Connection 206-3813 1. Connect the “DIGITAL AUDIO OUT” jack on the DIRECTV® High-Definition Receiver to the “SPDIF IN” jack on your Dolby Digital decoder using a digital optical cable. (A digital optical cable is not supplied.
3. SETUP AND CONNECTIONS 3-7. Audio connection - Analog Hi-Fi System Hi-Fi System Connection 33 206-3813 1. Connect the Left and Right “AUDIO OUT” jacks of the DIRECTV® High-Definition Receiver to the Left and Right “INPUT” jacks on your Hi-Fi audio system.
4. FRONT PANEL AND REMOTE CONTROL 4-1. Using the Front Panel of the DIRECTV® High-Definition Receiver 2 display info format 3 6 5 7 9 10 1 Display format indicator 1080i 1 select exit 8 4 power menu guide 720p 480p Display interface indicator 480i DVI RGB YPBPR Power Turns the DIRECTV HD Receiver on or off. Standby mode indicator Multi function indicator 2 Front Display Window Shows DIRECTV HD Receiver status: Current display output format, output type, and channel number.
4. FRONT PANEL AND REMOTE CONTROL 4-2. Using the Remote Control 1 Power Turns the DIRECTV® High-Definition Receiver on and off. If your remote control is programmed to control other components such as VCR, DVD, etc., Power will turn the component on and off. If you want to control other components from different manufacturers, you must first program your remote control. For further instructions on remote control programming, please refer to the section 4.
4-2. Using the Remote Control power sat vcr aux tv dvd 1 2 3 4 5 6 7 8 9 0 8 mute ratio pg up 9 pg dn vol ch signal sd/hd flashbk cc/date 10 11 12 13 menu guide surf info 206-3813 help exit record stop pause rew 8 CH +/Scrolls the channels up or down while you are viewing a program, or scrolls the program list in the Guide menu page by page. Press and hold the button to speed up and continue scrolling channels. 9 Ratio Changes the picture aspect ratio.
4. FRONT PANEL AND REMOTE CONTROL 14 Menu Brings up the main menu. You can return to normal viewing by pressing the Exit button or pressing the Menu button again. 15 Guide Brings up the DIRECTV Advanced Program Guide. You can also access the Advanced Program Guide via the main menu. Return to normal viewing by pressing the Exit button or pressing the Guide button again. 16 Surf Shows the list of your surf channels. A Surf channel list can contain up to fifty channels.
4-3. Programming the Remote Control The DIRECTV® High-Definition Receiver remote control is a multi-brand or universal remote control that can be programmed to control most remote-controllable devices from other manufacturers. NOTE The remote control may not control all models of other brands. 1. Test your remote control To find out whether your remote control can operate a component without programming.
4. FRONT PANEL AND REMOTE CONTROL 4-4.
4-4.
4. FRONT PANEL AND REMOTE CONTROL 4-4.
5. INITIAL SETUP CAUTION: Check your TV screen to determine the format required. The format must be set to appropriate mode using format button on the front panel. The on screen display or the picture may not appear if the wrong format mode is selected. When you turn on the DIRECTV® High-Definition Receiver for the first time, you will be asked if you want to set up DIRECTV® programming. If you have chosen to subscribe to DIRECTV programming, you should initialize the system according to section 8-6.
6. BASIC OPERATION 6-1. Viewing the Channel Banner The Channel Banner appears whenever you tune to a new channel or press the Info button on the remote control while viewing a program. It displays channel and program information in the banner shown at the top of the screen. When the Channel Banner is displayed, pressing “DE” toggles between extended and regular information banners. To remove the banner, press Info again or wait for 10 seconds.
6-1. Viewing the Channel Banner Input Source Icon (DIRECTV) Indicates from which source the current program signal is being received. The DIRECTV® HighDefinition Receiver can receive a signal from ANT, ANT/Digital, CABLE or DIRECTV. Lock Icon ( ) Indicates that the lock system is activated. Alternate Audio ( ENGLISH ) DIRECTV and ATSC channels or programs sometimes provide multiple audio tracks, usually in different language.
6. BASIC OPERATION 6-2. Channel Surfing The surf list appears on the TV screen when you press the Surf button on the remote control. It enables you to surf up to 50 favorite channels that were chosen in the Edit Channel section of the Setup menu. The surf list consists of the channel logos or channel numbers. If the logo of a certain channel is not available, the channel number is displayed instead. You can easily move the highlight on the surf list using “DEF G ” on the remote control.
6-3. Subscription to DIRECTV® programming and ANT/CABLE-Only operation The DIRECTV® High-Definition Receiver is designed to receive signals from DIRECTV, ANT and /or CABLE. If you are a DIRECTV customer, you can enjoy programming provided by DIRECTV. You can also receive the analog and digital over-the-air broadcasts, with the benefit of the Advanced Program Guide (APG) which is an integrated electronic program guide.
7. ADVANCED PROGRAM GUIDE 7-1. About the Advanced Program Guide The DIRECTV Advanced Program Guide (APG), contains schedule and program information for all DIRECTV® channels. The APG also provides local over-the-air channels information including both conventional analog and digital channels if you receive satellite service. Helping you to find a program easily and conveniently, the APG allows you to view schedule and descriptive program information for the channels.
7-2. Layout of the Advanced Program Guide Screen The on-screen guide maintains five different channel lists, each of which shows you only those channels and programs that belong to that channel list. The meaning and generation of each channel list is described below All Shows program listings for all channels that you are eligible to access.
7. ADVANCED PROGRAM GUIDE 7-3. Moving through the Advanced Program Guide The Advanced Program Guide is operated based on a simple and straightforward “Highlight and Select” process. 1. Use “DEF G ” on your remote control to navigate the guide screen. 2. Press “ ” to select or execute the highlighted menu or function. The on-screen guide shows you program listings for seven channels within a one and one half hour time slot. For example:, 6:00 - 7:30.
7-4. Selecting a Program The top region of the guide screen displays the schedule and program information of the currently highlighted program. You can also see other detailed information about the program by pressing the Info button. When you select the highlighted program by pressing “ ”, what happens or appears next depends on whether the highlighted program is currently on-air or scheduled in the future, and whether or not it is a pay per view program.
7. ADVANCED PROGRAM GUIDE 7-5. Getting More Information Pressing the Info button will display available additional information about the highlighted program. It includes actor and role relationships, original material, production studio, the date on which the program was first shown, and so on. To display program details: 1. Move the highlight to a desired program using “DEFG”, Pg Up, Pg Dn or CC/Date on the remote control. 2.
7-6. Referring to EZ Help Your basic understanding of certain features and terminology used in the APG will help you to fully enjoy the functionality of the DIRECTV® High-Definition Receiver. The receiver’s unique feature called ‘EZ Help’ serves as an on-line snapshot user’s manual. If you want to find out what the highlighted menu item is for and how it works while you are in the APG, just press and hold the “Help (?)” button on your remote control.
7. ADVANCED PROGRAM GUIDE 7-7. Making a Remind List for Future Viewing If you want to view a program scheduled in the future, you can put that program on the Remind List so that a reminder message will appear right before the program starts. To schedule a future viewing : 1. Move the highlight to a future program you want to watch using “DEF G ” on the remote control. 2. Press “ ”. A dialog box will appear for your information. 3.
7-8. Purchasing DIRECTV® Pay Per View Programs If you subscribe to DIRECTV® programming, you may preview pay per view movies on channel 200, the DIRECTV promo channel, to determine if you would like to purchase them. To purchase PPV programs: 1. From the program guide, press “ ” on the remote control to select the PPV program. A dialog box will appear to ask you whether you want to purchase or not. Selecting the “Others” button will show you other time schedules for the program. 2.
7. ADVANCED PROGRAM GUIDE 7-9. Searching Programs by Category You can search for specific programs by their categories. The category information of each program is provided by the APG so that you can choose one of them to search for matching programs. You can also set a search range to One Day or Three Days, (within 24 hours and 72 hours from now, respectively). In the search result one program may have multiple showings in different channels and/or in different time slots.
7-10. Searching Programs by Keyword You can also search for programs by keyword that include the keyword in their program titles or credit titles such as actor/actress name, director name, etc. To search programs by keyword: 1. Move the highlight to the KEYWORD in the guide menu. The Keyword Search screen will appear on the right side of the guide menu. 2. Move the highlight to the right and enter a word using the screen keyboard. Highlight a letter first and press “ ” to type it in. 3.
8. CUSTOMIZATION 8-1. The Structure of the On-screen Menu In this menu system, there are several ways to customize the settings provided. Most menus consist of three levels to set up the options, but some menus go to and require further levels to be set. If you press the Menu button, only the first level of the menu system will appear at the left side of the TV screen. The second and third level can be displayed by pressing “ ”.
8-2. The On-Screen Menu DIRECTV SETUP AUDIO 206-3813 PREFERENCE Guide Remind List Future Purchase Purchase List Mail List Initial Setup EZ Channel Scan Manual Ch. Add Surf List/Ch.
8. CUSTOMIZATION 8-3. Previewing the Remind List The Remind List shows the programs you have reserved in the Guide menu. You may cancel any program in the list by selecting the program. A pop-up screen will ask if you want to cancel it. To cancel a program in the Remind List: 1. Press the Menu button on the Remote Control to display the on-screen menu. 2. Select the DIRECTV® menu by pressing “ ”on the remote control. 3. Scroll down to Remind List using “E”. 4.
8-4. Managing Program Purchases Future Purchase Allows you to review upcoming DIRECTV® Pay Per View purchases. You may only cancel programs that were ordered through the DIRECTV® High-Definition Receiver and have not been viewed. You may do this by selection the program. A pop-up screen will ask you if you want to cancel the program. To cancel a newly purchased program : 1. Press the Menu button on the Remote Control to display the on-screen menu. 2.
8. CUSTOMIZATION 8-4. Managing Program Purchases Purchase List Shows you a list of past DIRECTV® Pay Per View purchases. You can see each charge of the PPV programs you purchased and viewed. To review programs in the Purchase List: 1. Press the Menu button on the Remote Control to display the on-screen menu. 2. Select the DIRECTV® menu by pressing “ ”on the remote control. 3. Scroll down to the Purchase List using “E”. 4. Move the highlight to the right with “ G ” to scroll the purchase list. 5.
8-5. Checking the Messages Allows you to view the messages that are sent from DIRECTV. For example, you may receive a message requesting your attention to a new service or special program offering. To check the Mail Box: 1. Press the Menu button on the Remote Control to display the on-screen menu. 2. Select the DIRECTV® menu by pressing “ ” on the remote control . 3. Scroll down to the Mail List option using “E”. 4. Move the highlight to the right with “G” to select a mail item from the list. 5.
8. CUSTOMIZATION 8-6. Initializing the System About Initial Setup The DIRECTV® High-Definition Receiver is capable of receiving three types of signals; ANT, CABLE and DIRECTV® programming (if you are a DIRECTV® customer). Initial Setup lets you initialize your system to function properly with your dish antenna.
8-6. Initializing the System Your Location Provides the coordinates of elevation, azimuth, and tilt based upon your zip code. Elevation is the up/down angle of the dish. Azimuth is the side-to-side direction, while tilt is the circular rotation of the dish itself around the pointing axis. Full instructions for the installation of your dish are provided with your satellite dish antenna. To enter your location: 1. Press the Menu button on the Remote Control to display the on-screen menu. 2.
8. CUSTOMIZATION 8-6. Initializing the System Signal Strength Shows you up to three signal strength bars for Satellite Networks A, B, and C, in order to help you adjust the dish to the correct position with the elevation, azimuth, and tilt values obtained from the Your Location menu. While the maximum signal strength is 100, there will be no apparent difference in picture quality between signal strengths of 60 to 85.
8-6. Initializing the System Channel Setup Searches for all channels available over the air or terrestrial in a selected local area. You can select two distinct areas by Zip code to view the channels being broadcast from both areas. This is useful if you live between two major broadcast centers and are capable of receiving signals from both. After this Channel Setup process, the channel list will be created. To scan the channels from the satellites: 1.
8. CUSTOMIZATION 8-7. Managing Channels EZ Channel Scan (Channel Search) Automatically finds all channels (both analog and digital) available through the antenna and cable inputs, and stores all the active channels in the channel list. Inactive or weak channels may not appear in the list. In that case, add missing channels manually in the Manual Ch. Add menu. The channel list created here can be shown in the Surf List/Ch. Edit menu. To scan the channels with the antenna: 1.
8-7. Managing Channels Manual Ch. Add Manually adds a channel to your channel list without rescanning all the channels again. EZ Channel Scan may not pick up every channel that is available on Air and Cable. Therefore, it may be necessary for you to add channels manually using this feature. To add the channels missed in your channel list: 1. Press the Menu button on the remote control to display the on-screen menu. 2. Scroll down using “E” on the remote control. 3. Select the Setup menu by pressing “ ”.
8. CUSTOMIZATION 8-7. Managing Channels Surf List/Ch. Edit The default channel list is made in the EZ Channel Scan menu. Surf List/Ch. Edit allows you to create two other types of channel lists; custom list and surf list. A custom list can be created by toggling each channel on or off with “ ”. Once a channel is highlighted, you will be able to see whether the channel is currently shown or hidden by referring to the small window at the top-left corner of the screen.
206-3813 8-7.
8. CUSTOMIZATION 8.8 EZ Hook-up Graphically depicts possible schemes for connecting the DIRECTV® High-Definition Receiver to your dish antenna and other components. Since the connection that is best for you depends on the components in your system, keep in mind that an alternative connection may also be possible. To see EZ Hook-up: 1. Press the Menu button on the remote control to display the on-screen menu. 2. Scroll down using “E ” on the remote control. 3. Select the Setup menu by pressing “ ”. 4.
8-9. Setting the Clock Clock (Auto) Enables adjustment of the time zone and activation of daylight savings time. Normally, your clock is set using signals transmitted by DIRECTV. To set auto clock: 1. Press the Menu button on the Remote Control to display the on-screen menu. 2. Scroll down using “E ” on the remote control. 3. Select the Setup menu by pressing “ ”. 4. Scroll down to Clock using “E ”. 5. Move the highlight to the right with “G ”. 6.
8. CUSTOMIZATION 8-9. Setting the Clock Clock (Manual) Enables you to set the time manually in the ANT/CABLE Only Operation. To set manual clock: 1. Press the Menu button on the Remote Control to display the on-screen menu. 2. Scroll down using “E ” on the remote control. 3. Select the Setup menu by pressing “ ”. 4. Scroll down to Clock using “E”. 5. Move the highlight to the right with “G ”. 6. Use “DE ” to move the highlight in the entry boxes. 7.
8-10. Advanced Advanced Setup Allows you to configure special settings such as the background matte color for wide aspect ratio programming, the channel banner time-out period and advanced digital closed captioning settings.” To set advanced Setup Menu: 1. Press the Menu button on the Remote Control to display the on-screen menu. 2. Scroll down using “E ” on the remote control. 3. Select the Setup menu by pressing “ ”. 4. Scroll down to Advanced using “E”. 206-3813 5.
8. CUSTOMIZATION 8-11. Setting the Audio Digital Output If you are using an external audio system that supports Dolby Digital, select Dolby Digital audio mode. If you are using an external audio system that has a PCM only decoder, select PCM (Digital). If you are not using an external audio system, select OFF. An external Digital Output other than Dolby Digital and PCM may create a high pitched noise and cause damage. To set the digital audio mode: 1.
8-11. Setting the Audio PCM (Digital) Pulse Code Modulation (PCM) decoders support L/R stereo only. If selected, audio outputs are decoded and transmitted to the Digital Output (SPDIF) in PCM mode. Dolby Digital Dolby Digital, formally known as AC-3 for Audio Coding 3rd Generation or 5.1 channel audio, is a coding technique that provides five independent, full frequency response audio channels and one low frequency bass channel. NOTE 206-3813 Refer to section 2.5 to see more detailed information.
8. CUSTOMIZATION 8-11. Setting the Audio Audio Mode Lets you choose the default audio mode when a program is broadcasting in analog format. When you view a program broadcast in mono, you will hear only mono sound, even though Stereo mode is set. When Second Audio Program “SAP” mode is set, the program’s second audio program is broadcast in mono, if provided. To Set the Analog Audio Mode: 1. Press the Menu button on the Remote Control to display the on-screen menu. 2.
8-11. Setting the Audio Audio Language If available, allows you to hear a program in other languages if the program is broadcast in digital format. You may select a language while you are viewing a program by selecting an option on the audio language box in the channel banner and pressing “DE ” repeatedly to select the desired language. To set the digital audio language: 1. Press the Menu button on the Remote Control to display the on-screen menu. 2. Scroll down using “E ” on the remote control. 3.
8. CUSTOMIZATION 8-11. Setting the Audio Variable Audio Allows you to control the volume with the remote control of the DIRECTV® High-Definition Receiver. To set Variable Audio: 1. Press the Menu button on the Remote Control to display the on-screen menu. 2. Scroll down using “E ” on the remote control. 3. Select the Audio menu by pressing “ ”. 4. Scroll down to Audio Variable using “E ”. 5. Move the highlight to the right with “G ”. 6. Select “On” or “Off” and press “ ” to return to the previous level.
8-12. Choosing the Aspect Ratio Lets you choose the screen format. When you view a picture with a wide (16:9) aspect ratio on a 4:3 TV, you can choose to view using Letterbox, Cropped, or Squeezed. When you view a picture with a normal (4:3) aspect ratio on a 16:9 TV, you can choose to view using Normal, Wide, Panorama, Zoom1, or Zoom2. (Refer to section 2.4 Normal and Wide Format Signals) Choosing the screen format of your TV: 1. Press the Menu button on the Remote Control to display the on-screen menu.
8. CUSTOMIZATION 8-12. Choosing the Aspect Ratio Modes for viewing wide image (16:9) on a normal TV (4:3) display when output display format is 480i or 480p mode : Letter Box Use for a picture with an original 16:9 aspect ratio (in a wide format). Letterbox mode will shrink the picture to fill the screen, with black (or gray) bars appearing at the top and bottom of the screen. Cropped Use for a picture filling the entire screen by cropping (removing) the left and right portions of the picture.
8-13. Setting Closed Caption Lets you select a mode for displaying Closed Caption Data. You can choose the Analog Caption Service or the Digital Caption Service. In the Analog Caption Service, Caption 1-4 display program’s dialog, and Text 1-4 display information for a data service. In the Digital Caption Service, Service 1-6 represent each Language Service. (Note : Closed Caption will appear only when it is provided by the broadcaster) To set Closed Caption: 1.
8. CUSTOMIZATION 8-13. Setting Closed Caption Analog Caption Service Caption1 (CC1) CC1 is the primary caption service that synchronizes the captioning language with the sound, used by most broadcasters. The captioning is displayed in the same language as the program’s dialog. Caption2 (CC2) CC2 is the special non-synchronous caption service that does not need to be in sync with the sound and may provide simplified captioning, which is usually delayed.
8-14. Setting Default Signal Out Output Channel Lets you choose the channel used to view the DIRECTV® High-Definition Receiver when connected to the TV from the "OUT TO TV" jack, either channel 3 or, 4. Make sure your TV is set to the selected channel and that the DIRECTV HD Receiver's display format is set at "480i". To set the channel number of the DIRECTV HD Receiver: 1. Press the Menu button on the Remote Control to display the on-screen menu. 2. Scroll down using “E ” on the remote control. 3.
8. CUSTOMIZATION 8-14. Setting Default Signal Out Out to TV -- Default Connection Lets you choose whether the OUT TO TV jack is connected to either the CABLE IN or ANT IN jack in standby mode. To set the standby mode default signal source: 1. Press the Menu button on the Remote Control to display the on-screen menu. 2. Scroll down using “E ” on the remote control. 3. Select the Preference menu by pressing “ ”. 4. Scroll down to Out to TV using “E ”. 5. Move the highlight to the right with “G ”. 6.
8-15. Setting the Digital TV Input Digital TV Input The DIRECTV® High-Definition Receiver is also capable of receiving an 8-VSB signal, if any, via cable service. Before you move the highlight in the sub menu, the dialogue box will pop up to make sure if you want to change the mode. After changing it, you should run “EZ Channel Scan” to view a program sent via the designated input. To set the Digital TV signal source: 1. Press the Menu button on the Remote Control to display the screen menu. 2.
8. CUSTOMIZATION 8-16. Running EZ Demo Shows you how to navigate through the on-screen menus of the DIRECTV® HighDefinition Receiver. To run EZ Demo: 1. Press the Menu button on the Remote Control to display the on-screen menu. 2. Scroll down using “E ” on the remote control. 3. Select the Preference menu by pressing “ ”. 4. Scroll down to EZ Demo using “E ”. 5. Press “G ” to display the EZ Demo screen. The screen will run automatically. 87 206-3813 6.
8-17. Setting Locks Lock System Lets you set up specific channels, ratings and spending limits through blocking schemes. Activates or disables all of the lock schemes previously set up. A password is required to gain access to this menu if the lock system is activated. You can change the password by inputting a new password twice. When the system is unlocked, the Block Channel, Program Rating and Spending Limits are not effective. To activate or deactivate the Lock System: 1.
8. CUSTOMIZATION 8-17. Setting Locks Block Channel Blocks any channels that you do not want to view or that you do not want your kids to watch. If you tune in a blocked channel, a black screen with a pop-up screen will appear. You will have to enter the correct password to view the channel. Once you turn off your DIRECTV® High-Definition Receiver, Block Channel will automatically be reactivated. To block channels: 1. Press the Menu button on the Remote Control to display the on-screen menu. 2.
8-17. Setting Locks Movie Rating Blocks movies according to the movie ratings limit, as defined by the Motion Picture Association of America, so children cannot view certain movies. You can set the ratings limit by blocking out all the movies with the ratings above a specified level. Keep in mind that the movie ratings limit applies only to movies shown on TV, not TV programs such as soap operas. To block movie programs: 1. Press the Menu button on the Remote Control to display the on-screen menu. 2.
8. CUSTOMIZATION 8-17. Setting Locks TV Rating for Children’s Programs Keeps children from watching certain children's TV programs according to the ratings limit as defined by the TV Parental Guidelines Monitoring Board. This rating applies only to TV programs for children. Unless you block TV programs intended for mature audiences in the TV Rating – General menu, your children may view those programs. To block TV programs: 1. Press the Menu button on the Remote Control to display the on-screen menu. 2.
8-17. Setting Locks TV Rating for General Programs Blocks TV programs that you and your family do not wish to watch, based on the rating scheme defined by the TV Parental Guidelines Monitoring Board. To block TV programs: 1. Press the Menu button on the Remote Control to display the on-screen menu. 2. Scroll down using “E ” on the remote control. 3. Select the Lock menu by pressing “ ”. 4. Scroll down to TV Rating-General using “E ”. 5.
8. CUSTOMIZATION 8-17. Setting Locks Spending Limit Sets the spending limit of each PPV program. After a spending limit is set and the system is locked, you must enter the password to purchase a PPV program that costs more than your spending limit allows. The system will temporarily unlock the limit you previously set. Once the receiver is turned off and then turned back on, the lock will be reactivated. To set the spending limit of each PPV program: 1.
8-18. Testing the System Checks the integrity of the DIRECTV® High-Definition Receiver. If any problems are detected, a short message will be displayed. To test DIRECTV HD Receiver : 1. Press the Menu button on the Remote Control to display the on-screen menu. 2. Scroll down using “E ” on the remote control. 3. Select the System menu by pressing “ ”. 4. System Test will be automatically highlighted. 5. Move the highlight to the right with “G ”. 6. Press “ ” to activate the system test.
DIRECTV may issue you a replacement access card periodically, if you are a DIRECTV customer. This menu enables you to transfer information, such as the record of your purchases, from the old card onto a new one. The access card fits into the slot on the back panel of the DIRECTV® High-Definition Receiver. Once you proceed past “Read the old card”, “Replace Card” cannot be cancelled. To replace the card : 1. Press the Menu button on the Remote Control to display the on-screen menu. 2.
8-20. Upgrading Software Shows you the current software version. If there is a software planned, you will be notified by a pop-up box on your TV screen and the pop-up box will ask you if you want to upgrade your system. To upgrade the software in the DIRECTV® High-Definition Receiver: 1. Press the Menu button on the Remote Control to display the on-screen menu. 2. Scroll down using “E ” on the remote control. 3. Select the System menu by pressing “ ”. 4. Scroll down to S/W Upgrade using “E ”. 5.
9. EZ HELP 9-1. EZ Help The EZ Help feature is designed to let you understand each function of the Menu and Advanced Program Guide in an easy and convenient way. When you navigate through the Menu and the Advanced Program Guide, press and hold the “Help (?)” button on your remote control if you want information about the highlighted item. The information will be displayed on the right side of the TV screen. Simply press and hold to see the helpful information.
9-1. EZ Help The EZ Help is an on-line version of this Operating Guide. You can review many features of the DIRECTV® High-Definition Receiver by navigating through a simple structure. It contains a brief overview of the DIRECTV HD Receiver, the use and programming of the remote control, a functional explanation of the front and back panel, and an instructive note about the Menu and the Advanced Program Guide. The see the EZ Help feature: 1.
PRODUCT SPECIFICATIONS Specifications For Model No.
AUDIO FEATURES Dolby Digital (AC-3) Linear PCM Audio Analog output level Analog output level (Maximum) Frequency Response (+/- 1dB) Digital outputs Analog outputs GENERAL Power Consumption Standby Power Power line Environment Safety and Regulation Mechanical Dimensions 206-3813 AC Line connector/cable Dolby Digital 20bit 200mV RMS, 1 RCA color-coded jack 3.
TROUBLESHOOTING Zenith and DIRECTV are dedicated to providing you with quality support and customer service. If you have questions or difficulties that you cannot resolve using the tips in this troubleshooting section, consult your dealer or call DIRECTV at 1-800-DIRECTV (1-800-347-3288) regarding problems with DIRECTV Service problems and Zenith Customer Support at Digital TV Hotline (1-877-993-6484) regarding your DIRECTV® High-Definition Receiver. 101 SOLUTIONS No power.
206-3813 SYMPTOMS SOLUTIONS Normal picture but no sound. - Check volume levels. - Make sure the TV is not muted. - Check that the DIRECTV® High-Definition Receiver is connected properly. Picture is distorted. - Make sure the proper format is selected. (see section 2-3) - Make sure the proper aspect ratio is selected. (see section 2-4) - Make sure the video output is connected to the TV. (see section 3-5) Available channels are missing.
ZENITH ELECTRONICS CORPORATION DIRECTV® HIGH-DEFINITION RECEIVER LIMITED WARRANTY-USA Zenith will repair or replace your product, at Zenith’s option, if it proves to be defective in material or workmanship under normal use during the warranty period listed below from the date of original consumer purchase. This warranty is available only to the original purchaser of the product and is effective only when used in the United States, excluding U.S. Territories.