(707) OWNER / OPERATOR MANUAL MODE D’EMPLOI MANUAL DE INSTRUCCIONES PORTABLE GAS DRILL PERCEUSE PORTATIVE A ESSENCE PERFORADORA PORTÁTIL A GASOLINA NOTE: Drill is optional part. REMARQUE : le foret est un composant optionnel. NOTA: la broca es una pieza opcional. EDG2300R WARNING AVERTISSEMENT ADVERTENCIA The engine exhaust from this product contains chemicals known to the State of California to cause cancer, birth defects or other reproductive harm.
English SAFETY FIRST Instructions contained in warnings within this manual marked with a symbol concern critical points which must be taken into consideration to prevent possible serious bodily injury, and for this reason you are requested to read all such instructions carefully and follow them without fail. ■ WARNINGS IN THE MANUAL WARNING This mark indicates instructions which must be followed in order to prevent accidents which could lead to serious bodily injury or death.
Français Español SECURITE LA SEGURIDAD PRIMERO Les instructions contenues dans les mises en garde de ce mode d’emploi portant le symbole concernent les points critiques qui doivent être pris en considération pour éviter les blessures corporelles graves, c’est pourquoi ces précautions doivent être rigoureusement suivies.
English 1. Parts location 4 1. 2. 3. 4. 5. 6. 7. 8. 9. 10. 11. 12. 5 Drill Chuck Reduction unit Spark plug Muffer Ignition switch Throttle lever Rear grip Starter grip Fuel cap Air cleaner Front grip 6 3 2 1 7 8 9 12 2. Specifications 11 10 English ■ EDG2300R Overall Dimensions (LxWxH) ·······································································16.5x12.1x11.3 (412x302x281) in.
Français Español 1. Emplacement des pieces 1. Situación de las piezas 1. 2. 3. 4. 5. 6. 7. 8. 9. 10. 11. 12. 1. 2. 3. 4. 5. 6. 7. 8. 9. 10. 11. 12. Foret Mandrin Réducteur Bougie Silencieux Bouton de contact Levier d'accélération Poignée arrière Poignée de démarrage Bouchon du réservoir de carburant Filtre à air Poigné avant 2.
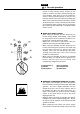
English 3. Symbols on the machine For safe operation and maintenance, symbols are carved in relief on the machine. According to these indications, please be careful not to take a mistake. (a) The port to refuel the "MIX GASOLINE" Position: FUEL TANK CAP (b) The direction to close the choke Position: AIR CLEANER COVER (c) The direction to open the choke Position: AIR CLEANER COVER ■ EMISSION CONTROL An emission control label is located on the engine. IMPORTANT ENGINE INFORMATION THIS ENGINE CONFORMS TO U.
Français Español 3. Symboles utilises sur la machine 3. Símbolos presentes en la máquina Des symboles en relief ont été placés sur la machine pour assurer la sécurité à l’usage et faciliter l’entretien. Prendre soin d’observer les indications suivantes afin d’éviter les erreurs. Para el uso y mantenimiento seguro del producto, los símbolos han sido estampados en relieve en la máquina. Siga siempre estas indicaciones, y tenga cuidado de no cometer un error.
English 4. For safe operation ■ IN ORDER TO ENSURE PROPER AND SAFE OPERATION OF YOUR PORTABLE GAS DRILL • Read this Owner/Operator Manual carefully. Be sure you understand how to operate this unit properly before you use it. Failure to do so could result in serious injury. • Be sure to keep this manual handy so that you may refer to it later whenever any questions arise.
Français 4. Consignes de securite Español 4. Instrucciones de seguridad ■ AFIN DE GARANTIR UNE UTILISATION CORRECTE ET SÛRE DE VOTRE PERCEUSE PORTATIVE A ESSENCE ■ PARA ASEGURAR UN FUNCIONAMIENTO ADECUADO Y SEGURO DE SU PERFORADORA PORTÁTIL A GASOLINA • Lire ce mode d'emploi attentivement. Assurezvous d'avoir bien compris le fonctionnement de cet appareil avant de l'utiliser. Si vous ne respectez pas cette précaution, vous risquez de causer des blessures graves.
English 4. For safe operation • Lack of sleep, tiredness, or physical exhaustion results in lower attention spans, and this in turn leads to accidents and injury. When planning your work schedule, allow plenty of time to perform the work of cutting and allow plenty of time for rest. Limit the amount of time over which the portable gas drill is to be used continuously to somewhere around 30~40 minutes per session, and take 10~20 minutes of rest between work sessions.
Français Español 4. Consignes de securite normal. • Le manque de sommeil, la fatigue, ou l'épuisement physique réduisent l'attention, ce qui peut provoquer accidents et blessures. Lors de l'élaboration du plan de travail, prévoir suffisamment de temps de repos. Limiter la durée des périodes pendant lesquelles la machine est utilisée sans interruption entre 30 et 40 minutes. Se reposer de 10 à 20 minutes entre ces périodes. Autant que possible, essayer de limiter de genre de travail à 2 heures par jour.
English 4. For safe operation there are no sparks or open flames anywhere nearby before refueling. • If any fuel spillage occurs during refueling, always be sure to use a dry rag to wipe any fuel which has been spilled onto the portable gas drill before turning the engine back on again. • After refueling, screw the fuel cap back tightly onto the fuel tank and then carry the portable gas drill to a spot 10feet (3m) or more away from where it was refueled before turning on the engine.
Français 4. Consignes de securite circonstances. • Avant de refaire le plein de carburant, arrêter d'abord le moteur et vérifier l'absence de flammes ou d'étincelles à proximité. • Si du carburant se renverse pendant le remplissage, veillez à toujours utiliser un chiffon sec pour essuyer le carburant renversé sur la perceuse portative à essence avant de redémarrer le moteur.
English 4. For safe operation engine, hold it firmly in place so as to ensure that nor the throttle may not come into contact with any obstacles when the engine starts up. • Never place the throttle into the high speed position when starting the engine. • After starting up the engine, check to make sure that the drills stop rotating when the throttle is moved fully back to its original position.
Français 4. Consignes de securite fermement en place afin de veiller à ce qu'aucun obstacle n'entre en contact avec l'accélérateur au démarrage. • Ne jamais mettre la manette de l'accélérateur à fond au démarrage du moteur. • Une fois le moteur en marche, vérifier que le foret s'arrête de tourner lorsque l'accélérateur est remis à zéro. Si le foret continue à tourner, couper le moteur et apporter l'appareil chez votre revendeur RedMax agrée afin de la faire réparer.
English 4. For safe operation • Keep operation area clear of all persons, particularly small children and pets. • Never touch the spark plug or plug cord while the engine is in operation. Doing so may result in being subjected to an electrical shock. • Never touch the muffler, spark plug, or other metallic parts of the engine while the engine is in operation or immediately after shutting down the engine.
Français 4. Consignes de securite Español 4. Instrucciones de seguridad manière ou d'une autre, arrêter le moteur avant de se tourner vers la personne. Eloigner les personnes de la zone de travail, surtout les enfants et les animaux. Ne jamais toucher la bougie ou le câble de la bougie lorsque le moteur est en marche. Vous risquez d'être électrocuté. Ne jamais toucher le silencieux , la bougie ou toute autre pièce métallique du moteur pendant le fonctionnement ou aussitôt après son arrêt.
English 5. Set up SE1 1. Assemble the front grip witch is supplied with the unit to the gear case. 2. Screw the chuck unit into the drive shaft (clockwise). (1) Front grip (2) Chuck unit SE2 3. Insert the drill bit to be used after opening the chuck by the chuck handle and tighten the chuck by the handle. (3) Chuck handle Selection of a Suitable Bit Choose a drill bit according to material to be drilled.
Français Español 5. Assemblage 5. Montaje 1. Monter le levier qui est fourni avec l’unité sur la boîte d’engrenages. 2. Visser l’ensemble du mandrin dans l’arbre d’entraînement (dans le sens des aiguilles d’une montre). 1. Móntese la agarradera, que se suministra con el aparato, en la caja de engranajes. 2. Atorníllese el conjunto de portabroca en el eje motor (según la marca del reloj). (1) Levier (2) Mandrin 3.
English 6. Fuel WARNING • Gasoline is very flammable. Avoid smoking or bringing any flame or sparks near fuel. Make sure to stop the engine and allow it cool before refueling the unit. Select outdoor bare ground for fueling and move at least 3m (10ft) away from the fueling point before starting the engine. • The RedMax engines are lubricated by oil specially formulated for air-cooled 2-cycle gasoline engine use.
Français Español 6. Carburant 6. Combustible AVERTISSEMENT ADVERTENCIA • L’essence est un produit hautement inflammable. S’abstenir de fumer et ne tolérer aucun flamme ou source d’étincelles à proximité de l’endroit où est entreposée l’essence. Arrêter le moteur puis le laisser refroidir un peu avant de remplir le réservoir. Remplir le réservoir à l’extérieur sur une surface nue et éloigner le bidon d’essence d’au moins 3 mètres avant de mettre le moteur de la tronçonneuse en marche.
English 6. Fuel ■ HOW TO MIX FUEL IMPORTANT Agitate carefully. 1. Measure out the quantities of gasoline and oil to be mixed. 2. Put some of the gasoline into a clean, approved fuel container. 3. Pour in all of the oil and agitate well. 4. Pour In the rest of gasoline and agitate again for at least one minute. As some oils may be difficult to agitate depending on oil ingredients, sufficient agitation is necessary for the engine to last long.
Français Español 6. Carburant 6. Combustible participer ainsi à la protection de l’environnement et de votre santé. • De l’essence ou de l’huile de basse qualité risque d’endommager les joints, les conduites d’essence ou le réservoir d’essence du moteur. • Gasolinas o aceites de mala calidad puede dañar los anillos de sellado, las líneas o el tanque de combustible del motor. ■ COMMENT OBTENIR UN BON MELANGE ■ COMO MEZCLAR EL COMBUSTIBLE IMPORTANT IMPORTANTE Agiter avec précautions.
English 6. Fuel cause severe damage to the internal engine parts very quickly. 2. GASOHOL – It can cause deterioration of rubber and/or plastic parts and disruption of engine lubrication. 3. OIL FOR 4-CYCLE ENGINE USE – It can cause spark plug fouling, exhaust port blocking, or piston ring sticking. 4. Mixed fuels which have been left unused for a period of one month or more may clog the carburetor and result in the engine failing to operate properly. 5.
Français Español 6. Carburant 6. Combustible 1. ESSENCE SANS HUILE (ESSENCE PURE) – L’essence pure est capable d’endommager très rapidement les pièces du moteur. 2. ESSENCE-ALCOOL – Ce mélange risque de très rapidement détruire les pièces en caoutchouc et/ou en plastique et d’empêcher la lubrification du moteur. 3. HUILE POUR MOTEURS 4 TEMPS – Elles risquent d’encrasser les bougies, de bloquer l’échappement ou d’endommager les segments des pistons. 4.
English 7. Operation ■ THROTTLE CABLE ADJUSTMENT Check the throttle cable play and adjust to .04 or .08 in. (1~2mm) at the carburetor side. (1) OP1 .04 or .08 in. (1~2mm) (2) (3) (1) Throttle cable (3) Lock nut (2) Adjusting screw ■ STARTING ENGINE 1. Set ignition switch to "RUN" position. (OP2) OP2 (1) Ignition switch (A) RUN (B) STOP 2.
Français Español 7. Fonctionnement 7. Uso ■ REGLAGE DU CABLE D'ACCELERATION Vérifier le jeu du câble d'accélération et le régler à 1 ou 2mm du côté du carburateur. ■ AJUSTE DEL CABLE DEL REGULADOR Controle el juego del cable del regulador y ajuste a 1~2 mm en la parte del carburador. (1) Câble d'accélération (2) Vis de réglage (3) Ecrou de verrouillage (1) Cable del regulador (3) Tuerca de fijación ■ MISE EN MARCHE DU MOTEUR 1. Positionner le bouton de contact en position "RUN" (MARCHE).
English 7. Operation OP5 ■ STOPPING ENGINE • Gradually decrease the engine speed to an idle speed, and then slide ignition switch to "STOP" position. (1) Ignition switch (A) RUN (B) STOP OP6 OP7 OP8 ■ BORING OPERATION (OP6, OP7) • Keep the engine running at full throttle during operation. • Keep the drill going straight. Tilted boring can cause the drill to bend. • Avoid touching the spark plug lead during operation. • Always hold unit firmly with both hands on handles and body well balanced.
Français Español 7. Fonctionnement 7. Uso ■ ARRET DU MOTEUR • Réduire peu à peu la vitesse du moteur jusqu’au ralenti, puis placer le bouton de contact en position "STOP" (arrêt). ■ PARO DEL MOTOR • Reduzca gradualmente la velocidad del motor hasta que alcance a una velocidad de ralentí, y luego posicione el interruptor de ignición en la posición de "STOP" (PARAR).
English 7. Operation OP9 (1) ■ ADJUSTMENT OF IDLING SPEED • The engine idling speed is preadjusted at the factory so that the engine keeps running without moving the drill when releasing the throttle lever to the idling position. However, due to changes in engine conditions, it may be necessary to adjust the idling. • To increase idling, screw idle adjustment screw in, until preferred speed is obtained. To decrease idling, unscrew idle adjustment screw until preferred speed is obtained.
Français Español 7. Fonctionnement 7. Uso ■ REGLAGE DE LA VITESSE DU RALENTI • La vitesse du ralenti du moteur est préréglée à l'usine afin que le moteur continue de fonctionner sans que le foret tourne lorsque le levier d'accélération est relâché en position de ralenti. Cependant, à cause de changements de l'état du moteur, il peut être nécessaire de régler le ralenti. • Pour augmenter le ralenti, visser la vis de réglage du ralenti jusqu'à obtenir la vitesse souhaitée.
English 8. Maintenance Maintenance, replacement, or repair of the emission control device and systems may be performed by any non-road engine repair establishment or individual. ■ MAINTENANCE CHART every 25 before hours use after system/compornent procedure fuel leaks, fuel spillage wipe out ✔ fuel tank, air filter, fuel filter inspect/clean ✔ idle adjusting screw see ■ADJUSTING IDLING SPEED (p.
Français 8. Entretien L’entretien, le remplacement ou la réparation du dispositif et des systèmes de lutte contre les émissions peuvent être effectués par toute société ou individu spécialisé dans la réparation des moteurs hors-route.
English 8. Maintenance MA1 WARNING Before cleaning, inspecting or repairing your unit, make sure that engine has stopped and is cool. Disconnect the spark plug terminal to avoid accidental engine starts. ■ DAILY INSPECTION • Remove grass or dust, from the entire body. • Check that all nuts and screws are securely tightened, and no parts are missing. • Check for leakage of fuel.
Français 8. Entretien AVERTISSEMENT Español 8. Mantenimiento ADVERTENCIA Avant de nettoyer, inspecter ou réparer votre appareil, assurez-vous que le moteur est arrêté et refroidi. Débrancher la borne de la bougie pour éviter un démarrage accidentel du moteur. Antes de limpiar, inspeccione o repare su unidad, asegúrese de que el motor se ha detenido y está frío. Desconecte el terminal de la bujía de encendido para evitar arranques accidentales del motor.
English 8. Maintenance • Check and tighten each fastener. • Dismount the engine and check the clutch system to see if oil is observed between the clutch lining and its drum. If any, wipe it off with gasoline. Cleaning the cylinder fins • When wood chips are caught between cylinder fins, the engine may overheat, resulting in lower output. To avoid this, always keep cylinderfins and fan case clean.
Français Español 8. Entretien 8. Mantenimiento • Contrôler et serrer toutes les attaches. • Démonter le moteur et vérifier le système d'embrayage et son barillet pour voir si de l'huile se trouve entre la garniture de l'embrayage et son barillet. S'il se trouve de l'huile, l'essuyer avec de l'essence. • Controle y apriete cada fijador. • Desmonte el motor y controle el sistema de embrague para ver si hay aceite entre el revestimiento del embrague y su tambor. Si hay aceite límpielo con gasolina.
English 11. Troubleshooting guide Case 1. Starting failure CHECK fuel tank fuel filter carburetor adjustment screw sparking (no spark) PROBABLE CAUSES incorrect fuel fuel filter is clogged out of normal range spark plug is fouled/wet plug gap is incorrect disconnected ➞ ➞ ➞ ➞ ➞ ➞ spark plug ➞ ➞ ➞ ➞ ➞ ➞ ACTION drain it and with correct fuel clean adjust to normal range clean/dry correct (GAP: 0.6 – 0.
PORTABLE GAS DRILL 12. Parts list 12. Liste des pièces 12. Lista de piezas PERCEUSE PORTATIVE A ESSENCE PERFORADORA PORTÁTIL A GASOLINA EDG2300R NOTE : 1. Use RedMax/ZENOAH genuine parts as specified in the parts list for repair and/or replacement. 2. RedMax/ZENOAH does not warrant the machines, which have been damaged by the use of any parts other than those specified by the company. 3.
12. Parts list Fig.
Fig.1 GEAR CASE, HANDLE, TOOLS EDG2300R (S/N 60000101 and up) KEY# PART NUMBER DESCRIPTION Q'TY TA0023214120 TA0063210A80 TA0893214180 TA1063214120 TA1083214120 TA3003225080 TA6733560020 TA99051040083 TA99201040011 TA99905041201 TA99962091211 GEAR CASE A GEAR CASE B COMP. SHIFT FORK COMP. SHIFT GUIDE SPRING SHIFT LEVER GREASE NIPPLE COMP. STEEL BALL HEX. HOLE BOLT 4x8 WASHER 4 KNOCK PIN 4x12 NEEDLE BRG TLA912 1.5x5.
12. Parts list Fig.
Fig.
LIMITED WARRANTY EMISSION-RELATED PARTS, FOR TWO (2) YEARS FROM THE DATE OF ORIGINAL DELIVERY OF THE UNIT, RedMax / ZENOAH AMERICA, INC., THROUGH ANY RedMax DEALER, WILL REPAIR OR REPLACE, FREE OF CHARGE, FOR THE ORIGINAL AND EACH SUBSEQUENT PURCHASER, ANY PART OR PARTS FOUND TO BE DEFECTIVE IN MATERIAL AND/OR WORKMANSHIP.
Garantie limitée Pièces en rapport avec les émissions de gaz d'échappement : RedMax / ZENOAH AMERICA, INC., par l'intermédiaire de n'importe quel revendeur RedMax, réparera gratuitement ou remplacera gratuitement pour l'acheteur initial et chaque acheteur successif toute(s) pièce(s) se révélant de constitution et/ou de montage défectueux pendant deux (2) ans à compter de la date initiale de livraison d’une unité.
GARANTÍA LIMITADA PIEZAS REALACIONADAS CON LAS EMISIONES, POR DOS (2) AÑOS A CONTAR DE LA FECHA DE ENTREGA ORIGINAL DEL UNIDAD, RedMax / ZENOAH AMERICA, INC., A TRAVÉS DE CUALQUIER DISTRIBUIDOR RedMax, REPARARÁ O REEMPLAZARÁ, GRATUITAMENTE, PARA EL COMPRADOR ORIGINAL Y CUALQUIER COMPRADOR POSTERIOR, CUALQUIER PIEZA O PIEZAS QUE PRESENTEN DEFECTOS EN SUS MATERIALES Y/O DE FABRICACIÓN.
ZENOAH AMERICA, INC. 1100 Laval Blvd.