
Instruction manual


16
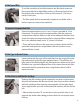
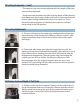
B. The magnifier is flipped into viewing position, by simply sliding the
release lever in the arrow-indicated direction. To store the magnifier,
simply push it down until it catches.
* The magnifier can be exchanged for one matching the eyesight of
the user.
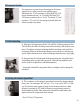
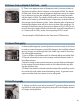
C. To close the focusing hood, first, push down the magnifier (if it is in
viewing position). Next, press in both side frames, as illustrated, and at
the same time, press the front frame back toward the rear. The focus-
ing hood will automatically be folded down.
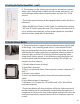
D.The standard magnifier supplied with the waist-level finder has a
power of -1.5 diopters, which can be exchanged for others with pow-
ers of -4.5, -3.5, -2.5, -0.5, +0.5, and +1.5 diopters.These optional
accessories should be purchased to suit the user's eyesight, if neces-
sary. Simply rotate the magnifier frame in the counter-clockwise
direction to unscrew. Attach in the reverse manner.
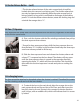
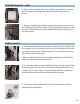
A. The aperture ring is rotated, in either direction, to set the required
f/number opposite the white index dot. The aperture ring click stops
at the numbered settings. Intermediate settings are also possible.
* Intermediate settings can be used with PS series lenses when the
finder with built-in exposure meter is used.
B. All interchangeable lenses for the Zenza Bronica SQ-Ai have fully
automatic lens diaphragms, which means that the focusing screen is
always viewed at the full aperture, providing the brightest possible
image. However, depressing the depth of field preview lever will stop
the lens diaphragm down to the pre-selected lens opening and per-
mit the photographer to check the depth of field effect on the focus-
ing screen.
17. Waist-Level Finder and Interchanging Magnifiers (con’t)
18. Setting the Aperture