ARES zClock-6000 Desk Clock Hiden Wireless Camera Quick Start
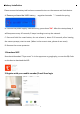
Battery Installation Please ensure the battery tab has been removed to turn on the camera and clock device. A. Ensure you have the 18650 battery, negative electrode "-" towads the spring B. Connect the power supply, side switch key, press down”ON”. After the startup beep, it will beep once every 10 seconds, 2 beeps is asking to set up the network. C. Press and hold the reset button, do not release it, about 5-10 seconds, after hearing the camera prompt, start to reset.
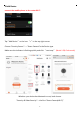
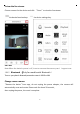
Add Device connect the mobile phone to the router Wi-Fi Tap Add Device or the icon + in the top right corner Choose “Security Sensor”-----“Smart Camera”in the Device type Make sure the indicator is flashing quickly and click next step (Mode 1:QR Code mode) Whether your device has bluetooth or not, both choose “Security & Video Security”----the first “Smart Camera(Wi-Fi)” 2
Connect Network Enter your Wi-Fi password and Click + or, Next ,the mobile phone displays a QR code, Hold the camera 15 to 20cm in front of the mobile phone for the camera to scan the QR code. (Camera does not support 5GHz Wi-Fi, Only 2.4GHz Wi-Fi networks are supported.) Please click heard the beep when the device voices tips Please wait about 30-120 seconds. The QR code needs to face the lens position. 10-20cm position, move your phone parallel.
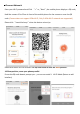
view the live stream Choose a name for the device and click Done to view the live stream. the device function keys the device settings key. SD Card Note:When the device's power is off, Insert or remove the memory card. support max 128G Bluetooch Only for models with Bluetooth Turn on your phone's bluetooth,connection name is L1819 or MH Change camera owner "Remove the device" from app, do not unplug the power adapter, the camera will automatically reset and rotate.
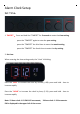
Alarm Clock Setup Set Time 1. TIMESET Press and hold the "TIMESET" for 3 seconds to enter the time setting. press the "TIMESET" again to enter the year setting. press the "TIMESET" the third time to enter the month setting. press the "TIMESET" the fourth time to enter the day setting. 2. Set time When entering the time setting mode, the "time" is blinking. Press the "MIN" to increase the clock by minute, (1-60). press and hold - time to increase rapidly.
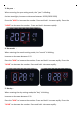
3. Set year When entering the year setting mode, the "year" is blinking. the last two digits, Increase or decrease between 20-99.(2020-2099) Press the "MIN" to increase the number. Press and hold - increase rapidly. Press the "HOUR" to decrease the number. Press and hold - decrease rapidly. 4. Set month When entering the month setting mode,t he "month" is blinking. Increase or decrease between 1-12. Press the "MIN" to increase the number. Press and hold - increase rapidly.
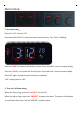
Alarm Clock 1. Set alarm clock Press the "AL1", turn on / off Press and hold the"AL1" to enter the alarm clock1 setting. The "time" is blinking. Press the "MIN" to increase the clock by minute. Press and hold - time to increase rapidly. Press the "HOUR" to increase the clock by hour. Press and hold - time to increase rapidly. Press"AL1"again, the alarm clock1 setting is completed. "AL2" setting same as "AL1" 2. Turn on / off alarm clock When the alarm rings, press the "AL1/AL2 " to turn off.
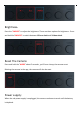
Brightness Press the "SNOOZE" to adjust the brightness. There are three options for brightness.. Press and hold the"SNOOZE" to switch between 12-hour clock and 24-hour clock. Reset The Camera: Press and hold the "MODE" about 5 seconds , you'll hear a beep, the camera reset. Deleting the camera in the app, the camera will also be reset. Power supply: When the usb power supply is unplugged, the camera continues to work until the battery is depleted.
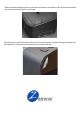
Please remove the battery door on the back and ensure the battery tab has been removed so the camera and clock device is powered. The clock comes with a protective film on the front to prevent scratches during assembly and transportation. You may remove the film for an improved look.