
Specifications


MANUAL
A INSTALLING THE HEATER
Carefully remove your heater from the box and check the contents.
I
n addition to the heater you also need to have:
E a manual fuel pump
E a transportation cap
E a fuel cap cover
E these directions for use
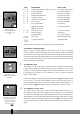
Keep the box and the packaging materials (Fig. A) for storage and/or
transportation.
Open the lid of the removable tank
7 and remove the piece of cardboard.
Attach the sticker to the inside of the lid.
Fill the removable tank as indicated in
Section B.
The floor should be firm and completely level. Reposition the heater, when it
is not level. Do not try to correct the situation by placing books or other
goods under the heater.
Please refer to the separate instruction in the carton
box for fixing of the heater.
Insert the plug K into the wall-socket (220/230 Volts - AC / 50 Hz) and set the
correct time using the adjustment keys
O (refer to Section C).
Your heater is now ready for use.
B FILLING FUEL
Do not fill the removable tank in the living room, but in a more suitable place
(there can always be some spillage). Follow the procedure below:
Make sure that the heater is switched off.
Open the lid 4 and lift the removable tank 7 out of the heater (Fig. B).
Note: Some drops may leak from the tank. Put down the removable tank
(cap pointing upwards) and screw off the fuel cap using the fuel cap cover
(Fig. C).
Take the manual fuel pump and insert the smooth, most rigid tube into the
jer
rycan. Make sure that it is in a higher position than the removable tank
(Fig. D). Insert the ribbed hose into the opening of the removable tank.
Lock the switch button on top of the pump (tur
n clockwise).
Squeeze the pump a few times, until fuel starts flowing into the removable
tank. As soon as this happens, there is no need to press any longer.
5
4
3
2
1
6
5
4
3
2
1
4
45
SRE 250
SRE 260
B
E E E E E E
D
C