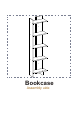
Bookcase Assembly uide
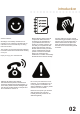
introduction Valued Customer, We design and carefully manufacture our products for our customers, We wish that our customers to have fun while they are doing their new furniture The product you just purchased was subjected to all sorts of tests and controls before sending out to you. Hope you enjoy your new furniture!!! Although all products are carefully manufactured and packed, sometimes we experience damage during transportation.
before you start o or Get required installation tools prepared. Do not install the product on rough surfaces.
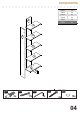
components Part1 Part2 Part3 Part4 Part5 TOTAL 2 1x 1x 4x 1x 1x 8x 3 3 1 3 3 4 5 A16 Ø8 2x A13 50 MM 17x A12 4 sw 1x A17 5x70 2x A10 19x 04
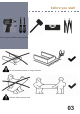
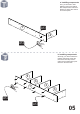
a. installing components 1 First, you will need to start attaching part #1 and part #4 with components A12 and A13. Please use given allen wrench to screw the parts. A13 1 4 A12 b. installing components 2 Secondly, you need to attach the part #3s just like the same way done in the first step. Please make sure that side holes of part #3s are in the same side.
c. installing components 3 Please attach the part #4 and part #5 with given component numbered #A13.Please use Allen wrench to screw. 5 Please be careful with direction of the side holes of number #3s and #4. Side holes needs to face to the same direction to fit the holes and screws in the next step 4 A13 d. installing components In this step, part #2 need to be attached to part #3s and #4 as shown below. Please be careful with direction of the side holes.
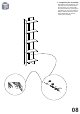
f. completing the assembly Depending on the preference, you may also mount the bookcase to the wall. First, you need to take the measurement by choosing the right space in your room and then drill the wall and attach as shown below. Bookcase can also be used as free standing.
final look Enjoy your product!