HOJA DE PRECAUCIONES Cuando utilice el Aparato, recuerde seguir las precauciones siguientes para evitar deformar la carcasa, que se quiebre la pantalla o el cristal, y además se produzca una pérdida de líquido. Todo esto provoca un fallo de funcionamiento. Recuerde: • No exponga el Aparato al agua. El Aparato no es a prueba de agua. • Tenga cuidado de no arrojar el aparato en un lavamanos o en otro recipiente con agua.
Características ● Pantalla LCD-TFT (2.7”) de cristal líquido que muestra imágenes nítidas y claras. ● Resolución de pantalla 960 x 240 píxeles. ● Incorpora 36 emocionantes juegos de acción y deportes en 3D de alta resolución. ● Incluye juegos en formato 32 bits: GBA, SMD, GB, GBC. ● Admite la descarga de juegos de Internet. ● Soporta juegos en Flash. ● Ranura para tarjeta Micro-SD de hasta 8GB. ● Videocámara digital incorporada de 1.3 megapíxeles. ● Incorpora salida AV (TV-NTSC/TV-PAL).
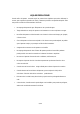
8: 9: 10: 11: 12: 13: 14: 15: 16: 17: 18: 19: Botón “B” /Botón de salida: girar o saltar en el juego Botón de menú Botón “A” /Confirmación Entrada mini USB Ranura para tarjeta TF Botón de reinicio Entrada de auriculares, Salida AV Pantalla LCD Altavoz Indicador LED Micrófono Cámara Funcionamiento básico Encender/Apagar el dispositivo Pulse y mantenga pulsado el botón de Encendido/Apagado (Botón 1) durante 3 segundos para encenderlo o apagarlo.
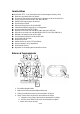
Pulsa el botón OK (Botón 2) y podrá visualizar lo siguiente: Pulse el botón Arriba (Botón 2) para elegir el juego deseado. Presione el botón OK (Botón 10) para confirmar la elección. Para jugar el juego, tenga en cuenta que los siguientes botones de funcionamiento son indispensables: Botón Función De dirección ∧ (Arriba, botón 3) ∨ (Abajo, botón 4) < (Izquierda, botón 5) > (Derecha, botón 6) OK Confirmar/Entrar (botón 2) Iniciar/Pausar (botón 2) A B Girar/Saltar, etc.
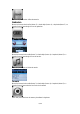
Presione OK para acceder al libro electrónico. Grabadora Mueva los botones hacia arriba (botón 3) o hacia abajo (botón 4), a izquierda (botón 5) o a derecha (botón 6) para elegir el icono de grabación. Pulse “ok” para entrar. Música Mueva los botones hacia arriba (botón 3) o hacia abajo (botón 4), a izquierda (botón 5) o a derecha (botón 6) para elegir el icono de música. Pulse “ok” para entrar en la lista de música.
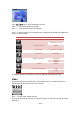
Pulse (botón 1) para disparar. Elija ∧∨ para ajustar el brillo de la imagen. Seleccione <> para ajustar el enfoque. Pulse “X” (botón 9) para entrar al submenú, y verá lo siguiente: Puede elegir la captura de fotografías, pulsando imágenes.
Pulse (botón 1) Iniciar la grabación de video Pulse ∧∨ para ajustar el brillo de la imagen Pulse <> para ajustar el enfoque de la imagen Pulse “X” (Botón 9) para ir a la configuración de los elementos del submenú de la grabación de video.
Calendario Mueva los botones hacia arriba (botón 3) o hacia abajo (botón 4), a izquierda (botón 5) o a derecha (botón 6) para seleccionar el icono de calendario. Pulse “OK” para acceder al calendario. Radio FM Por favor, asegúrese de que ha conectado los auriculares en la entrada de auriculares antes de seleccionar el modo de radio FM. Mueva los botones hacia arriba (botón 3) o hacia abajo (botón 4), a izquierda (botón 5) o a derecha (botón 6) para seleccionar el icono de radio.
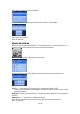
Pulse “OK” para entrar al modo de la alarma. Configure la hora de la alarma para ajustar la hora y activar el despertador. Pulse “OK” para confirmar. Pulse “B” para salir. Ajustes del sistema Mueva los botones hacia arriba (botón 3) o hacia abajo (botón 4), a izquierda (botón 5) o a derecha (botón 6) para seleccionar el icono de los ajustes del sistema. Pulse “OK” para acceder a esta opción tal como sigue. Fecha/Configuración de la hora: Seleccionar Fecha/Hora para ajustar la fecha y la hora.
Conectar al PC Para conectar el dispositivo a un PC, coloque el cable USB en la entrada USB para utilizar el aparato como una unidad Flash.
CONDICIONES DE GARANTIA AID AID en cumplimiento de lo establecido en la Ley de Protección al Consumidor (Ley 23/2003, de 10 de julio, de Garantías en la Venta de Bienes de Consumo, BOE núm. 165, de 11/07/2003 ), ofrece Garantía Directa a los clientes de España y Portugal, para todos los productos de nuestras marcas: ZIPY, MUSE, NEW ONE, AC-RAYAN, TNB, BARKAN, BRASFORMA, THE COMPLEMENTS y GO BY ZIPY, bajo las siguientes condiciones: A – Nuestros productos tienen una garantía de dos años.
PRESUPUESTOS: 1. Si el producto se encuentra fuera de garantía, el departamento técnico de AID facilitará presupuesto de la reparación por fax o correo electrónico. Dicho presupuesto deberá ser aceptado por escrito sellado y firmado, y el usuario deberá hacerse cargo del importe de reparación así como de los portes de envío y retorno. 2. Si el presupuesto no es aceptado se devengará un cargo en concepto de diagnostico. (6€) 3.
DECLARACION DE CONFORMIDAD ACCESORIOS INTELIGENTES DIGITAL S.A. C/CARPINTEROS,6 , OF-13 VILLAVICIOSA DE ODON. 28670 MADRID Declaramos bajo nuestra exclusiva responsabilidad la conformidad del producto: MP5/Videoconsola: GAME SOUND JR de la marca ZIPY, fabricado en China.
PRECAUÇÕES Quando utilize o aparelho, lembre de seguir as seguintes precauções para evitar deformar a carcaça, que se quebre o ecrã ou o cristal, ou ainda que se produza a perdida do líquido. Todo isso provoca uma falha de funcionamento. Lembre-se: • Não exponha o aparelho à água, pois não é a prova de água. • Tenha cuidado de não arrojar o aparelho em um lavabo ou em outro recipiente com água. • Não utilizar o aparelho em sítios úmidos ou no exterior se faz mau tempo, por exemplo, se chove ou neva.
Caraterísticas ● ● ● ● ● ● ● ● ● ● ● ● ● ● ● ● ● ● ● Ecrã de cristal líquido LCD-TFT (2.7”) que exibe imagens claras e nítidas. Resolução de ecrã: 960 x 240 píxeis Inclui 36 jogos de ação e de esportes em 3D de alta resolução. Inclui jogos em formato 32-bit GBA, SMD, GB, GBC. Suporta o download de jogos da Internet Suporta jogos em Flash. Ranhura para cartão Micro-SD, até 8 GB. Câmara digital integrada de 1.3 megapixéis. Inclui saída AV (TV-NTSC/TV-PAL).
9: 10: 11: 12: 13: 14: 15: 16: 17: 18: 19: Botão de menu Botão "A" / Confirmação Entrada mini-USB Ranhura para cartão TF Botão de reinício Entrada de fones de ouvido, saída AV Ecrã LCD Altifalante Indicador LED Microfone Câmara Funcionamento básico Ligar/Desligar o dispositivo Mantenha pressionado o botão liga-desliga (botão 1) durante 3 segundos para ligá-lo ou desligá-lo. Reinício Aperte o botão (botão 13) para reiniciar o dispositivo.
Jogos Esta videoconsola inclui 36 jogos de ação e de esportes em 3D de alta resolução. Move o botão para cima (Botão 3), para baixo (botão 4), à esquerda (Botão 5) ou à direita (botão 6) para selecionar o jogo da forma seguinte: Pulse no botão OK (botão 2) e poderá exibir o seguinte: Pressione o botão para acima (botão 2) para escolher o jogo desejado. Pressione o botão OK (botão 10) para confirmar a eleição.
E-book Move o botão para cima (Botão 3), para baixo (botão 4), à esquerda (Botão 5) ou à direita (botão 6) para selecionar o ícone de livro eletrónico. Pressione OK para acessar ao livro eletrónico. Gravadora Move o botão para cima (Botão 3), para baixo (botão 4), à esquerda (Botão 5) ou à direita (botão 6) para selecionar o ícone de gravação. Pulse em "OK" para entrar.
Pulse em "OK" para selecionar a câmara e poderá ver o seguinte: Pulse ( botão 1) para disparar a câmara. Escolhe ∧ ∨ para ajustar o brilho da imagem. <> Selecione para ajustar o foco. Pressione "X" (botão 9) para entrar no submenu, e você verá o seguinte: Você pode escolher a captura de imagens, pulsando captura das imagens.
Pulse ( botão 1) para começar a gravação de vídeo. Pressione ∧ ∨ para ajustar o brilho da imagem. Pulse <> para ajustar o foco da imagem. Pressione "X" (botão 9) para ir para à configuração dos itens do submenu da gravação de vídeo.
Calendário Move o botão para cima (Botão 3), para baixo (botão 4), à esquerda (Botão 5) ou à direita (botão 6) para selecionar o ícone de calendário. Pulse em "OK" para aceder ao calendário. Rádio FM Por favor, certifique-se de ter conectado os fones de ouvido na entrada dos fones de ouvido antes de selecionar o modo de rádio FM. Move o botão para cima (Botão 3), para baixo (botão 4), à esquerda (Botão 5) ou à direita (botão 6) para selecionar o rádio. Pulse em "OK" para entrar no modo de rádio.
Pulse em "OK" para entrar no modo de alarme. Defina o tempo de alarme para ajustar o tempo e ativar o relógio de alarme. Pulse em "OK" para confirmar. Pressione "B" para sair. Configurações do Sistema Move o botão para cima (Botão 3), para baixo (botão 4), à esquerda (Botão 5) ou à direita (botão 6) para selecionar o ícone das configurações do sistema. Pulse em "OK" para aceder a esta opção como segue. Data/ Configuração da hora: Selecione data / Hora para ajustar a data e a hora.
memória do dispositivo. Altifalante: pressione ∧ ∨ para ativar ou desativar o altifalante. Pulse em "OK" para confirmar a ação, uma vez que você tenha selecionado os itens. Pressione "B" para sair. Conectar ao PC Para conectar o dispositivo ao PC, conecte o cabo USB na porta USB para usar o dispositivo como uma unidade Flash.
CONDIÇÕES DE GARANTIA AID AID em cumprimento com o estabelecido na Lei de Defesa ao Consumidor (Lei 23/2003, de 10 de Julho, Garantia de Venda de Bens de Consumo, BOE num. 165, de 11/07/2003), oferece garantia directa aos clientes de Espanha e Portugal, para todos os produtos da marca ZIPY, AC-RYAN, TnB e BARKAN, com as seguintes condições: A- Os produtos têm uma garantia de dois anos. Durante o primeiro ano, a garantia cobra os defeitos originais que são detectados, os quais serão reparados.
2. Caso o orçamento não seja aceite cobrar-se-á uma taxa pelo diagnóstico efectuado. 3. As reparações têm uma garantia de 90 dias, sempre que a avaria seja sobre o mesmo conceito e unicamente em caso de avarias orçamentadas. B. Serão por conta da AID todos os gastos de transporte pela recolha e entrega do produto, através exclusivamente da empresa de transportes designada pela AID, segundo o procedimento de autorização.
DECLARAÇAO DE CONFORMIDADE ACCESORIOS INTELIGENTES DIGITAL S.A. C/CARPINTEROS,6 , OF-13 VILLAVICIOSA DE ODON.
Lorsque vous utilisez l’Appareil, veuillez respecter les précautions suivantes afin d’éviter de déformer le boîtier, de rompre l’écran ou le verre et de provoquer en plus la perte du liquide. Tout ceci engendre un mauvais fonctionnement de l’appareil. Souvenez-vous : • N’exposez pas l’appareil à l’eau. Il ne résiste pas à l’eau. • Prenez soin de ne pas faire tomber l’appareil dans un évier ou autre récipient contenant de l’eau.
● ● ● ● ● ● ● ● ● ● ● ● ● ● ● ● ● Incorpore 36 jeux haute définition et passionnants d’action et de sport en 3D Format pour les jeux: 32-bit GBA、SMD、GB、GBC Permet le téléchargement de jeux online Permet les jeux en flash Fente pour carte Micro-SD jusqu’à 8GB Caméra vidéo numérique incorporée de 1.
13: Réinitialiser 14: Entrée écouteur, sortie AV 15: Ecran LCD 16: Haut-parleur 17: Indicateur DEL (diode électroluminescente) 18: MIC 19: Appareil photo Opérations principales Allumer/Eteindre Appuyez et maintenez appuyé le bouton d’allumage « ON/OFF » (Touche 1) pendant 3 secondes pour allumer ou éteindre Réinitialiser Appuyer sur Réinitialiser (Touche 13) pour réinitialiser le dispositif.
Appuyez sur la touche OK (touche 2), vous verrez s’afficher ce qui suit: Appuyez sur la touche vers le haut (touche 2) pour choisir le jeu Appuyez sur la touche Ok (touche 10) pour confirmer. Pour jouer, lisez attentivement les instructions suivantes, Touche Fonction Direction ∧ (Touche vers le haut, touche 3) ∨ (Touche vers le bas, touche 4) < (Touche à gauche, touche 5) > (Touche à droite, touche 6) OK Confirmer/Entrer (touche 2) Démarrer/Pause (touche 2) A B Tourner/Sauter etc.
Appuyez sur la touche OK pour y accéder. Musique Utilisez les touches de direction vers le haut (touche 3), vers le bas (touche 4), vers la gauche (touche 5) ou vers la droite (touche 6) pour choisir l’icône Musique. Appuyez sur OK pour accéder à la liste de musique. Appareil photo Utilisez les touches de direction vers le haut (touche 3), vers le bas (touche 4), vers la gauche (touche 5) ou vers la droite (touche 6) pour choisir l’icône Appareil photo. Appuyez sur OK pour accéder à l’Appareil photo.
Appuyez sur « » (touche 1) pour prendre une photo. Choisissez ∧、∨ pour régler la luminosité. Choisissez <、> pour régler la mise au point. Appuyez sur “X (touche 9) pour accéder au sous menu, vous verrez s’afficher ce qui suit : Vous pourrez choisir de capturer une photo, appuyez sur (touche 1) pour déclencher la prise de photo. Regardez aussi la description des icones ci-dessous.
Appuyez sur « X » (touche 9) pour accéder au sous menu, vous verrez s’afficher les paramètres d’enregistrement suivants : Icone Signification Fonction Mode Capture Photo Enregistrement de vidéo Format de vidéo MPEG4 Définition 320*240* 640*480 Mode Nuit Off Balance des blancs Automatique Ensoleillé Couvert Qualité Bonne Fréquence 50Hz 60Hz La vidéo sera sauvegardée dans le Mode Enregistrement du sous menu de Vidéo.
Radio FM Veuillez vérifier d’avoir bien branché les écouteurs avant de choisir le mode Radio FM. Utilisez les touches de direction vers le haut (touche 3), vers le bas (touche 4), vers la gauche (touche 5) ou vers la droite (touche 6) pour choisir l’icône Radio. Appuyez sur OK pour accéder au mode Radio. Réveil Utilisez les touches de direction vers le haut (touche 3), vers le bas (touche 4), vers la gauche (touche 5) ou vers la droite (touche 6) pour choisir l’icône Réveil.
Appuyez sur OK pour confirmer. Appuyez sur « B » pour sortir. Paramètres du système Utilisez les touches de direction vers le haut (touche 3), vers le bas (touche 4), vers la gauche (touche 5) ou vers la droite (touche 6) pour choisir l’icône Paramètres du système. Appuyez sur OK pour y accéder, vous verrez s’afficher ce qui suit: Réglage de Date/Heure : Sélectionnez Date/Heure pour régler la date et l’heure. TV: Choisissez ∧、∨ pour sélectionner les paramètres de la TV, vous pouvez choisir PAL ou NTSC.
Problème Ne peut pas démarrer Disque amovible non trouvé Pas de son Raison Il n’y a pas d’énergie? Opération erronée? L’entrée USB ne fonctionne pas? Problème au niveau du PC? Volume trop petit? Les écouteurs ne fonctionnent pas? Le format de musique n’est pas reconnu par le système? 39 / 57 5) 6) 5) 6) 7) 8) 9) Solution Charger le dispositif Ré initier le dispositif Changer le câble USB Redémarrer le PC Augmenter le volume Changer les écouteurs Vérifier que le format de musique est admis
CONDITIONS DE GARANTIE AID En application de la loi pour la Protection du Consommateur (Loi 23/2003, du 10 juillet, sur les garanties de ventes des Biens de Consommation, BOE num. 165, du 11/07/2003), AID offre une Garantie Directe aux clients d’Espagne et du Portugal, sur tous les produits de nos marques : ZIPY, MUSE, NEW ONE, AC-RAYAN, TNB, BARKAN, BRASFORMA, THE COMPLEMENTS et GO BY ZIPY, aux conditions suivantes : A – Nos produits ont une garantie de deux ans.
produit, une fois cette période dépassée, ils ne seront couverts par aucune garantie. 8. Les utilisateurs finaux n’auront pas à nous envoyer les accessoires des appareils, à fortiori s’il ne s’agit pas des originaux, car nous ne les prenons pas en charge. DEVIS : 1. Si le produit n’est plus sous garantie, le Département Technique de AID établira et enverra un devis de la réparation par fax ou courrier électronique.
DECLARATION DE CONFORMITE ACCESORIOS INTELIGENTES DIGITAL S.A. C/CARPINTEROS,6 , OF-13 VILLAVICIOSA DE ODON.
PRECAUTIONS AND MAINTENANCE When using the device, remember to follow the following precautions to prevent the deformation of the case, the breakage of the screen or glass, or also may cause loss of fluid. All this causes a malfunction. Remember: • Do not expose the device to water. The device is not waterproof. • Be careful not to throw the device in a sink or other water container. • Do not use the device in wet places or outside in bad weather, for example, if it rains or snows.
Feature ● ● ● ● ● ● ● ● ● ● ● ● ● ● ● ● ● ● ● 2.7” TFT LCD screen with crystal clear sharp images 960 x 240 pixels display resolution Built in 36 x high-resolution 3D Sport Games and exciting Arcade games Support 32-bit GBA、SMD、GB、GBC format game Supports direct online game download Supports flash games Built-in Micro-SD card slot, supports up to 8GB Built-in 1.
8: 9: 10: 11: 12: 13: 14: 15: 16: 17: 18: 19: “B” key/Exit key: turning or jumping in game Menu key “A” Key/Confirm key Mini USB Jacket TF card slot Reset Earphone jacket, AV output jacket LCD screen Speaker LED indicator MIC Camera Basic Operation Power on/off Press and hold the power “ON/OFF”(button 1) for 3 seconds to power on or power off. Reset Press Reset (button 13) to reset the device. Main Menu After power on the device, it will go to the main menu where shows following icons.
Press OK key (button 2) , it will show following, Press Up key (button 2) to select game Press Ok key (button 10) to confirm the game.
Record Move Up key (button 3) or down key (Button 4) or Left key (Button 5) or Right key (Button 6) to select Record icon. Press “ok” to enter into. Music Move Up key (button 3) or down key (Button 4) or Left key (Button 5) or Right key (Button 6) to select Music icon. Press OK to enter into music list. Camera Move Up key (button 3) or down key (Button 4) or Left key (Button 5) or Right key (Button 6) to select Camera icon Press “OK” to enter into Camera.
(button 1) to shot. Press “ Choose ∧、∨to adjust the brightness Choose <、> to adjust the focus Press “X (button 9) to enter into sub-menu, you’ll find following, You can choose photo capture, press see also the icon explanation. Carton Item (button 1) to start photo capture. Capture Mode Capture type Resolution Night Mode White Balance Quality Power freq All captured file will be saved in DCIM list in PHOTO mode.
Press (button 1) Start Video record shooting Press ∧、∨to adjust the brightness Press <、> to adjust the focus Press “X (button 9) to go to sub-menu Video record actors setting menu, You’ll see Carton Type Function Capture Mode Photo Video record Video Format MPEG4 Resolution 320*240* 640*480 Night Mode Off White Balance Automatic Sunlight Cloudy Quality Good Power freq 50Hz 60Hz The entire video record program saved in VIDEO sub-menu RECORD Mode.
to select Calendar icon. Press “OK” to enter into calendar. FM Radio Please make sure you already insert earphone into the earphone jacket before you choose FM radio mode. Move Up key (button 3) or down key (Button 4) or Left key (Button 5) or Right key (Button 6) to select Radio icon. Press “OK” to enter into Radio mode.
Press “OK” to enter into Alarm mode Choose Alarm time setting to set the time and put Alarm on Press “OK” to confirm Press “B” to exit. System setting Move Up key (button 3) or down key (Button 4) or Left key (Button 5) or Right key (Button 6) to select System setting icon Press “OK” to enter into, you’ll see. Date/Time setting : Select Date/Time to set the time and date TV: Choose ∧、∨ to select the TV setting, you can choose PAL or NTSC TV OUT function is only for picture、movie and game.
Connect to PC. To connect to PC, please insert USB cable into the USB jacket to use as a flash drive. Trouble shooting Trouble Can not turn on Can not find flash disk sign No sound Reason No power? Error operation? USB jacket broken? PC problem? Volume to small? Earphone broken? Music format is not supported? 53 / 57 Solution 7) Charge the device 8) Reset the device. 7) Change USB cable 8) Re-start PC 10) Increase volume 11) Change earphone 12) Make sure the music format is supported.
AID WARRANTY CONDITIONS AID, in compliance with the Customer Protection Law (Ley 23/2003, July 10th, of Warranty in the Sale of Consumer Goods, BOE no. 165, 11/07/2003), offers Direct Warranty to Spain and Portugal customers for all our brands’ products: ZIPY, MUSE, NEW ONE, AC-RAYAN, TNB, BARKAN, BRASFORMA, THE COMPLEMENTS, and GO BY ZIPY, under the following conditions: A – Our products have a two year warranty. During the first year original defects that may be detected are repaired.
CASES: 1. If the product is out our guarantee, the AID technical department will facilitate a budget for the repair by fax or e-mail. Said budget will need to be authorized in writing, sealed and signed, and the user will have to satisfy the repair fee as well as the freight. 2. If the budget is not accepted a diagnosis fee will be charged. (6€) 3. Repairs have a 90 days guarantee, provided that the breakdown is under the same concept and in the case of budgeted breakdowns alone.
DECLARATION OF CONFORMITY ACCESORIOS INTELIGENTES DIGITAL S.A. C/CARPINTEROS, 6, OF-13 VILLAVICIOSA DE ODÓN.