
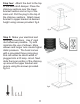
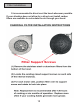
Installation Guide and User's Manual
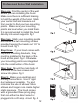


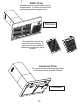

Step three: Take the chimney
sections and separate slightly
to reveal the vent slots. Next
take the hood and slide the top
mounting bracket over the
mounting screws and slide
back into position. fig 3.
Make your electrical and duct
connections at this point using
8 inch rigid ducting wherever
possible.
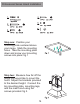
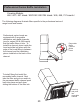
Step four: Tighten the top
mounting screws, securing the
top mounting plate to the ceiling.
fig 4.
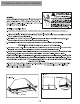
Step five: Slide the inner
chimney up over the top
mounting plate securing with two
screws provided. Pull the lower
section down to rest on top of the
main hood. fig 5.
15