.0.1 MICROWAVE DRAWER Installation Guide and User Manual Luxury should never be left desired - it’s meant to be attainable.
Registering Your Product Please register your ZLINE appliance to activate your warranty. Begin the simple registration process by scanning the QR code. By registering your appliance, you will have access to: • Technical Support • Warranty Service • Tracking your support inquiries ZLINE is fueled by a passion for innovation; A relentless pursuit of bringing the highest end luxury designs and professional features into everyone's homes.
Take back your counterspace with the ZLINE microwave drawer. Meeting standards set by the Americans with Disabilities Act, this top loading microwave drawer has one-touch opening and closing technology with a powerful 1,000 watt output. With 11 power levels at your disposal, enjoy 1.2 cubic feet seamlessly built-in to any cabinetry. Easily add 30 seconds to cook times with a touch of a button.
WARRANTY COVERAGE ZLINE Kitchen and Bath microwave parts will be warrantied for two years from the original purchase date for the original purchaser of the product. TERMS This warranty applies only to the original purchaser of the product installed for normal residential use. This is defined as a single-family, residential dwelling in a non-commercial setting.
TABLE OF CONTENTS SAFETY INSTRUCTIONS 1 BEFORE INSTALLATION 3 INSTALLING THE MICROWAVE 5 OPERATION 10 TROUBLESHOOTING 17
SAFETY INSTRUCTIONS WARNING • Installation and service must be performed by a qualified installer. The oven should not be adjusted or repaired by anyone except properly qualified service personnel. • IMPORTANT: Save this installation manual for local electrical inspector’s use. • Read and save these instructions for future reference. • Do not attempt to operate this oven with the door open since open-door operation can result in harmful exposure to microwave energy.
SAFETY INSTRUCTIONS • Do not store this appliance outdoors. Do not use this product near water - for example, near a kitchen sink, in a wet basement, near a swimming pool, or similar locations. • When cleaning surfaces of door and oven that comes together on closing the door, use only mild, nonabrasive soaps, or detergents applied with a sponge or soft cloth. Do not clean with metal scouring pads. Pieces can burn off the pad and touch electrical parts involving a risk of electric shock.
BEFORE INSTALLATION Remove the oven and all materials from the carton and oven cavity. Your oven comes with the following accessories: A: Control Patch B: Control Box C: Right Mounting Plate D: Cavity E: Handle F: Windows G: Door Frame H: Automatic putter I: Drawer J: Hinge Joint Board K: Left Mounting Plate NOTE: Defrosting Rack should only be used in defrosting function and not used for cooking. Do not use without food.
BEFORE INSTALLATION WARNING • This appliance must be grounded. In the event of an electrical short circuit, grounding reduces the risk of electric shock by providing an escape wire for the electric current. This appliance is equipped with a cord having a grounding wire with a grounding plug. The plug must be plugged into an outlet that is properly installed and grounded. • Improper use of the grounding can result in a risk of electric shock.
INSTALLATION WARNING CLEARANCES AND DIMENSIONS For safety considerations, do not install drawer in any combustible cabinetry, which is not in accordance with the stated clearances. UNPACKING YOUR MICROWAVE DRAWER Remove all packing materials from inside the microwave drawer. DO NOT REMOVE THE WAVEGUIDE COVER, located on the top of the microwave drawer. Remove the feature sticker, if there is one.
INSTALLATION CLEARANCES AND DIMENSIONS Dimensions shown in the figure below must be used. Given dimensions provide CLEARANCES & DIMENSIONS minimum clearance. Locate electrical outlet in the shaded area in the upper left-hand Dimensions shown in Figure 1 must be used. Given dimensions provide minimum clearance. Locate electrical in the shaded areasurface in the upper corner the cutout (also of seethe Figure 3) Contact corner ofoutlet the cutout. Contact mustleft-hand be solid and oflevel.
INSTALLATION ELECTRICAL OUTLET AND ANTI-TIP BLOCK To reduce the risk of tipping the drawer, the anti-tip block must be properly located 14 above the floor on which the microwave drawer will sit. The 6” anti-tip block must be provided by the installer. The anti-tip block prevents serious injury that might result from spilled hot liquids. If the microwave drawer is ever moved to a different location, the anti-tip block must also be moved and installed.
Figure 4 INSTALLATION installation instructions DRAWER INSTALL ATION Figure 4 1. Place the drawer adjacent to the wall or cabinet opening. Plug the power supply cord into the electrical outlet. 2. Carefully guide the drawer into the prepared opening. Avoid pinching the cord between the oven and wall. 3. Slide the drawer all the way until the mounting flange is flush with the face of the cabinet. t drawer. Using the 4 holes on the drawer as 4.
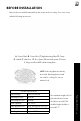
INSTALLATION radio interference INTERFERENCE • Operation of the microwave oven may cause interference to your radio, TV, or similar equipment. • When there is interference, it may be reduced or eliminated by taking the following measures: • Clean door and sealing surface of the oven. • Reorient the receiving antenna of radio or television. • Relocate the microwave oven with respect to the receiver. • Move the microwave oven away from the receiver.
OPERATION Utensils Browning dish Usage Follow manufacturer instructions. The bottom of browning dish must be at least 3/16 inch (5mm) above the turntable. Incorrect usage may cause the turntable to break. Dinnerware Microwave-safe only. Follow manufacturer’s instructions. Do not use cracked or chipped dishes. Glass jars Always remove lid. Use only to heat food until just warm. Most glass jars are not heat resistant and may break. Oven cooking bags Follow manufacturer instructions.
OPERATION 1. Open 2. Setup 3. Auto Menu 4. Defrost Weight 5. Close 6. Clock/Kitchen Timer 7. Defrost Time 8. Number Keys 9. Power 10. Start/+30sec. 11. Time Cook 12. Stop/Cancel POWER ON • When the microwave oven is plugged into an outlet, buzzer sounds once. Screen displays “WELCOME”. Then the oven turns into waiting state. The screen displays “00:00”. • In waiting state, the screen will display the current time if the clock has been set. Otherwise, “00:00” will display.
OPERATION KITCHEN TIMER • Press “CLOCK/KITCHEN TIMER” button twice, Screen will display 00:00. “FUNCTION” will light. • Press the number buttons to enter the time. The maximum cooking time is 99 minutes 99 seconds. • Press “START/+30SEC.” to confirm the setting. . The time begins to count down. • When the kitchen time arrives, buzzer will ring 5 times. The oven turns into waiting state. Screen will display the current time if the clock has been set. Otherwise, Screen will display “00:00”.
OPERATION MICROWAVE COOKING FUNCTION • In waiting state, instant cooking at 100% power level with 30 seconds cooking time can be started by pressing “START/+30SEC”. Each press on the same button will increase cooking time by 30 seconds. • During microwave and defrost by time, “START/+30SEC.” can be pressed to increase cooking time. Each press will increase 30 seconds. • Note: “START/+30SEC.” cannot be pressed to increase cooking time for defrost by weight and Auto menu cooking.
OPERATION AUTO MENU: POPCORN • Press “POPCORN” button. Screen displays “1.75”. “AUTO MENU” and “OZ” indicators will light. • Continue to press “POPCORN” button, “1.75”, “3” or “3.5” will display in order. • Press “START/+30SEC.” to start cooking. Buzzer sounds once. “OZ” will go out. The cooking time begins to count down. When cooking finished, buzzer sounds five times and “FINISH” displays. AUTO MENU: MELT • Press “MELT” button. Screen displays “BUTTER”. “AUTO MENU” indicator will light.
OPERATION AUTO MENU: MELT • Press “MELT” button. Screen displays “BUTTER”. “AUTO MENU” indicator will light. • Continue to press “MELT” button, “BUTTER”, “CHOCOLA”, “CHEESE” or “MARSHMA” will display in order. • Press “START/+30SEC.” to confirm the selection. • Press “MELT” button to select the weight. “OZ” will light except butter menu. • Press “START/+30SEC.” to start cooking. Buzzer sounds once. “OZ” will go out. The cooking time begins to count down.
OPERATION operation PANEL LOCK • Lock: In waiting state, press “STOP/CANCEL” for 3 seconds, the oven will enter into the panel lock state. Screen will display the current time if the clock has been set. Otherwise, “00:00” will display. • Lock release: In locked state, press “STOP/CANCEL” for 3 seconds to release the lock. INQUIRING FUNCTION • In cooking state, press “CLOCK/KITCHEN TIMER ” button to check the clock. The current time will display for 3 seconds.
TROUBLESHOOTING ZLINE Customer Service is available at 1-614-777-5004. Fault Oven won’t start. Arching or sparking. Possible Cause Troubleshooting Electrical cord is unplugged. Plug into the outlet. Door is open. Close the door and retry. Wrong operation is set. Check instructions Materials to be avoided in Use microwave-safe the microwave oven were cookware only. used. The oven is operated when Do not operate with oven empty. empty. Spilled food is in the cavity.
1.0.1 Installation Guide and User Manual www.zlinekitchen.