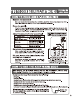
DPF LOL MI COM RICE COOKER & WARMER OPERATING INSTRUCTIONS NS-WAC10 / NS-WAC18 IMPORTANT SAFEGUARDS. PARTS NAMES AND FUNCTIONS EXPLANATION OF RICE J TIS TO COKING GREAT-TASTING RICE PREPARATION oN 8 Ep! WARM). o HOW TO COCK RICE: BASIC COOKING STEPS. HOW TO COOK RINSE FREE RICE... TIPS TO COOKING GREAT TASTING RICE BY MENUS HOW TO SET THE CLOCK. oe SOUND SIGNALS & HOW TO CHANGE THEM. REGULAR KEEP WARM & EXTENDED KEEP WARM USING THE TIMER... RECIPES: MIXED RICE / MANS-ROLLED SUSHI.
BEFORE USE IMPORTANT SAFEGUARDS BASIC SAFETY PRECAUTIONS SHOULD ALWAYS BE FOLLOWED WHEN USING ELECTRICAL APPLIANCES, INCLUDING THE FOLLOWING: 1 Read all instructions thoroughly. 2 Avoid touching hot surfaces and do not close or cog the steam vent opening under any circumstances. The handles and knobs are provided for your safety and protection. 3 To prevent hazardous operation or electric shock, do not immerse power cord, power plug, or rice cooker (except inner cooking pan) in Walter or other liquids.
IMPORTANTES MESURES DE SÉCURITÉ LORS DE L'UTILISATION D'APPAREILS ÉLECTRIQUES, SUIVEZ LES précautions DE BASE SUIVANTES: 1 Lisez bien toutes les instructions. Ne louchez pas les surfaces qui peuvent tre chaudes. Utilisez les poignées ou les boutons. N'obturez en aucun cas l'orifice d'échappement de la vapeur.
BEFORE USE IMPORTANT SAFEGUARDS Be sure to follow eee ® These WARNINGS and CAUTIONS are intended to protect you and others from personal injury and household damage. To ensure safe operation, please follow carefully. indicates risk of serious injury. = A\WARNING A indicates a warning or caution. A specific caution is indicated inside or near CAUTIONS Indicates risk of injury AN CAUTIONS Sana mishandled.
/\ CAUTIONS Do not touch hot surfaces during or immediately after use. Be careful of steam when opening the Outer Lid. Be careful not io touch the inner Cooking Pan when loosening rice. Touching hot surfaces may cause bums. po By and the Inner Cooking Pan. i Do not uss the Rice Cooker where it may come into contact with water or near heat sources. @ May cuss satirical shack, short circuit, and can Do ned use the Rice Cooker near walls, furniture or beneath shelving.
BEFORE USE PARTS NAMES AND FUNCTIONS ive i® 8 Steam Vent Cap Outer Lid ® Steam arising from the vent is vary hot while rice is cooking. Please exercise care. Plug Receptacles Appliance Plug inserts here. Center Sensor Heating Plate rood ® Please remove the protective sheet placed between the Heating Plate and Twist Tie Power Cord the Inner Cooking Pan before initial use. @Please remove the twist tie holding the Power Cord before use. Outer Lid Gasket ® Do not use the Power Cord bundled up. Doing so may .
Press buttons down firmly. ® The raised dot and dash in the center of the COOKING and RESET buttons and the Sound Signals are provided for individuals with visual impairment. RESET button —— Use this bunion to cancel the selected setting or function in operation. KEEP WARM SELECTION button Use this button fo select Display The Illustration below shows all possible displays and is for reference only. This display will not appear during actual use.
BEFORE USE EXPLANATION OF RICE ® Names and types of rice varies according to how the grain has been polished and/or processed. Different grades of rice correspond to the percentage of bran and germ removed. Rice in the bus Be Bran layer £7, A Coe Brown Rice | Se ml-Brown | Se ml-Brown, Sam-Brown, White Rice | Rinds-Free Rice ‘ : | The chaffs | Rice 30% Rice 50% | Rice 70% Aldebaran + boon removed.
TIPS TO COOKING GREAT-TASTING RICE underwater Measure rice accurately Be sure fo use the Measuring Cup provided, as other measuring cups may differ. Level the rice off at the top of the cup to maintain accuracy. Rinse rice quickly The first rinse should be done quickly, swishing and stirring the rice by hand with plenty of water. Drain the water immediately afterwards. Then rinse the rice 4-5 times with fresh water io clean out the bran.
HOW 10 USE HOW TO COOK RICE BASIC COOKING STEPS Measure the rice with the provided Measuring Cup. One leveled cup of rice in the provided Measuring Cup is approx. 6 oz. . Rinse the rice and adjust the amount of water. Page the Inner Cooking Pan on 2 fiat surface. Add water lo the wale elev according to the menu sating vou have chosen (see pg. 13 "TIPS 10 COOKING GREAT TASTING RICE BY MENUS". For an sculptural Measurement, eve the surface of the rice.
When the melody or beep to indicate the cooking completion sounds, stir and loosen the rice immediately to give the rice a deliciously fluffy texture, The Pics Cooker automatically switches 1b the Keep Warm mode after cooking hag completed and the REGULAR KEEP WARM light ums on. The Display will show the lapsed Keep Wang teems In hour(s). Stir he Hee and loosen it immediately to release excessive moisture for fluffy rice.
"HOW TO COOK RICE (cont) HOW TO COOK RINSE-FREE RICE Measure the rinse-free rice with the provided green Rinse-Free Measuring Cup. One leveled cup of rinse-free cite In the provided green Measuring Cup {for tinge-free rice) is approx. 58 oz, Add enough water io cover the rice and gently stir 2.3 times fo separate the grains, and then adjust the amount of water. Place the Inner Cooking Pan on a flat surface.
HOW 10 USE HOW TO COOK RICE (cont) TIPS TO COOKING GREAT-TASTING RICE BY MENUS When cooking Rains-Fros FICA, use the same water love for WHITE RICE. Se pg.12 "HOW TO COOK RINSE-FREE RICE” ® Measure the rice accurately with the provided Measuring Guy White, brown and germinated brown rice — Use the Surveying Cup for whits rice. Rinse-fare ree — Use te green Measuring Cup for rinse-free Ice. CECA Ion: Limit the amount of rice to be cooked to 14 cups for the 1.0L mods! and 2-6 cups Tor the 1.
"How TO SET THE CLOCK it is important to set the clock first before cooking rice with the Timer. Although the clock is set before shipment from the factory, certain conditions may cuss it fo display an inaccurate time. if the clock is inaccurate, set the comet time as shown below. ® The clock cannot be adjusted during Cooking, Regular Keep Warm, Extended Esp Warm and Timer Cooking settings. en: lithecurenitimels but displays 144 1 Set the Inner Cooking Pan and plug in the Power Cord.
SOUND SIGNALS & HOW TO CHANGE THEM This product is equipped with a Sound Signal function, which will inform you when the Rice Ocker begins cooking, when the Timer is set, and when cooking has completed. You can choose the Sound Signals from the following. Types of Sound Melody: Heap: Client: their makings The default setting af Choose this selling If Chose this setting if you the time of purchase. yous wish to change wish fo disable the Sound from Melody. Signal when cooking bas completed.
HOW 10 USE REGULAR KEEP WARM & EXTENDED KEEP WARM Press the KEEP WARM SELECTION button to choose Regular Keep Warm or Extended Keep Warm. \/ REGULAR KEEP WARM light — —\ EXTENDED KEEP WARM light SELECTION button When cooling completes, the Rice Cooker automatically switches to asp Warm and the REGULAR KEEP WARM light tums on. ® To start the Keep Warm mods from the reset status, press the KEEP WARM SELECTION bunion. This function can be activated during the Keep Warm process.
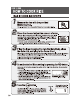
CLEANING AND MAINTENANCE Any other servicing should be performed by an authorized service representative. # Ba sure to unplug the Prows Cord and allow the Main Body and the Inner Cooking Pan to cool down. @ Do not use a thinner, benzene, abrasive cleaners and brushes {nylon/metal), hibachi or anything that may damage the surface of the Rice Cooker. @ & : wii @ln Soak a cloth in mild detergent, & > wring out all excess moisture, and Steam vent Cap water wipe clean.
USING THE TIMER # This function sets the Rice Cooker fo automatically finish cooking by a specific time. Once sel, the timer settings are stored in "Timer 1 ©" and "Timer 208." 8.9: Wuhan you want your rice io compromise cooking at 7:30 ® Be sure to check if the current time is correct before setting the Timer function. — pg.14 7 Press the button to select "Timer 1.” Tha Display shown the preset time of 6.
18 Cre Light sv sie £45 hp. kip attack) 142 forage ioe Lor Son ken from Lost oz, sealing dod Shiitake To ls 30x Sing boars (hosed or dona partly oo Iota 23 slices How to cook 1 Slice chicken info 172 inch cubes and Age info strips. Place Age in a strainer and pour hot water over i; gently squeeze fu drain excess oil. Soak chicken and Ags in soup stack A for 5 minuses {do not discard this Soup sock] 2 Slice canals and Donnybrook into small strips, soak in hot water and drain.
Seg isl Sie Ve See RR RR Lien Aun PISS (ns ss doo plowmen Hard clams {mull co online 40 place Sui: Qi il Salt Soup stock football a Alston (Turmeric can be substituted nn zw How to cook T Peel shells off prawns and remove entrails. Remove sand from clams and wash. Cut said into small pieces. Cut green peppers into small cubes. 2 Stir-fry ingredients from Step, 1 with olive oll. Season with salt and cover lid until clams halls open up. Put the ingredients aside and reserve 2 Tsp. of the liquid.
20 den Bs Cara lf Rena ERR Semen dn lel ay | ingredients (4-6 serine) wah vice How to cook 1 Rinse rice and drain in a strainer for more than 30 minutes. 2 Rinse the adze beans, put into a saucepan with 2 cups of water and boll for 2 minutes. Then add 3 cups of water and boil for 20 minutes until the beans become soft enough to brag by pressing with your fingertip.
CLEANING AND MAINTENANCE Any other servicing should be performed by an authorized service representative. # Ba sure to unplug the Prows Cord and allow the Main Body and the Inner Cooking Pan to cool down. @ Do not use a thinner, benzene, abrasive cleaners and brushes {nylon/metal), hibachi or anything that may damage the surface of the Rice Cooker. @ & : wii @ln Soak a cloth in mild detergent, & > wring out all excess moisture, and Steam vent Cap water wipe clean.
CLEANING AND MAINTENANCE / REPLACEMENT PARTS @ dB i Rink How to detach the Inner Lid Set: Hold the Cuter Lid with one hand and pull the Inner Lid Set Knob toward you with the other hand. Inner Lid Set Knob How to attach the Inner Lid Set: Affix the hollow part of Inner Lid Set {opposite side of the Inner Lid Set Knob) to the Inner Lid Set Mounting Axis to attach the Inner Lid Set. Affix this hollow part to the Inner Lid Set Mounting 2. Opposite side of the Inner Lid Set Knob.
BEFORE CALLING FOR SERVICE Lela Eel VT) ester ® Duse (Points lo check) Problems | Rice cooks too { hard or too soft: ®1f the Rice Cooker is positioned on an unseen of tilted surface, the texture of the cocked rice may be to hard or too sof as the amount of patsy becomes Inconsistent # Tha textural of rice varies depending on the brand of the Erica, where it was harvested, and how long It was stored (now crop of oid crop). ®The textures of rice varies depending on the room and water temporaries.
8.9 B ¢ Problems @ Cause (Fonts to check) i The Rice Cooker #5 the current ime set correctly? — The clock is displayed in 24 hours glares cooking {auxiliary time). Pleads chick and ast R again immediately after ®1f the Timer is set at & shorter time than suggested, it will begin the Timer is sel: coking immediately. TIMER The rice is not ready 18 the currant ime set compaction? — The clack Is displayed In 2 hours COOKING 8% the set ime: {military time). Please sack and est k again.
SPECIFICATIONS Model No. NS WACKO NEWBIE White Rice o1g~10L [1~58] [2~10] Mixed Rice oia~o7aL [1~4] 036~108L [2-6] Singe-Free Rice 0.17084. [1~55] 034~171L [210] Cooking Capacity Quick Cooking o18~10L [1~55] [2~10] [ups] Sufi Rice [1~55] | 036~18. [2~10] Porridge | [05~25] Sweet Rice [14] [2~g] Brown Rice o1a~072L [18] [2~g] Germinated Brown Rice | [1~4] [2-8] Rating AC120V 610W 60Hz | AC120V 820W 60Hz Average Power Consumption during Keep Warm 20.5W 37.