HoudahGeo User Guide (May 2015) http://www.houdah.
Table of Contents 1. Introduction 2. The Basics 3. Workflows 3.1. Geotag images hosted by iPhoto / Aperture 3.2. Reference geotagged images in Aperture. Option 1 3.3. Reference geotagged images in Aperture. Option 2 3.4. Geotag images hosted by Lightroom 3.5. Publish geotagged images to Flickr 4. Step by Step 4.1. Step 1: Load 4.1.1. Add Images 4.1.2. Camera Setup 4.1.3. Import Track Logs 4.1.4. Import from GPS 4.2. Step 2: Process 4.2.1. Automatic Geocoding 4.2.2. The Inspector Pane 4.2.3. The Map 4.2.4.
4.3. Step 3: Output 4.3.1. EXIF / XMP Export 4.3.2. Notify media libraries (iPhoto / Aperture) 4.3.3. Google Earth Export 4.3.4. KML Export 4.3.5. CSV Export 4.3.6. GPX Export 4.3.7. Flickr Upload 4.3.8. Locr Upload 5. Frequently Asked Questions 5.1. Does HoudahGeo support RAW files? 5.2. I don't own a GPS. Can I still use HoudahGeo? 5.3. Does HoudahGeo work with DNG files? 5.4. Why doesn’t HoudahGeo support Canon CRW/CIFF files? 5.5. Can you recommend a particular GPS device? 5.6.
1. Introduction HoudahGeo is a one-stop geocoding solution for the Mac.
3. Workflows HoudahGeo fits many workflows. The below are only a few examples. Feel free to adapt these to your liking. Writing EXIF/XMP/IPTC tags to image files requires modifying the files. This process is lossless. Image quality is not affected. Modifying files is however not without risk. We thus recommend you always have backup copies. 3.1. Geotag images hosted by iPhoto / Aperture 1.Make sure you have a backup of your iPhoto / Aperture library and images 2.
3.3. Reference geotagged images in Aperture. Option 2 1.Drag images from the memory card to your HoudahGeo project 2.Set coordinates and metadata in HoudahGeo 3.Export metadata to EXIF/XMP/IPTC a.Deselect the “Tag masters / originals” option b.Select the “Create copies” option c. Deselect the “Bypass XMP sidecars” option d.Deselect the “Always write XMP sidecars” option 4.Specify a location where HoudahGeo should save the copies it will create 5.Import the copies into Aperture.
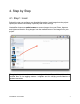
4. Step by Step 4.1. Step 1: Load During this step you configure your HoudahGeo project. Load images into the project. Specify the camera clock setup. Optionally load GPS track logs. HoudahGeo features a media browser to access images from your iPhoto, Aperture and Lightroom libraries. Drag images from the media browser to the image list in your project.
4.1.1. Add Images The “Add Images” toolbar button allows you to browse the file system to add images to your project. You may also load folders containing the images. Alternatively you may drag images from the media browser or the Finder to the images list. HoudahGeo supports JPEG as well as a large selection of RAW formats. Please make use of the demo period to make sure HoudahGeo supports the image format produced by your camera. HoudahGeo only references files. It does not copy them.
4.1.2. Camera Setup All digital cameras write timestamps to the images they take. Most cameras however do not store the time zone they are configured for. HoudahGeo uses timestamps to match images to GPS track logs. It needs to know how to interpret the timestamps embedded in the images. Camera clock setup thus is the single most important information you need to provide to HoudahGeo. Automatic geocoding is only possible when this information is accurate.
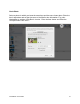
Clock Photo Select a photo for which you know the exact time and time zone it was taken. Enter the time it was taken and set the time zone of the filled in time information. E.g. point HoudahGeo to a photo of Big Ben in London. Enter the time shown and select the “Europe/London” time zone.
gps4cam This option allows for geocoding using QR codes generated by the gps4cam app. Select all gps4cam QR codes in the list. You may opt to let gps4cam handle image geocoding. Otherwise, HoudahGeo will geocode using the imported track log. Settings made in “Camera Setup” are, by default, ignored for images which come with time zone information already embedded. This includes images taken by the iPhone or another GPS-enabled camera.
4.1.3. Import Track Logs The “Import Track Logs” toolbar button allows you to browse the file system to add GPS track logs to your project. You may also load folders containing the track log files. Alternatively you may drag track log files from the Finder to the tracks list. HoudahGeo supports a large selection of track log file formats. These include: GPX, NMEA, TES, TCX, … Please make use of the demo period to make sure HoudahGeo supports the file format your GPS device or its software can provide.
4.1.4. Import from GPS HoudahGeo may connect to a large selection of GPS devices. For this, it relies on various helpers (e.g. GPSBabel) which ship with HoudahGeo and can be configured using presets.
To import GPS track logs from a device, you first need to select a Preset. Next select a Port type: USB, Serial / Bluetooth, WiFi / AirPort. A device Name is also required. However, HoudahGeo provides sensible defaults. You will probably not need to modify this value.
Set Up Bluetooth Devices First, make sure Bluetooth is enabled both on your computer and on the GPS device. Using System Preferences, you will need to pair the device with your computer before first use. In the pairing process, you will get the opportunity to specify a serial device name. It is recommended you use the suggested default value. You may now address the device in HoudahGeo by the above specified name.
4.2. Step 2: Process During this step you provide or let HoudahGeo compute GPS coordinates and other metadata for the images in the project. 4.2.1. Automatic Geocoding The most convenient way of geocoding images is by matching them to a GPS track log file. For this you would have loaded such a track log during the first step. If the track log matches the images, HoudahGeo will already have geocoded your images. You may now verify the coordinates using the map and inspector panes.
4.2.2. The Inspector Pane During step 2, the inspector pane is shown to the right-hand side of the project window. The values in the inspector pane pertain to the currently selected images. The first segment of the inspector shows information about the image: its name, preview and master path. Click the preview or master path to reveal the referenced file in the Finder. Photo libraries like iPhoto, Aperture or Lightroom store or reference a master version of each image.
A second tab of the inspector is dedicated to information which may be exported to IPTC tags: title, comment and keywords.
4.2.3. The Map The most prominent part of the step 2 interface is the built-in map. A toolbar at the top of the map pane has controls to zoom the map and to switch between street map and satellite mode. There is also a control to switch between the inspect and the geocode modes. HoudahGeo gives you a choice of map services. In inspect mode, the map shows pins for all the currently selected images. It also shows track logs. This modes serves to verify that images are correctly geocoded.
The geocode mode is used to adjust image positions after automatic geocoding or to manually geocode photos. In this mode, the map shows only a single pin located at the center of the map. It also shows a toolbar with additional controls. To adjust the location of an image: Select the image from the list at the bottom of the window ■ Click the Jump to Selection button to “copy the coordinates from ■ the image to the map”.
The Bookmarks button allows you to set and manage bookmarked pins on the map. The Open in Browser button opens a web browser window showing the map area in Google Maps, Bing Maps, Apple Maps ... The Settings button offers two options which may help speed up the process: Automatically proceed to next image. When this option is ■ enabled, HoudahGeo will automatically select the next image once you are done geocoding one image Automatically jump to selection.
track's end and the other track's beginning is less than the specified number of minutes. The default value is 30 minutes. Matching limit: HoudahGeo determines the location where a photo was taken by matching it up with two track points: one preceding and one following the time the photo was taken. If the closest point's timestamp is more than the specified number of minutes before or after the photo was taken, HoudahGeo considers there is no match and does not geocode the photo.
You may specify reference photos to always precede, always follow or just be taken in the same time frame as the photos you want to tag. E.g. your workflow may include always taking a reference photo before proceeding to take other photos. Coordinates propagate from a reference photo to the nearest image and from there on to the next. Until HoudahGeo hits a time gap large enough to suppose that you have changed location. 4.2.6.
The Geocode button copies the crosshairs’ coordinates to the currently selected images. The Fly to Image Location button moves the crosshairs to the coordinates of the currently selected images. The arrow buttons allow you to navigate images in the project without returning to the HoudahGeo project window. When you quit Google Earth, you will be offered the option to save the crosshairs to the “My Places” folder in Google Earth. You should decline that offer. 4.2.7.
Alternatively, you can choose to use GeoNames (local) for reverse geocoding. This is faster and does not require an Internet connection to reverse geocode. You only need to download the GeoNames database once. This will need about 400 MB of disk space. 4.2.8. Altitude Lookup This option allows for deriving altitude values from GPS coordinates.
4.3. Step 3: Output During this step HoudahGeo exports or publishes the metadata collected and generated in the previous steps. Some settings are shared by most export options: Selected images only: Only images previously selected in the project window will be processed. Geocoded images only: Only images with latitude and longitude values will be processed. 4.3.1. EXIF / XMP Export EXIF, XMP and IPTC tags allow for geocoding information to be stored invisibly within the image files.
Bypass XMP sidecars: When XMP sidecars are present, HoudahGeo gives these priority over the actual image files: it will read from and write to the sidecars. With this option you may override this behavior and force HoudahGeo to write to the actual image files. Always write XMP sidecar: With this option checked, HoudahGeo will create sidecars for images that have no sidecars yet.
4.3.2. Notify media libraries (iPhoto / Aperture) HoudahGeo may notify your media library (iPhoto or Aperture) that images they manage have updated metadata available. Usually, you would perform this operation after tagging master / original files. 4.3.3. Google Earth Export HoudahGeo offers the option to create a Google Earth KMZ file. This allows for viewing your photos within Google Earth. This is a terrific way for sharing photos and showing them in context. E.g.
Template: HoudahGeo offers two predefined templates: Default - Actual Altitude and Default - Clamped to Ground. They differ in the way altitudes are handled. With the Clamped to Ground option Google Earth will assume photos were taken at ground level. The use of the Actual Altitude mode makes sense only if your images have been geocoded with altitude information. There is a risk of images not showing in Google Earth if they are tagged with an altitude below ground level.
4.3.4. KML Export Advanced users may opt to generate KML files from a HoudahGeo project. KML is an open standard. It is supported natively by Google Earth and Google Maps. Unlike KMZ, it is not self-contained. The KML file references image files residing next to it. This makes managing KML files pretty tricky. We can distinguish two types of KML files: The first is used locally on a computer. This one is easiest to create and to share.
4.3.5. CSV Export This creates a Comma-Separated-Values file listing all images in the project. Such a file may be processed by various tools and applications. This includes spreadsheet applications.
4.3.6. GPX Export This creates a GPX file which has one waypoint for each image in the project. Waypoint names: You have the option to have HoudahGeo use the image’s title, file name or path for the name of the associated waypoint. Include track log: HoudahGeo can include relevant parts of a loaded GPS track log. 4.3.7. Flickr Upload This option uploads photos from your HoudahGeo project to Flickr.com Image size: HoudahGeo converts your images to the JPEG format before uploading.
Include machine tags: Flickr supports two ways of attaching location information to a photo. The first is based on EXIF tags which HoudahGeo automatically attaches to the images it uploads. The second makes use of machine tags. These are special tags which the Flickr server knows to interpret. E.g. geo:lat=34.073157 geo:lon=-118.452398 Some Flickr clients rely on the presence of these tags. It is best to let HoudahGeo attach those.
4.3.8 Locr Upload This option uploads photos from your HoudahGeo project to locr.com Image size: HoudahGeo converts your images to the JPEG format before uploading. You may specify a maximum dimension to scale the image down to. Privacy: This setting determines who may see the photos you are about to publish. Possible values are: Public, Friends, Family and Private. Album: You may choose to add your photos to one of your Locr albums.
5. Frequently Asked Questions For more questions and answers, also check out the Houdah online forums: http://forums.houdah.com 5.1. Does HoudahGeo support RAW files? Yes. HoudahGeo can read all the same file formats as Apple's iPhoto and Aperture. HoudahGeo can write EXIF, XMP & IPTC tags to JPEG as well as many RAW image file formats. Please use the trial version of HoudahGeo to test with actual files from your camera. 5.2. I don't own a GPS.
5.5. Can you recommend a particular GPS device? GPS devices come in a wide variety conceived for many different uses. It is a good idea to assess your needs and buy the receiver that matches those. For the use with HoudahGeo, you need a device that has a track logging feature. This is available in most handheld receivers. Car navigation devices however usually do not have this ability. You should also make sure that the device has the ability to export GPX or NMEA track log files.
5.6. How do I ensure the camera's clock is accurate? 1. Decide on a time zone you will use over the course of the project. Typically this is either your home time zone or a time zone you travel to. 2a. Set your GPS device to display time in the chosen time zone. 2b. If your GPS device has no display, use a radio-controlled clock. 3. Start setting the time on your digital camera. 4a. If your camera allows for setting seconds to zero, do so when the clock on the GPS device jumps to the next minute. 4b.
within the correct time frame, you may want to double check the camera time zone and clock error settings. Remedy: Geocode the photo using the build-in map or using Google Earth. Why can't Lightroom see the geotags? Lightroom requires special setting to share metadata with HoudahGeo. You need to set Lightroom to write metadata to XMP sidecars. HoudahGeo will read and update the sidecars. After that you need to instruct Lightroom to reload metadata from the files. 5.8.