iHiFi BLUETOOTH HEADSET and USB ADAPTER f o r m a k i n g S K Y P E™ C A L L S Quick Start English............................................... 3 Español............................................
Making Skype™ Calls With This Product ® Thank you for choosing Zoom . Your package includes: ® • Zoom Bluetooth Class 1 USB Adapter • Zoom iHiFi™ Bluetooth Headset • Cable for charging the headset from a computer's USB port • CD-ROM with Adapter warranty and User Guide You will need: • A computer running Windows® Vista, XP or 2000 with an available USB port • Skype Internet phone service. If Skype is not already installed on your computer, go to www.Skype.com and download the free software.
Step 1: Charging the Bluetooth headset USB charging jack Charging cable On/Off switch Charging LED Follow these steps: a Make sure the computer is turned on and NOT set to go into sleep mode after a period of inactivity. b Plug one end of the charging cable into the computer's USB port and plug the other end of the cable into the headset's charging jack. The headset’s charging LED is red during charging.
Step 2: Installing the USB Adapter Important: Install the software before you plug the adapter into your computer. a Insert the installation CD into the CD drive. The CD should start automatically. (If it does not, double-click the Computer or My Computer icon on your desktop and then, in the Computer/My Computer window, double-click the Zoom icon.) Windows Vista users: At the User Account Control message, click Continue. b In the Language Selection window, choose your language.
When the License Agreement dialog box appears, click I accept the terms . . . and then click Next. Windows XP and 2000: In the Custom Settings dialog box, leave the Startup Shortcut and Desktop Shortcut boxes checked, and click Next. f The installation may take a few minutes. When it is complete, click Finish to exit. Note the new Bluetooth icon on your desktop: g Remove the CD from the DVD/CD drive and restart your computer.
Step 3: Configuring the Adapter and pairing your computer with the Bluetooth Headset Pairing is the procedure that establishes a wireless link between two Bluetooth devices. To pair the computer and the headset: a Turn on your computer if it is not already on. b Plug the Bluetooth Adapter into a USB port on the computer. A message tells you that your new hardware is installed and ready to use.
e To start pairing, first turn on the headset and make sure it is within a few meters of your computer. The headset automatically goes into discoverable mode (that is, it becomes visible to other Bluetooth devices) and its pairing LED flashes red and blue to indicate that it is searching for another device to pair with.
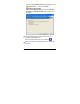
Pairing LED f Then open the My Bluetooth menu and select Bluetooth Device Discovery to see the available devices in the area. The devices are shown in orbit around the sun, which represents your computer.
g Windows XP and 2000: In the Enter Bluetooth Passkey dialog box, enter 0000, and click OK. All operating systems: The headset icon becomes orange to indicate that it is paired with the adapter. The headset should pair quickly with the computer. When pairing takes place, the headset's Pairing LED flashes blue for 10 seconds and then turns off. Note: If pairing doesn't occur, see the Notes on Pairing on page 15.
i (Optional) If you want to place connection shortcuts on your desktop, right-click again on the BT AV Headset icon, select Save Connection As Shortcut→ Bluetooth Advanced Audio Service. Repeat for Bluetooth Headset Service. Now, whenever you want to pair with and connect to the headset, just turn the headset on and double-click both shortcut icons: BT AV Headset (AV Headphone) BT AV Headset (Audio Device) To unpair and disconnect the headset, see page 17.
Step 4: Configuring Skype to Use the Headset as Its Sound Device a Double-click the Skype icon in the Windows system tray. b From the Tools menu, select Options. c In the Options dialog box, in the left menu pane, click Sound Devices. d In the Sound Devices dialog box, make sure that Bluetooth Hands-free Audio is displayed in the Audio In, Audio Out, and Ringing list boxes: e Click Save and exit the Skype configuration software.
Making and Receiving Calls Using the Headset Volume Up Volume Down Play/Pause Stop/ Ignore call Forward/ Phone Pairing LED Back Microphone • To make a call, simply open Skype and select a contact from your Skype Contacts list or click the Dial tab to enter a number. • When a Skype call comes in, you will hear the ring over your headset. Flip down the microphone and press the headset's Phone button to answer. If you don't want to take the call, you can reject it by pressing the Stop button.
Listening to music through the headset To listen to tunes stored on your computer, simply go to the folder where you keep your music downloads and select the songs. If a Skype call comes in while your music is playing, you will hear the ring through the headset. Just press the Phone button on your headset to take the call, or the Stop button to ignore the call and continue listening to music. When the call is over, press the Phone button again to hang up and return to your music.
Microphone Flips down for phone conversations. Mutes/unmutes the microphone. Play/ Pause Stop Toggles music on and off. Rejects an incoming call. To power off the headset, hold for 4 seconds. To power back on and re-initiate pairing, hold again for 4 seconds. Ends the music. Volume up Volume down Increases sound volume. System beeps at maximum. Decreases volume. System beeps at minimum.
• The headset stops working if it gets too far away from the computer – for example, if you move more than 30 meters (100 feet) away from your computer without taking your headset off. If this happens, the headset goes into Idle mode, and the Pairing LED flashes blue intermittently. If you come back in range within three minutes, the headset automatically becomes paired with the computer again. If you don't come back within range within three minutes, the headset goes into Sleep mode.
Disconnecting and Unpairing • To disconnect, right-click the BT AV Headset icon and select Disconnect→Bluetooth Advanced Audio Service. Then right-click the headset icon again and select Disconnect→ Bluetooth Headset Service. The headset icon turns from green to orange to indicate that it is disconnected. • To unpair your computer and the headset, right-click the BT AV Headset icon and select Unpair. The icon turns from orange to gray to indicate that it is no longer paired.
Regulatory Information U.S. FCC Part 15 Emissions Statement This equipment has been tested and found to comply with the limits for a Class B digital device, pursuant to part 15 of the FCC Rules. These limits are designed to provide reasonable protection against harmful interference in a residential installation. This equipment generates, uses and can radiate radio frequency and, if not installed and used in accordance with the instructions, may cause harmful interference to radio communications.
De fabrikant verklaart geheel onder eigen verantwoordelijkheid dat deze apparatuur voldoet aan Richtlijn 1999/5/ EC op grond van het onderstaande. Dit product is voorzien van de CEmarkering. Le constructeur déclare sous son entière responsabilité que ce matériel est conforme à la Directive 1999/5/EC via les documents ci-dessous. Ce produit a reçu le marquage CE.
Como hacer llamadas Skype™ con este Producto ® Gracias por escoger Zoom . Su paquete incluye: • Adaptador USB Zoom Bluetooth® Clase 1 • Audífonos Zoom iHiFi™ Bluetooth • Cable para recargar los audífonos en el puerto USB del computador • CD-ROM con la garantía y la Guía del Usuario del Adaptador Usted necesitará: • Un computador con Windows® Vista, XP o 2000, con un puerto USB disponible • Servicio telefónico Skype Internet. Si Skype todavía no esta instalado en su computador vaya a www.Skype.
5 Use los audífonos para las llamadas Skype (página 31). Paso 1: Como recargar los audífonos Bluetooth Enchufe para recargar USB Cable para recargar Interruptor Encender/apagar Luz LED de recargar Siga estos pagos: a Asegúrese de que el computador este encendido y que NO este en el modo inactivo después de un período de inactividad. b Conecte un extremo del cable para recargar en el puerto USB del computador y conecte el otro extremo del cable en el enchufe de recarga de los audífonos.
Los audífonos completamente recargados funcionan durante 12 horas. Nota: Zoom ofrece un adaptador iHiFi opcional para recargarlo sin necesidad de un PC. Para más información vea www.zoom.com. Paso 2: Como Instalar el Adaptador USB Importante: Instale el software antes de conectar el adaptador a su computador. a Inserte el CD de instalación en la unidad de CD. El CD deberá iniciarse automáticamente.
d En la caja de dialogo de Windows Elegir idioma de instalación seleccione el idioma que aparecerá en las pantallas de configuración/emparejamiento, ayuda en línea y el Manual del Usuario del Adaptador y haga clic en OK. e En la ventana de dialogo InstallShield Wizard, siga las indicaciones para instalar el software. Cuando aparezca la ventana de dialogo Contrato de licencia, haga clic en Acepto los términos . . .y luego haga clic en Siguiente.
f La instalación puede tomar unos pocos minutos. Cuando este completa haga clic en Finalizar para salir. g Retire el CD de la unidad DVD/CD y reinicie su computador. Observe el nuevo icono Bluetooth en su escritorio: Paso 3: Como configurar el Adaptador y Emparejar su Computador con los Audífonos Bluetooth Emparejar es el procedimiento que establece un enlace inalámbrico entre dos dispositivos Bluetooth. Para emparejar el computador y los audífonos: a Encienda su computador si todavía no esta encendido.
Seleccione su tipo de computador de la lista Tipo de Dispositivo, deje la caja Utiliza el modo de la seguridad Mediano seleccionada y haga clic en OK. e Para iniciar el emparejamiento con los audífonos, primero encienda los audífonos y asegúrese de que están dentro de algunos metros de su computador. Los audífonos irán automáticamente al modo visible (esto es, se vuelve visible a otros dispositivos Bluetooth) y sus luces LED destellarán en rojo y azul para indicar que esta buscando.
LED para emparejar f 26 Luego abra el menú Mi Bluetooth y seleccione Búsqueda de Dispositivo Bluetooth para ver los dispositivos disponibles en el área. Los dispositivos se muestran en orbita alrededor del sol, que representa a su computador.
g Windows XP and 2000: En la caja de diálogo Introduzca la contraseña de Bluetooth, ingrese 0000 y haga clic en OK. Todos los sistemas operativos: El icono BT AV Headset se vuelve de color naranja para indicar que esta emparejado con el adaptador. Los audífonos emparejarán rápidamente con el computador y la luz LED de emparejamiento destellará en azul por 10 segundos y luego se apagará. (Si el emparejamiento no ocurre, ver las Notas sobre el Emparejamiento en la página 34.
i (Opcional) Si desea colocar los conexiónes de acceso directo en su escritorio, haga clic derecho nuevamente en el icono BT AV Headset y seleccione Guardar Conexión como Acceso Directo→Servicio de audio Bluetooth avanzado. Repite para Servicio de Auricular de Bluetooth.
Para desconectar y desemparejar • Para desconectarse, haga clic derecho en el icono BT AV Headset y seleccione Desconectar→Servicio de audio Bluetooth avanzado. Luego haga clic derecho nuevamente en el icono y seleccione Desconectar→ Servicio de Auricular de Bluetooth. El icono cambiara de color verde a naranja para indicar que esta desconectado. • Para desemparejar su computador y los audífonos, haga clic derecho en el icono BT AV Headset y seleccione Desemparejar.
d En la caja de diálogo Sound Devices (Dispositivos de Audio), asegúrese de que Bluetooth Handsfree Audio (Audio Manos Libres Bluetooth) este desplegado en las cajas de listas Audio In (Entrada de Audio), Audio Out (Salida de Audio) y Ringing (Timbre): e Haga clic en Save (Guardar) para salir del software de configuración de Skype.
Como Hacer y Recibir Llamadas Usando los Audífonos Subir Volumen Bajar Volumen Adelantar/ Teléfono Play/Pausa Parar/ Ignorar llamada Emparejar LED Devolver Micrófono • Para hacer una llamada simplemente abra Skype y seleccione un contacto de su lista de Contactos de Skype o haga clic en el tab Dial (Marcar) para ingresar un número. • Cuando entre una llamada Skype, usted escuchará el timbre en sus audífonos. Gire hacia abajo el micrófono y presione el botón Teléfono de los audífonos para responder.
Como Escuchar Música con los Audífonos Para escuchar canciones guardadas en su computador, simplemente vaya al archivo donde guarda la música que ha descargado y seleccione las canciones. Si entra una llamada Skype mientras esta escuchando música, usted oirá el timbre sonar en los audífonos. Solo tiene que presionar el botón Teléfono en sus audífonos para recibir la llamada o el botón Parar para ignorar la llamada y continuar escuchando la música.
Botón Función Micrófono Gira hacia abajo para conversaciones telefónicas. Enciende /silencia el micrófono. Play/Pausa Parar Prende y apaga la música. Rechaza la llamada entrante. Para apagar los audífonos sostenga por 4 segundos. Para encender de nuevo y reiniciar el emparejamiento sostenga nuevamente por 4 segundos. Finaliza la música. Subir volumen Bajar volumen Aumenta el volumen. El sistema suena al máximo. Disminuye el volumen. El sistema suena al mínimo.
Notas sobre el Emparejamiento • Por lo general el emparejamiento solo toma 10 segundos. Sin embargo, puede tomar hasta tres minutos si hay otros dispositivos habilitados Bluetooth cerca. Cambie de lugar estos dispositivos hasta que estén fuera del rango o apáguelos. • Los audífonos dejan de funcionar si están muy lejos del computador – por ejemplo, si se retira más de 30 metros (100 pies) lejos del computador sin retirar sus audífonos.
Emparejar Estatus luz LED Explicación Destella Azul Intermitente Inactivo (sin emparejar) o intentando emparejar con el dispositivo emparejado más reciente. Después de tres minutos, los audífonos entran en el modo inactivo y se apaga la luz LED. Destella rojo Intermitente Batería baja No indicación Emparejado o en modo inactivo. Si Necesita Ayuda Para solicitar ayuda, por favor vaya a www.zoom.com y seleccione Soporte Técnico.
3487-B 27452-2 ©2007