X5 U S E R M A N U A L
NOTICE This document contains proprietary information protected by copyright, and this Manual and all the accompanying hardware, software, and documentation are copyrighted. No part of this document may be photocopied or reproduced by mechanical, electronic, or other means in any form.
Contents OVERVIEW ........................................................................................... 5 1. INSTALLATION INSTRUCTIONS ........................................................ 6 INSTALLING THE X5...................................................................................... 7 2. CONNECTING ADDITIONAL COMPUTERS AND/OR A NETWORK DEVICE ...............................................................................................15 3. ONLINE GAMING ................................
APPENDIX F: GETTING HELP ........................................................... 64 APPENDIX G: REGULATORY INFORMATION .....................................
Overview The X5 integrates an ADSL modem, 4-port router, and firewall in one device. Each of the 4 Ethernet ports can be used for plugging in a computer, wireless access point, HomePlug adapter, or other network device. This User Manual contains installation instructions for direct connection of a Windows, Macintosh, or Linux computer. Once you’ve done a setup with one computer, you can use all 4 ports for connecting computers and other network devices.
1 Installation Instructions This chapter covers the basic instructions needed to connect your X5 to a computer and to the Internet. These instructions can be used for computers with a Windows, Macintosh, or Linux operating system. If you want to connect your X5 to a network device, you should first do the installation for a computer and then connect the network device. If you already installed and connnected your X5, you can skip this chapter and begin with Chapter 2.
Before You Begin Before you begin installing the X5 modem using this manual, you must have the following available to you: • ADSL service enabled on your telephone line. To do this, you need to sign up with an ADSL service provider. Once this service is enabled, you should have an ADSL-enabled telephone wall jack to plug the X5 modem into. (Your service provider may refer to “ADSL service” as “DSL service.”) • A computer.
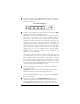
2 Close any open programs, including any antivirus software or pop-up blockers. 3 Insert the supplied CD into the CD drive of your computer. The CD should start automatically. (If the CD does not start automatically, click the Windows Start button, click Run, and then type E:\setup.exe, where E is the letter of your CD drive.) Windows 7 or Vista: If the AutoPlay dialog box appears, click Run Setup.exe. If the User Account Control dialog box appears, click Allow.
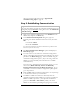
2 Connect one end of the supplied Ethernet cable to any of the computer’s Ethernet ports and the other end to your modem’s Ethernet (LAN) port. Back Panel Diagram DSL 3 ETHERNET 1 ETHERNET 2 ETHERNET 3 ETHERNET 4 RESET POWER SWITCH Connect the supplied phone cord between your modem’s DSL jack and a phone jack with ADSL service.
does not become solid, please refer to Appendix D: Troubleshooting Tips on page 54. Step 2: Establishing Communication Important! Mac users must make sure that the computer’s TCP/IP settings are configured properly BEFORE starting this section. See Macintosh TCP/IP Settings. 1 2 Open your computer’s Web browser, enter 192.168.1.1 in the address bar, and press the Enter key. In the Authentication Required dialog box, type the following User Name and Password in lower case, then click OK.
7 address, and a Password. These are NOT the User ID and Password that you used to get into the Basic Setup menu.) Click Next three times to reach the Summary Page of the setup. If a 1483 Bridged IP+NAT or 1483 Routed IP connection is detected, click Next until you reach the Summary Page of the setup. On the Summary Page, click Save/Reboot. Congratulations! If you want to connect your X5 to only one computer, you are now done. Your modem is connected.
NOT the User ID and Password that you used to get into the Basic Setup menu.) If you cannot remember or cannot find your User ID and Password, call your service provider and ask for them. Then enter them in the appropriate boxes. This information is required for PPPoE and PPPoA protocols. e If you selected 1483 Bridged IP+NAT or 1483 Routed IP as your Protocol, your provider should have given you four series of numbers for the IP (Internet Protocol) Address, Subnet Mask, Gateway, and DNS.
fax machines? If not, continue with B below. If you ARE, on the other hand, you should put an ADSL filter between each phone and the wall jack where the phone was connected. This filter prevents interference between the modem and the phone or other equipment. Your modem may have come with a filter, and filters are also available from retailers of phones, modems, and other electronics.
your Encapsulation begins with PPP). If you still cannot connect, look up your provider in the ADSL Internet Settings Tables in Appendix A and try the setting(s) shown, if different. If you did not connect and were using settings from the ADSL Internet Settings Tables, return to the tables and find the next most frequently used settings—those labeled (2) if you just entered (1), or (3) if you just entered (2), and repeat steps c-g above.
2 Connecting Additional Computers and/or a Network Device If you want to connect your X5 to only one computer, please go to Chapter 3 now. If you want to connect the X5 to additional computers or to a network device such as a wireless access point or a switching hub, please continue reading Chapter 2 below.
you are connecting a network device such as a wireless access point or switching hub, go to step 4 below. 4 5 Set up your network device by using the instructions that came with that device. Then reboot any computer that is part of your network. For example, if you connected a wireless access point, reboot any computer that will make a wireless connection to that wireless access point. Verify that your Internet connection is working. Open the Web browser (e.g.
3 Online Gaming If you are using your router for gaming, you may need to make changes to the router’s firewall setting for the game to work. This is done by setting up a DMZ or virtual server, or using port triggering so that the modem’s firewall won’t block the other players from your system during your gaming. The main difference between the three methods is the amount of access someone has to your system. A virtual server will allow access to your computer or gaming station on certain ports.
should be used with caution on your computer. However DMZ’s work well with your gaming stations since security is not as much of an issue for gaming stations as it is for computers. Once you’ve decided what type of security to use for gaming, you can set up that security using the appropriate section of this manual: 18 • Virtual Server: For instructions on how to set up a virtual server, please refer to page 30.
4 Status Monitoring This chapter discusses how to check the status of your modem and its ADSL connection. Most users can skip this chapter, as it is primarily for advanced users and for those who are instructed by their Internet service provider or Zoom Technical Support to verify settings, usually for troubleshooting. If you skip this section, you should go to Chapter 5. Why Monitor Status? The X5 provides easy-to-read screens for you to review the status of the modem and its ADSL connection.
connection is active or not. You can also monitor related ADSL parameters—for example, how fast the X5 is transferring data (Downstream Speed and Upstream Speed), your WAN settings, your LAN settings, and so forth. Note: The Status page does not provide a way to change any of these settings—see Chapter 5: Advanced Setup Options, if you need to make changes to these settings.
5 Advanced Setup Options The options that are set by default when the X5 is installed are sufficient for most users. However, those that want or need to change the X5’s settings can do so using the Advanced Setup page. This chapter explains how to specify advanced options. The information in this chapter applies to you if: • Your Internet service provider instructs you to enable, disable, or change the default settings for your X5 in order for it to work properly with your ADSL service.
How To Use the Advanced Options Configuring the X5 for the situations described at the beginning of this chapter requires the use of the Advanced Setup page. To access this page, click on the Advanced Setup link on the left pane in the Zoom Configuration Manager. (If you forgot how to log in to the Zoom Configuration Manager, see page 10). Advanced Setup Options Use the links on the left pane in the Zoom Configuration Manager under Advanced Setup Options to perform advanced configuration tasks.
Setup Control Advanced Setup Quality of Service (Queue Management Configuration) Allows different priorities to be assigned to different applications, users, data, or guarantee a certain level of performance to data (for upstream only, not for downstream). If Enable QoS checkbox is selected, choose a default DSCP mark to automatically mark incoming traffic without reference to a particular classifier.
Advanced Setup DSL Allows you to select the modulation and capability of DSL Settings. Advanced Setup Interface Group This proxy enables the router to send all multicast/unicast traffic to a specific upstream interface. Most users will not use this feature, it is typically used for IPTV applications. Changing Your WAN Settings Use the WAN Configuration page to change your Wide Area Network (WAN) settings. To open this page, click the WAN link under Advanced Setup on the left pane.
The following table describes the settings on the WAN Configuration pages and the values that you can enter. The settings displayed on the page will vary according to the protocol you are using. Setting Description PVC Displays the value (PVC0 through PVC3) of the selected Permanent Virtual Circuit (PVC). You can set the PVC value by entering it in the text box. VPI Virtual Path Identifier ranges from 0 – 256. Your DSL provider supplies the VPI when you sign up for ADSL service.
value refers to the way that data is passed over the Internet. An example value is LLC (Logical Link Control). Your DSL provider supplies this value when you sign up for ADSL service. Username Your DSL provider supplies this PPP username when you sign up for ADSL service. Password Your DSL provider supplies this PPP password when you sign up for ADSL service. MTU Maximum Transmission Unit. Largest physical packet size, measured in bytes, that the modem can send.
Changing Your LAN Settings When would I need to change my LAN settings? DHCP (Dynamic Host Configuration Protocol) is a protocol that enables your modem to manage the assignment of IP addresses to computers and devices on your Ethernet (LAN) network on the X5. Enabling DHCP on your modem allows it to assign temporary IP addresses to your computers whenever they connect to your network. You can control the amount of time that elapses before a new address is issued or renewed.
Address settings. Your modem's DHCP server will assign the IP addresses in this range at random to the computers and devices in your network. Note that the Start and End IP Addresses must both be in the same subnet as the IP Address, above. End IP Address The last IP address of a range that you specify using the Start and End IP Address settings. Your modem’s DHCP server will assign numbers from this range at random to the computers and devices in your network.
To set up a device with Fixed DHCP Mapping: 1 Click Advanced SetupÆ LAN to open the LAN page. 2 Under Fixed IP Mapping click on Add Entries. 3 Enter the MAC Address of the computer or gaming station that you wish to assign a fixed IP address to. Tip: To find the MAC address of your device go to STATUSÆ DHCP. This page shows you a list of all devices connected to your router as well as their MAC addresses. 4 Enter the IP address that you always want assigned to your computer or gaming station.
To create a Virtual server: 1 Click Advanced SetupÆ NATÆ Virtual ServersÆ Add to open the Add Virtual Servers page. 2 For the server name check the list of predefined games and applications to see if yours is on the list. If it is, go ahead and select it. You will need to enter the IP address of your computer or gaming station in the Server IP Address field but the rest of the information will be filled out for you. 3 Click Save/Apply to save your new virtual server.
DMZ Use this page to designate a computer or gaming station on the Local Area Network as a DMZ (Demilitarized Zone). When you set up a DMZ, all ports on that computer are opened up to all Internet traffic – the computer is no longer protected by the X5’s NAT firewall. Caution should be used when setting up a computer with a DMZ. A game station does not have the same security issues as your computer so setting up a DMZ works well with your game station.
If your game or application is not listed, enter a Custom Name for your port triggering rule and go to step 5. 5 Enter the Start and End Trigger Ports in the text fields. Your games documentation should supply you with this information. 6 Select the Protocol for the Trigger Protocol from the dropdown menu. 7 Enter the Start and End Open Ports in the text fields. 8 Select the Open Protocol from the drop-down menu. 9 Repeat steps 5-8 for each range of ports you want to trigger open ports with.
To filter Internet traffic, you must define one or more rules (that is, criteria you want the information to meet before it can proceed). As information comes in from the Internet, the X5 examines it and—if it meets the rule—the information moves forward to its destination on your computer or network. If it does not, it is discarded.
6 Management and Diagnostics Please read this chapter if you want to perform modem management functions, as discussed below, or if you want to run diagnostics to diagnose a modem problem. If you don’t want to do either of these things, your modem is probably set up and ready to go. You may want to read Appendix B: Top and Back Panels, for details about the modem’s lights and back panel jacks.
improper functioning and is not captured by the system traps that create alarms. You can save the system log to a file. Management TR-069 Client Allow an Auto-Configuration Server (ACS) to perform auto-configuration, provision, collection, and diagnostics to the ADSL modem. Select the desired values and click Save to configure the TR-069 client options.
Remote Access to Your Modem Configuration Settings If you want to access your modem configuration manager to change or view your configuration settings remotely: 1 2 3 4 5 Click on Management. Click on Access Control, and then select the enable check box for Http WAN to allow access from a remote PC. Click Save/Apply and wait several seconds for the settings to be saved. Click on Status from the left pane of the Zoom Configuration Manager. Click on WAN.
Changing User Names and Passwords Use the Passwords page to manage the user names and passwords that can access the Zoom Configuration Manager. To open this page, click on Advanced Setup Æ Management Æ Access Control Æ Passwords. When you installed the X5 and tried to open the Zoom Configuration Manager, you were prompted for a User Name and Password in order to gain access. (The default user name and password were supplied to you in the section Establishing Communication.
Backing Up Your Configuration Users who change the configuration settings for the X5 may want to back up their settings. This will enable them to restore those settings at a later time, if needed. This feature may be especially useful when you receive firmware updates from Zoom. Installing the update may overwrite your customized settings with default values. Before you update the firmware, backup your configuration. Then, after the firmware has been updated, restore your configuration.
To restore a configuration 1 Click on the Management link on the left pane of the window. 2 Then click on the Settings link. 3 Then click on the Update link. 4 5 On the Update Settings page, click Browse and navigate to the file containing the configuration to which you want the X5 restored. Click Update Settings.
Insert a paper clip into the RESET pinhole in the center of the modem’s back panel and hold it there for five seconds. You are now guaranteed that all system settings are restored to the X5’s factory defaults. Diagnostics You can use the Diagnostics page to run a series of diagnostic tests of your system software and hardware connections.
Appendix A: ADSL Internet Settings Tables These tables are for customers whose service providers do not supply them with the ADSL settings to connect to the Internet. Many ADSL providers use different settings depending on the region in which they are operating, which is why there may be more than one setting for your service provider. We post updated tables on our Web site. If your country is not listed in the tables below, please consult www.zoomtel.
Covad 0 35 PPPoE LLC Crocker Communications 0 35 PPPoE LLC Earthlink (1) 0 35 PPPoE LLC Earthlink (2) 8 35 PPPoE LLC Earthlink (3) 8 35 PPPoE VC-MUX Earthlink (4) 0 32 PPPoA LLC Eastex 0 100 PPPoA LLC Embarq 8 35 1483 Bridged IP LLC 4DV.
SouthWestern Bell 0 35 1483 Bridged IP LLC Sprint (1) 0 35 PPPoA LLC Sprint (2) 8 35 PPPoE LLC SureWest Communications (1) 0 34 1483 Bridged LLC Snap SureWest Communications (2) 0 32 PPPoE LLC SureWest Communications (3) 0 32 PPPoA LLC Toast.
Table B: Countries Other Than The USA ISP VPI VCI Encapsulation Australia - Telstra 8 35 PPPoA LLC Argentina - Telecom 0 33 PPPoE LLC Argentina Telefonica 8 35 PPPoE LLC Argentina 1 33 PPPoA VC-MUX Belgium-ADSL Office 8 35 1483 Routed IP LLC Belgium - Turboline 8 35 PPPoA LLC Bolivia 0 34 1483 Routed IP LLC Brazil - Brasil Telcom 0 35 PPPoE LLC Brazil - Telefonica 8 35 PPPoE LLC Brazil - Telmar 0 33 PPPoE LLC Brazil - South Region 1 32 PPPoE LLC Colombia - EMC
Jamaica (1) 8 35 PPPoA VC-MUX Jamaica (2) 0 35 PPPoA VC-MUX Jamaica (3) 8 35 1483 Bridged IP LLC SNAP Jamaica (4) 0 35 1483 Bridged IP LLC SNAP Kazakhstan 0 33 PPPoA VC-MUX Mexico 8 35 PPPoE LLC Netherlands - BBNED 0 35 PPPoA VC-MUX Netherlands - MX Stream 8 48 PPPoA VC-MUX New Zealand Slingshot 0 100 PPPoA VC-MUX Portugal 0 35 PPPoE LLC Puerto Rico Coqui.
Spain - Wanadoo (3) 8 32 1483 Routed IP LLC Sweden - Telenordia 8 35 PPPoE Sweden - Telia 8 35 1483 Routed IP LLC Switzerland 8 35 PPPoE LLC Trinidad & Tobago TSTT 0 35 PPPoA VC-MUX Turkey (1) 8 35 PPPoE LLC Turkey (2) 8 35 PPPoA VC-MUX United Kingdom (1) 0 38 PPPoA VC-MUX United Kingdom (2) 0 38 PPPoE LLC 0 38 PPPoE VC-MUX 1 50 PPPoA LLC Venezuela - CANTV 0 33 1483 Routed IP LLC Vietnam 0 35 PPPoE LLC Vietnam - VDC 8 35 PPPoE LLC Vietnam - Viettel 8 3
Appendix B: Top and Back Panels The following table describes each light on the top panel. Light Description Power Lights when the X5 is plugged into a power source. DSL Blinks when the X5 is performing its startup sequence. Stays on solid when the unit has synched up with its ADSL connection. Note: If the light fails to switch from blinking to steady after a minute or two, check with your ADSL provider that the ADSL connection is activated, or refer to Appendix D: Troubleshooting Tips.
Appendix C: TCP/IP Network Settings If you are using a Mac computer, you must ensure that your computer’s TCP/IP network settings are configured properly. Otherwise, you will not be able to connect to the Internet. Note: If you are using a Windows computer, you do not have to configure the TCP/IP settings if you are using DHCP because your Windows computer will automatically configure them for you. If you are not using DHCP, you will need to set up the TCP/IP settings for your Windows computer.
3 4 On the right pane, select Using DHCP from the Configure drop-down menu. All of the text fields should be left blank. Click Apply. Mac OS X 10.4 and 10.3 1 2 3 4 From the Dock or Apple menu, select System Preferences and then Network. Select your connection method, normally Built-in Ethernet for a wired connection. Make sure the TCP/IP tab is selected, and then select Using DHCP from the Configure IPv4 drop-down menu. All of the text fields should be left blank. Click Apply Now. Mac OS 7.6.1 - 9.2.
Windows TCP/IP Settings How you configure your Windows computer’s network settings differs, depending on your operating system. Windows 7 Users: 1 2 3 4 5 6 7 From the desktop, click the Start button, select Control Panel. Under Network and Sharing Center, select Change adapter settings from the menu on the left side of the screen. Right-click on the Local Area Connection icon and select Properties.
5 6 7 8 In the Local Area Connection Properties dialog box, highlight Internet Protocol Version 4 (TCP/Ipv4) and click the Properties button. Select Use the following IP address and enter 192.168.1.100 and 255.255.255.0 as the IP address and Subnet mask, respectively. Click OK, then click Close. Re-enter 192.168.1.1 in your Web browser’s address bar. Windows XP 1 Open the Internet Protocol (TCP/IP) Properties dialog box.
Subnet mask, Default gateway, and Preferred DNS server values appear. Windows 2000 1 Open the Internet Protocol (TCP/IP) Properties dialog box. a From the desktop, click the Start button, point to Settings, then Network and Dial-up Connections. b Right-click the Local Area Connection icon, and select Properties. c Select your NIC card’s TCP/IP entry (it should include “TCP/IP” in it, but not “AOL,” “Dial-up,” or “Adapter”) and click the Properties button.
c Select your NIC card’s TCP/IP entry (it should include “TCP/IP” in it, but not “AOL,” “Dial-up,” or “Adapter”) and click the Properties button and then click OK 2 Ensure the following is selected, depending on whether you are using dynamic (DHCP) or static IP addressing: ¾ If you are using DHCP (most users): Ensure that Obtain an IP address automatically is selected and that either Obtain a DNS server address automatically or Enable DNS is selected. All fields should be blank.
Appendix D: Troubleshooting Tips The following are some problems you may experience and some possible solutions to remedy the situation. Problem My X5’s ADSL light continually blinks and does not stay solidly lit. Solution There are several issues that could cause this problem. Check these items: • Ensure that the phone cord is firmly plugged into the wall jack and the LINE jack on the back of the X5. • Verify that the jack the phone cord is connected to is enabled for ADSL service.
• If your Encapsulation begins with PPP, ensure that you have typed your ADSL Username and Password correctly. (Note that this is NOT the username and password you used to log into the Zoom Configuration Manager on page 10.) • Verify that your service provider’s ADSL connection is functioning properly. (Place a call to your service provider’s customer support department to verify this.
Click the Configure button and then the Renew DHCP Lease button. • If you are using a Windows computer, perform a Release/Renew operation: ¾ Windows 2000/XP: From the desktop, click the Start button, then point to Programs, point to Accessories, and then select Command Prompt. Type ipconfig /all and press the Enter key on your keyboard. In the subsequent dialog box, make sure the NIC adapter is listed, click Renew and then click Release. Then type 192.168.1.
help, refer to the documentation that came with your network device or contact its manufacturer. • Refer to the documentation provided with your network device or contact its manufacturer for assistance.
Appendix E: Configuring Your Web Browser Important! This section is for Windows computers only. If you are using a Mac computer, your browser is already configured properly. However, you must ensure that your computer’s TCP/IP settings are configured properly. See Macintosh TCP/IP Settings on page 48 for instructions on how to do this. When using a Windows computer, the software that you use to make an Internet connection must be set for a network connection, not a dial-up connection.
Configuring Internet Explorer Version 8.0 The following instructions are for Internet Explorer Version 8.0. (If you do not have this version, you can get a free upgrade from Microsoft Corp. If you are not sure what version you have, open Internet Explorer and from the Help menu, choose About Internet Explorer. The version number is directly below the Microsoft Internet Explorer logo. You can ignore all the numbers after the period following the first digit.
connection). Since the X5 device is not wireless and will not work with a PPPoE connection type by default then you do not need to setup either of these and can use the existing wired connection successfully. Configuring Internet Explorer Version 7.0 The following instructions are for Internet Explorer Version 8.0. (If you are not sure what version you have, open Internet Explorer and from the Help menu, choose About Internet Explorer.
6 7 8 Select Set up my connection manually. Click Next. Select Connect using a broadband connection that is always on. Click Next. Select Finish. Configuring Internet Explorer 5.0 or 6.0 The following instructions are for Internet Explorer Version 5.0 and 6.0. (If you are not sure what version you have, open Internet Explorer and from the Help menu, choose About Internet Explorer. The version number is directly below the Microsoft Internet Explorer logo.
3 The setup process will proceed differently, depending on your operating system. The following table details the process for your Windows computer. Note: If you are using Windows 7, you do not need to do anything since it will be configured automatically. Windows XP Windows 98/Me/2000 a. a. b. c. d. e. 4 On the Welcome to the New Connection Wizard dialog box, click Next.
Configuring Mozilla Firefox No setup is necessary since Mozilla Firefox will use the active connection. Unlike IE, Firefox cannot be configured to use a specific connection type; it will use whatever is available and active at the time. Configuring Google Chrome No setup is necessary since Google Chrome will use the active connection. Unlike IE, Google Chrome cannot be configured to use a specific connection type; it will use whatever is available and active at the time.
Appendix F: Getting Help • Zoom has many Technical Support services available to its customers. • Visit our Web site at www.zoomtel.com and select Technical Support. From here, you can send email to our technical support experts and/or do a smart search through our intelligent database by using SmartFacts™. Tip: From time to time, Zoom may release improved firmware. This is also available at www.zoomtel.com , along with upgrade instructions.
Appendix G: Regulatory Information Declaration of Conformity Declaración de conformidad Manufacturer/Fabricantet Zoom Telephonics, Inc. 207 South Street Boston, MA 02111 USA 617-423-1072 www.zoomtel.com Brand/Marca Zoom X5 ADSL Modem Router Type/Tipo Series 1083, Models 5754XN, 5724XN, 1752XN, 1754XN Where X=A,B,C,D,E,F,G or Nothing; N=A,B,C,D,E,F,G or Nothing) The manufacturer declares under sole responsibility that this equipment is compliant to Directive 1999/5/EC via the following.
U.S. FCC Part 68 Statement This equipment complies with Part 68 of the FCC rules and the requirements adopted by the ACTA. The unit bears a label on the back which contains among other information a product identifier in the format US:AAAEQ##TXXXX. If requested, this number must be provided to the telephone company. This equipment uses the following standard jack types for network connection: RJ11C. This equipment contains an FCC compliant modular jack.
• • Connect the equipment into an outlet on a circuit different from that to which the receiver is connected. Consult the dealer or an experienced radio/TV technician for help. Industry Canada Emissions Statement This Class B digital apparatus meets all requirements of the Canadian Interference-Causing Equipment Regulations. Cet appareil numérique de la classe B respecte toutes les exigences du Règlement sur le matériel brouilleur du Canada.
European Declaration of Conformity The manufacturer declares under sole responsibility that this equipment is compliant to Directive 1999/5/EC (R&TTE Directive) via the following. This product is CE Marked. Directive Standard Test Report 73/23/EEC-Low Voltage EN 60950 : 2000 IEC 60950 : 3e éd. 1999 electrical safety 89/336/EEC-EMC EN 55024 : 1998 EN 55022 : 1998 EMC-immunity EMC-emissions Electrostatic Discharge Statement The unit may require resetting after a severe electrostatic discharge event.