
User manual


10
does not become solid, please refer to Appendix D:
Troubleshooting Tips on page
54.
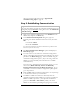
Step 2: Establishing Communication
Important!
Mac users must make sure that the computer’s TCP/IP settings are
configured properly BEFORE starting this section. See Macintosh
TCP/IP Settings.
1 Open your computer’s Web browser, enter 192.168.1.1 in the
address bar, and press the Enter key.
2 In the Authentication Required dialog box, type the
following User Name and Password in lower case, then click
OK.
User Name: admin
Password: zoomadsl
(For easy future reference, the above information is printed on the
bottom of your X5 unit’s case.)
3 The Zoom Configuration Manager opens and displays its
Basic Setup page.
4 You may choose to use either the Automatic Configuration
option or manually enter information provided by your service
provider in the Basic Setup page. We recommend using the
Automatic Configuration option. (If you are using a static IP
address, you must manually enter information to establish
communication.)
If you choose to manually enter information, please go to the
next section (Read This Only if Your Are Manually
Entering Information Into the Basic Setup Page). If you
would like to use the Automatic Configuration option, please
go to step 5 below.
5 Click on Start under Automatic Configuration. It may take up
to 2-3 minutes to detect your connection.
6 If a PPPoE or PPPoA connection is detected, enter the
username and password provided by your service provider for
PPPoE or PPPoA protocols. (Your provider should have
given you a User ID or User Name, usually your email
address or the characters preceding the @ sign in your email