
User's Manual


Reference [Recorder]
ZOOM MRS-8
41
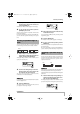
The following settings are available.
• CURRENT (default)
The bounce result will be recorded on the V-take
currently selected for the recording track.
•1 – 10
Regardless of the V-take currently selected for the track,
the bounce result will be recorded on the specified V-take.
4.
Turn the dial to specify the recording
destination V-take.
5.
To return to the main screen, press the
[EXIT] key repeatedly.
HINT
By setting the operation for the bounce destination track(s)
to “PLAY” and selecting an unused V-take as recording
destination, you can play all tracks and bounce the result as
an entire song onto the V-take.
This example explains how to bounce the contents of all
tracks onto V-take 10 of tracks 7/8.
1.
Refer to “Making bounce settings” and set
the BOUNCE RECTRACK parameter to
“PLAY”.
2.
Refer to “Making bounce settings” and set
the BOUNCE REC TAKE parameter to “10”.
3.
Press the status key of tracks 7/8
repeatedly, until the key is lit in red.
In this condition, V-takes 10 of tracks 7/8 are selected as
bounce destination.
HINT
• When a single mono audio track is selected as bounce
destination, the bounce signal is mixed to mono for recording.
• When a pair of mono tracks with odd/even numbers is
selected as bounce destination, the bounce signal is recorded
in stereo. To achieve correct left/right positioning of the
bounced result, set the Pan parameter for the odd-numbered
and even-numbered tracks to separate left and right settings.
4.
Press the [BOUNCE] key.
The key lights up and the bounce function for the
destination tracks is turned on. While the key is lit, the
track(s)/V-take(s) selected in steps 2 and 3 are used as
recording destination. Other tracks and effects are
unchanged.
5.
Play the song from the beginning and
adjust the mixing balance of the various
tracks.
The individual track level and panning settings as well as
the insert effect and send/return effect settings all have an
influence on the mixed signal that is sent to the bounce
destination tracks. Adjust levels while watching the L/R
level meter, and make sure that no signal clipping occurs.
6.
Press the ZERO [
U
] key to return to the
counter zero position, and press the PLAY
[
R
] key while holding down the REC [
O
]
key.
Bounce recording starts.
7.
When recording is complete, press the
STOP [
P
] key.
HINT
It is also possible to combine the bounce function and the
auto punch-in/out function (
→
p. 37).
Executing bounce recording
REC TAKE
REC TAKE
CURRENT
CURRENT
MRS-8(E).book 41 ページ 2004年7月30日 金曜日 午後5時24分