
User's Manual


Reference [Track Editing]
ZOOM MRS-8
47
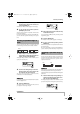
7.
Specify the move destination start point in
the same way as for the move source, and
press the [ENTER] key.
The indication “Move SURE?” appears on the display.
8.
To carry out the move operation, press the
[ENTER] key once more.
When the move operation is completed, the unit returns
to the track edit menu.
By pressing the [EXIT] key instead of the [ENTER] key,
you can cancel the operation and back up one step at a
time.
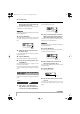
You can erase the audio data of a specified range and
return the range to the mute (non-recorded) condition.
1.
Refer to steps 1 – 6 of “Basic steps for
range editing” to select the track/V-take for
erasing, and press the [ENTER] key.
The display changes as follows. In this condition, you can
specify the erase start point.
2.
Use the cursor left/right keys to move the
flashing section of the counter, and turn the
dial to specify the erase start point.
The point can be specified in minutes/seconds/
milliseconds, or in measures/beats/ticks.
HINT
If you specify a point where no audio data exist, the second
line of the display shows *.
3.
Press the [ENTER] key.
The display changes to “Ers Src END”. This screen lets
you specify the erase range end point.
4.
Specify the erase end point in the same way
as described in step 2.
If you press the PLAY [
R
] key at this point, the specified
range will be played.
5.
Press the [ENTER] key.
The indication “Erase SURE?” appears on the display.
6.
To carry out the erase operation, press the
[ENTER] key.
When the erase operation is completed, the unit returns to
the track edit menu.
By pressing the [EXIT] key instead of the [ENTER] key,
you can cancel the operation and back up one step at a time.
You can erase the audio data outside of a specified range
and adjust the data start/end point (trimming). This is
useful to eliminate unnecessary portions from a
completed master track.
NOTE
When data before a specified section are erased (trimmed),
the remaining audio data will move up by that amount.
Therefore the timing may become mismatched with regard to
other tracks.
1.
Refer to “Basic steps for range editing” to
select the track/V-take from which to trim
data, and press the [ENTER] key.
The display changes as follows. In this condition, you can
specify the start point of the range that you want to keep.
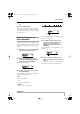
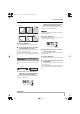
Erasing a specified range of
data
Erase
Ers Src
Ers Src
START
START
1- 0 0 0 1- 0
00
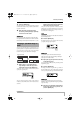
Trimming a specified range of
data
Ers Src
Ers Src
END
END
40- 1 44 0 4-23
00
Trim Tri m
Trim Src
Trim Src
START
START
1- 0 0 0 1- 0
00
MRS-8(E).book 47 ページ 2004年7月30日 金曜日 午後5時24分