User Manual PBT23420SK Notice d'utili‐ sation Benutzerin‐ formation Fridge Freezer Réfrigéra‐ teur/congéla‐ teur Kühl - Ge‐ frierschrank
Contents Safety information Safety instructions Operation Daily Use Hints and tips 2 3 4 5 6 Care and cleaning Troubleshooting Technical information Installation 7 7 9 10 Subject to change without notice. Safety information Before the installation and use of the appliance, carefully read the supplied instructions. The manufacturer is not responsible if an incorrect installation and use causes injuries and damages. Always keep the instructions with the appliance for future reference.
• • • • • Do not use electrical appliances inside the food storage compartments of the appliance, unless they are of the type recommended by the manufacturer. Do not use water spray and steam to clean the appliance. Clean the appliance with a moist soft cloth. Only use neutral detergents. Do not use abrasive products, abrasive cleaning pads, solvents or metal objects. Do not store explosive substances such as aerosol cans with a flammable propellant in this appliance.
• • • • • • • • Do not let hot items to touch the plastic parts of the appliance. Do not put soft drinks in the freezer compartment. This will create pressure on the drink container. Do not store flammable gas and liquid in the appliance. Do not put flammable products or items that are wet with flammable products in, near or on the appliance. Do not touch the compressor or the condenser. They are hot. Do not remove or touch items from the freezer compartment if your hands are wet or damp.
Daily Use Cleaning the interior In this condition, the refrigerator compartment temperature might drop below 0°C. If this occurs reset the temperature regulator to a warmer setting. Before using the appliance for the first time, wash the interior and all internal accessories with lukewarm water and some neutral soap so as to remove the typical smell of a brand-new product, then dry thoroughly. Warning! Do not use detergents or abrasive powders, as these will damage the finish.
Hints and tips Normal operating sounds • The following sounds are normal during operation: • • • • A faint gurgling and bubbling sound from coils sound when refrigerant is pumped. A whirring and pulsating sound from the compressor when refrigerant is pumped. A sudden cracking noise from inside appliance caused by thermic dilatation (a natural and not dangerous physical phenomenon). A faint click noise from the temperature regulator when the compressor switches on or off.
Care and cleaning drains out through a trough into a special container at the back of the appliance, over the motor compressor, where it evaporates. Warning! Refer to Safety chapters. Periodic cleaning It is important to periodically clean the defrost water drain hole in the middle of the refrigerator compartment channel to prevent the water overflowing and dripping onto the food inside. Caution! Do not pull, move or damage any pipes and/or cables inside the cabinet.
Problem Possible cause Solution The appliance is noisy. The appliance is not supported properly. Check if the appliance stands stable. The lamp does not work. The lamp is in stand-by. Close and open the door. The lamp is defective. Refer to "Replacing the lamp". Temperature is set incorrectly. Refer to "Operation" chapter. Many food products were put in at the same time. Wait some hours and then check the temperature again. The room temperature is too high.
Problem Possible cause The thickness of the frost is greater than 4-5 mm. Defrost the appliance. The door has been opened often. Open the door only if necessary. There is no cold air circulation in the appliance. Make sure that there is cold air circulation in the appliance. 3. Replace the used lamp with a new lamp of the same power and specifically designed for household appliances (the maximum power is shown on the lamp cover). 4. Install the lamp cover. 5. Tighten the screw to the lamp cover. 6.
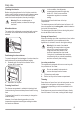
Installation Warning! Refer to Safety chapters. 5 cm min. 200cm2 Positioning min. 200cm2 This appliance can be installed in a dry, well ventilated indoor where the ambient temperature corresponds to the climate class indicated on the rating plate of the appliance: Climate class Ambient temperature SN +10°C to + 32°C N +16°C to + 32°C ST +16°C to + 38°C T +16°C to + 43°C Some functional problems might occur for some types of models when operating outside of that range.
2 1 6. 7. 8. 9. Install the lower pin on the opposite side. Tighten the middle hinge. Install the upper door. Tighten the spacer and tighten the upper pin. Do a final check to make sure that: • All screws are tightened. • The magnetic seal adheres to the cabinet. • The door opens and closes correctly. If the ambient temperature is cold (i.e. in Winter), the gasket may not fit perfectly to the cabinet. In that case, wait for the natural fitting of the gasket.
C Ha D E E Hc B 10. Install the vent grille (B). 11. Attach the hinge covers (E) to the hinge. 12. Connect the appliance laterally to the kitchen furniture sidewall: a. Loosen the screws of the part (G) and move the part (G) till the furniture sidewall. b. Tighten the screws of the part (G) again. c. Attach the part (H) to the part (G). 14. Open the appliance door and the kitchen furniture door at an angle of 90°. a. Insert the small square (Hb) into guide (Ha). 8 mm Hb GH Ha 13.
If the ambient temperature is low (for example, in winter), the size of the gasket decreases. The size of the gasket increases when the ambient temperature increases. Hb Hd Do a final check to make sure that: • All screws are tightened. • The magnetic sealing strip is attached tightly to the cabinet. ENVIRONMENT CONCERNS Recycle the materials with the symbol . Put the packaging in applicable containers to recycle it.
Table des matières Consignes de sécurité Instructions de sécurité Fonctionnement Utilisation quotidienne Conseils 14 15 16 17 18 Entretien et nettoyage En cas d'anomalie de fonctionnement Caractéristiques techniques Installation 19 20 22 22 Sous réserve de modifications. Consignes de sécurité Avant d'installer et d'utiliser cet appareil, lisez soigneusement les instructions fournies.
• • • • • N'utilisez pas d'appareils électriques à l'intérieur des compartiments de conservation des aliments de l'appareil, sauf s'ils sont du type recommandé par le fabricant. Ne pulvérisez pas d'eau ni de vapeur pour nettoyer l'appareil. Nettoyez l'appareil avec un chiffon doux humide. Utilisez uniquement des produits de nettoyage neutres. N'utilisez pas de produits abrasifs, de tampons à récurer, de solvants ni d'objets métalliques.
• • • • • • • • • ayant un niveau élevé de compatibilité environnementale. Ce gaz est inflammable. Si le circuit frigorifique est endommagé, assurezvous de l'absence de flammes et de sources d'ignition dans la pièce. Aérez la pièce. Évitez tout contact d'éléments chauds avec les parties en plastique de l'appareil. Ne placez jamais de boissons gazeuses dans le congélateur. Cela engendrerait une pression sur le récipient de la boisson. Ne stockez jamais de gaz ou de liquide inflammable dans l'appareil.
ATTENTION! Si la température ambiante est élevée ou l'appareil très rempli et si le thermostat est réglé sur la température la plus basse, il est possible que le compresseur fonctionne en régime continu, d'où un risque de formation de givre sur la paroi arrière. Pour éviter cet inconvénient, modifiez la position du thermostat pour obtenir moins de froid, de façon à permettre un dégivrage automatique et, par conséquent, des économies d'énergie.
Conservation d'aliments congelés et surgelés À la mise en service ou après un arrêt prolongé, placez le thermostat sur la position maximale pendant 2 heures environ avant d'introduire les produits dans le compartiment.
• Bananes, pommes de terre, oignons et ail ne doivent pas être mis dans le réfrigérateur, s'ils ne sont pas emballés. Conseils pour la congélation • • Voici quelques conseils importants pour obtenir un processus de congélation optimal : • • • • • • • Respectez la quantité maximale de denrées fraîches que vous pouvez congeler par 24 heures figurant sur la plaque signalétique ; Le processus de congélation dure 24 heures.
• • • • En cas de non-utilisation prolongée Si l'appareil n'est pas utilisé pendant de longues périodes, prenez les précautions suivantes : Débranchez l'appareil de l'alimentation secteur Retirez tous les aliments Dégivrez (si nécessaire) et nettoyez l'appareil ainsi que tous les accessoires Laissez la porte/les portes ouverte(s) pour éviter la formation d'odeurs désagréables.
Problème Cause probable Solution La porte n'est pas fermée correctement. Reportez-vous au chapitre « Fermeture de la porte ». La porte n'est pas correctement fermée ou le joint est déformé/ sale. Reportez-vous au chapitre « Fermeture de la porte ». Le bouchon de la gouttière d'évacuation de l'eau de dégivrage n'est pas bien placé. Placez correctement le bouchon de la gouttière d'évacuation de l'eau. Les aliments ne sont pas correctement emballés. Emballez les produits de façon plus adaptée.
3. Remplacez l'ampoule défectueuse par une ampoule neuve de puissance identique, spécifiquement conçue pour les appareils électroménagers (la puissance maximale est indiquée sur le diffuseur). 4. Installez le diffuseur de l'ampoule. 5. Serrez la vis du diffuseur. 6. Branchez la fiche de l'appareil à la prise secteur. 7. Ouvrez le hublot. Vérifiez que l'ampoule s'allume. Si ces conseils n'apportent pas de solution à votre problème, veuillez contacter votre service après-vente agréé.
Réversibilité de la porte Classe climatique Température ambiante ST +16°C à + 38°C T +16°C à + 43°C Des problèmes fonctionnels peuvent se produire sur certains types de modèles fonctionnant hors de cette plage de températures. Seul le respect de la plage de températures spécifiée peut garantir un bon fonctionnement de l'appareil. En cas de doute concernant l'emplacement d'installation de l'appareil, veuillez contacter le vendeur, notre service après-vente agréé le plus proche.
Faites une dernière vérification pour vous assurer que : • Toutes les vis sont bien serrées. • Le joint magnétique adhère bien à l'appareil. • La porte s'ouvre et se ferme correctement. Si la température ambiante est basse (par exemple, en hiver), il se peut que le joint n'adhère pas parfaitement. Dans ce cas, attendez que le joint reprenne sa taille naturelle. Si vous ne voulez pas effectuer personnellement les opérations décrites ci-dessus, contactez le service aprèsvente agréé le plus proche.
C Ha D E E Hc B 10. Mettez en place la grille d'aération (B). 11. Fixez les cache-charnières (E) sur la charnière. 12. Placez l'appareil contre la paroi latérale du meuble de cuisine : a. Desserrez les vis de la pièce (G) et déplacez la pièce (G) jusqu'à la paroi latérale du meuble. b. Serrez de nouveau les vis de la pièce (G). c. Fixez la pièce (H) à la pièce (G). 14. Ouvrez la porte de l'appareil et la porte du meuble de cuisine à un angle de 90°. a. Insérez le petit carré (Hb) dans le guide (Ha).
Si la température ambiante est basse (par exemple, en hiver), la taille du joint diminue. La taille du joint augmente lorsque la température ambiante augmente. Hb Hd Faites une dernière vérification pour vous assurer que : • Toutes les vis sont bien serrées. • La bande d'étanchéité magnétique est solidement fixée au meuble. EN MATIÈRE DE PROTECTION DE L'ENVIRONNEMENT Recyclez les matériaux portant le symbole . Déposez les emballages dans les conteneurs prévus à cet effet.
Inhaltsverzeichnis Sicherheitsinformationen Sicherheitsanweisungen Betrieb Täglicher Gebrauch Tipps und Hinweise 27 28 29 30 31 Reinigung und Pflege Fehlersuche Technische Daten Montage 32 33 35 35 Änderungen vorbehalten. Sicherheitsinformationen Lesen Sie vor der Montage und dem Gebrauch des Geräts zuerst die Gebrauchsanleitung. Der Hersteller übernimmt keine Verantwortung für Verletzungen und Beschädigungen durch unsachgemäße Montage. Bewahren Sie die Gebrauchsanleitung griffbereit auf.
• • • • • • Beschädigen Sie nicht den Kältekreislauf. Betreiben Sie in den Lebensmittelfächern des Geräts keine anderen als die vom Hersteller empfohlenen Elektrogeräte. Reinigen Sie das Gerät nicht mit einem Wasser- oder Dampfstrahl. Reinigen Sie das Gerät mit einem weichen, feuchten Tuch. Verwenden Sie ausschließlich Neutralreiniger. Benutzen Sie keine Scheuermittel, scheuernde Reinigungsschwämmchen, Lösungsmittel oder Metallgegenstände.
Verwendung WARNUNG! Es besteht Verletzungs-, Verbrennungs-, Stromschlag- und Brandgefahr. • • • • • • • • • • • • Nehmen Sie keine technischen Änderungen am Gerät vor. Stellen Sie keine elektrischen Geräte (z. B. Eisbereiter) in das Gerät, wenn solche Geräte nicht ausdrücklich vom Hersteller für diesen Zweck zugelassen sind. Achten Sie darauf, den Kältekreislauf nicht zu beschädigen. Er enthält Isobutan (R600a), ein Erdgas mit einem hohen Grad an Umweltverträglichkeit. Dieses Gas ist brennbar.
1. 2. Drehen Sie den Temperaturregler auf eine niedrigere Einstellung, um die minimal mögliche Kühlung zu erreichen. Drehen Sie den Temperaturregler auf eine höhere Einstellung, um die maximal mögliche Kühlung zu erreichen. ACHTUNG! Ist die Umgebungstemperatur hoch oder das Gerät voll beladen, dieses aber auf die niedrigste Temperatur eingestellt, so kann es bei andauerndem Betrieb des Geräts an der Rückwand zu Frostbildung kommen.
Lagern von gefrorenen Lebensmitteln Lassen Sie das Gerät vor der ersten Inbetriebnahme oder nach einer Zeit, in der das Gerät nicht benutzt wurde, mindestens 2 Stunden lang mit höherer Einstellung laufen, bevor Sie Lebensmittel in das Gefrierfach legen.
• • Flaschen: Sie sollten mit Deckel in der Flaschenablage in der Tür oder im Flaschenhalter (falls vorhanden) aufbewahrt werden. Bananen, Kartoffeln, Zwiebeln und Knoblauch sollten im Kühlschrank nicht unverpackt aufbewahrt werden. • • Hinweise zum Einfrieren Im Folgenden finden Sie einige wertvolle Tipps für einen optimalen Gefriervorgang: • • • • • • Die maximale Menge an Lebensmitteln, die in 24 Stunden eingefroren werden kann, ist auf dem Typenschild angegeben.
• • • Stillstandszeiten Bei längerem Stillstand des Geräts müssen Sie folgende Vorkehrungen treffen: • Alle Lebensmittel entnehmen Tauen Sie das Gerät ab (sofern vorgesehen) und reinigen Sie den Innenraum sowie das gesamte Zubehör. Lassen Sie die Tür(en) offen, um das Entstehen unangenehmer Gerüche zu vermeiden.
Problem Abhilfe Die Tür ist nicht richtig geschlossen. Siehe „Schließen der Tür“. Die Tür ist nicht richtig geschlossen oder die Dichtung hat sich verformt/ist verschmutzt. Siehe „Schließen der Tür“. Der Wasserablaufstopfen sitzt nicht richtig. Setzen Sie den Wasserablaufstopfen richtig ein. Die Lebensmittel sind nicht richtig verpackt. Verpacken Sie die Lebensmittel richtig. Die Temperatur ist nicht richtig eingestellt. Siehe Kapitel „Betrieb“.
3. Bitte wenden Sie sich an den nächsten autorisierten Kundendienst, wenn alle genannten Abhilfemaßnahmen nicht zum gewünschten Erfolg führen. Austauschen der Lampe Ziehen Sie den Netzstecker aus der Steckdose. 1. 2. Lösen Sie die Schraube an der Lampenabdeckung. Nehmen Sie die Lampenabdeckung ab (siehe hierzu die Abbildung).
Wechseln des Türanschlags Klimaklasse Umgebungstemperatur ST +16 °C bis +38 °C T +16 °C bis +43 °C Bei einigen Modellen können Funktionsstörungen auftreten, wenn sie außerhalb dieses Temperaturbereichs betrieben werden. Der ordnungsgemäße Betrieb wird nur innerhalb des angegebenen Temperaturbereichs gewährleistet. Bei Fragen zum Aufstellungsort des Geräts wenden Sie sich an den Verkäufer, unseren Kundendienst oder nächstgelegenen autorisierten Service-Partner.
Führen Sie eine Endkontrolle durch, um sicherzustellen, dass: • Alle Schrauben fest angezogen sind; • Die Magnetdichtung am Gerät anliegt. • Die Tür ordnungsgemäß öffnet und schließt. Bei niedrigen Umgebungstemperaturen (z. B. im Winter) kann es vorkommen, dass die Türdichtung nicht richtig am Gerät anliegt. Warten Sie in diesem Fall ab, bis sich die Dichtung allmählich anpasst.
C Ha D E E Hc B 10. Bauen Sie das Belüftungsgitter (B) ein. 11. Stecken Sie die Scharnierabdeckungen (E) auf das Scharnier auf. 12. Schließen Sie das Gerät seitlich wie folgt an das Küchenmöbel an: a. Lösen Sie die Schrauben von Teil (G) und verschieben Sie Teil (G) zur KüchenmöbelSeitenwand. b. Ziehen Sie die Schrauben vom Teil (G) erneut fest. c. Befestigen Sie Teil (H) am Teil (G). 14. Öffnen Sie die Gerätetür und die Möbeltüre in einem Winkel von 90°. a.
Bei niedriger Umgebungstemperatur (zum Beispiel im Winter) schrumpft die Dichtung. Bei höherer Umgebungstemperatur dehnt sich die Dichtung aus. Hb Hd Führen Sie eine Endkontrolle durch, um sicherzustellen, dass: • Alle Schrauben fest angezogen sind. • Der magnetische Dichtungsstreifen fest am Gerät anliegt. UMWELTTIPPS nicht mit dem Hausmüll. Bringen Sie das Gerät zu Ihrer örtlichen Sammelstelle oder wenden Sie sich an Ihr Gemeindeamt. Recyceln Sie Materialien mit dem Symbol .
www.electrolux.