
Operating Instructions
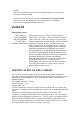
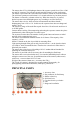
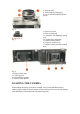
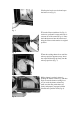
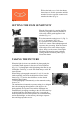
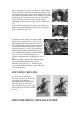
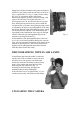
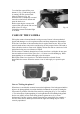

Fig. 9
5Close the back cover. Cock the shutter,
then release it. Do this operation until the
number 36 on the exposure counter scale
matches the index (Fig. 9).
SETTING THE FILM SENSITIVITY
Fig. 11
1Set the film sensitivity, rotating the film
sensitivity ring until necessary number of
ASA units or DIN grades appears in the
window (Fig. 11).
Fig. 10
2 Set the automatic setting lever 13 (Fig. 3)
at "A" or "Automatic" (Fig. 10).
It is possible to take pictures with the
"Zorki-10" camera without diaphragm and
exposure time presetting. Point the camera
at the subject to be taken. Observing the
object, bring it to the center of the bright-
line frame and pressing gently (without
jerking) shutter release key until it goes,
release the shutter.
TAKING THE PICTURE
When the light levels are not suitable for photography the
viewfinder needle appears in the zone of red-colored line
(Fig. 12). To photograph at this light change the film for one
with higher sensitivity, or work with flash-lamp or with "B"
time exposure.
Fig. 12
When taking a photograph at around 1.5 m (5 ft.) use the
inside markings just inside the bright-line frame (small
frame) (Fig. 13), and at other distances use the outside
markings (large frame).
To take photographs automatically set the automatic setting
lever at "A".
The mechanism of automatic exposure setting is so designed
that, when changing the brightness of the object to be
photographed, the exposure time and the diaphragm are
simultaneously changing according to the set film sensitivity.
At bright light after the shutter release key is pressed the
short exposure time and small aperture are set automatically,
and in subdued light, on the contrary, the longer exposure
time and larger aperture are set.
Fig. 13