
User manual


¾ When creating your own startup image, use with sharp outline and sharp contrast to achieve
better results
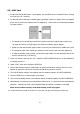
¾ There are three commands that allow you to rotate (
), enlarge (
), and shrink ( )
the loaded image before updating the PHOTO HARDDISK
4. To change the 2nd menu language in PHOTO HARDDISK, checkbox “Sub language” and select the
one you need from the drop down list.
5. After making all the selections and settings, choose the drive you want to apply these settings from
the “Drive” selection list at the bottom of the utility window. This is only necessary when there are
more than one PHOTO HARDDISK connected to the computer. If there is only one PHOTO
HARDDISK connected to the computer, the utility program will find it automatically and there will be
only one drive available. Press the “Update” button and the new settings will be transferred to the
PHOTO HARDDISK.
6. Wait until the computer screen displays “New settings have been transferred…” message, and then
“Safely Remove” the PHOTO HARDDISK from the computer, and then disconnect PHOTO HARDDISK
from the computer.
7. Press the POWER key to turn the PHOTO HARDDISK on. The PHOTO HARDDISK will turn on and
displaying “Updating…” on the screen. Do not press any key at this time. Once the update is
complete, the unit will turn off automatically. You may need to wait for up to two minutes for the
update to complete.
8. When you turn on the PHOTO HARDDISK again, you will be able to use PHOTO HARDDISK with new
settings.
16