DMA-1000 Series Digital Media Adapter User’s Guide Version 1.00 3/2007 Edition 2 www.zyxel.
About This User's Guide About This User's Guide Intended Audience This manual is intended for people who want to use and configure the DMA-1000 or DMA1000W. You should have at least basic computer usage knowledge. Related Documentation • Quick Start Guide The Quick Start Guide is designed to help you get up and running right away. It contains information on setting up your network and configuring for Internet access. • Supporting Disk Refer to the included CD for software and support documents.
Document Conventions Document Conventions Warnings and Notes These are how warnings and notes are shown in this User’s Guide. 1 " Warnings tell you about things that could harm you or your device. Notes tell you other important information (for example, other things you may need to configure or helpful tips) or recommendations. Syntax Conventions • Both the DMA-1000 and DMA-1000W may be referred to as the “DMA”, the “device”, the “system” or the “product” in this User’s Guide.
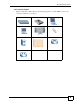
Document Conventions Icons Used in Figures Figures in this User’s Guide may use the following generic icons. The DMA icon is not an exact representation of your device.
Safety Warnings Safety Warnings 1 For your safety, be sure to read and follow all warning notices and instructions. • Do NOT use this product near water, for example, in a wet basement or near a swimming pool. • Do NOT expose your device to dampness, dust or corrosive liquids. • Do NOT store things on the device. • Do NOT install, use, or service this device during a thunderstorm. There is a remote risk of electric shock from lightning. • Connect ONLY suitable accessories to the device.
Safety Warnings DMA-1000 Series User’s Guide 7
Safety Warnings 8 DMA-1000 Series User’s Guide
Contents Overview Contents Overview Introducing the DMA .................................................................................................................. 21 Using the Remote Control ......................................................................................................... 25 DMA Menus ............................................................................................................................... 27 Favorites (Playlists) ........................................
Contents Overview 10 DMA-1000 Series User’s Guide
Table of Contents Table of Contents About This User's Guide .......................................................................................................... 3 Document Conventions............................................................................................................ 4 Safety Warnings........................................................................................................................ 6 Contents Overview .......................................................
Table of Contents 4.2 Using the TOOL Menu in the Favorites Folder .................................................................... 35 4.2.1 Keyboard Input ........................................................................................................... 36 4.2.2 Favorites Folders ....................................................................................................... 36 4.2.3 Editing Favorites Folders ..............................................................................
Table of Contents 9.10 Audio Settings ................................................................................................................... 62 9.10.1 Audio Formats .......................................................................................................... 64 9.11 Language Settings ............................................................................................................. 64 9.12 Settings For Ease of Use .........................................................
Table of Contents 14 DMA-1000 Series User’s Guide
List of Figures List of Figures Figure 1 DMA with USB ......................................................................................................................... 21 Figure 2 DMA with Media Servers ......................................................................................................... 22 Figure 3 Podcasts .................................................................................................................................. 22 Figure 4 LEDs .........................
List of Figures Figure 39 OPTION > Device Information ............................................................................................... 69 Figure 40 Media Server Tool Icon ......................................................................................................... 72 Figure 41 Wall-mounting Example .......................................................................................................... 86 Figure 42 Masonry Plug and M4 Tap Screw ..................................
List of Figures Figure 82 Library ..................................................................................................................................117 Figure 83 Media Sharing .......................................................................................................................118 Figure 84 Network and Sharing Center .................................................................................................
List of Figures 18 DMA-1000 Series User’s Guide
List of Tables List of Tables Table 1 LEDs ......................................................................................................................................... 23 Table 2 HOME Menu ............................................................................................................................. 27 Table 3 Menus Summary ....................................................................................................................... 28 Table 4 Main Menu Description .....
List of Tables Table 39 Maximum Host Numbers ...................................................................................................... 125 Table 40 Alternative Subnet Mask Notation ......................................................................................... 125 Table 41 Subnet 1 ................................................................................................................................ 127 Table 42 Subnet 2 ......................................................
CHAPTER 1 Introducing the DMA This chapter introduces the main applications and features of the DMA. See the Quick Start Guide for instructions on connecting the DMA. 1.1 Overview The DMA plays digital audio, video and photo files on your television (instead of your computer monitor). The DMA has an HDMI (High Definition Multimedia Interface) for high quality digital video and audio output.
Chapter 1 Introducing the DMA Figure 2 DMA with Media Servers NSA-220 B DMA A 1.1.3 Play Podcasts The DMA can play podcast audio files. Podcasting is a way of publishing audio files through the Internet using feeds. You can play the content on your computer or a mobile device (like an MP3 player). Place the DMA behind a firewall and/or IDP (Intrusion Detection and Prevention) device to protect it from attacks from the Internet. Figure 3 Podcasts DMA 1.
Chapter 1 Introducing the DMA The following table describes the DMA LEDs. Table 1 LEDs LED COLOR STATUS DESCRIPTION STATUS Orange On The DMA is receiving power and in operation mode (on). Green On The DMA is receiving power and in standby mode (off). Off The DMA is not receiving power. PLAY LAN WLAN (DMA1000W only) USB Green Green Green Green DMA-1000 Series User’s Guide Blinking The DMA is playing a file. Off The DMA is not playing a file.
Chapter 1 Introducing the DMA 24 DMA-1000 Series User’s Guide
CHAPTER 2 Using the Remote Control This chapter describes how to use the remote control to configure and use the DMA. 2.1 Using the Remote Control Use the remote control to navigate the menus, play files and configure the DMA. The following figure describes the function of each button on the remote control. Point the remote control at the front of the DMA.
Chapter 2 Using the Remote Control Figure 5 Remote Control Power turns the DMA off and on. HOME return to the main menu. Use the 0~9, CLEAR and INPUT buttons to input numbers (like for individual scenes or times). MUTE turns off the sound. VOLUME up/down adjust the volume. PAGE up/down scroll up or down a list to the previous or next page. AUDIO switches audio output between left, right and stereo speakers. A-B lets you select start and stop times to repeat an interval.
CHAPTER 3 DMA Menus This chapter introduces the DMA’s menus and how to navigate them. 3.1 Menus Overview The DMA uses menus that display on your television screen. The HOME menu is the first menu you see when you turn on the DMA. Figure 6 HOME Menu A B This table describes the HOME menu. Table 2 HOME Menu AREA DESCRIPTION A Select the menu that you want to use (Table 3 on page 28 lists the main menus). B This is the number of media servers the DMA has detected.
Chapter 3 DMA Menus 3.2 Menu Navigation Use the remote control’s OK, BACK and arrow buttons to go through the menus, configure the DMA and play your files. " Use the remote control’s arrow and OK buttons to select fields and field options. 3.3 Menus Summary These are the DMA’s main menus. Table 3 Menus Summary MENU DESCRIPTION SERVER Select a media server with content files that you want to play. See Chapter 5 on page 39 for details. MUSIC Contains music files on the media server you are accessing.
Chapter 3 DMA Menus Figure 7 Main Menu Description A C B This table describes the main VIDEO menu. Table 4 Main Menu Description AREA DESCRIPTION A List of the file folders. The currently selected item is white. The arrows show that you can move up or down in the menu. The DMA categorizes files into album, artist and genre folders according to the information stored in your files. Files may not appear in the proper folders if they have missing, incorrect or incomplete information.
Chapter 3 DMA Menus Figure 8 File Folder Menu Description B A This table describes the main VIDEO menu. Table 5 File Folder Menu Description AREA DESCRIPTION A Details about the currently selected file. TITLE - The name of the file. ALBUM - Which album the file belongs to. DATE - The date the file was created (or last modified). DURATION - The play time of the file in hours:minutes:seconds. SERVER - The name of the media server where the file is located.
Chapter 3 DMA Menus Table 6 Album > TOOL Menu LABEL DESCRIPTION Filtering Use the filter to search for files by title (or part of a title). After you select this option and select OK, the on-screen keyboard displays (see Figure 13 on page 36). Use the on-screen keyboard to specify up to 16 characters of text that you want to search for in the file titles. Slideshow Settings Use this to configure how the slideshow changes from one photo file to the next and how long it displays each photo file.
Chapter 3 DMA Menus Figure 10 VIDEO Menu 3 Use the remote control’s arrow and OK buttons to select the All Videos folder. Figure 11 VIDEO > All Videos 4 Use the remote’s arrow and OK buttons to select and play a video file. • During playback, use the remote control’s buttons for fast forward, reverse and pause. • Press the remote control’s INFO button to display information on the screen as shown in the following figure.
Chapter 3 DMA Menus Figure 12 VIDEO Playback Information Example B A CD E The following table describes the information you can display during video playback. Table 7 VIDEO Playback Information AREA DESCRIPTION A Current function. B Elapsed time. C Audio (Left, Right or Stereo). D The A-B function lets you repeat a certain section of a video or music file. This can be useful for language learners wanting to repeat a particular word or phrase. See Section 3.5.1 on page 33 for an example.
Chapter 3 DMA Menus 3.5.2 Using the TOOL Menu During Video Playback While a video file is playing, press the remote control’s TOOL button to open the TOOL menu. The following table describes the options in this menu. Table 8 Video Playback TOOL Menu LABEL DESCRIPTION Add Favorite Use this to add the video to a favorite videos list (which you can use as a playlist).
CHAPTER 4 Favorites (Playlists) This chapter introduces the DMA’s favorites feature. 4.1 Favorites (Playlists) Introduction You can have the DMA play all of the files in a favorites folder. This is also known as a playlist. • See Section Table 8 on page 34 for how to add files to favorites folders. • See Section Table 13 on page 49 for how to select a favorites folder to use as the music during a slide show. 4.2 Using the TOOL Menu in the Favorites Folder Use the TOOL menu to edit the playlists.
Chapter 4 Favorites (Playlists) 4.2.1 Keyboard Input When you use the Change Name option, you use an on-screen keyboard to edit the name. Figure 13 Keyboard Input The following table describes the options in this menu. Table 10 Keyboard Input TOOL MENU DESCRIPTION Favorite Name This is the playlist name that you are editing. Use the fields below to edit the name in this field. Number Select this to change the text input mode to numbers. A check mark displays next to the selected input mode.
Chapter 4 Favorites (Playlists) • Press Play to start playing the play list. • Select a file and press OK to play the individual file. 4.2.3 Editing Favorites Folders Use the TOOL menu to edit an individual favorites folder (playlist). Press the remote’s TOOL button to open the TOOL menu. Figure 14 Favorite > TOOL Menu TOOL MENU Change View Move Remove from Favorites Slideshow Settings Detailed Information View Current Slideshow Music Back The following table describes the options in this menu.
Chapter 4 Favorites (Playlists) 38 DMA-1000 Series User’s Guide
CHAPTER 5 SERVER Menu This chapter covers how to use the SERVER menu. 5.1 Accessing the SERVER Menu If you have content files stored on more than one media server, use the SERVER menu to select the one you want to use. To open the SERVER menu: • Press the SERVER button on the remote control. or • From the HOME menu, use the remote control’s arrow and OK buttons to select the SERVER icon. Figure 15 SERVER Icon 5.
Chapter 5 SERVER Menu Figure 16 SERVER Menu Use the remote control to navigate to the files you want to play (or use the main menus to do so).
CHAPTER 6 USB Menu This chapter covers how to use the USB menu. 6.1 USB Menu Use the USB menu to browse the contents stored on a USB device connected to the DMA. To open the USB menu: • Press the USB button on the remote control. or • Use the arrow and OK buttons to select the USB icon in the HOME menu. Figure 17 USB Icon The USB menu displays your USB devices. Select a USB device to browse through its folders for files to play.
Chapter 6 USB Menu Figure 18 USB Menu 42 DMA-1000 Series User’s Guide
CHAPTER 7 MUSIC Menu This chapter covers how to use the MUSIC menus. 7.1 MUSIC Menu The DMA automatically arranges the music files on the media server into folders in the MUSIC menu. Use the MUSIC menu to select music files to play. To open the MUSIC menu, press the MUSIC button on the remote control or use the arrow and OK buttons to select the MUSIC icon in the HOME screen.
Chapter 7 MUSIC Menu Figure 20 MUSIC Menu Playing music files is similar to playing video files (see Section 3.5 on page 31 for an example of how to play a video file). One key difference is that you can play music files while you use the DMA’s menus or play photo files or slideshows (use the TOOL menu and the View Current Slideshow Music option to identify a music file that is playing). 7.2 Podcast (RSS) Podcasting is a way of publishing frequently updated audio files on the Internet.
Chapter 7 MUSIC Menu 7.3 Podcast Menu Go to the Podcast menu within the MUSIC menu and press the remote control’s TOOL button to open the TOOL menu. Use this menu to configure podcast and slideshow settings. The following table describes the items related to podcast settings. See Table 12 MUSIC > Podcast Menu > TOOL Menu TOOL MENU DESCRIPTION Import You can use your computer to save a song list from the iTunes Podcast website to your USB memory stick.
Chapter 7 MUSIC Menu 46 DMA-1000 Series User’s Guide
CHAPTER 8 PHOTO Menu This chapter tells how to go to and use the PHOTO menu. 8.1 PHOTO Menu The DMA automatically arranges the photo files on the media server into folders in the PHOTO menu. Use the PHOTO menu to select photo files to view. To open the PHOTO menu, press the PHOTO button on the remote control or use the arrow and OK buttons to select the PHOTO icon in the HOME screen.
Chapter 8 PHOTO Menu Figure 23 PHOTO Menu 8.2 Organizing Your Photos The DMA automatically organizes your files by album according to their filenames and the folders in which they are stored. • You can use your computer to arrange your photo files in folders to make them easier to browse. • You can also use the TOOL menu to add photo files to favorites folders in the DMA to make them easier to find (see Section 8.3.1 on page 49 for details). 8.
Chapter 8 PHOTO Menu 8.3.1 Configuring Slideshow Settings During a slideshow, press the remote’s TOOL button to open the TOOL menu to configure the slideshow’s settings. The following table describes the options in this menu. Table 13 MUSIC Menu > TOOL Menu LABEL DESCRIPTION Add Favorite Use this to add the photo to a favorite photos list. Note: After adding to or editing a favorites list, use the remote control’s Power button to turn the DMA off and back on to save your change.
Chapter 8 PHOTO Menu 50 DMA-1000 Series User’s Guide
CHAPTER 9 Configuring the DMA This chapter explains how you use the remote control to configure the DMA. 9.1 Accessing the OPTION Menu Use the OPTION menu to configure the DMA. Figure 24 OPTION Icon 1 To open the OPTION menu, press the OPTION button on the remote control or use the arrow and OK buttons to select the OPTION icon in the HOME screen. Figure 25 OPTION Menu 2 Use the remote’s arrow and OK buttons to select an option sub-menu to configure.
Chapter 9 Configuring the DMA 9.2 Network Settings The DMA needs an IP address to communicate with the media servers on your network. The DMA can get an IP address automatically if you have a device on your network that gives them out. Or you can assign the DMA a static (fixed) IP address. 9.2.1 DNS Server Address A DNS (Domain Name System) server maps domain names (like www.zyxel.com) to their corresponding IP addresses (204.217.0.2 in the case of www.zyxel.com).
Chapter 9 Configuring the DMA Figure 26 OPTION > Network Settings • Select Wired LAN Settings to configure the DMA’s wired LAN settings (see Section 9.4 on page 53). • Select Wireless LAN Settings to configure the DMA’s wireless LAN settings (see Section 9.7 on page 55). " The DMA-1000W can use either a wired LAN connection or a wireless LAN connection, but only one at a time. 9.4 Wired LAN Settings Use this menu to configure the DMA’s wired LAN settings.
Chapter 9 Configuring the DMA Figure 27 OPTION > Network Settings > Wired LAN Settings The following table describes the fields in this menu. Table 14 OPTION > Network Settings 54 LABEL DESCRIPTION Get IP Address Use the arrow and OK buttons to select this field. Then use the arrow and OK buttons to select an option. Select YES to have the DMA get IP address information automatically. If no IP address information is assigned, the DMA uses Auto-IP to assign itself an IP address and subnet mask.
Chapter 9 Configuring the DMA 9.5 Station Mode The DMA-1000W acts as a wireless LAN client. You can either set the network type to Infrastructure and connect to an Access Point (AP) or use Ad-Hoc mode and connect to another wireless device in Ad-Hoc mode (like a computer with a wireless client) without an AP. See Section 9.7.0.2 on page 57 for how to configure the network type. The DMA can connect to your computers on the wired network through an Access Point (AP). This is called Infrastructure mode.
Chapter 9 Configuring the DMA Figure 30 OPTION > Network Settings > Wireless LAN Settings • Select Scan for wireless LANs to have the DMA scan for available wireless networks (see Section 9.4 on page 53). • Select Manual Configuration to manually enter the wireless LAN network settings (see Section 9.4 on page 53).
Chapter 9 Configuring the DMA The Wireless LAN Settings Menu displays after you select a wireless LAN, enter any security settings that the network uses (see Section 9.7.0.2 on page 57). 9.7.0.2 Wireless LAN Settings Your DMA is a wireless LAN client. Use this menu to manually configure your wireless LAN settings. Figure 32 OPTION > Network Settings > Wireless LAN Settings The following table describes the fields in this menu.
Chapter 9 Configuring the DMA Table 15 OPTION > Network Settings > Wireless LAN Settings (continued) LABEL DESCRIPTION Cryptography Key The DMA uses a WEP key to encrypt data. All the devices on the wireless LAN must use the same WEP key for data transmission. Your DMA allows you to configure up to four 64-bit or 128-bit WEP keys. Only one key is used as the default key at any one time. The default key is key 1.
Chapter 9 Configuring the DMA 2 The first wizard screen displays. Click Next in each screen to continue. 3 Select Set up a new wireless network to configure a new wireless network. 4 In the Network name (SSID) field, specify a unique name to identify your wireless LAN. 5 Select Automatically assign a network key to have Windows create a security key.
Chapter 9 Configuring the DMA 6 Select Use a USB Flash drive to set up a wireless network. 7 Connect the USB memory stick to your computer’s USB port. 8 This screen appears after your wireless settings are saved on the USB stick. • Remove the USB stick from your computer and insert it in the DMA’s USB port. • Go to the Wireless LAN settings menu and select Windows Connect Now (see Section Figure 30 on page 56).
Chapter 9 Configuring the DMA 9 This screen displays when you have successfully set up a secure wireless network. Click Finish. 9.8 Video Modes The DMA supports 480i, 480p, 720p and 1080i video modes. 720p and 1080i are high definition television modes. 480i is used with most standard definition televisions. The number (“1080” for instance) stands for the number of lines of vertical resolution. The letter “i” stands for interlaced scan. The letter “p” stands for progressive scan.
Chapter 9 Configuring the DMA The following table describes the fields in this menu. Table 16 OPTION > TV Settings LABEL DESCRIPTION Output Type Select Digital if your television accepts digital input. Select Analog if your television only accepts analog input. Screen Size Select 16:9 if your television supports the 16:9 format (widescreen). Select 4:3 if your television supports the 4:3 format (traditional television). Resolution Select a video mode.
Chapter 9 Configuring the DMA Figure 34 OPTION > Audio Output Settings The following table describes the fields in this menu. Table 17 OPTION > Audio Output Settings LABEL DESCRIPTION Analog Output The DMA sends two channel (also called left and right or stereo) audio output through the LEFT and RIGHT audio connectors for music files. S/PDIF Output Use this column to turn the S/PDIF connector’s output (the DMA’s digital output) on or off for individual audio formats.
Chapter 9 Configuring the DMA 9.10.1 Audio Formats This section provides background information on audio formats mentioned in the previous section. 9.10.1.1 S/PDIF S/PDIF (Sony/Philips Digital Interface Format) is also IEC 958 type II, part of IEC-60958. S/ PDIF is a collection of low-level protocol and hardware specifications for carrying digital audio signals between devices and stereo equipment. 9.10.1.2 AAC AAC (Advanced Audio Coding) is a standardized digital audio compression method.
Chapter 9 Configuring the DMA Figure 35 OPTION > Language Settings The following table describes the fields in this menu. Table 18 OPTION > Language Settings LABEL DESCRIPTION Language Settings Select the language that you want the DMA menus to use. A check mark appears next to the current display language. OK Select this to save your changes back to the DMA. CANCEL Select this to exit this screen without saving your changes. 9.
Chapter 9 Configuring the DMA Figure 36 OPTION > Settings for Ease of Use The following table describes the fields in this menu. Table 19 OPTION > Settings for Ease of Use LABEL DESCRIPTION Connect to last accessed server automatically When the DMA starts up, this option has it automatically connect to the media server that you last used. A check mark appears next to the option if it is selected.
Chapter 9 Configuring the DMA Figure 37 OPTION > Reset Settings The following table describes the fields in this menu. Table 20 OPTION > Reset Settings LABEL DESCRIPTION RESET Select this to restore all of the DMA’s settings to the factory defaults. CANCEL Select this to exit this screen without saving your changes. 9.14 Software Update Use this menu to upload new software to the DMA. 1 Only use software for your device’s specific model. Refer to the label on the bottom of your DMA.
Chapter 9 Configuring the DMA Figure 38 OPTION > Software Update The following table describes the fields in this menu. Table 21 OPTION > Software Update LABEL DESCRIPTION Update over Internet Select this option and follow the on-screen instructions to have the DMA check for and download new software from a server. The DMA must be connected to the Internet in order to do this. A check mark appears next to the option if it is selected.
Chapter 9 Configuring the DMA Figure 39 OPTION > Device Information The following table describes the fields in this menu. Table 22 OPTION > Device Information LABEL DESCRIPTION Device Name This is the name of the series to which your device belongs. Version This is the version of the software currently on the DMA. See Section 9.14 on page 67 for how to update software when there is a new version. Wired LAN MAC Address This field displays the MAC address of the DMA’s wired Ethernet interface.
Chapter 9 Configuring the DMA 70 DMA-1000 Series User’s Guide
CHAPTER 10 Media Server Software This chapter introduces the media server software included on the CD. 10.1 Media Server Introduction The DMA can play files on DLNA (Digital Living Network Alliance) compliant media servers. The DLNA is a group of leading personal computer and electronics companies that works to make products compatible and able to work in a home network in order to make digital living easy and seamless.
Chapter 10 Media Server Software Figure 40 Media Server Tool Icon 10.3 Configuring the Media Server Software Refer to the Quick Start Guide and the help (Start > All Programs > DigiOn > Help) for details on how to configure and use the media server software.
CHAPTER 11 Troubleshooting This chapter offers some suggestions to solve problems you might encounter. The potential problems are divided into the following categories. • Power, Hardware Connections, and LEDs • DMA Usage 11.1 Power, Hardware Connections, and LEDs V None of the LEDs turn on. 1 Make sure the DMA is turned on. 2 Make sure you are using the power adaptor or cord included with the DMA.
Chapter 11 Troubleshooting 11.2 DMA Usage V I cannot see the DMA menus on the television screen. 1 Check the hardware connections, and make sure the LEDs are behaving as expected. See the Quick Start Guide and Section 11.1 on page 73. 2 Make sure your Internet browser does not block pop-up windows and has JavaScripts and Java enabled. See Section 11.1 on page 73. 3 Make sure your television is set to display the DMA’s input.
Chapter 11 Troubleshooting The media server installation wizard can automatically configure the Windows XP firewall. See the media server help (Start > All Programs > DigiOn > Help) for instructions on how to manually configure the Windows XP firewall. You need to configure any other software firewalls (like ZoneAlarm for example). Your software firewall may automatically prompt you when it detects the DMA’s access attempts and give you the option to allow or deny access.
Chapter 11 Troubleshooting V Some of my photo files do not display thumbnails. Some files do not support thumbnails and thus will not display them. V I cannot see the files on my USB device. 1 Make sure you have the USB device properly connected to the USB port. See the Quick Start Guide for details. 2 Files with unsupported formats or codecs may not play or may not play properly. See Section on page 81 for details on the supported file formats and codecs.
Chapter 11 Troubleshooting V The content playback does not fill my television screen. 1 Check the DMA’s video output settings (see Section 9.9 on page 61). 2 The content may be a different format from your television. For example, a 4:3 format video file will not fill the width of a 16:9 (widescreen) format television. V The audio on my 5.1 channel speakers does not sound right or I only hear audio from my rear left and right speakers. When the DMA plays 5.
Chapter 11 Troubleshooting 78 DMA-1000 Series User’s Guide
APPENDIX A Product Specifications General Specifications The following tables summarize the DMA’s hardware and software features. Table 23 Hardware Specifications Dimensions (W x D x H) 190 x 130 x 33 mm Device Weight 0.4 kg Power Specification 5 V DC 2 A Ethernet Port Auto-negotiating: 10 Mbps or 100 Mbps in either half-duplex or full-duplex mode. Television Connectors HDMI S-Video Right/Left RCA connectors S/PDIF coaxial RCA connector Remote Control Recommended operating range up to 5 m.
Appendix A Product Specifications Table 24 Software Specifications FEATURE DESCRIPTION Default IP Address DHCP client. If no DHCP server is found, the DMA uses Auto-IP to choose an IP address in the 169.254.X.X subnet (where X is a number from 1 to 254). Default Subnet Mask DHCP client by default. If no DHCP server is found, the subnet mask defaults to 255.255.255.0 (24 bits). Wireless LAN Standards (DMA-1000W only) IEEE 802.11a, IEEE 802.11b, IEEE 802.
Appendix A Product Specifications Table 25 Standards Supported (continued) STANDARD DESCRIPTION IEEE 802.11 (DMA-1000W only) IEEE 8012.11 denotes a set of Wireless LAN/WLAN standards developed by working group 11 of the IEEE LAN/MAN Standards Committee (IEEE 802). IEEE 802.11b (DMA-1000W only) Uses the 2.4 gigahertz (GHz) band IEEE 802.11g (DMA-1000W only) Uses the 2.4 gigahertz (GHz) band USB 2.0 USB (Universal Serial Bus) version 2.
Appendix A Product Specifications Table 27 MPEG-2 TS/TTS Video File Specifications Extensions The DMA supports the playback of mpeg, mpg, and mpe MPEG-2 TS and TTS video files. The DMA cannot play MPEG-2 TTS files from a USB device. The DMA can play MPEG-2 TTS files shared on a media server that supports them (although the included media server software does not support them).
Appendix A Product Specifications Table 29 AVI Video File Specifications Video Stream XviD, 3ivx Resolution: Maximum 1280 x 720 Audio Stream MPEG-1/2 Layer-III Sample Frequency: Maximum 48 kHz Channels: Maximum 2 Channels Bit rate: VBR/CBR, Maximum 320 kbps AC3 Sample Frequency: Maximum 48 kHz Channels: Maximum 6 Channels Bit rate: Maximum 640 kbps Table 30 MPEG4 Video File Specifications Extensions mp4 Video Stream MPEG-4 ASP Resolution: Maximum 1920 x 1080 Bit rate: VBR/CBR, Maximum 5 mbps Audio
Appendix A Product Specifications Music File Formats Supported Table 33 Music File Specifications 84 TYPE EXTENSIONS DETAILS MP3 mp3 Audio Stream: MPEG-1/2 Layer-III Sample Frequency: Maximum 48 kHz Channels: Maximum 2 Channels Bit rate: VBR/CBR, Maximum 320 kbps ID3 tag: ID3 version 1.x, 2.2, 2.3, 2.4 tags MP3 file ID3 tags provide information like the title, name of the artist, album name, and track number. The USB browse screens can retrieve and display English language ID3 tag information.
Appendix A Product Specifications Photo File Formats Supported Table 34 Photo File Specifications TYPE EXTENSIONS DETAILS JPEG jpg jpeg Maximum Resolution: 67174416 pixels (8196 × 8196) When displaying JPEG images that meet the conditions below, the max resolution is 67108864 pixels (8192 x 8192.) It may get smaller when the following conditions are not met.
Appendix A Product Specifications 5 Align the holes on the back of the DMA with the screws on the wall. Hang the DMA on the screws. Figure 41 Wall-mounting Example The following are dimensions of an M4 tap screw and masonry plug used for wall mounting. All measurements are in millimeters (mm).
Appendix A Product Specifications Cable Pin Assignments Table 35 Ethernet Cable Pin Assignments LAN ETHERNET CABLE PIN LAYOUT Straight-through (Switch) (Adapter) 1 IRD + 1 OTD + 2 IRD - 2 OTD - 3 OTD + 3 IRD + 6 OTD - 6 IRD - Power Adaptor Specifications Table 36 Power Adaptor Specifications AC Power Adaptor Model MU12-2050200-A1 Input Power AC 100~240 Volts/60Hz/0.
Appendix A Product Specifications 88 DMA-1000 Series User’s Guide
APPENDIX B Wireless LANs Wireless LAN Topologies This section discusses ad-hoc and infrastructure wireless LAN topologies. Ad-hoc Wireless LAN Configuration The simplest WLAN configuration is an independent (Ad-hoc) WLAN that connects a set of computers with wireless adapters (A, B, C). Any time two or more wireless adapters are within range of each other, they can set up an independent network, which is commonly referred to as an ad-hoc network or Independent Basic Service Set (IBSS).
Appendix B Wireless LANs Figure 44 Basic Service Set ESS An Extended Service Set (ESS) consists of a series of overlapping BSSs, each containing an access point, with each access point connected together by a wired network. This wired connection between APs is called a Distribution System (DS). This type of wireless LAN topology is called an Infrastructure WLAN. The Access Points not only provide communication with the wired network but also mediate wireless network traffic in the immediate neighborhood.
Appendix B Wireless LANs Figure 45 Infrastructure WLAN Antenna Overview An antenna couples RF signals onto air. A transmitter within a wireless device sends an RF signal to the antenna, which propagates the signal through the air. The antenna also operates in reverse by capturing RF signals from the air. Positioning the antennas properly increases the range and coverage area of a wireless LAN. Antenna Characteristics Frequency An antenna in the frequency of 2.4GHz (IEEE 802.11b) or 5GHz(IEEE 802.
Appendix B Wireless LANs approximately 2.5%. For an unobstructed outdoor site, each 1dB increase in gain results in a range increase of approximately 5%. Actual results may vary depending on the network environment. Antenna gain is sometimes specified in dBi, which is how much the antenna increases the signal power compared to using an isotropic antenna. An isotropic antenna is a theoretical perfect antenna that sends out radio signals equally well in all directions.
APPENDIX C Setting up Your Computer’s IP Address All computers must have a 10M or 100M Ethernet adapter card and TCP/IP installed. Windows 95/98/Me/NT/2000/XP, Macintosh OS 7 and later operating systems and all versions of UNIX/LINUX include the software components you need to install and use TCP/ IP on your computer. Windows 3.1 requires the purchase of a third-party TCP/IP application package.
Appendix C Setting up Your Computer’s IP Address Figure 46 WIndows 95/98/Me: Network: Configuration Installing Components The Network window Configuration tab displays a list of installed components. You need a network adapter, the TCP/IP protocol and Client for Microsoft Networks. If you need the adapter: 1 In the Network window, click Add. 2 Select Adapter and then click Add. 3 Select the manufacturer and model of your network adapter and then click OK.
Appendix C Setting up Your Computer’s IP Address Configuring 1 In the Network window Configuration tab, select your network adapter's TCP/IP entry and click Properties 2 Click the IP Address tab. • If your IP address is dynamic, select Obtain an IP address automatically. • If you have a static IP address, select Specify an IP address and type your information into the IP Address and Subnet Mask fields. Figure 47 Windows 95/98/Me: TCP/IP Properties: IP Address 3 Click the DNS Configuration tab.
Appendix C Setting up Your Computer’s IP Address Figure 48 Windows 95/98/Me: TCP/IP Properties: DNS Configuration 4 Click the Gateway tab. • If you do not know your gateway’s IP address, remove previously installed gateways. • If you have a gateway IP address, type it in the New gateway field and click Add. 5 Click OK to save and close the TCP/IP Properties window. 6 Click OK to close the Network window. Insert the Windows CD if prompted. 7 Turn on your DMA and restart your computer when prompted.
Appendix C Setting up Your Computer’s IP Address Figure 49 Windows XP: Start Menu 2 In the Control Panel, double-click Network Connections (Network and Dial-up Connections in Windows 2000/NT). Figure 50 Windows XP: Control Panel 3 Right-click Local Area Connection and then click Properties.
Appendix C Setting up Your Computer’s IP Address Figure 51 Windows XP: Control Panel: Network Connections: Properties 4 Select Internet Protocol (TCP/IP) (under the General tab in Win XP) and then click Properties. Figure 52 Windows XP: Local Area Connection Properties 5 The Internet Protocol TCP/IP Properties window opens (the General tab in Windows XP). • If you have a dynamic IP address click Obtain an IP address automatically.
Appendix C Setting up Your Computer’s IP Address Figure 53 Windows XP: Internet Protocol (TCP/IP) Properties 6 If you do not know your gateway's IP address, remove any previously installed gateways in the IP Settings tab and click OK. Do one or more of the following if you want to configure additional IP addresses: • In the IP Settings tab, in IP addresses, click Add. • In TCP/IP Address, type an IP address in IP address and a subnet mask in Subnet mask, and then click Add.
Appendix C Setting up Your Computer’s IP Address Figure 54 Windows XP: Advanced TCP/IP Properties 7 In the Internet Protocol TCP/IP Properties window (the General tab in Windows XP): • Click Obtain DNS server address automatically if you do not know your DNS server IP address(es). • If you know your DNS server IP address(es), click Use the following DNS server addresses, and type them in the Preferred DNS server and Alternate DNS server fields.
Appendix C Setting up Your Computer’s IP Address Figure 55 Windows XP: Internet Protocol (TCP/IP) Properties 8 Click OK to close the Internet Protocol (TCP/IP) Properties window. 9 Click Close (OK in Windows 2000/NT) to close the Local Area Connection Properties window. 10 Close the Network Connections window (Network and Dial-up Connections in Windows 2000/NT). 11 Turn on your DMA and restart your computer (if prompted).
Appendix C Setting up Your Computer’s IP Address Figure 56 Windows Vista: Start Menu 2 In the Control Panel, double-click Network and Internet. Figure 57 Windows Vista: Control Panel 3 Click Network and Sharing Center. Figure 58 Windows Vista: Network And Internet 4 Click Manage network connections.
Appendix C Setting up Your Computer’s IP Address 5 Right-click Local Area Connection and then click Properties. " During this procedure, click Continue whenever Windows displays a screen saying that it needs your permission to continue. Figure 60 Windows Vista: Network and Sharing Center 6 Select Internet Protocol Version 4 (TCP/IPv4) and click Properties.
Appendix C Setting up Your Computer’s IP Address 7 The Internet Protocol Version 4 (TCP/IPv4) Properties window opens (the General tab). • If you have a dynamic IP address click Obtain an IP address automatically. • If you have a static IP address click Use the following IP address and fill in the IP address, Subnet mask, and Default gateway fields. • Click Advanced.
Appendix C Setting up Your Computer’s IP Address Figure 63 Windows Vista: Advanced TCP/IP Properties 9 In the Internet Protocol Version 4 (TCP/IPv4) Properties window, (the General tab): • Click Obtain DNS server address automatically if you do not know your DNS server IP address(es). • If you know your DNS server IP address(es), click Use the following DNS server addresses, and type them in the Preferred DNS server and Alternate DNS server fields.
Appendix C Setting up Your Computer’s IP Address Figure 64 Windows Vista: Internet Protocol Version 4 (TCP/IPv4) Properties 10 Click OK to close the Internet Protocol Version 4 (TCP/IPv4) Properties window. 11 Click Close to close the Local Area Connection Properties window. 12 Close the Network Connections window. 13 Turn on your DMA and restart your computer (if prompted). Verifying Settings 1 Click Start, All Programs, Accessories and then Command Prompt.
Appendix C Setting up Your Computer’s IP Address Figure 65 Macintosh OS 8/9: Apple Menu 2 Select Ethernet built-in from the Connect via list. Figure 66 Macintosh OS 8/9: TCP/IP 3 For dynamically assigned settings, select Using DHCP Server from the Configure: list. 4 For statically assigned settings, do the following: • From the Configure box, select Manually.
Appendix C Setting up Your Computer’s IP Address • Type your IP address in the IP Address box. • Type your subnet mask in the Subnet mask box. • Type the IP address of your DMA in the Router address box. 5 Close the TCP/IP Control Panel. 6 Click Save if prompted, to save changes to your configuration. 7 Turn on your DMA and restart your computer (if prompted). Verifying Settings Check your TCP/IP properties in the TCP/IP Control Panel window.
Appendix C Setting up Your Computer’s IP Address Figure 68 Macintosh OS X: Network 4 For statically assigned settings, do the following: • From the Configure box, select Manually. • Type your IP address in the IP Address box. • Type your subnet mask in the Subnet mask box. • Type the IP address of your DMA in the Router address box. 5 Click Apply Now and close the window. 6 Turn on your DMA and restart your computer (if prompted). Verifying Settings Check your TCP/IP properties in the Network window.
Appendix C Setting up Your Computer’s IP Address " Make sure you are logged in as the root administrator. Using the K Desktop Environment (KDE) Follow the steps below to configure your computer IP address using the KDE. 1 Click the Red Hat button (located on the bottom left corner), select System Setting and click Network. Figure 69 Red Hat 9.0: KDE: Network Configuration: Devices 2 Double-click on the profile of the network card you wish to configure.
Appendix C Setting up Your Computer’s IP Address • If you have a dynamic IP address, click Automatically obtain IP address settings with and select dhcp from the drop down list. • If you have a static IP address, click Statically set IP Addresses and fill in the Address, Subnet mask, and Default Gateway Address fields. 3 Click OK to save the changes and close the Ethernet Device General screen. 4 If you know your DNS server IP address(es), click the DNS tab in the Network Configuration screen.
Appendix C Setting up Your Computer’s IP Address Figure 73 Red Hat 9.0: Dynamic IP Address Setting in ifconfig-eth0 DEVICE=eth0 ONBOOT=yes BOOTPROTO=dhcp USERCTL=no PEERDNS=yes TYPE=Ethernet • If you have a static IP address, enter static in the BOOTPROTO= field. Type IPADDR= followed by the IP address (in dotted decimal notation) and type NETMASK= followed by the subnet mask. The following example shows an example where the static IP address is 192.168.1.10 and the subnet mask is 255.255.255.0.
Appendix C Setting up Your Computer’s IP Address Verifying Settings Enter ifconfig in a terminal screen to check your TCP/IP properties. Figure 77 Red Hat 9.0: Checking TCP/IP Properties [root@localhost]# ifconfig eth0 Link encap:Ethernet HWaddr 00:50:BA:72:5B:44 inet addr:172.23.19.129 Bcast:172.23.19.255 Mask:255.255.255.
Appendix C Setting up Your Computer’s IP Address 114 DMA-1000 Series User’s Guide
APPENDIX D Windows Vista Media Server " This appendix is provided for your information only. The DMA is not Vista certified. Playing Media Files From Your Windows Vista Computer This appendix covers using the media server included in Windows Vista to let the DMA play media files on the computer. This way you do not need to install media server software. In the following figure, the DMA and your Windows Vista computer (A) are both connected to your home network.
Appendix D Windows Vista Media Server 1 Follow the Quick Start Guide Instructions to connect the DMA to your computer. 2 Right-click the Computer icon and click Manage. " During this procedure, click Continue whenever Windows displays a screen saying that it needs your permission to continue. 3 In the following screen, click Services and Applications > Services > Windows Media Player Network Sharing Service > Start.
Appendix D Windows Vista Media Server Figure 80 Start WIndows Media Player 2 Right-click in the menu bar and click Tools > Options. Figure 81 WIndows Media Player Tools> Options 3 In the Library tab, click Configure Sharing. Figure 82 Library 4 Click Networking.
Appendix D Windows Vista Media Server Figure 83 Media Sharing 5 Windows searches for your network connections and displays them in the following window. Click Customize. Figure 84 Network and Sharing Center 6 Select Private and click Next to have the computer trust the network connection to the DMA.
Appendix D Windows Vista Media Server Figure 85 Set Network Location: Customize network settings Setting Your Computer to Share Files With the DMA This section covers how to set Windows Media Player to allow the DMA to play media files. 1 Click View computers and devices on the network. Figure 86 Set Network Location: Successfully set network settings 2 Right-click the DMA icon and click Open Media Sharing.
Appendix D Windows Vista Media Server Figure 87 Network 3 Select Share my media and click OK. Figure 88 Media Sharing 4 Identify the device that the computer should share media files with. Select the DMA icon and click Allow > OK.
Appendix D Windows Vista Media Server Figure 89 Media Sharing: Select DMA Selecting Files to Share This section covers how to select the media files that the DMA is allowed to play. 1 In the Library tab, click Monitor Folders. Figure 90 Library 2 Click Advanced Options.
Appendix D Windows Vista Media Server Figure 91 Add To Library 3 Select the folders to share and click OK when you are done. Figure 92 Add To Library > Advanced 4 Click OK after the computer finds the files to share.
APPENDIX E IP Addresses and Subnetting This appendix introduces IP addresses and subnet masks. IP addresses identify individual devices on a network. Every networking device (including computers, servers, routers, printers, etc.) needs an IP address to communicate across the network. These networking devices are also known as hosts. Subnet masks determine the maximum number of possible hosts on a network. You can also use subnet masks to divide one network into multiple sub-networks.
Appendix E IP Addresses and Subnetting Figure 94 Network Number and Host ID How much of the IP address is the network number and how much is the host ID varies according to the subnet mask. Subnet Masks A subnet mask is used to determine which bits are part of the network number, and which bits are part of the host ID (using a logical AND operation). The term “subnet” is short for “subnetwork”. A subnet mask has 32 bits.
Appendix E IP Addresses and Subnetting Subnet masks are expressed in dotted decimal notation just like IP addresses. The following examples show the binary and decimal notation for 8-bit, 16-bit, 24-bit and 29-bit subnet masks. Table 38 Subnet Masks BINARY DECIMAL 1ST OCTET 2ND OCTET 3RD OCTET 4TH OCTET 8-bit mask 11111111 00000000 00000000 00000000 255.0.0.0 16-bit mask 11111111 11111111 00000000 00000000 255.255.0.0 24-bit mask 11111111 11111111 11111111 00000000 255.255.255.
Appendix E IP Addresses and Subnetting Table 40 Alternative Subnet Mask Notation (continued) SUBNET MASK ALTERNATIVE NOTATION LAST OCTET (BINARY) LAST OCTET (DECIMAL) 255.255.255.192 /26 1100 0000 192 255.255.255.224 /27 1110 0000 224 255.255.255.240 /28 1111 0000 240 255.255.255.248 /29 1111 1000 248 255.255.255.252 /30 1111 1100 252 Subnetting You can use subnetting to divide one network into multiple sub-networks.
Appendix E IP Addresses and Subnetting Figure 96 Subnetting Example: After Subnetting In a 25-bit subnet the host ID has 7 bits, so each sub-network has a maximum of 27 – 2 or 126 possible hosts (a host ID of all zeroes is the subnet’s address itself, all ones is the subnet’s broadcast address). 192.168.1.0 with mask 255.255.255.128 is subnet A itself, and 192.168.1.127 with mask 255.255.255.128 is its broadcast address.
Appendix E IP Addresses and Subnetting Table 42 Subnet 2 IP/SUBNET MASK NETWORK NUMBER LAST OCTET BIT VALUE IP Address 192.168.1. 64 IP Address (Binary) 11000000.10101000.00000001. 01000000 Subnet Mask (Binary) 11111111.11111111.11111111. 11000000 Subnet Address: 192.168.1.64 Lowest Host ID: 192.168.1.65 Broadcast Address: 192.168.1.127 Highest Host ID: 192.168.1.126 Table 43 Subnet 3 IP/SUBNET MASK NETWORK NUMBER LAST OCTET BIT VALUE IP Address 192.168.1.
Appendix E IP Addresses and Subnetting Table 45 Eight Subnets (continued) SUBNET SUBNET ADDRESS FIRST ADDRESS LAST ADDRESS BROADCAST ADDRESS 5 128 129 158 159 6 160 161 190 191 7 192 193 222 223 8 224 225 254 255 Subnet Planning The following table is a summary for subnet planning on a network with a 24-bit network number. Table 46 24-bit Network Number Subnet Planning NO. “BORROWED” HOST BITS SUBNET MASK NO. SUBNETS NO. HOSTS PER SUBNET 1 255.255.255.
Appendix E IP Addresses and Subnetting Table 47 16-bit Network Number Subnet Planning (continued) NO. “BORROWED” HOST BITS SUBNET MASK NO. SUBNETS NO. HOSTS PER SUBNET 14 255.255.255.252 (/30) 16384 2 15 255.255.255.254 (/31) 32768 1 Configuring IP Addresses Where you obtain your network number depends on your particular situation. If the ISP or your network administrator assigns you a block of registered IP addresses, follow their instructions in selecting the IP addresses and the subnet mask.
Appendix E IP Addresses and Subnetting IP Address Conflicts Each device on a network must have a unique IP address. Devices with duplicate IP addresses on the same network will not be able to access the Internet or other resources. The devices may also be unreachable through the network. Conflicting Computer IP Addresses Example More than one device can not use the same IP address.
Appendix E IP Addresses and Subnetting Conflicting Computer and Router IP Addresses Example More than one device can not use the same IP address. In the following example, the computer and the router’s LAN port both use 192.168.1.1 as the IP address. The computer cannot access the Internet. This problem can be solved by assigning a different IP address to the computer or the router’s LAN port.
APPENDIX F Open Software Announcements Notice Information herein is subject to change without notice. Companies, names, and data used in examples herein are fictitious unless otherwise noted. No part may be reproduced or transmitted in any form or by any means, electronic or mechanical, for any purpose, except the express written permission of ZyXEL Communications Corporation. This DMA-1000 product included Third Party Software with the license conditions as specified below.
Appendix F Open Software Announcements Software included in the MRUA package is proprietary Sigma Designs except: Jpeg library: All the files in MRUA_src/rmlibjpeg/src/libjpeg Custom license Png library: All the files in MRUA_src/rmlibpng/src/libpng Custom license Gif library: All the files in MRUA_src/rmlibungif/src/libungi Custom license http library: MRUA_src/rmlibhttp/src/common.c MRUA_src/rmlibhttp/src/http.c Custom license Vera.ttf: MRUA_src/samples/Vera.ttf bin/Vera.ttf Custom license VeraMono.
Appendix F Open Software Announcements vfb.c GPL License (see ARMUtils package) JPEG License LEGAL ISSUES In plain English: 1. We don't promise that this software works. (But if you find any bugs, please let us know!) 2. You can use this software for whatever you want. You don't have to pay us. 3. You may not pretend that you wrote this software. If you use it in a program, you must acknowledge somewhere in your documentation that you've used the IJG code.
Appendix F Open Software Announcements PNG License * libpng version 1.2.5 - October 3, 2002 * Copyright (c) 1998-2002 Glenn Randers-Pehrson * (Version 0.96 Copyright (c) 1996, 1997 Andreas Dilger) * (Version 0.88 Copyright (c) 1995, 1996 Guy Eric Schalnat, Group 42, Inc.) * * Authors and maintainers: * libpng versions 0.71, May 1995, through 0.88, January 1996: Guy Schalnat * libpng versions 0.89c, June 1996, through 0.96, May 1997: Andreas Dilger * libpng versions 0.97, January 1998, through 1.2.
Appendix F Open Software Announcements * 1.0.2 source version) 10002 is 2.V where V is the source code * 1.0.2a-b 10003 version, except as noted. * 1.0.3 10003 * 1.0.3a-d 10004 * 1.0.4 10004 * 1.0.4a-f 10005 * 1.0.5 (+ 2 patches) 10005 * 1.0.5a-d 10006 * 1.0.5e-r 10100 (not source compatible) * 1.0.5s-v 10006 (not binary compatible) * 1.0.6 (+ 3 patches) 10006 (still binary incompatible) * 1.0.6d-f 10007 (still binary incompatible) * 1.0.6g 10007 * 1.0.6h 10007 10.6h (testing xy.z so-numbering) * 1.0.
Appendix F Open Software Announcements * 1.0.12 2 10012 2.1.0.12 * 1.1.0a-f - 10100 2.1.1.0a-f (branch abandoned) * 1.2.0beta1-2 2 10200 2.1.2.0beta1-2 * 1.2.0beta3-5 3 10200 3.1.2.0beta3-5 * 1.2.0rc1 3 10200 3.1.2.0rc1 * 1.2.0 3 10200 3.1.2.0 * 1.2.1beta1-4 3 10201 3.1.2.1beta1-4 * 1.2.1rc1-2 3 10201 3.1.2.1rc1-2 * 1.2.1 3 10201 3.1.2.1 * 1.2.2beta1-6 12 10202 12.so.0.1.2.2beta1-6 * 1.0.13beta1 10 10013 10.so.0.1.0.13beta1 * 1.0.13rc1 10 10013 10.so.0.1.0.13rc1 * 1.2.2rc1 12 10202 12.so.0.1.2.2rc1 * 1.0.
Appendix F Open Software Announcements * release number plus "betaNN" or "rcN". * * Binary incompatibility exists only when applications make direct access * to the info_ptr or png_ptr members through png.h, and the compiled * application is loaded with a different version of the library. * * DLLNUM will change each time there are forward or backward changes * in binary compatibility (e.g., when a new feature is added). * * See libpng.txt or libpng.3 for more information.
Appendix F Open Software Announcements * * libpng versions 0.97, January 1998, through 1.0.6, March 20, 2000, are * Copyright (c) 1998, 1999, 2000 Glenn Randers-Pehrson * Distributed according to the same disclaimer and license as libpng-0.96, * with the following individuals added to the list of Contributing Authors: * * Tom Lane * Glenn Randers-Pehrson * Willem van Schaik * * libpng versions 0.89, June 1996, through 0.
Appendix F Open Software Announcements * including, without limitation, the warranties of merchantability and of * fitness for any purpose. The Contributing Authors and Group 42, Inc. * assume no liability for direct, indirect, incidental, special, exemplary, * or consequential damages, which may result from the use of the PNG * Reference Library, even if advised of the possibility of such damage.
Appendix F Open Software Announcements * Thanks to Frank J. T. Wojcik for helping with the documentation. */ /* * Y2K compliance in libpng: * ========================= * * October 3, 2002 * * Since the PNG Development group is an ad-hoc body, we can't make * an official declaration. * * This is your unofficial assurance that libpng from version 0.71 and * upward through 1.2.5 are Y2K compliant. It is my belief that earlier * versions were also Y2K compliant. * * Libpng only has three year fields.
Appendix F Open Software Announcements * png_convert_from_time_t() function calls gmtime() to convert from system * clock time, which returns (year - 1900), which we properly convert to * the full 4-digit year.
Appendix F Open Software Announcements ARISING FROM, OUT OF OR IN CONNECTION WITH THE SOFTWARE OR THE USE OR OTHER DEALINGS IN THE SOFTWARE. libHTTP License /** Copyright (c) 2000-2004 Dag-Erling Coïdan Smørgrav * All rights reserved. * * Redistribution and use in source and binary forms, with or without * modification, are permitted provided that the following conditions * are met: * 1.
Appendix F Open Software Announcements * Copyright 1997 Massachusetts Institute of Technology * * Permission to use, copy, modify, and distribute this software and * its documentation for any purpose and without fee is hereby * granted, provided that both the above copyright notice and this * permission notice appear in all copies, that both the above * copyright notice and this permission notice appear in all * supporting documentation, and that the name of M.I.T.
Appendix F Open Software Announcements Permission is hereby granted, free of charge, to any person obtaining a copy of the fonts accompanying this license ("Fonts") and associated documentation files (the "Font Software"), to reproduce and distribute the Font Software, including without limitation the rights to use, copy, merge, publish, distribute, and/or sell copies of the Font Software, and to permit persons to whom the Font Software is furnished to do so, subject to the following conditions: The above
Appendix F Open Software Announcements Permission is hereby granted, free of charge, to any person obtaining a copy of the fonts accompanying this license ("Fonts") and associated documentation files (the "Font Software"), to reproduce and distribute the Font Software, including without limitation the rights to use, copy, merge, publish, distribute, and/or sell copies of the Font Software, and to permit persons to whom the Font Software is furnished to do so, subject to the following conditions: The above
Appendix F Open Software Announcements LICENSE. Subject to the terms and conditions of this Agreement, Intel hereby grants to Licensee under Intel's copyrights in the Intel Software as delivered a nonexclusive, nontransferable, non sub-licensable worldwide, perpetual (subject to revocation for material breach of this license grant), royalty free license to copy, modify and create derivative works of the source code of the Intel Software solely for the purpose of developing Licensed Products.
Appendix F Open Software Announcements APPLICABLE LAWS. Claims arising under this Agreement shall be governed by the laws of Deleware, excluding its principles of conflict of laws and the United Nations Convention on Contracts for the Sale of Goods. You may not export the Software in violation of applicable export laws and regulations. Intel is not obligated under any other agreements unless they are in writing and signed by an authorized representative of Intel.
Appendix F Open Software Announcements busybox-1.00-pre3 and busybox-1.00 GPL http://www.busybox.net/downloads ccache: ccache-2.3 GPL http://ccache.samba.org/ftp/ccache/ cdrtools: cdrtools-2.00.3 GPL http://www.fokus.gmd.de/research/cc/glone/employees/jo erg.schilling/private/cdrecord.html elf2flt: elf2flt-20020214 and elf2flt-20030314 GPL http://www.uclinux.org/pub/uClinux/utilities/ gcc: gcc-2.95.3 GPL http://gcc.gnu.org ext2root: genext2fs-1.3 GPL http://packages.debian.
Appendix F Open Software Announcements uClinux-2.4.22-uc0 GPL http://www.uclinux.org/pub/uClinux/uClinux-2.4.x microwin: microwindows-src-snapshot-013004 MPL (Mozilla Public License) -OR- GPL ftp://ftp.microwindows.org/pub/microwindows madwifi: madwifi-cvs20040331 Dual license: a) Custom license - source redistribution OK - see - OR b) GPL http://madwifi.org/pub/linux/snapshot/tars mtd: mtd-20040901 GPL ftp://ftp.uk.linux.org/pub/people/dwmw2/mtd/cvs ncurses: ncurses-5.2 GPL http://ftp.gnu.
Appendix F Open Software Announcements prism54-cvs20040318 GPL http://prism54.org/pub/linux/snapshot/tars Software issue at http://www.prism54.org/software/ STLport: STLport-4.5.3 Custom license - source redistribution OK - see http://www.stlport.org/archive tinylogin: tinylogin-1.4 GPL -AND- Shadow utilities license (BSD-style) -PLUS- derived work from code licensed under the Eindhoven University of Technology license http://tinylogin.busybox.net/downloads uclibc: uClibc-0.9.21 and uClibc-0.9.
Appendix F Open Software Announcements A copy of the MPL is always available at http://www.mozilla.org/MPL/ GNU GENERAL PUBLIC LICENSE Version 2, June 1991 Copyright (C) 1989, 1991 Free Software Foundation, Inc. 59 Temple Place, Suite 330, Boston, MA 02111-1307 USA Everyone is permitted to copy and distribute verbatim copies of this license document, but changing it is not allowed. Preamble The licenses for most software are designed to take away your freedom to share and change it.
Appendix F Open Software Announcements Finally, any free program is threatened constantly by software patents. We wish to avoid the danger that redistributors of a free program will individually obtain patent licenses, in effect making the program proprietary. To prevent this, we have made it clear that any patent must be licensed for everyone's free use or not licensed at all. The precise terms and conditions for copying, distribution and modification follow.
Appendix F Open Software Announcements these conditions, and telling the user how to view a copy of this License. (Exception: if the Program itself is interactive but does not normally print such an announcement, your work based on the Program is not required to print an announcement.) These requirements apply to the modified work as a whole.
Appendix F Open Software Announcements 4. You may not copy, modify, sublicense, or distribute the Program except as expressly provided under this License. Any attempt otherwise to copy, modify, sublicense or distribute the Program is void, and will automatically terminate your rights under this License. However, parties who have received copies, or rights, from you under this License will not have their licenses terminated so long as such parties remain in full compliance. 5.
Appendix F Open Software Announcements 8. If the distribution and/or use of the Program is restricted in certain countries either by patents or by copyrighted interfaces, the original copyright holder who places the Program under this License may add an explicit geographical distribution limitation excluding those countries, so that distribution is permitted only in or among countries not thus excluded. In such case, this License incorporates the limitation as if written in the body of this License. 9.
Appendix F Open Software Announcements YOU OR THIRD PARTIES OR A FAILURE OF THE PROGRAM TO OPERATE WITH ANY OTHER PROGRAMS), EVEN IF SUCH HOLDER OR OTHER PARTY HAS BEEN ADVISED OF THE POSSIBILITY OF SUCH DAMAGES. END OF TERMS AND CONDITIONS How to Apply These Terms to Your New Programs If you develop a new program, and you want it to be of the greatest possible use to the public, the best way to achieve this is to make it free software which everyone can redistribute and change under these terms.
Appendix F Open Software Announcements GNU LESSER GENERAL PUBLIC LICENSE Version 2.1, February 1999 Copyright (C) 1991, 1999 Free Software Foundation, Inc. 59 Temple Place, Suite 330, Boston, MA 02111-1307 USA Everyone is permitted to copy and distribute verbatim copies of this license document, but changing it is not allowed. [This is the first released version of the Lesser GPL. It also counts as the successor of the GNU Library Public License, version 2, hence the version number 2.1.
Appendix F Open Software Announcements Finally, software patents pose a constant threat to the existence of any free program. We wish to make sure that a company cannot effectively restrict the users of a free program by obtaining a restrictive license from a patent holder. Therefore, we insist that any patent license obtained for a version of the library must be consistent with the full freedom of use specified in this license.
Appendix F Open Software Announcements 0. This License Agreement applies to any software library or other program which contains a notice placed by the copyright holder or other authorized party saying it may be distributed under the terms of this Lesser General Public License (also called "this License"). Each licensee is addressed as "you".
Appendix F Open Software Announcements (For example, a function in a library to compute square roots has a purpose that is entirely well-defined independent of the application. Therefore, Subsection 2d requires that any application-supplied function or table used by this function must be optional: if the application does not supply it, the square root function must still compute square roots.) These requirements apply to the modified work as a whole.
Appendix F Open Software Announcements 5. A program that contains no derivative of any portion of the Library, but is designed to work with the Library by being compiled or linked with it, is called a "work that uses the Library". Such a work, in isolation, is not a derivative work of the Library, and therefore falls outside the scope of this License.
Appendix F Open Software Announcements b) Use a suitable shared library mechanism for linking with the Library. A suitable mechanism is one that (1) uses at run time a copy of the library already present on the user's computer system, rather than copying library functions into the executable, and (2) will operate properly with a modified version of the library, if the user installs one, as long as the modified version is interface-compatible with the version that the work was made with.
Appendix F Open Software Announcements distribute the Library or its derivative works. These actions are prohibited by law if you do not accept this License. Therefore, by modifying or distributing the Library (or any work based on the Library), you indicate your acceptance of this License to do so, and all its terms and conditions for copying, distributing or modifying the Library or works based on it. 10.
Appendix F Open Software Announcements Each version is given a distinguishing version number. If the Library specifies a version number of this License which applies to it and "any later version", you have the option of following the terms and conditions either of that version or of any later version published by the Free Software Foundation. If the Library does not specify a license version number, you may choose any version ever published by the Free Software Foundation. 14.
Appendix F Open Software Announcements To apply these terms, attach the following notices to the library. It is safest to attach them to the start of each source file to most effectively convey the exclusion of warranty; and each file should have at least the "copyright" line and a pointer to where the full notice is found.
Appendix F Open Software Announcements etc - miscellanous files (ChangeLog, TODO, scripts, etc.) GETTING STLPORT To download the latest version of STLport, please be sure to visit http://www.stlport.com/ download.html LEGALESE This software is being distributed under the following terms : * * * Copyright (c) 1994 * Hewlett-Packard Company * * Copyright (c) 1996-1999 * Silicon Graphics Computer Systems, Inc.
Appendix F Open Software Announcements * notice, this list of conditions and the following disclaimer, * without modification. * 2. Redistributions in binary form must reproduce at minimum a disclaimer * similar to the "NO WARRANTY" disclaimer below ("Disclaimer") and any * redistribution must be conditioned upon including a substantially * similar Disclaimer requirement for further binary redistribution. * 3.
Appendix F Open Software Announcements * The contents of this file are subject to the Mozilla Public License * Version 1.1 (the "License"); you may not use this file except in * compliance with the License. You may obtain a copy of the License at * http://www.mozilla.org/MPL/ * * Software distributed under the License is distributed on an "AS IS" * basis, WITHOUT WARRANTY OF ANY KIND, either express or implied.
Appendix F Open Software Announcements Copyright (c) 1998-2000 The OpenSSL Project. All rights reserved. Redistribution and use in source and binary forms, with or without modification, are permitted provided that the following conditions are met: 1. Redistributions of source code must retain the above copyright notice, this list of conditions and the following disclaimer. 2.
Appendix F Open Software Announcements Copyright (C) 1995-1998 Eric Young (eay@cryptsoft.com) All rights reserved.This package is an SSL implementation written by Eric Young (eay@cryptsoft.com). The implementation was written so as to conform with Netscapes SSL. This library is free for commercial and non-commercial use as long as the following conditions are aheared to. The following conditions apply to all code found in this distribution, be it the RC4, RSA, lhash, DES, etc., code; not just the SSL code.
Appendix F Open Software Announcements POSSIBILITY OF SUCH DAMAGE.The licence and distribution terms for any publically available version or derivative of this code cannot be changed. i.e. this code cannot simply be copied and put under another distribution licence [including the GNU Public Licence. Sash License /* * Copyright (c) 2004 by David I. Bell * Permission is granted to use, distribute, or modify this source, * provided that this copyright notice remains intact.
Appendix F Open Software Announcements LIABILITY, OR TORT (INCLUDING NEGLIGENCE OR OTHERWISE) ARISING IN ANY WAY OUT OF THE USE OF THIS SOFTWARE, EVEN IF ADVISED OF THE POSSIBILITY OF SUCH DAMAGE. This source code is currently archived on ftp.uu.net in the comp.sources.misc portion of the USENET archives. You may also contact the author, Julianne F. Haugh, at if you have any questions regarding this package. THIS SOFTWARE IS BEING DISTRIBUTED AS-IS.
Appendix F Open Software Announcements NOTE: Some components of the DMA-1000 incorporate source code covered under GPL or GPL like licenses. To obtain the source code covered under those Licenses, please contact ZyXEL Communications Corporation at: ZyXEL Technical Support. End-User License Agreement for “DMA-1000” WARNING: ZyXEL Communications Corp. IS WILLING TO LICENSE THE ENCLOSED SOFTWARE TO YOU ONLY UPON THE CONDITION THAT YOU ACCEPT ALL OF THE TERMS CONTAINED IN THIS LICENSE AGREEMENT.
Appendix F Open Software Announcements You may not publish, display, disclose, sell, rent, lease, modify, store, loan, distribute, or create derivative works of the Software, or any part thereof. You may not assign, sublicense, convey or otherwise transfer, pledge as security or otherwise encumber the rights and licenses granted hereunder with respect to the Software.
Appendix F Open Software Announcements HAS BEEN ADVISED OF THE POSSIBILITY OF SUCH DAMAGES. ZyXEL'S AGGREGATE LIABILITY WITH RESPECT TO ITS OBLIGATIONS UNDER THIS AGREEMENT OR OTHERWISE WITH RESPECT TO THE SOFTWARE AND DOCUMENTATION OR OTHERWISE SHALL BE EQUAL TO THE PURCHASE PRICE, BUT SHALL IN NO EVENT EXCEED $1,000. BECAUSE SOME STATES/COUNTRIES DO NOT ALLOW THE EXCLUSION OR LIMITATION OF LIABILITY FOR CONSEQUENTIAL OR INCIDENTAL DAMAGES, THE ABOVE LIMITATION MAY NOT APPLY TO YOU. 8.
Appendix F Open Software Announcements without the prior written consent of ZyXEL. Any waiver or modification of this License Agreement shall only be effective if it is in writing and signed by both parties hereto. If any part of this License Agreement is found invalid or unenforceable by a court of competent jurisdiction, the remainder of this License Agreement shall be interpreted so as to reasonably effect the intention of the parties.
APPENDIX G Legal Information Copyright Copyright © 2007 by ZyXEL Communications Corporation. The contents of this publication may not be reproduced in any part or as a whole, transcribed, stored in a retrieval system, translated into any language, or transmitted in any form or by any means, electronic, mechanical, magnetic, optical, chemical, photocopying, manual, or otherwise, without the prior written permission of ZyXEL Communications Corporation. Published by ZyXEL Communications Corporation.
Appendix G Legal Information • This device may not cause harmful interference. • This device must accept any interference received, including interference that may cause undesired operations. FCC Warning This device has been tested and found to comply with the limits for a Class A digital switch, pursuant to Part 15 of the FCC Rules. These limits are designed to provide reasonable protection against harmful interference in a commercial environment.
Appendix G Legal Information condition. Any replacement will consist of a new or re-manufactured functionally equivalent product of equal or higher value, and will be solely at the discretion of ZyXEL. This warranty shall not apply if the product has been modified, misused, tampered with, damaged by an act of God, or subjected to abnormal working conditions. Note Repair or replacement, as provided under this warranty, is the exclusive remedy of the purchaser.
Appendix G Legal Information 182 DMA-1000 Series User’s Guide
APPENDIX H Customer Support Please have the following information ready when you contact customer support. Required Information • • • • Product model and serial number. Warranty Information. Date that you received your device. Brief description of the problem and the steps you took to solve it. Corporate Headquarters (Worldwide) • • • • • • • Support E-mail: support@zyxel.com.tw Sales E-mail: sales@zyxel.com.tw Telephone: +886-3-578-3942 Fax: +886-3-578-2439 Web Site: www.zyxel.com, www.europe.zyxel.
Appendix H Customer Support Denmark • • • • • • Support E-mail: support@zyxel.dk Sales E-mail: sales@zyxel.dk Telephone: +45-39-55-07-00 Fax: +45-39-55-07-07 Web Site: www.zyxel.dk Regular Mail: ZyXEL Communications A/S, Columbusvej, 2860 Soeborg, Denmark Finland • • • • • • Support E-mail: support@zyxel.fi Sales E-mail: sales@zyxel.fi Telephone: +358-9-4780-8411 Fax: +358-9-4780 8448 Web Site: www.zyxel.
Appendix H Customer Support • • • • Telephone: +7-3272-590-698 Fax: +7-3272-590-689 Web Site: www.zyxel.kz Regular Mail: ZyXEL Kazakhstan, 43, Dostyk ave.,Office 414, Dostyk Business Centre, 050010, Almaty, Republic of Kazakhstan North America • • • • • • • Support E-mail: support@zyxel.com Sales E-mail: sales@zyxel.com Telephone: +1-800-255-4101, +1-714-632-0882 Fax: +1-714-632-0858 Web Site: www.us.zyxel.com FTP Site: ftp.us.zyxel.com Regular Mail: ZyXEL Communications Inc., 1130 N. Miller St.
Appendix H Customer Support • Web Site: www.zyxel.es • Regular Mail: ZyXEL Communications, Arte, 21 5ª planta, 28033 Madrid, Spain Sweden • • • • • • Support E-mail: support@zyxel.se Sales E-mail: sales@zyxel.se Telephone: +46-31-744-7700 Fax: +46-31-744-7701 Web Site: www.zyxel.se Regular Mail: ZyXEL Communications A/S, Sjöporten 4, 41764 Göteborg, Sweden Ukraine • • • • • • Support E-mail: support@ua.zyxel.com Sales E-mail: sales@ua.zyxel.
Index Index Numerics B 0~9 buttons 26 1080i 61 16 by 9 format 62 2 channel (stereo) 62 4 by 3 format 62 480i 61 480p 61 5.
Index contact information 183 copyright 179 current function 33 customer support 183 D DD 5.
Index INFO button 26 information 68 INPUT button 26 inputting lower-case letters 36 numbers 36 upper-case letters 36 inputting symbols 36 inputting text 36 interlaced scan 61 Internet Assigned Numbers Authority See IANA 130 interval repeat 26, 33 OPTION 51 PHOTO 47 TOOL 34 USB 41 video playback TOOL 34 Moving Pictures Experts Group, See MPEG 64 MPEG 64 MPEG-4 AAC 64 MUSIC button 26, 43 icon 43 menu 43 music play 44 MUTE button 26 K N key WEP 58 keyboard 36 L LAN LED 23 language settings 64 languages 65
Index organization 48 rotation 26, 48 play music 44 photos 48 video file 31 Play button 26, 48 PLAY LED 23 playback menu 34 playlist 30, 34, 35, 36, 37, 49 popup screen 26 power adaptor specifications 87 Power button 26, 34 power specification 79 Previous button 26, 48 problems 73 product registration 181 progressive scan 61 R random play 26, 49 rear left speaker 77 rear right speaker 77 registration product 181 related documentation 3 remote control 31, 34, 41 REPEAT button 26 repeat interval 26, 33 rese
Index text input 36 lower-case letters 36 numbers 36 symbols 36 upper-case letters 36 time 33 elapsed 33 search 34 TOOL button 26 menu 26 TOOL button 34 TOOL menu 26, 34 trademarks 179 troubleshooting 73 5.
Index 192 DMA-1000 Series User’s Guide