www.zyxel.com User Handbook Switch Series Zyxel GS1920 / GS2210 / XGS2210 / GS3700 / XGS3700 / XGS4600 / XS1920 / XS3700 Default Login Details LAN IP Address https://192.168.1.1 User Name admin Password 1234 Version 1.
www.zyxel.com This handbook is a series of tutorials that guides you through various applications of the Zyxel. The purpose of the handbook is to show you how to proceed through an application rather than explain the meaning of GUI features. For the latter, see the Related Information section.
www.zyxel.com Table Of Content Configure the basic information on Switch ................................................. 6 1.1 General Settings ............................................................................................................. 6 1.1.1 How to configure management IP address?............................................... 6 1.1.2 How to configure switch host name? ............................................................ 9 1.1.3 How to configure system time?...................
www.zyxel.com 3.1.7 How to configure VLAN Trunking on the switch?.......................................30 Improve network reliability ......................................................................... 32 4.1 STP (Spanning Tree Protocol) .....................................................................................32 4.1.1 How to configure RSTP on the switch? ........................................................33 4.1.2 How to configure MSTP on the switch? ................................
www.zyxel.com 7.1 802.1x Authentication .................................................................................................64 7.1.1 How to Implement 802.1X Port Authentication with Dynamic VLAN Assignment (Radius Server) .....................................................................................65 8.1 IP Source Guard ...........................................................................................................79 8.1.1 How to set DHCP snooping? (Dynamic) ................
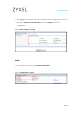
www.zyxel.com Configure the basic information on Switch 1.1 General Settings 1.1.1 How to configure management IP address? Overview Management IP address provides to connect to the switch by using web browser to configure settings & save configuration of the entire switch. 1. Open a browser (IE, Chrome, Safari, Firefox, etc….) 2. Go to website https://192.168.1.1 (default management IP address). 3. Default – (username: admin) (password: 1234), Log in.
www.zyxel.
www.zyxel.com 1. The highlight part, please enter the IP address & subnet mask of the switch. For example: (192.168.1.2, 255.255.255.0). Then click Apply to save the configuration. Figure 3 Basic Setting > IP Setup Verify 1. In this screen is to check the IP Address Information.
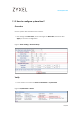
www.zyxel.com 1.1.2 How to configure switch host name? Overview Configure the switch with hostname for identification purpose. 1. Enter a hostname for identification purpose of the switch, and then click Apply to save the configuration. Figure 1 Basic setting > General setup Verify 1. In the screen it will display the system status Device information > System name. Figure 2 Basic Setting > System Info.
www.zyxel.com 1.1.3 How to configure system time? Overview Set the system date and time for the switch. 1. First change the New Date, second change the New Time, and then click Apply to save the configuration. Figure 1 Basic Setting > General Setup Verify 1.
www.zyxel.com Maintain Devices and Network 2.1 Firmware 2.1.1 How to upgrade firmware from GUI? Overview The switch can be maintained by upgrading it to the latest new firmware version. But make sure you have downloaded (and unzipped) the correct model firmware and version to your computer before uploading to the device, uploading the wrong model firmware may damage your device. 1. Select Firmware Upgrade.
www.zyxel.com 2. To upgrade firmware image, users can select to upload firmware image to image 1 or 2 and click upgrade to activate the process. Firmware upgrades are only applied after a reboot. To reboot, go to Management > Maintenance > Reboot System and select which configuration will switch use when it restart. Figure 2 Management > Maintenance > Firmware Upgrade 3. Users can select which boot image 1 or 2 to use. Then click Apply to save the settings into the memory of the switch.
www.zyxel.com 2.1.2 How to upgrade firmware from FTP? Overview Upgrade firmware by using File Transfer Protocol (FTP). 1. On the operating system open the Command Processor (CMD). Figure 1 PC > Start > All Programs > Accessories > Command Prompt 2. Use a FTP client to access the switch>ftp (switch IP address)>Enter username & password> put 430XXXX0C0.bin ras-0. Ras-0: firmware image 1. Ras-1: firmware image 2. Ras: only for Switch model series with only single image. Note: The firmware image (.
www.zyxel.com Verify 1. Go to website https://192.168.1.1, click the quick button (Status). Check in the Device Information >Firmware Version Figure 3 Basic Setting > System Info.
www.zyxel.com 2.2 Reset 2.2.1 How to reset switch? Overview Reset the switch to its default settings. 1. In this page click the Factory default Icon, the switch will reset back to default settings. Then wait for the switch to restart. Figure 1 Management > Maintenance Verify 1. Go to website https://192.168.1.1, the entire switch configuration will be gone and set to default configuration.
www.zyxel.com VLAN 3.1 Virtual Local Area Network Overview VLAN is a group of end stations with a common set of requirements; Independent of their physical location, floods traffic only to the ports belongs to that VLAN. VLAN characteristic: A broadcast domain. Logical network. (Subnet). An independent LAN network. Benefits of VLAN: Simple management. Increase performance. Flexible network segmentation. Enhance network security. Reduce costs.
www.zyxel.com 3.1.1 How to configure Static VLAN on the switch? Overview Static VLAN is the widest used VLAN in real application. It can cross multiple switches. It does add s 4 bytes to be tagged frame into its normal MTU. Static VLAN topology, Figure 1 Note: In the scenario, both switch is configured with VLAN10/20, in order to let the same VLAN to communicate is to tag the frames with a VID number. 1. Check the Active to activate the VLAN settings.
www.zyxel.com 2. Choose which control to be configured, Normal: for the port to dynamically join this VLAN group using GVRP. Fixed: to be permanent member of this VLAN group. Forbidden: prohibit the port from joining this VLAN group. Check the tagging to tag all outgoing frames with this VLAN group ID, then click Add. Figure 3 Advanced Application > VLAN > VLAN Configuration > Static VLAN Setup Verify 1. Check the VLAN status in the Index table, it will display the VLAN that been configured.
www.zyxel.com 3.1.2 How to configure Subnet Base VLAN on the switch? Overview Subnet based VLANs allow to group traffic into logical VLANs based on the source IP subnet you specify. Note: Subnet based VLAN applies to un-tagged packets and is applicable only when you use IEEE 802.1Q tagged VLAN. Subnet based VLAN topology, Figure 1 Note: In the scenario, switch is configured with a three specify IP source subnet. It divided with Data (192.168.1.0), Video (10.59.1.0) & Voice (172.25.1.0).
www.zyxel.com 2. Check the Active box to activate the features and IP, Mask-bits & VID should be filled. Click Add to save the configuration. For more details click the HELP icon at the quick button. Figure 3 Advanced Application > VLAN > VLAN Configuration > Subnet-based VLAN Verify: 1. Click the Index number to check & edit the settings. Figure 4 Advanced Application > VLAN > VLAN Configuration > Subnet-based VLAN 2.
www.zyxel.com 3.1.3 How to configure Protocol Base VLAN on the switch? Overview Protocol-based VLANs allow you to group traffic into logical VLANs based on the protocol you specify. Allow users to classify source traffic by specific protocols. Notes: Protocol-based VLAN applies to un-tagged packets and is applicable only when you use IEEE 802.1Q tagged VLAN. Protocol Base VLAN topology: Figure 1 Note: In the scenario, the switch is configured and specify based on the protocol.
www.zyxel.com 1. Check the Active box to activate the features. Choose which Ethernet-type to configure. Fill in the VID number that has been created on the static VLAN. Then click Add to save the configuration. Figure 2 Advanced Application > VLAN > VLAN Configuration > Protocol-based VLAN Verify 1. Click the Index number to check & edit the configuration. Figure 3 Advanced Application > VLAN > VLAN Configuration > Protocol-based VLAN 2.
www.zyxel.com 3.1.4 How to configure Voice VLAN on the switch? Overview Voice VLAN ensures that the sound quality of an IP phone is preserved from deteriorating when the data traffic on the Switch ports is high which enables the separation of voice and data traffic coming onto the Switch port. 1. Click the Voice VLAN radio button if you want to enable the Voice VLAN feature and enter a valid VLAN ID number that is associated with the voice VLAN. Then click Apply to save the configuration.
www.zyxel.com Verify 1. Click the Index number to check & edit the configuration. Figure 3 Advanced Application > VLAN > VLAN Configuration >Voice VLAN 2. Display the VID number & the status VLAN. Figure 4 Advanced Application > VLAN 3. To confirm the port number belongs to which VID & VLAN.
www.zyxel.com 3.1.5 How to configure MAC Base VLAN on the switch? Overview MAC-based VLAN feature assigns incoming untagged packets to a VLAN and classifies the traffic based on the source MAC address of the packet. A feature that decides the VLAN for forwarding an untagged frame based on the source MAC address of the frame. MAC Base VLAN topology: Figure 1 Note: In the scenario, the switch port is configured with the specific device (Client A) VID & MAC address. 1.
www.zyxel.com Verify 1. It display the MAC based VLAN configuration. Click the Index number to change the configuration. Figure 3 Advanced Application > VLAN > VLAN Configuration > MAC-based VLAN 2. The device MAC address should be seen in the MAC table.
www.zyxel.com 3.1.6 How to configure GVRP on the switch? Overview GVRP a protocol dynamically exchange VLAN configuration information with other devices. GVRP topology: Figure 1 Note: In the scenario both switch port number 5 are enable with GVRP features, so that the switch 1 will learn the switch 2 VLAN configuration dynamically, same with switch 2 it will learn the VLAN configuration of switch 1 dynamically. 1.
www.zyxel.com Verify 1. Check in the Index table, it will appear a dynamic VLAN configuration, belongs to the other device configured with GVRP. Click the Index number to display the VLAN table.
www.zyxel.
www.zyxel.com 3.1.7 How to configure VLAN Trunking on the switch? Overview VLAN trunking, allow an unknown VLAN groups frame pass through a port. Communicate with end device without the same VLAN configuration on the switch. VLAN trunking topology: Figure 1 Note: In the scenario the task is to let switch 1 VLAN10/20 communicate with switch 2 VLAN 10/20, but the highlight part 3 switch in the center are not configured with the same VLAN.
www.zyxel.com Verify 1. Switch 1 VLAN10 can ping switch 3 VLAN10. Figure 3 Topology 2. Switch 2 will have the device MAC address & VID in the MAC Table.
www.zyxel.com Improve network reliability 4.1 STP (Spanning Tree Protocol) Overview Blocks a certain ports and there is only one active path for each network segment. It’s a loop avoidance mechanism, a protocol used to solve problems that are caused redundant topology like broadcast storm, multiple frame transmission & MAC database instability. STP topology, Figure 1 Note: In the scenario both switch are configured with STP features.
www.zyxel.com 4.1.1 How to configure RSTP on the switch? Overview The Switch uses IEEE 802.1w RSTP (Rapid Spanning Tree Protocol) that allows faster convergence of the spanning tree than STP. In RSTP, there are additional port roles; alternate port & backup port, and the port states are discarding, learning, and forwarding.
www.zyxel.com 2. Select and check which port should be activate with RSTP and click Apply to save the configuration. For more specific information please kindly click the HELP button.
www.zyxel.com Verify 1. Figure 3, Figure 4 & Figure 5, In this screen display the RSTP process and port status.
www.zyxel.com 4.1.2 How to configure MSTP on the switch? Overview Multiple spanning-tree (MSTP), allows frames assigned to different VLANs to follow separate paths & provides multiple forwarding paths for data traffic and enables load balancing. Topology: Note: In the scenario both switches are configured with MSTP, configured with the same region & revision number. VLAN 1is mapped to instance 1. The port 1 is been configured to be the primary link & port 2 is the secondary link (blocked port). 1.
www.zyxel.com 2. Check the Active box and click Apply to save the configuration & activate the feature. Switch in the same region should have the same Configuration name & Revision number. Please kindly use the HELP icon for more specific information. Figure 2, Advanced Application > Spanning-Tree Protocol > MSTP 3. In this screen is to configure MSTI use to identify this MST instance on the Switch (numbers 0-15).
www.zyxel.com 4. select which port to be add in MSTI, configure the priority to decide which port should be disabled when one port or more forms a loop in a switch the higher the priority value will be disabled first. Path cost is the cost of transmitting. Click Add to save the configuration. Figure 4, Advanced Application > Spanning-Tree Protocol > MSTP 5. Click the Instance 0 then configure which port should run STP features. Figure 5, Advanced Application > Spanning-Tree Protocol > MSTP Verify 1.
www.zyxel.com 4.1.3 How to configure MRSTP on the switch? Overview It’s an extension to RSTP to provide multiple ring extensions in one switch. Each spanning tree operates independently with its own bridge information. Protect network for self-recovery when a link goes down Topology: Note: In the scenario, switch A is configured with MRSTP and connected with 4 different RTP divided & configured to tree 1,2,3,4. 1. Select multiple rapid spanning tree and click Apply to run MRSTP.
www.zyxel.com 2. The tree features are depend on the device and it’s design, some of the device can only configured 2 tree. Select and check how many STP to be configured in MRSTP. Figure 2, 3. Select and check which port to be configured and choose which STP (Tree) is it configured in Figure 2, then Apply to save the configuration.
www.zyxel.com Verify 1. In this screen it will display the MRSTP status; user can change the Tree type to show each tree status.
www.zyxel.com 4.2 Link Aggregation Overview Link aggregation a feature to aggregate one or more Ethernet interfaces to form a logical point-to-point link, known as a LAG, virtual link, or bundle, provides degradation if failure occurs and increase availability. It provides network redundancy by load-balancing traffic across all available links. If one of the links fails, the system automatically load-balances traffic across all remaining links.
www.zyxel.com 4.2.1 How to configure Static Trunk on the switch? Overview Static trunks are groups of two to eight ports that act as single virtual links. Static trunks are commonly used to improve network performance by increasing the available bandwidth between the switch and other network devices as well as to enhance the reliability of the connections between network devices. 1.
www.zyxel.com 2. Select which port to be bundle then choose the right Group ID that configured in step 1. Figure 3, Advanced Application > Link Aggregation > Link Aggregation Setting Verify 1. In this screen you can confirm the Link Aggregation (static trunk) configuration.
www.zyxel.com 4.2.2 How to configure LACP on the switch? Overview Link Aggregation Control Protocol (LACP) is part of an IEEE specification (802.3ad) that allows you to bundle several physical ports together to form a single logical channel. LACP allows a switch to load sharing & can detect failure even if not directly connect, or remove the link from the group Figure 1, Difference between static Trunk & LACP. 1. Check Active Box to run LACP then choose & check the Group ID that been configured.
www.zyxel.com Verify 1. In this screen user can check the LACP settings.
www.zyxel.com 4.3 VRRP (Layer 3) Overview Traditional network has one and only one gateway to put between internal network and external network. When the link of router has some trouble, the user can’t access to internet anymore. But when we enable VRRP, if MASTER router fails, and the BACKUP router will take over, and ensure the traffic still go through.
www.zyxel.com 4.3.1 How to set VRRP on the switch? Overview Each host in a network is configured to send packets to a statically configured default gateway. The default gateway can become a single point of failure. Virtual Router Redundancy Protocol (VRRP), defined in RFC 2338, allows you to create redundant backup gateways to ensure that the default gateway of a host is always available.
www.zyxel.com 2. Configure IP interface & set default gateway for VLAN 1 & 2.
www.zyxel.com 3. In this screen the highlight part is to configure & activate VRRP. Be sure to check Active to run VRRP features and Preempt Mode to let the switch choose the master. The Virtual Router ID, Primary & Secondary Virtual IP should have the same configure with the master & backup switch. For more specific information, please kindly use HELP icon. Figure 3, IP Application > VRRP > Configuration Verify 1. In this screen will display the VRRP status and will show the master switch.
www.zyxel.com How to setup CCTV? 5.1 IGMP Routing Overview Use for routing multicast data within autonomous system, provides multicast forwarding capability to a layer 3 switch. 5.1.1 How to setup IPTV Layer3 environment? The network administrator want to separator the stream server and host in difference VLANs to avoid the other packets to affect the stream quality. The example instructs how to implement the IPTV service on Layer 3 topology. Figure, IPTV service on Layer3 environment.
www.zyxel.com 1. In the XGS-4528F, go to Advanced Application > VLAN > Static VLAN, to create VLAN 10 for IPTV Server and VLAN 20 for host. Active the VLAN 10 and type the Name and VLAN Group ID then select the Fixed and remove TX Tagging on Port 1. Click Add.
www.zyxel.com 2. Active the VLAN 20 and type the Name and VLAN Group ID then select the Fixed on Port 9.Click Add. Figure 3 Advanced Application > VLAN > Static VLAN 3. Go to Advanced Application > VLAN > VLAN Port Setting, to configure PVID 10 for Port 1. Click Apply.
www.zyxel.com 4. Go to Basic Setting > IP Setup > IP Interface, to create ip address for VLAN 10and VLAN 20.Click Add.
www.zyxel.com 5. Go to IP Application > IGMP, active the IGMP router and select the Drop for unknown Multicast Frame and enable the IGMP-v2 for VLAN 20 interface. Unknown Multicast Frame Drop is able to discard IGMP packets flooding to all ports. Switch will send the General-Query when user enables IGMP-Version on VLAN interface. Click Apply.
www.zyxel.com 5.2 IGMP Snooping Overview The switch can passively snoop on the IGMP packets transferred between IP multicast routers/switches and IP multicast host to learn the IP multicast group membership. It checks IGMP packets passing through it, picks out the group registration information, and configures multicasting accordingly. IGMP snooping allows the switch to learn multicast groups without you having to manually configure them. 5.2.1 How to setup IPTV Layer3 environment? 1.
www.zyxel.com 2. Go to Advanced Application > VLAN > VLAN Configuration > Static VLAN Setup, to create VLAN 20 for Host. Active the VLAN 20 and type the Name and VLAN Group ID then select the Fixed on Port 2 and Port 10 and remove TX Tagging on Port 2.Click Add. Figure 2, Advanced Application > VLAN > VLAN Configuration > Static VLAN Setup 3. Go to Advanced Application > VLAN > VLAN Configuration> VLAN Port Setup, to configure PVID 20 for Port 2. Click Apply.
www.zyxel.com 4. Go to Advanced Application > Multicast > IPv4 Multicast > IGMP Snooping, to set up IGMP-Snooping. Active the IGMP Snooping and choose the Unknown Multicast Frame to Drop. Click Apply. Figure 4, Advanced Application > Multicast > IPv4 Multicast > IGMP Snooping Verify 1. Client use VLC to send the IGMP-Join to group 239.239.239.1 or 239.239.239.2. Go to Advanced Application > Multicast > IPv4 Multicast, the group entry has recorded on IGMP-Snooping table.
www.zyxel.com How to protect network? 6.1 MAC Filter Overview Filtering means sifting traffic going through the Switch based on the source and/or destination MAC addresses and VLAN group (ID). Scenario, Note, in this scenario Client A has been configured witch MAC filtering an action of discard destination, it means that it drop the frames to the destination MAC address (specified in the MAC address). The Switch can still receive frames originating from the MAC address.
www.zyxel.com 6.1.1 How to set MAC filter? 1. Check the Active box to activate filtering, select which action to be run. Input the specific MAC address of the device want to be configured and key in which VLAN ID then Add to save configuration. Figure 1, Advanced Application > Filtering Verify 1. Based on the scenario, client A should not be able to ping the switch (192.168.1.1) because the switch drops all frames to the destination MAC address..
www.zyxel.com 6.2 Layer 2 isolation Overview This feature is to Block traffic communication between ports in the same VLAN, but it can communicate with the uplink port to access the internet. Topology, Note: Block all traffics within the same VLAN, but it can communicate with uplink port (port 24) .
www.zyxel.com 6.2.1 How to setup L2 isolation? Topology, Note, all in the same VLAN can’t communicate with each other, but can communicate with uplink port. 1. In this screen, check Active to run features and specify which VLAN ID and input the uplink port then add to save configuration.
www.zyxel.com Verify 1. According to the scenario, VLAN 100 PC1, PC2 & PC3 can’t communicate with each other, but they can communicate with Port 24 (uplink port) to access the internet. PC1 can’t ping PC2 PC1 can’t ping PC3 PC1 can ping uplink port 24.
www.zyxel.com 7.1 802.1x Authentication Overview 802.1 x authentications is a common security application which requires hosts to enter a username and password in order to be authenticated by an authentication server. The Zyxelenterprise switch models support 802.1x Port Authentication that forces hosts to submit valid user credentials before their traffic can be forwarded across the switch.
www.zyxel.com 7.1.1 How to Implement 802.1X Port Authentication with Dynamic VLAN Assignment (Radius Server) Scenario and Topology Port Authentication: Upon detection of a new client (supplicant), the port on the switch (authenticator) will be enabled and set to an "unauthorized" state. In this state, only the 802.1x traffic will be allowed; other traffic, such as DHCP or HTTP, will be blocked at the data link layer. The authenticator will send out EAP-requests identity to the supplicant.
www.zyxel.com An authentication server informs the authenticator to process the host’s traffic on specific VLANs. This can be done by adding the following attributes on the user profile: Tunnel-Type = VLAN Tunnel-Medium-Type = IEEE-802 Tunnel-Private-Group-ID = With Dynamic VLAN Assignment, administrators allow a more flexible network access to the users. Host-1 can access VLAN10 by submitting User10 credentials.
www.zyxel.com - Only the “VLAN 10” users can access Server-1. - Only the “VLAN 20” users can access Server-2. 1.
www.zyxel.com 2. Create VLAN 20 for Host and Server-2.
www.zyxel.com 3.
www.zyxel.com 4.
www.zyxel.com 5. Configure the DHCP service for VLAN 10 users Figure 5, IP Application > DHCP > DHCPv4 > VLAN 6.
www.zyxel.com 7. Input the RADIUS server’s IP address and set the shared secret as “12345” Figure 7, Advance Application > AAA > RADIUS Server Setup 8. Check Dot1x under the Authorization section Figure 8, Advance Application > AAA > AAA Setup 9. Activate Port Authentication on the port connected to Host Figure 9, Advance Application > Port Authentication > 802.
www.zyxel.com 10. Access the RADIUS server. Edit the Client profile located in /etc/freeradius/clients.conf for Core Switch Figure 10, /etc/freeradius/clients.conf 11.
www.zyxel.com 12. Edit EAP profile located in /etc/freeradius/eap.conf to allow dynamic VLAN attributes Figure 12, /etc/freeradius/eap.conf 13.
www.zyxel.com Verification procedures 1. Access the Host PC. 2. Click the Start button and type services.msc into the search box. 3. In the Services window, locate the service named Wired AutoConfig. 4. Make sure the service status is “Started”. 5. Right-click on your network adapter and select Properties. 6. Click on the Authentication tab and check “Enable IEEE 802.1X authentication”.
www.zyxel.com 7. Choose the network authentication method Microsoft: Protected EAP (PEAP). 8. Click on Additional Settings, select Specify authentication mode and specify User authentication. 9. Make sure that the Host PC is using the dynamic IP address configurations. 10. Connect the Host PC to port 1 of the Core Switch.
www.zyxel.com 11. Host PC should show “Additional information is needed to connect to this network.” 12. Enter the username (vlan10) and password (vlan10user) which must be consistent with the RADIUS server’s user profile settings. 13. Go to Windows command prompt and type “ipconfig /all”. The IP address should be assigned to the VLAN 10 network (192.168.10.X). 14. Host PC can ping Server-1 connected to port 10 of Core Switch with the IP 192.168.10.100. 15.
www.zyxel.com 17. Host PC should show “Additional information is needed to connect to this network”. 18. Enter the username (vlan20) and password (vlan20user) which must be consistent with the RADIUS server’s user profile settings. 19. Go to Windows command prompt and type “ipconfig /all”. The IP address should be assigned to the VLAN 10 network (192.168.20.X). 20. Host PC can ping Server-2 connected to port 11 of Core Switch with the IP 192.168.20.100.
www.zyxel.com 8.1 IP Source Guard Overview Use IPv4 and IPv6 source guard to filter unauthorized DHCP and ARP packets in your network. It uses a binding table to distinguish between authorized and unauthorized DHCP ARP packets in your network. A binding contains: MAC address VLAN ID IP address Port number When switch receives a DHCP or ARP packets, it looks up the MAC address, VLAN ID, IP address & port number in the binding table. If there is binding, the switch forward the packet.
www.zyxel.com 8.1.1 How to set DHCP snooping? (Dynamic) Overview DHCP snooping, you can configure the DHCP Server on a “Trusted Port” so that all clients can get the IP address from a trusted DHCP server. Also, all DHCP IP address assignments will be recorded into an internal table called the “Snooping Table”. So if there is another DHCP server in the network, but located on an untrust port, all DHCP message will be discard.
www.zyxel.com 1. In this screen check the Active box then click Apply to enable DHCP snooping features. For the following options, please use the HELP icon for more information.
www.zyxel.com 2. Select which port should be Trusted for the DHCP server or other switch and Rate specify the maximum number for DHCP packets (1-2048) that the Switch receives from each port each second. Figure 2, Advanced Application > IP Source Guard > DHCP Snooping > Configure > Port 3. Use this screen to enable DHCP snooping on each VLAN and to specify whether or not the Switch adds DHCP relay agent option 82 information to DHCP requests that the Switch relays to a DHCP server for each VLAN.
www.zyxel.com Verify 1. Based on the scenario client A should get an IP of 192.168.1.X/24.
www.zyxel.com 8.1.2 How to set static MAC binding? (Static) Overview Static MAC address is an address that has been manually entered in the MAC address table, Static MAC address does not age out. After setting up a static MAC address on a port it reduce the need for broadcasting. Topology, Note: in the scenario switch port 1 has been configured static MAC binding with client A specific MAC address and given the port 1 an IP address of 192.168.1.101. 1. Enter Source Guard Setup.
www.zyxel.com 2. Input the specific MAC address of the device. User can specify the IP address, VLAN & port number. Figure 2, Advanced Application > IP Source Guard > Static Binding Verify 1. Based on the scenario client A should be configured with an IP address of 192.168.1.101 and can ping the switch IP 192.168.1.1.
www.zyxel.com 8.1.3 How to set ARP inspection? Overview This feature prevent ARP spoofing from the network to secure L2 forwarding, it contains a DHCP snooping table which can match and check which IP address is allowed to access the network, if It’s not the traffic will be blocked and classified to blacklist.
www.zyxel.com 1. Check the Active box and click the Apply to run the feature. Please kindly use the HELP button for more specific information. Figure 1, Advanced Application > IP Source Guard > Source Guard setup > ARP Inspection > Configure 2. In this screen user can configure which device will be trust on this port.
www.zyxel.com 3. Use this screen to enable ARP inspection on each VLAN and to specify when the Switch generates log messages for receiving ARP packets from each VLAN. Figure 3, Advanced Application > IP Source Guard > Source Guard setup > ARP Inspection > Configure > VLAN Verify 1. Figure 4, in this screen it will display the unknown ARP blocked by the switch.
www.zyxel.com 9.1 Access Control List (ACL) Overview ACL (Access Control List) is the name of a combination of Classifier and Policy Rule. A classifier groups traffic into data flows according to specific criteria such as the source address, destination address, source port number, destination port number or incoming port number. For example, you can configure a classifier to select traffic from the same protocol port (such as Telnet) to form a flow.
www.zyxel.com 9.1.1 How to block host to access internet? Overview We define three rules. First, we define a classifier for the traffic that is coming from port 2 is the host and its source address 192.168.1.100; second, we specify a classifier for the traffic from port 2. Finally we specify a classifier for ARP. 1. Select Active, set Name as “Allport2”, select “Count” and Ingress port as 2, then clicks Add to run feature.
www.zyxel.com 2. Select Active, set Name as “Port+IP”, Ingress port as 2, selects “Count” and Source IP as 192.168.1.100/32, then click Add to run feature.
www.zyxel.com 3. Select Active, set Name as “ARP”, Ingress port as 2, select “Count “and Ethernet Type as ARP, then click Add to run feature. Figure 3 Advanced Application > Classifier> Classifier Configuration Verify 1. In this screen display the classifiers status.
www.zyxel.com 9.1.2 How to configure classifier on the switch? Overview After the classification, we need to define the policy rule to ensure that the traffic gets the deserved treatment in the network. Here, we also define three policy rules. The first policy rule is to forward (do not drop the matching frame previously marked for dropping) only the traffic from port 2 and with the ip address of 192.168.1.100.
www.zyxel.com 2. Select Active, set Name as “Allowport2IP”, select classifier “Port+IP” and select “Do not drop the matching frame previously marked for dropping” in Action, then click Add to run feature.
www.zyxel.com 3. Select Active, set Name as “AllowARP”, select classifier “ARP” and select “Do not drop the matching frame previously marked for dropping” in Action, then click Add to run feature. Figure 7 Advanced Application > Policy Rule Verify 1. In this screen it will display the policy rule status.
www.zyxel.com Verify 1. Connect a PC ―A to the Switch on port2. Connect another PC ―B to the Switch on port10 with IP 192.168.1.200. First set the IP of PC ―A to 192.168.1.100. At this time, PC ―A can ping PC ―B.
www.zyxel.com 2. However, if you set the IP of PC ―A to another IP besides 192.168.1.100, it can no longer ping PC ―B. PC ―A can no longer ping PC ―B 3. You may also know how many packets match the classifiers in Match Count of Classifier Status.
www.zyxel.com 10.1 Management 10.1.1 How to change password? Overview User can change the switch administrator password. 1. In this screen the highlight part is how the user change the password then clicks Apply to save the settings. Figure 1, Management > Access Control > Logins Verify 1. Please logout the device, and then login again using the new password. It should let you access the WEB GUI website.
www.zyxel.com 10.1.2 How to configure remote management service? Overview Remote management service is to specify a group of one or more “trusted computers” from which an administrator may use a service to manage the Switch. 1. Select and check how many entry want to be Active. User can configure the range of an IP address and configure which remote should be use to login to the device.
www.zyxel.com Verify 1. In this screen, user can check the remote management configuration.